TABLE OF CONTENTS 4
PARTS GUIDE
MIC PLACEMENT
FUZZY WINDSCREEN
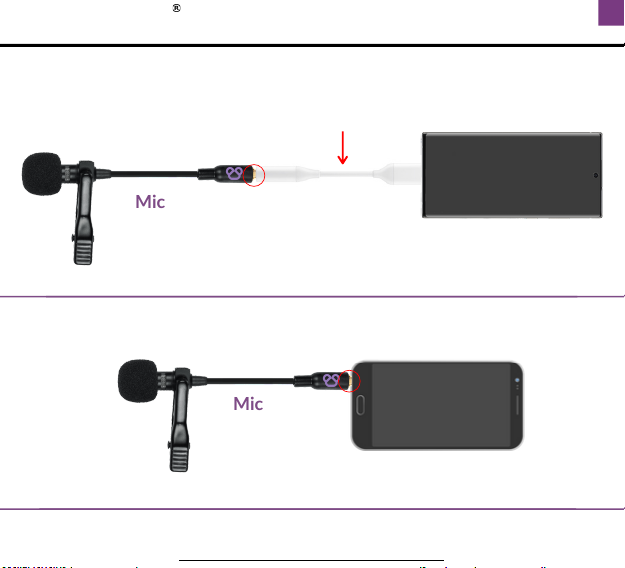
SMARTPHONES WITH 3.5MM EARPHONE PORT
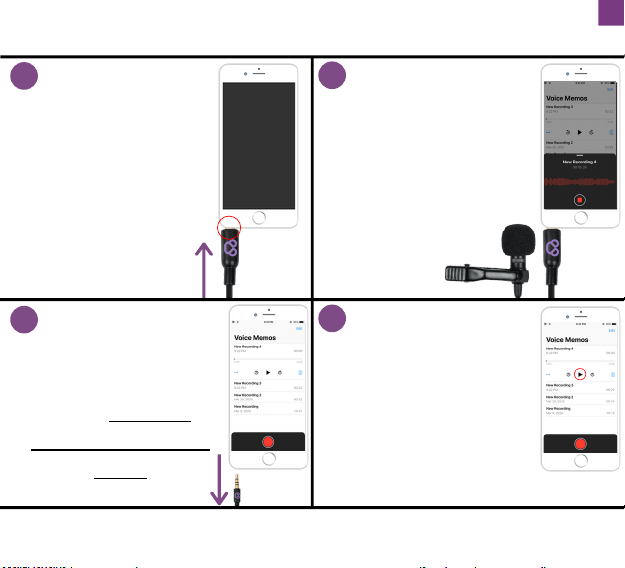
IPHONE - MIC RECORDING SETUP
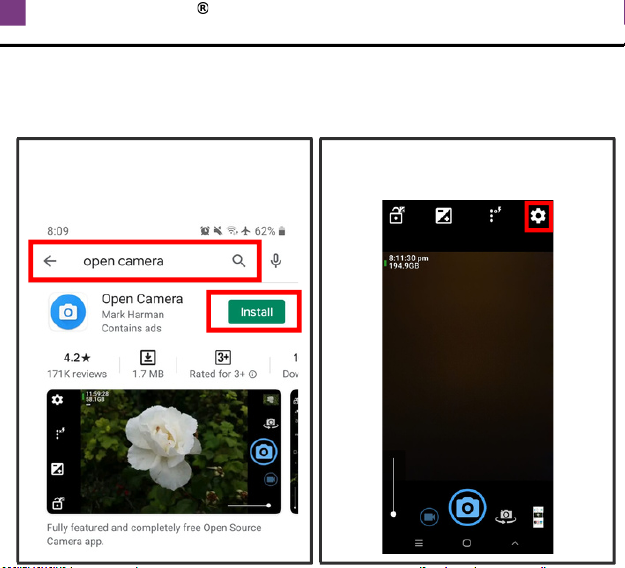
ANDROID - MIC RECORDING SETUP
ANDROID - MIC NOT RECOGNIZED
IPAD - MIC RECORDING SETUP
TABLET - MIC RECORDING SETUP
GOPRO - MIC RECORDING SETUP
DSLR - MIC RECORDING SETUP
ZOOM [H1N / H2N / H4N / H5 / H6] - MIC SETUP
TASCAM - MIC SETUP / OTHER AUDIO RECORDERS
TROUBLESHOOTING
CONTACT US / NEED MORE HELP?
SPECIFICATIONS
1
2
3
4
5
6
7-8
9
10
11
12
13 -14
15-16
17-19
20
21