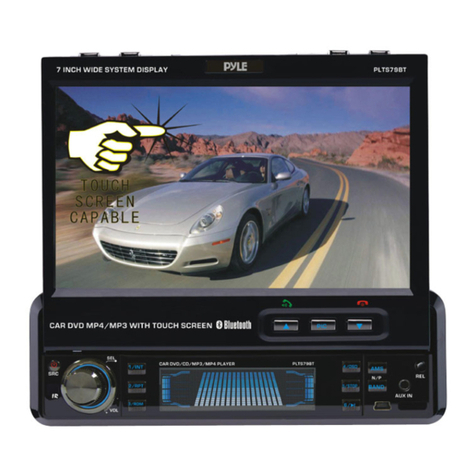
Pyle PLTS79DUB User manual

with Multimedia Disc Player, BT Wireless Streaming,
Hands-Free Talking, Motorized Fold-Out 7’’Touchscreen Display,
DVD/CDMP4/MP3/USB/AM/FM Radio, Single DIN
PLTS79DUB
CarStereoVideoReceiver

www.PyleUSA.com
2
CONTENTS
Safety Information
Precautions
Installation
Control Panel
Remote Control
Set Up Operations
Radio Operations
DVD/CD/MP3/USB Device Operations
Wireless BT Operations
Features
Technical Specs
3
3
4
7
9
11
15
16
19
21
22
Download the “Phonelink” Apk
from Google Play Store

www.PyleUSA.com
3
To establish a safe level:
Start your volume control at a low setting.
• Slowly increase the sound until you can hear it comfortably and clearly, and
without distortion.
• Once you have established a comfortable sound level, set the dial and leave it
there.
How to Handle Discs:
• Handle disc by its edges. Do not touch the playing side.
• Before inserting a disc, wipe the disc outward from the disc
center with a clean, soft, dry and lint-free cloth. Do not use
solvents or thinners such a petrol/benzene or cleaners.
• After removing disc from the disc slot, place the disc in a sleeve
or case to keep it clean and prevent scratches.
• Do not stick paper or tape on the disc surface. If there is glue (or
adhesive) on the disc surface, remove it before using the disc.
Precautions:
1. To reduce the risk of fire, electric shock, and interference, do not attempt to
repair this product yourself. Refer all servicing to a qualified technician.
2. This digital video player is compatible with VIDEO/AUDIO discs with 12 cm size:
• DVD disc
• VCD disc
• CD, CD-R, CD-RW disc
• MP3 disc
3. Do not switch ON this digital video player for a long time when the vehicle’s
4. Do not apply strong mechanical stress like drop, shock or any force to the TFT
LCD. Do not hard hit, press or rub the TFT LCD display surface. If the display
surface is dirty, please wipe the surface softly with cotton swab or clean cloth.
5. Never place any foreign objects into the openings of this product such as disc
slot, USB port, AUX IN jack. Otherwise you might damage the slots and
connectors.
6. Do not throw the battery cell of remote control into fire as this may cause an
explosion. Keep battery cells out of reach of children.
IMPORTANT:
• Do not operate this digital video player while the vehicle is moving.
• This is a safety feature to prevent driver distraction.
• It’s illegal in most country for the driver to view video while the vehicle is
moving.
• The digital video functions will only be operated when vehicle is parked
and the parking brake is engaged.

www.PyleUSA.com
4
Copyright Notes:
This product incorporates copyright protection technology that is protected by
method claims of certain U.S. patents and other intellectual property rights owned
by Macrovision Corporation and other rights owners.
Use of this copyright protection technology must be authorized by Macrovision
Corporation, and is intended for home and other limited viewing uses only unless
otherwise authorized by Macrovision Corporation.
Reverse engineering or disassembly is prohibited.
Region Management information:
This product is designed and manufactured to respond to the Region Management
Information that is recorded on a digital video disc. If the Region number describled
on the DVD disc does not correspond to the Region number of this DVD player. the
disc cannot be played on by this DVD player.
INSTALLATION:
Before Installation:
• We recommend you to let a professional technician install the unit in the vehicle.
• Disconnect negative battery terminal of vehicle.
Installation Process:
• Carefully remove the existing head unit.
• Before finally installing this product, connect wiring harness temporarily and
make sure it’s all connected up properly and test the head unit if it can work
properly. (Consult a qualified technician if you unsure)
• Lift the left or right top corner of the plastic outer trim ring then pull it o to
remove it.
• Insert the two bracket keys into the left and right side of the chassis to separate
the chassis from the housing.
• Insert the mounting sleeve into the dashboard and bend the mounting tabs out
with a screwdriver. Make sure that the lock lever is flush with the mounting
sleeve and it dose not project beyond it.
• Slide the digital video player carefully into the already fixated mounting sleeve
till it clicks into place.
• Use a metal strap to fix the rear part of the chassis.
• Connect wires as illustrated in the“wiring diagram”.
• Install the plastic outer trim ring.
Note: If you need other screws to fix other terminal, please buy from your dealer
according to the drilling of holes size.

www.PyleUSA.com
5
INSTALLATION:
Wiring Connections:
Hex Bolt
Spring Washer
Plain Washer
Tapping Screw
Screwdriver
Tabs
Hex Nut
Dash Board
Key Plate
Key Plate
Plastic
Trim Out
Metal Mounting
Strap
Console
Slide Bracket Housing
CAM-R
CAM-F
SUB OUT
V-IN
AV-L
AV-R
V-OUT1
RL
RR
V-OUT2
FL
FR
10
RADIO ANTENNA JACK
10A

www.PyleUSA.com
6
Note: the ground connection cable (parking brake B-) must be connected in order
for pictures to be played back to the monitor. If the cable has not been correctly
connected, warning message appears on the monitor.
AUDIO/VIDEO I/O CONNECTIONS
RED
YELLOW
BLACK
BLUE
ACC
B+
GROUND
POWER ANTENNA
FRONT LEFT
CHANNEL SPEAKER
REAR LEFT
CHANNEL SPEAKER
WHITE
WHITE/BLACK
GREEN
GREEN/BLACK
SWC - GND
SWC - 1
SWC - 2
REVERSE (+)
PARKING BRAKE (B-)
ILLUMINATION (+)
FRONT RIGHT
CHANNEL SPEAKER
REAR RIGHT
CHANNEL SPEAKER
ORANGE
BROWN
BROWN / WHITE
BLACK
PINK
ORANGE / BLACK
GRAY
GRAY / BLACK
VIOLET
VIOLET/BLACK
CAM-R: Rear Camera Video input Socket (Yellow)
CAM-F: Front Camera Video input Socket (Yellow)
SUB1: Subwoofer Output Socket (Green)
V-IN: AV IN Video input Socket (Yellow)
AV-L: AV IN Left CH Audio input Socket (White)
AV-R: AV IN Right CH Audio input Socket (Red)
V-OUT1: Video Output Socket 1 (Yellow)
RL: Rear Left CH RCA Output Socket (White)
RR: Rear Right CH RCA Output Socket (Red)
V-OUT2: Video Output Socket 2 (Yellow)
FL: Front Left CH RCA Output Socket (White)
FR: Front Right CH RCA Output Socket (Red)

www.PyleUSA.com
7
Control Panel Buttons:
1. OPEN/ BUTTON
• Briefly press this button to slide the monitor out of slot.
• Repeatedly press this button to tilt up and down the monitor.
• Press and hold this button to slide the monitor inside of the slot.
2. /MODE BUTTON
ON
In power on mode, short press it repeatedly to select one mode of the DISC,
RADIO, USB, Phonelink, BT and AUX IN (AV IN).
3.Volume KNOB / SELECT BUTTON
Rotate the VOL knob to increase or decrease the volume level.
Press the SEL button to turn to audio settings: Volume, Dimmer, Balance, Fader,
4. Handsfree Microphone
Uses the Wireless BT handsfree system to receive your voice when calling.
5. IR REMOTE SENSOR
6. BAND
In radio model, press BAND to select between FM1, FM2, FM3, AM1 and AM2
bands.
7.Tune Previous/ Skip Previous track, Reject and End Call ( )
In Radio mode, press to scan strong signal radio station downward step by step.
Press and hold it to tune radio frequency downward one step at a time.
In Disc/USB/BT music playback, press this button to skip previous track.
Press and hold to fast backward playback.
In BT mode, press to reject an income call or end a call.

www.PyleUSA.com
8
8. MUTE ON/OFF, PTY (Program Types)
In power on mode, press the MUTE
In radio mode, press and hold the PTY
9. (PLAY/PAUSE) /CH 1-6 (PRESET RADIO STATION)
In Disc/USB/BT music playback mode
Press this button to pause playback, touch again to resume playback.
In Radio Mode
Press repeatedly to preset radio station. With this system a total of 30 stations
can be stored in the memory. Each band store up to six preset stations.
The stations might be FM1, FM2, FM3, AM1 (MW1) and AM2 (MW2) band.
• To retrieve a preset station
Press repeatedly this button to recall the preset stations which had been stored
in the memory in advance.
10.Tune Next/ Skip Next track, Make a Call,Receive and Redial Last Call ( )
In Radio mode, press it to scan strong singal radio station upward step by step.
Press and hold it to tune radio frequency upward one step at a time.
In Disc/USB/BT music playback, press to skip next track.
Press and hold to fast forward playback.
In BT phone mode, press the button to make a call / receive a call / redial
the last dialed phone number.
11.TA (Traffic Announcement Settings)/AF(Alternative Frequencies)
TA/AF
• ON: TA symbol will be displayed if this function is activated. In the TA mode,
• OFF: The function is deactivated.
In Radio mode, press and hold the TA/AF
searches the best frequency for the selected station.
• ON: If a certain broadcast station has bad reception, the device switches
automatically to a broadcast station broadcasting the same program via the
same RDS broadcast chain.
• OFF: The function is deactivated.
12. (EJECT) BUTTON
Insert the disc, label side facing up, until the mechanism senses its presence and
draws the disc in. Press it to eject the disc.
13. USB PORT
Open the cover for USB device use.
1 Amp charging for most iPhone / andriod mobile phone.
14. AUXILIARY INPUT JACK
Insert an external device to this 3.5mm auxiliary jack in order to have audio
output of the device through the unit.

www.PyleUSA.com
9
15. Release the detachable front panel
If you want to reset the system of unit, when the LCD does not display normally
or sound is distorted, or some controls are disabled, press the release button to
detach the front panel.
16. RESET SYSTEM
The RESET button is used to reset all paramenters to factory default setttings.
This function may be used when the LCD does not display normally or sound is
distorted, or when any of controls are disabled. Gently press the RESET button
to reset your system with a thin object with a pointed end.
REMOTE CONTROL:

www.PyleUSA.com
10
1. OPEN /
Briefly press this button to slide the monitor out of slot.
Repeatedly press this button to tilt up and down the monitor.
Press and hold this button to slide the monitor inside of the slot.
2. Power ON/OFF, MODE
Press it to turn the unit ON , press and hold to turn the unit OFF.
Bluetooth and AUX IN(AV IN).
3 & 7. /
In Disc/USB Playback mode, press each one to fast forward and fast backward
playback with X2, X4, X8, X16 speed.
In Radio mode, press each one to select the next or the previous preset station.
4. AS /
In Radio mode, press and hold AS for more than 2 seconds to store 18 FM stations
stored in memories in each band.
Press the button to make a call / receive a call / redial the last dialed phone
number.
5. (Play/Pause)
In Disc/USB/BT music playback mode, press to pause playback. Press again to
start where playback stopped.
6 & 17. / .
In Disc/USB/BT music playback, press both buttons to skip next or previous track.
In Radio mode, press to tune radio frequency down or up one step at a time.
8.TITLE
When playing a DVD disc, press this TITLE button will open the TITLE menu
which is recorded on the media. (If the DVD disc with title menu).
9. RPT (Repeat playback) / 2
In Disc/USB playback mode, press and hold the RPT button to
repeat playback modes: Repeat title, Repeat One, Repeat Dir(folder), Repeat All.
In radio mode, press to store or recall the preset station 2.
10. DISP / 1
In video playing mode, press and hold the DISP to show information such as
Title number, Chapter number, Track number, elapsed time, remain time etc..
In radio mode, press to store or recall the preset station 1.
11. AUDIO / 5
In DVD playback, press and hold the AUDIO button repeatedly to switch the
language of audio if the DVD disc is recorded with multi-languages.
In VCD playback, press and hold AUDIO button repeatedly to switch L/R or
stereo audio track.
In radio mode, press to store or recall the preset station 5.
12. MENU / 4
In DVD playback mode, press and hold the MENU button to display the root
level directory of DVD disc.
In radio mode, press to store or recall the preset station 4.
13 & 21.VOL+/VOL
Use both controls to adjust the volume level.
www.PyleUSA.com
11
14. SEL
Press to turn to
Pop/Classic/Rock/Jazz.
15. MUTE
In power on mode, press the MUTE
16. BAND /
Press the BAND button to select between FM1, FM2, FM3, AM1 and AM2 bands.
In BT mode, press to reject an income call or end a call.
18. EQ
wish to use.
19. RDM / 3
In Disc/USB Playback mode, press and hold the RDM button to play tracks in
random order, press again to cancel the RDM function.
In radio mode, press to store or recall the preset station 3.
20. SUB-T/6
In Disc/USB Playback mode, press and hold the SUB-T button to change the
subtitle language on discs which have this as an option.
In radio mode, press to store or recall the preset station 6.
Setup Operations:
Main Menu:
In each mode, touch the icon to enter the main menu as below image. In the
main menu screen, press the desired icon to enter each of the following settings:
Disc(CD/VCD/DVD), Radio, Phonelink, USB, BT (Phone & Music), AUX In (AV In),
F. CAM (Front View Camera), Setup.
In main menu, touch the icon to enter the setup menu, as below images.
Then user can set up or adjust the general settings for this DVD player.
Brightness
Control
Time

www.PyleUSA.com
12
A. System: Logo Setting, Radio Area, OSD Language, Screensaver Mode, Key Beep,
Setting, Time Setting, Default.
• Logo Setting: To set a logo as the splash screen for this DVD player.
• Radio Area: To choose the radio area: EUROPE, Northen America, South America,
Russia, Japan, Asia.
• OSD Language: English, Chinese, Arabic, Greek, Thai, Hebrew, Turkish, Russian,
French, German, Spanish, Persian, Indonesian, Portuguese, Italian.
• Screensaver Mode: Enables or Disables the screensaver of this DVD player.
• Parke control: Enables or Disables the brake detection.
This safety feature to prevent driver distraction. We recommend user to enable
this brake detection function. When enable this function, user were forbidden to
watch video from this unit while this system is not detect the brake signal of the
parking brake.
• Camera Mirror Image: Enables or Disables the camera mirror image.
• Auto Front Camera: Allows you to preset the duration of the front view camera
• SWC (Steering Wheel Control)
Tap“SWC” to enter the study operation menu.
First, make sure the SWC connecting wires have
been connected to this unit.
Before study, tap the icon to clear all
previous settings.
Press and hold a steering wheel button, at the
same time, tap the function button on touch
screen that you want to set on to the steering wheel.
• RGB LED (Key Lights):
- To preset the color of button illumination: Red, Blue, Purple, Green, Yellow, Cyan,
•Time Setting:
Tap the“Time Setting” to enter the time setting
interface, tap the and button to adjust
Year, Month, Day, Hour, Minute.
Tap the button to preset 12 or 24 Hours
format as sytem clock time format.
Tap the button to preset date format.
• Default
Tap this item to restore to all parameters to
factory default settings.
B. DISC (DVD Setup):
Tap the icon to set up the DVD system
language:
• Audio/Subtitle/Menu Language: Chinese, English,
Japan, French, Spanish, Portuguese, Latin, German

www.PyleUSA.com
13
can change the password for parental control rating as your favour. The factory
default password is“0000”.
• Rating: Every time changing parental control rating, user have to input the
password. User can select one of below suitable parental control rating: 1 Kid Safe,
2 G, 3 PG, 4 PG 13, 5 PG-R, 6 R, 7 NC-17, 8 Adult.
C. Screen(Video Settings)
Tap the icon to set up the video parameter of screen:
• Adjust(Video Parameter Settings)
Tap this item to set the Brightness, Contrast,
Hue, Saturation, Sharpness of this TFT screen.
- Brightness: 00, ~, 36
- Contrast: 00, ~, 36
- Hue: 00, ~, 36
- Saturation: 00, ~, 36
- Sharpness: 00, ~, 36
Tap the icon to clear all previous settings.
• Touch Calibration
Touch this item to enter touch screen calibration mode, tap the cursor “+”
calibration of touch screen.
• Wallpaper: To change the wallpaper.
D. Audio Settings
Tap the icon to enter the audio setting:
mode, tap the EQ button to enter EQ setting.
• Sound eect:
Tap the FL, FR, RL, RR, ALL button to preset the
Move the blue circle at the middle of “car inside”
front seat passenger, left back passenger, right
back passenger and all passengers in the car.
- Tap the“ ” button to clear all the audio settings.
- Tap the“ ” button to exit from the audio setting.
• EQ Presets:
- User can preset EQ: Standard -> POP -> Classic -> Rock -> Jazz.
- Tap LOUD button to enables or disables loudness.
- Tap SUB button to enables or disables subwoofer output.
E.Version (System information) : Tap this item to view the software version.
F.Version (Factory Setup) : Tap this item to enter factory setup.

www.PyleUSA.com
14
Radio Operations:
Press MODE button on the control panel or on the remote control, or tap the“Radio”
icon on touch screen until Tuner is selected.
1. Home Page
2. Clock Time
3. Volume Level Adjust
4. TFT Screen Backlight brightness Adjust
5. Disc Eject
6. Active Media
7/8. Tune/Seek Down & Tune/Seek Up
Tap this button to seek tuning down or up.
Tap and hold this button to move radio frequency down or up one step
at a time.
9. Current Radio Reception State
10. Preset Stations
Tap and hold one of preset station touch buttons to store the preset station.
Tap one of preset station touch buttons to recall the preset station.
11. Input a specic radio frequency
12. Band Selector
13. Stereo/Mono Reception
14. (Automatic Store Preset Stations, Automatic Scan Preset station)
Tap and hold this button for more than 2 second to store station automatically.
Tap this button to recall each preset station that stored in the memories.
15. DX/LOC Reception
16. EQ/Audio Setting
17. PTY (Program Types)
Touch to display program types. Search for stations according to program type
as follows:
11
1 2 5 643
10
7
9
8
12 13 14 15 16
17 18 19

www.PyleUSA.com
15
Radio Operations:
None, News, Aairs, Info, Sport, Educate, Drama, Culture, Science, Varied, Pop M,
Rock M, Easy M, Light M, Classics, Other M, Weather, Finance, Children, Social,
Religion, Phone in, Travel, Leisure, Jazz, Country, Nation (national) M, Oldies, Folk M,
Document, Test, Alarm!
18. AF (Alternative Frequencies)
Tap this button to enables or disables the alternative frequency search mode
(AF). This function is used for maintaining a program being listened to during
a trip if its frequency changes.
19. TA (Trac Announcement)
Tap the TA button to enables or disables the TA function (trac information).
When this function is enabled, the tuner will periodically scan received
frequencies and play any trac information message that may be broadcast.

www.PyleUSA.com
16
DVD/CD/MP3/USB Operations:
Insert DVD/CD Disc
Insert a video disc in the disc slot for video disc playback.
Playback will begin automatically.
Eject DVD/CD Disc
on faceplate) or tap the icon on the touch sceen to eject the disc.
USB Connection
Note: The USB port of this car radio is also designed for phone link and charging
for iPhone/android mobile phone. The charging current consumption is 1 ampere.
DVD Playback
Insert a video disc in the disc slot for video disc playback. Press MODE button on
the control panel or on the remote control, or tap the “DISC” icon on touch screen
to switch DVD playback.
1. Home Page
2. Time
3. Volume Level Adjust
4. TFT Screen Backlight brightness Adjust
5. Disc Eject
6. Active Media
7. Previous Track / Fast backward
8. Play/Pause
9. Next Track / Fast forward
10. Stop Playback
41 2 3 65
78 9 10 11 12 13 14 15 16 17 18 19 20 21
11. Root Menu
12. Next Page of the Menu Bar
13. Previous Page of the Menu Bar
14. Repeat Playback
15. Random Playback
16. Title Menu
17. Zoom In/ Zoom Out
18. Multi-Subtitle Language
19. Multi-Angle View
20. Audio Settings
21. Multi-Audio Language

www.PyleUSA.com
17
CD, CD-R/CD-RW/ MP3 Disc Playback:
DVD/CD/MP3/USB Operations:
VCD Playback:
1. Home Page
2. Time
3. Volume Level Adjust
4. TFT Screen Backlight brightness Adjust
5. Disc Eject
6. Active Media
7. Previous Track / Fast backward
8. Play/Pause
9. Next Track / Fast forward
41 2 3 65
78 9 10 11 12 13 14 15 16 17 18
10. Stop Playback
11. Repeat Playback
12. Next Page of the Menu Bar
13. Previous Page of the Menu Bar
14. Random Playback
16. Zoom In/ Zoom Out
17. Audio Track Selector
18. Audio Settings
1. Home Page
2. Time
3. Volume Level Adjust
4. TFT Screen Backlight Brightness Adjust
5. Disc Eject
6. Active Media
7. Previous Track / Fast backward
8. Play/Pause
9. Next Track / Fast forward
10. Sort the List of the Folders and Files
11. View the Music File List
41 2 3 65
7 8 9 10 11 12 13 14 15 16 17 18 19 20 21
12. Next Page of the Menu Bar
13. Previous Page of the Menu Bar
14. Repeat Playback
15. Random Playback
16. Audio Settings
17. View the Root Directory in Disc
18. View the Music Files/Folders
19. View the Video Files/Folders
20. View the Photo Files/Folders
21. Return

www.PyleUSA.com
18
DVD/CD/MP3/USB Operations:
Photo Playback:
MP3 Disc/USB Playback:
1. Home Page
2. Time
3. Volume Level Adjust
4. TFT Screen Backlight Brightness Adjust
5. Disc Eject
6. Active Media
7. Previous Track / Fast backward
8. Play/Pause
9. Next Track / Fast forward
10. Sort the List of the Folders and Files
11. View the Music File List
41 2 365
78 9 10 11 12 13 14 15 16 17 18 19 20 21
12. Next Page of the Menu Bar
13. Previous Page of the Menu Bar
14. Repeat Playback
15. Random Playback
16. Audio Settings
17. View the Root Directory in USB
Flash Memory Device
18. View the Music Files/Folders
19. View the Video Files/Folders
20. View the Photo Files/Folders
21. Return
1. Home Page
2. Time
3. Volume Level Adjust
4. TFT Screen Backlight Brightness Adjust
5. Disc Eject
6. Active Media
7. Previous Photo
8. Play/Pause
9. Next Photo
41 2 3 65
78 9 10 11 12 13 14 15 16 17
10. Sort the List of the Folders and Files
11. View the Photo File List
12. Next Page of the Menu Bar
13. Previous Page of the Menu Bar
14. Repeat Playback
15. Zoom In/ Zoom Out
16. Rotate Photo
17. Audio Settings

www.PyleUSA.com
19
Wireless BT Streaming Operations:
Pairing and Connecting
Before using a BT phone with this unit, the phone must be paired and connected.
The BT signal of the unit will broadcast when the power is on.
This DVD player will displayed as "PyleUSA" on your phone. When prompted, enter
the pass code "0000" on your phone. Once paired, the BT phone should
automatically connect this unit whenever the unit is in range.
- Make a Call
Input the phone number by using the keypad in Wireless BT mode.
- Making and Ending a Call
Tap to make a call, and tap to end a call.
- Redial last dialed number
Tap to redial the last dialed phone number.
- Transferring Audio
Tap icon to transfer audio between this car
BT hands-free system and mobile phone.
- Disconnect or re establish BT connection
Tap to disconnect the BT connection.
Tap to reconnect the BT connection.
- Viewing Recent Call List
Tap icon to view the income calls.
Tap icon to view the outgoing calls.
Tap icon to view the missed calls.
Tap icon to refresh the recent call list.
- Contacts List (Phonebook)
Tap icon to view the contacts (phonebook).
Tap icon to refresh the phone book.
Tap icon to and input a key-letter to retrieve
- Streaming Audio
Tap icon on BT mode to enter the music
control playback interface.
Tap icon to skip to the previous track.
Tap icon to play or pause the music.
Tap icon to advance to the next track.
- Setup
Tap icon to set auto connect, auto answer and
Pin Code.
- Audio Settings

www.PyleUSA.com
20
Phone link allows you to mirror the screen of certain Android smartphones on the
screen of this car DVD player. Simply connect your device to the USB port
and you're ready to see your favorite smartphone apps directly on the screen.
- Android phone link:
1) Please scan one of QR code on right side to
download the “Phonelink” app and install it to
your smartphone.
the USB port, and then connect it to your phone.
3) Now the car DVD player’s screen will do the mirror function with your smartphone
and you will be able to run any application or function of your smartphone.
Using of the Icons:
1. : Return to the previous step
2. : Return to home page of smart devices
3. : Landscape mode (Rotate the screen)
4. : Exit the phone link mode
Android Phone Link Operations:
Note:
a. To unlink your smartphone from the car DVD player, just disconnect the USB
cable again.
b. For Android smart devices, this unit support two-way control (both by the car
DVD player and connected smart devices).
c. For Android smart devices, the Wireless BT must be connected, to have sound
output.
d. Some phones do not support Landscape mode on the home screen.
AMAZON GOOGLE
Table of contents
Other Pyle Car Video System manuals

Pyle
Pyle PLM4135BT User manual

Pyle
Pyle PYLE View Series PLVWR5600 User manual

Pyle
Pyle PLD7HB User manual

Pyle
Pyle PLVHR85M User manual

Pyle
Pyle PLDVD134F User manual

Pyle
Pyle PLVW8M User manual

Pyle
Pyle PYLE PLDCS400 User manual

Pyle
Pyle PLD43MU User manual

Pyle
Pyle PLDNAND465 User manual

Pyle
Pyle PLDHR926KT User manual

Pyle
Pyle PLD58MUT User manual

Pyle
Pyle PLD187V User manual

Pyle
Pyle PLINTBL10 User manual

Pyle
Pyle View PLRTD155 User manual

Pyle
Pyle PLBINDV7 User manual

Pyle
Pyle PLDN70U User manual

Pyle
Pyle PLDVD65IN User manual

Pyle
Pyle PYLE View Series PLVRL6400 User manual

Pyle
Pyle PYLE View Series PLVWR7300 User manual

Pyle
Pyle PLRD106 User manual