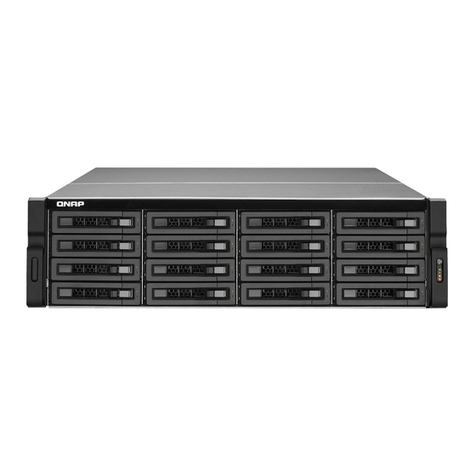
QNAP ES1640dc Instructions for use

QNAP Enterprise-class NAS Series:
ES1640dc v2, ES1640dc
QNAP Enterprise-class JBOD Series:
EJ1600 v2, EJ1600
Hardware User Manual
Version 1.0
©2017. QNAP Systems, Inc. All Rights Reserved.

2
Thank you for choosing QNAP products! This user manual provides description of the hardware of the
ES NAS and relevant guideline of certain functions. Please read carefully and strictly adhere to the
instructions of the manual.
This user manual is applicable to the following ES NAS models:
ES1640dc v2 and ES1640dc
This user manual is applicable to the following EJ JBOD models:
EJ1600 v2 and EJ1600
NOTE:
•The “ES NAS” is hereafter referred to as “NAS” or “ES NAS”.
•The product you purchased may not support certain functions dedicated to specific models.
•All features, functionality, and other product specifications are subject to change without prior
notice or obligation.
•Information presented is subject to change without notice.
•No part of this publication may be reproduced, stored in a retrieval system, or transmitted, in any
form or by any means, mechanical, electronic, photocopying, recording, or otherwise, without prior
written permission of QNAP Systems, Inc.
•QNAP and the QNAP logo are registered trademarks of QNAP Systems, Inc. Other products
and company names mentioned herein may be the trademarks of their respective companies.
DISCLAIMER
In no event shall QNAP Systems, Inc. (QNAP) liability exceed the price paid for the product from direct,
indirect, special, incidental, or consequential damages resulting from the use of the product, its
accompanying software, or its documentation. QNAP makes no warranty or representation, expressed,
implied, or statutory, with respect to its products or the contents or use of this documentation and all
accompanying software, and specifically disclaims its quality, performance, merchantability, or fitness
for any particular purpose. QNAP reserves the right to revise or update its products, software, or
documentation without obligation to notify any individual or entity.
Note:
Back up your system periodically to avoid any potential data loss. QNAP disclaims any
responsibility of all sorts of data loss or recovery.
Should you return any components of the ES NAS package for refund or maintenance, make sure
they are carefully packed for shipping. Any form of damages due to improper packaging will not
be compensated.
3
Regulatory Notice
FCC Notice
The QNAP NAS complies with different FCC compliance classes. Please refer to Appendix C for details.
Once the class of the device is determined, refer to the following corresponding statement.
=======================================================
FCC Class A Notice
This device complies with Part 15 of the FCC Rules. Operation is subject to the following two conditions:
1. This device may not cause harmful interference.
2. This device must accept any interference received, including interference that may cause
undesired operation.
Note: This equipment has been tested and found to comply with the limits for a Class A digital device,
pursuant to Part 15 of the FCC Rules. These limits are designed to provide reasonable protection against
harmful interference when the equipment is operated in a commercial environment. This equipment
generates, uses, and can radiate radio frequency energy, and if not installed and used in accordance
with the instruction manual, may cause harmful interference to radio communications. Operation of this
equipment in a residential area is likely to cause harmful interference, in which case the user will be
required to correct the interference at his own expense.
Modifications: Any modifications made to this device that are not approved by QNAP Systems, Inc. may
void the authority granted to the user by the FCC to operate this equipment.

4
CE NOTICE
The QNAP NAS complies with different CE compliance classes. Please refer to Appendix C for details.

5
Symbols in this document
Warning
This icon indicates the instructions must be strictly followed. Failure to do
so could result in injury to human body or death.
Caution
This icon indicates the action may lead to disk clearance or loss OR failure
to follow the instructions could result in data damage, disk damage, or
product damage.

6
Table of Contents
Chapter 1. Introduction to QNAP ES NAS series .......................................................................................... 9
Chapter 2. Hardware Specifications............................................................................................................ 11
Chapter 3. System Components ................................................................................................................. 14
Front Panel Features...............................................................................................................................14
Font Panel LEDs and Buttons ..................................................................................................................14
Rear Panel Features ................................................................................................................................17
Rear Panel LEDs and Buttons ..................................................................................................................18
Storage Controllers .................................................................................................................................19
Redundant Power Supply........................................................................................................................ 20
PCIe expansion adaptors......................................................................................................................... 20
Onboard mini-SAS ports..........................................................................................................................20
SAS Host Bus Adapter (HBA) ................................................................................................................... 20
Battery Backup Units (BBU) .................................................................................................................... 20
10GbE networking ..................................................................................................................................20
Storage Features .....................................................................................................................................21
Disk drives and Disk Enclosures ..........................................................................................................21
RAID implementation.......................................................................................................................... 21
Reset Button Behavior ............................................................................................................................24
Management port...................................................................................................................................24
Service port .............................................................................................................................................25
Connecting Expansion Units ................................................................................................................... 26
Expansion Units Features........................................................................................................................ 29
Font Panel LEDs and Buttons ..................................................................................................................29
Enclosure IDs...........................................................................................................................................30
Rear Panel LEDs and Buttons ..................................................................................................................30
Rear Panel LEDs and Buttons ..................................................................................................................32
Onboard mini-SAS ports..........................................................................................................................32
Disk drives and Disk Enclosures ..............................................................................................................32
Service port of expansion units...............................................................................................................33

7
Chapter 4. Service and Maintenance..........................................................................................................34
Safety Considerations ................................................................................................................................. 34
Preparation Procedures .......................................................................................................................... 34
Powering Down the ES NAS ........................................................................................................................ 35
Replacing the battery backup unit (BBU)................................................................................................ 35
Replacing hot-plug power supply ........................................................................................................... 36
Replacing hot-plug SAS HDDs .................................................................................................................37
Replacing field-replaceable fan modules................................................................................................38
Installing expansion cards.......................................................................................................................38
Installing DIMMs .....................................................................................................................................40
Chapter 5. Quick-Deploy Rack kit Installation Instructions ........................................................................43
Overview .................................................................................................................................................43
Kit contents .............................................................................................................................................43
Mounting the Device .............................................................................................................................. 44
Appendix A: Multipathing Support for High Availability............................................................................47
Appendix B: Beep alarm............................................................................................................................. 49
Appendix C. Product Compliance Class....................................................................................................... 50
Technical Support .......................................................................................................................................51
GNU GENERAL PUBLIC LICENSE ..................................................................................................................52

8
Safety Warnings
1. The ES NAS can operate normally in temperatures of 0ºC–40ºC (32ºF -104ºF) and relative humidity
of 5%–95%. Please make sure the environment is well-ventilated.
2. The power cord and devices connected to the ES NAS must provide correct supply voltage (770W,
100-240 V@50/60Hz).
3. Do not place the ES NAS in direct sunlight or near chemicals. Make sure the temperature
and humidity of the environment are in optimized level.
4. Unplug the power cord and all connected cables before cleaning. Wipe the ES NAS with a dry
towel. Do not use chemical or aerosol to clean the ES NAS.
5. Do not place any objects on the ES NAS for the server’s normal operation and to avoid overheat.
6. Use the flat head screws in the product package to lock the hard disks in the ES NAS when installing
hard disks for proper operation.
7. Do not place the ES NAS near any liquid.
8. Do not place the ES NAS on any uneven surface to avoid falling off and damage.
9. Make sure the voltage is correct in the location where the ES NAS is installed. Contact the
distributor or the local power supply company for the information.
10. Do not place any object on the power cord.
11. Do not attempt to repair the ES NAS in any occasions. Improper disassembly of the product may
expose the users to electric shock or other risks. For any enquiries, please contact the distributor.
12. The ES NAS models should only be installed in the server room and maintained by the
authorized server manager or IT administrator. The server room is locked by key or keycard access
and only certified staff is allowed to enter the server room.
Warning:
Danger of explosion if battery is incorrectly replaced. Replace only with the same or equivalent type
recommended by the manufacturer. Dispose of used batteries according to the manufacturer’s
instructions.
Do NOT touch the fan inside the system to avoid serious injuries.

9
Chapter 1. Introduction to QNAP ES NAS series
The Enterprise Storage NAS (ES NAS) series offers robust functionality, exceptional reliability,
and availability with the familiar ease of storage management shared by all of QNAP NAS product lines.
The ES NAS series consists of two new major products: the ES1640dc v2 and the ES1640dc. Both of these
models are ideal for mid- to large-scale network storage systems.
The ES NAS chassis adopts the industry standard 19 inch high-density enclosure design. The chassis
supports 16 drives, saving physical space and lowering the energy consumption required for
system cooling in data center environments.
The new ES NAS series has a high availability and serviceability architecture that supports two redundant
Storage Controllers and two power supply units. In addition, the EJ1600 v2 and EJ1600 expansion
enclosures allow for the growth of the storage system up to a 128 drive maximum using the ES NAS’s
SAS drive expansion. These expansion units also have high availability features, including dual power
supplies and redundant cross loop connections to a base ES NAS. The new ES NAS series provides a
number of new capabilities that distinguish them from other enterprise-class NAS. The enhancements
are:
•To deliver reliable performance and advanced data services, the ES NAS series combines
enterprise-grade hardware and a storage-optimized, enterprise operating system (QES)
based on ZFS.
•The dual storage controllers are powered by Intel® Xeon® E5 series processors that deliver
unprecedented computing power to run multiple workloads and management
tasks concurrently in addition to advanced data services.
•The two active storage controllers work as a cluster, backing up one another so that a
single controller can take over the storage resources owned by the other controller in the event
of a controller failure.
•Non-disruptive firmware upgrades: Enables controller firmware upgrades with no interruption
to data access.
•Cache configurations are available ranging from 1 drive up to 16 drives (full-SSD drive set)
system cache.
•Data writes are protected by maintaining a copy in the battery-backed cache unit (comprising
DRAM, an mSATA / M.2 SSD module, and a battery backup unit) until the data is written to the
HDDs.
•Storage Pool Striping (across different expansion units) provides a mechanism to aggregates
hard drives into a bigger storage space with the ability to support multiple RAID groups across
different expansion enclosures. (Note that all RAID groups must have the same RAID type.)

10
Storage Pool Striping helps maximize performance by reducing hot spots in arrays and provides
better data safety.
•RAID-TP (Triple parity) provides enhanced redundancy and protection in the event of three
simultaneous disk failures.
•Triple Mirroring writes data simultaneously to three separate HDDs so if two-thirds of the HDDs
fail in the same RAID group, no data will be lost.
•Support for OpenStack enables integration with the OpenStack cloud environment. After the
driver is installed on the OpenStack Cinder nodes, block storage resources can be allocated by
the Cinder nodes.
Data safety and encryption
Combined with the world-class business resiliency and encryption features, the ES NAS series provides a
unique combination of high availability, performance, and security. QES built-in support for
shared folder and LUN encryption ensures critical business-sensitive data is protected. In addition,
WORM (Write Once Read Many) functionality protects data from being tampered at a shared-folder
level.

11
Chapter 2. Hardware Specifications
Caution: Modifying the hardware, software, or firmware of the QNAP products will void the
warranty. QNAP is not responsible for any form of damage or loss of data caused by modifying the
QNAP products. Users should bear their own risks of all sorts of possible data loss or system instabilities
due to changing the hardware parts, modifying the default system firmware or installing any
unauthorized third party applications on QNAP products.
Model No.
ES1640dc v2
ES1640dc
Form Factor
3U, Rackmount
Processor
Intel Xeon E5-2420 v2
(2.2GHz, 6 core, 15MB L3, 80W TDP)
Memory
(x 2 for every
system)
ES1640dc-v2-E5-160G:
Per controller (2 controllers per
system):
DDR3 ECC RDIMM 32GB x 2 ( total
of 64GB) 16GB x 1 (NVRAM)
ES1640dc-v2-E5-96G:
Per controller (2 controllers per
system):
DDR3 ECC RDIMM 16GB x 2 ( total
of 32GB) 16GB x 1 (NVRAM)
ES1640dc
Per controller (2 controllers per
system):
DDR3 ECC RDIMM 16GB x 2 ( total
of 32GB) 16GB x 1 (NVRAM)
Number of Disk
Drives
16 x 2.5"/3.5"
HDD Tray is lockable
16 x 2.5"/3.5"
HDD Interface
SAS 12Gb/s; backward-compatible
to SAS 6Gb/s
SAS 6Gb/s
JBOD
Expansion connectors
(x 2 for every system)
Two mini-SAS 12Gb/s ports (SFF-
8644)
Two mini-SAS 6Gb/s ports (SFF-
8088)
Battery-Backed Write
Cache (x 2 for every
system)
M.2 2280 for NVRAM (SATA
signal)
mSATA for NVRAM

12
10GbE LAN Port (x 2
for every system)
Four SFP+ (Intel XL710-AM1)
Two RJ45 (Intel X540-BT2)
PCIe expansion slots
(x 2 for every system)
PCIe Slot x8 (Gen3 x8):
Pre-installed with a LAN-10G2T-
X550 NIC (2 x 10GbE RJ45 ports),
replaceable with a 40GbE NIC
PCIe Slot x4 (Gen2 x4):
Pre-installed with a dual-port
Mini-SAS adapter
PCIe Slot x8 (Gen2 x8):
Reserved for 40GbE or 10GbE
LAN card
PCIe Slot x4 (Gen2 x4):
Reserved for dual path Mini-SAS
Fan module (x 2 for
every system)
Field-replaceable fan module (60*60*38mm, 16000 RPM/12v/2.8A x 3)
Power Supply
770W 1+1, 100-240V@50/60Hz (hot-swappable, redundant)
Temperature
0° C to 40 ºC
Relative Humidity
5 % to 95 %
Dimensions (mm)
618 (Depth) x 446.2 (Width) x 132 (Height), excluding the handles
Weight (Net)
26.75kg
Expansion Enclosures
Expansion Model
EJ1600 v2
EJ1600
Form Factor
3U, Rackmount
3U, Rackmount
Number of Disk
Drives
16 x 2.5"/3.5"
HDD Tray is lockable
16 x 2.5"/3.5"
HDD Interface
SAS 12Gb/s (backward-compatible
to SAS 6Gb/s)
SAS 6Gb/s
JBOD
expansion connector
(x 2 for every system)
Two mini-SAS 12Gb/s ports (SFF-
8644)
One mini-SAS 12Gb/s port
reserved
Two mini-SAS 6Gb/s ports (SFF-
8088)
Fan module (x 2 for
every system)
Field-replaceable fan module
(60*60*38mm, 16000
RPM/12v/2.8A x 3)
Field-replaceable fan module
(60*60*38mm, 16000
RPM/12v/2.8A x 3)
Power Supply
450W 100-240V@50/60Hz (hot-
swappable, redundant)
450W 100-240V@50/60Hz (hot-
swappable, redundant)
Temperature
0°C to 40 °C
0°C to 40 °C
Relative Humidity
5 % to 95 %
5 % to 95 %

13
Dimensions (mm)
618 (Depth) x 446.2 (Width) x 132
(Height), excluding the handles
618 (Depth) x 446.2 (Width) x 132
(Height), excluding the handles
Weight (Net)
24.11kg
24.11kg
All product specifications are subject to change without prior notice.

14
Chapter 3. System Components
Front Panel Features
The power button, Power/Status LED indicators and LCD status display are conveniently located at the
front panel for easy access.
ES1640dc v2:
ES1640dc:
Note: Refer to the next section for detailed descriptions on these features.
Front Panel LEDs and Buttons
Item
Description
LED Color
Status
1
Power on button
System power on button. To force shut down the ES NAS,
press and hold it for about 10 seconds (or after hearing a
long beep, which indicates the system is performing
power-down procedure). Release the button after hearing
a long beep.
2
System Power LED
Blue
On = System power on
①
②
③
④
⑤
①
②
③
④
⑤

15
Off = System power off
3
Status
Green
Red
Green =The system is operating normally.
Red = One or more of the following conditions
exist:
•There are system errors or warnings (e.g.
degraded RAID mode, memory failure, fan/power
supply failure, system/disk temperature too high,
storage pool reaching threshold value) recorded in
system logs of the QES to notify system
administrators. Correct errors to reset the LED to
green.
•The system is performing takeover.(*)
•The power supply unit has been unplugged.
4
LCD status display
The two-digit number represents various states of device
booting process. The left and right digits represent the left
Storage Controller (SCB) and the right Storage Controller
(SCA) respectively. (Please refer to the High Availability
app of the QES for viewing the components and their
denoted names).
No-Display: BIOS booting
1: Device detecting
2: Network settings
3: System settings
4: Services start
5: System self-testing
8: System initializing
0: System ready
5
HDD Status LEDs
(upper)
Green
Red
Green On = Drive is actively online
Slow flashing = The “Locate” command which helps
identify the drive is executed in the Storage Manager on
the QES
Red = Error/Damage
Off = No HDD present
5
HDD Activity LEDs
(lower)
Green
On/Slow flashing = No Drive activity
Flashing = High activity on the drive or drive is
being configured as part of an array
Caution: Do not replace a drive without bring it offline first
in the QES. You may replace a drive online only when it is
part of an array that has been configured for fault
tolerance and a predictive failure alert is received from the
QES. For more information, refer to the software user
00

16
manual.
* The dual active-active controller system enables a single controller to take over the pool disk resources
owned by the other controller in the event of a controller failure. Takeovers can be initiated manually or
be set up with the automatic system failover protection (please refer to the software user manual).

17
Power Supply
Battery Backup
Unit
Power Supply
Battery Backup
Unit
Rear Panel Features
The rear panel consists of two Storage Controllers, both including I/O expansion slots, Ethernet ports,
USB connectors, onboard mini-SAS ports, a SAS HBA, the Storage Controller power-on button, a reset
button, the system management port and the BBU.
ES1640dc v2:
ES1640dc:
Note: USB 3.0 Ports are for development and debug only.
③④⑤⑥ ⑦⑧⑨⑩⑪ Reset
②
①
PCIe slot
1GbE
Port
USB 3.0
Ports
Service Port
mini-SAS
Ports
(HBA)
Onboard
mini-SAS
10GbE
Ports
①
②
③④⑤⑥ ⑧⑩⑨⑪ Reset
⑫
⑬
Service
Port
1GbE
Port
USB 3.0
Ports

18
Rear Panel LEDs and Buttons
Item
Description
LED
Color
Status
1
Power supply LED
Green
Orange
On = Power turned on and power supply
functioning properly
Flashing green= System off
Flashing orange= AC power cord is unplugged
Off = One or more of the following conditions
exist:
• AC power unavailable
• Power supply failed
• Power supply exceeded current limit
2
BBU LED (on the
battery module)
Green
Red
Orange
Green = Normal
Flashing Green = Copying data to the NVRAM
Red = Damage
Orange= Charging/learning
Off = Not correctly attached to the ES NAS
3
Status
Green
Orange
Off = The system is powered off.
Green = The system is operating normally.
Flashing green = The system is booting.
4
Fan
Green
Orange
Green = The fan is operating normally.
Orange = Damage/error
Off = Not detecting any fans
5
BBU LED (on the
Storage Controller)
Green
Orange
Green = Normal
Orange = Error/Damage
Off = One or more of the following conditions
exist:
•The Storage Controller is not powered on
•The system cannot detect the BBU
6
High Availability LED
Green
Orange
Green = Active state
Flashing orange = performing takeover* or
undergoing giveback**
Orange = The Storage Controller has taken over from
the other Storage Controller.
Off = One or more of the following conditions exist:
• The Storage Controller has failed over to the other
Storage Controller.
• The Storage Controller is not powered on.
7
Onboard mini-SAS Port
LED
Green
Red
Off = No link
Green = Network link
Flashing = Network activity
Red = Error/damage
8
Power-on Button
The Power-on button of the Storage Controller. To
shut down the Storage Controller, press and hold it

19
for about 5 seconds. It provides the same function as
the Power on and Shut Down function in the High
Availability app on QES.
9 (Left)
10 Gigabit Ethernet RJ-
45 Ports
LAN1/LAN2 Speed LED
Green
Orange
Off
Green = 10 GbE connection
Orange = 1 GbE connection
Off = 100Mbps connection
9 (Right)
10 Gigabit Ethernet RJ-
45 Ports
LAN1/LAN2 link/activity
LED
Green
Off = No link
Green = Network link
Flashing = Network activity
9 (Left for
Model
ES1640dc v2)
10 Gigabit Ethernet
SFP+
LAN1/LAN2/LAN3/LAN4
Speed LED
Green
Orange
Off
Green = 10 GbE connection
Orange = 1 GbE connection
9 (Right for
Model
ES1640dc v2)
10 Gigabit Ethernet
SFP+
LAN1/LAN2/LAN3/LAN4
link/activity LED
Green
Off
Off = No link
Green = Network link
Flashing = Network activity
10 (Left)
Management Port
Link/activity LED
Green
Off
Off = No link
Green = Network link
Flashing = Network activity
10 (Right)
Management Port
Speed LED
Green
Orange
Orange = 1 GbE connection
Green = 100Mbpsconnection
11
Reset
System reset button for rebooting the Storage
Controller without turning off the system power.
12 (Model
ES1640dc v2)
PCIe Gen3 x8 Slot
LAN-10G2T-X550 NIC for 2 x 10GbE (RJ45) Port
13 (Model
ES1640dc v2)
PCIe Gen2 x4 Slot
Dual path Mini-SAS (SFF-8644) expansion card on
board
* The dual active-active controller system enables a controller to take over the pool disk resources
and access the data upon the failure of the other controller. Takeovers can be initiated manually or be set
up with the automatic system failover protection (please refer to the software user manual).
**Storage Controller A (or B) has taken over the system. Storage Controller B (or A) has been
recovered and it is ready to resume data service. Giveback can be initiated manually or be set up with
automatic failback after system recovers (please refer to the software user manual).
Storage Controllers
With the dual-controller configuration, the controller on the left is Storage Controller A (SCA) and the
right is Storage B (SCB), as named in the QES, when viewed from the rear of the system. The dual-
controller configuration offers redundant access to disk storage. In the case of a controller or an I/O
path failure, the redundant controller will continue to provide access to disk drives.

20
Each storage controller features a BBU, one SAS host bus adapter (pre-installed in one of the PCIe slot),
one PCIe expansion slot, an onboard mini-SAS port, power-on button, two 10 Gigabit Ethernet ports,
one system management port, two USB 3.0 ports, one service port, and a reset button.
Redundant Power Supply
The power supply module is a 770 Watt switching power supply (Input: 100-127V~/10A, 50-60Hz; 200-
240V~/5A, 50-60Hz). The ES NAS has two identical power supply modules for power redundancy. If
either power supply fails, the other module will keep the system running until it can be replaced.
Note: Refer to Rear Panel LEDs and Buttons for power supply LED description.
PCIe expansion adaptors
The ES NAS adopts point-to-point, high-speed PCI Express (PCIe) Gen2 (x4) and Gen3 (x8) for I/O
expansions. The system can support one additional PCIe (Gen3 x8) attachment. The one with Gen2 (x4)
is pre-installed with a SAS host bus adapter.
Onboard mini-SAS ports
Two onboard mini Serial Attached SCSI (SAS) ports provide point-to-point 6Gb/s data (or 12Gb/s
depending on the model) transmission to other storage devices.
SAS Host Bus Adapter (HBA)
In addition to the above external Serial Attached SCSI (SAS) host attachment port built into the Storage
Controller, a pre-installed SAS HBA provides two additional mini-SAS ports for direct attachment to the
expansion units. The SAS HBA supports either 12Gb/s or 6Gb/s transmission speed depending on the
models. (ES1640dc v2 comes with 12Gb/s SAS HBA whereas ES1640dc comes with 6Gb/s SAS HBA.)
Battery Backup Units (BBU)
The battery is 10.8V 2200mAH.
The cache of QES NAS Storage is protected by a battery against power loss. The BBU provides power to
Battery-Backed Write Cache. The battery provides power if the data in the cache needs to be written to
the mSATA memory card if power is disrupted. In the instance when only one BBU fails, the working BBU
will protect the operation of write cache on both Storage Controllers. If both BBU fail at the same time,
the system will switch to write-through cache mode. You can schedule the BBU learning cycle in the QES;
for more information, please refer to the software user manual.
10GbE networking
4 x SFP+ (Intel® XL710-AM1) for Model ES1640dc v2 or 2 x RJ45 (Intel® X540-BT2) for Model ES1640dc
The ES NAS series is architected and validated with Intel® Xeon® processor E5 v2. The Ethernet ports
based on the Intel XL710 or X540 Ethernet controller implement hardware optimizations and off-loads
for exceptional performance. The network configuration of the QES supports Jumbo frame, port
trunking and VLAN settings for you to optimize performance and security in an IP SAN environment.
This manual suits for next models
4
Table of contents
Other QNAP Storage manuals

QNAP
QNAP TS 53D Series User manual

QNAP
QNAP TS-410E User manual

QNAP
QNAP TS-h1886XU-RP User manual

QNAP
QNAP TS-453BT3 User manual

QNAP
QNAP TS-963X User manual

QNAP
QNAP TVS-1282T3 User manual

QNAP
QNAP TDS-h2489FU User manual

QNAP
QNAP TS-2888X Series User manual

QNAP
QNAP TS-453BT3 User manual

QNAP
QNAP TS 32PXU Series User manual

QNAP
QNAP TVS-H874-I5-32G User manual

QNAP
QNAP TS-673A-8G User manual

QNAP
QNAP TS-1886XU-RP User manual

QNAP
QNAP TS-677 User manual

QNAP
QNAP ES1642dc Instructions for use

QNAP
QNAP TS-453D-4G-16TB User manual

QNAP
QNAP TS 28A Series User manual

QNAP
QNAP TS 77XU Series User manual

QNAP
QNAP TVS-951 Series User manual

QNAP
QNAP TS-464 User manual