154.018UK User Manual
Master/Slave Operation
Connect a DMX lead from a standalone ZP18 unit to further slave units and set each slave to “SLAV”in the RUN menu.
The slave units will now mimic the standalone “master”ZP18 fixture.
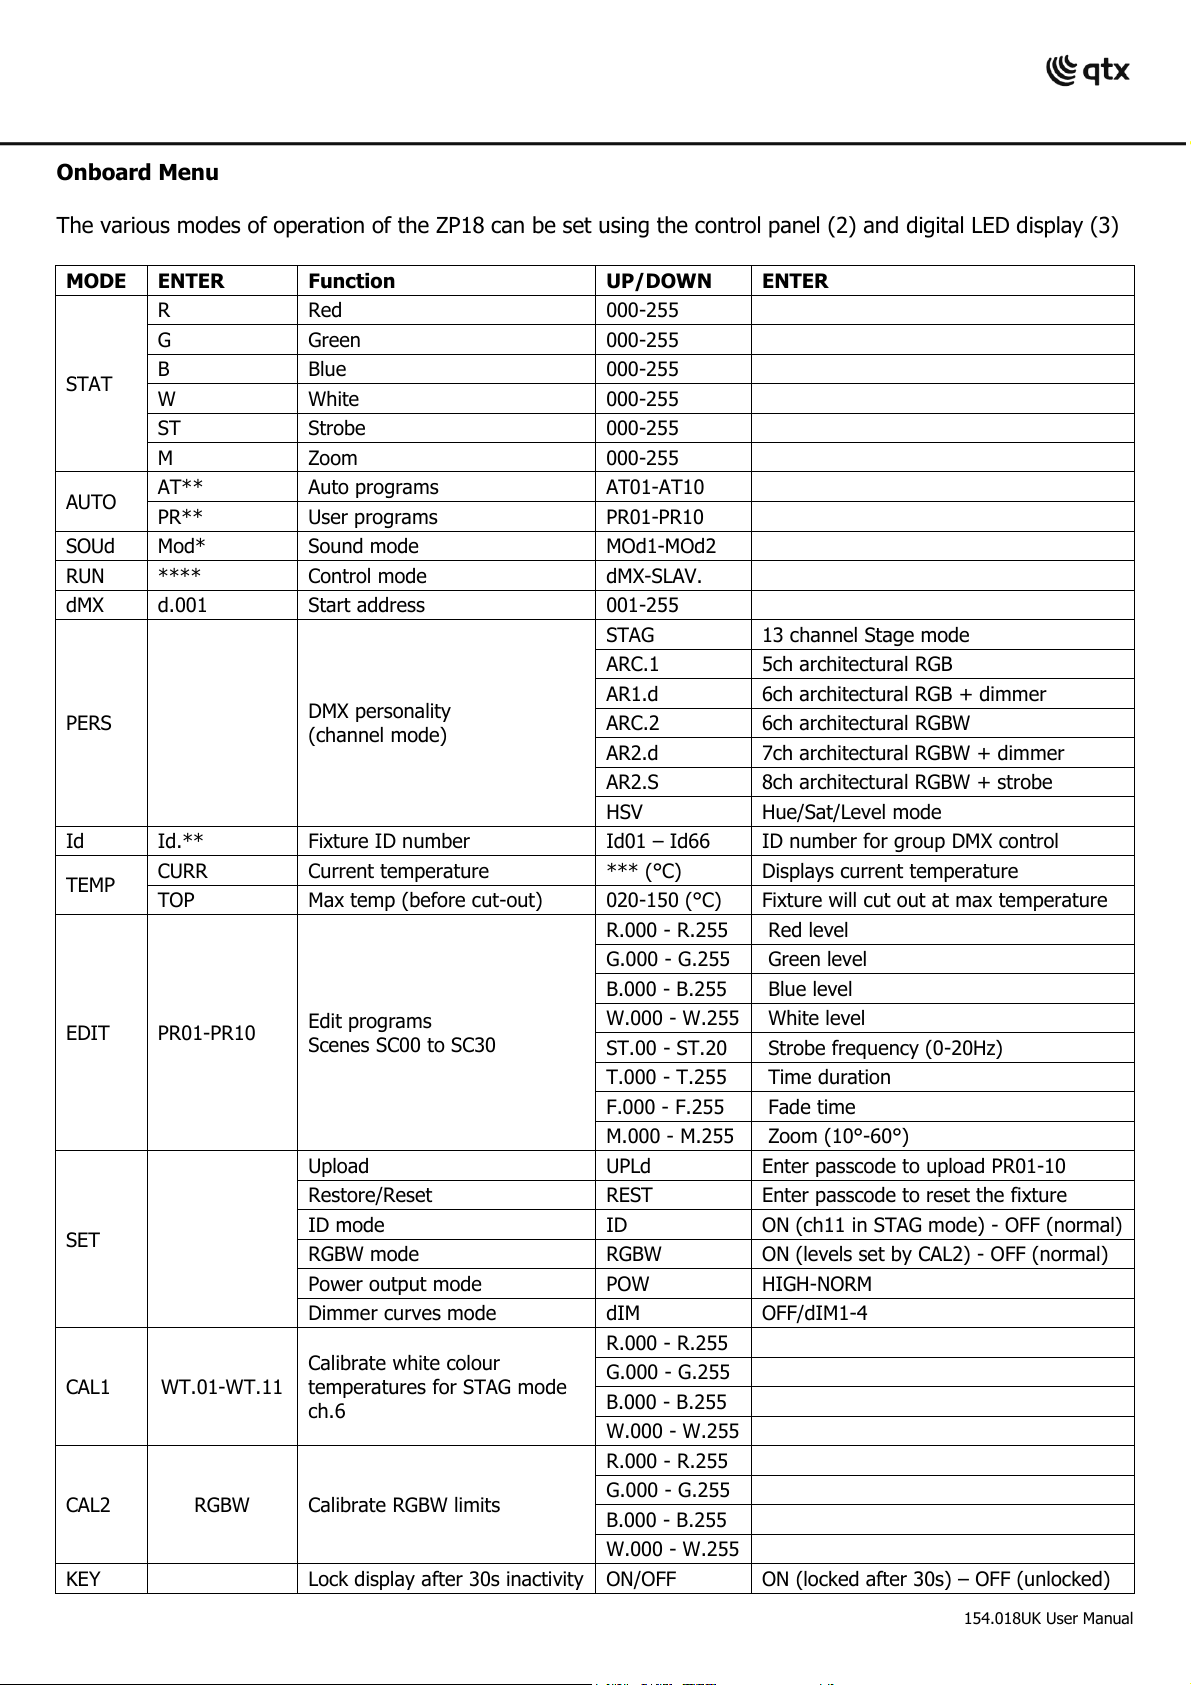
Passcode Key and SET menu functions
The KEY setting in the menu sets a lock for the display. When set to “ON”, the display will lock after 30s of inactivity. To
unlock the display, enter the passcode –UP-DOWN-UP-DOWN-ENTER
The passcode is also used for UPLd and REST functions in the SET menu as shown below.
Enter passcode (UP-DOWN-UP-DOWN-ENTER ) to upload PR01-10 programs to a connected slave fixture
Enter passcode (UP-DOWN-UP-DOWN-ENTER ) to reset the fixture
When set to “ON”, allows fixture to be controlled in groups in STAG mode determined by the ch11 setting
When set to “ON”, the max levels of R, G, B, W outputs are set by CAL2 to achieve balanced white output
Determines whether the output is set to Normal or High power
4 dimming curves can be set to vary the fading profile of
Specifications
110-240Vac, 50/60Hz (IEC)
18 x 8W (4-in-1 quad colour)
Dimmer, R, G, B, W, Zoom, Strobe
Troubleshooting
No light output and no
display
Check mains voltage is correct and socket is switched on
Check IEC lead is OK and connected properly
Check mains fuse on rear panel and fuse in plug top
If fuse blowing repeatedly, refer to qualified service personnel
Display on but no light
output
Check operation mode (DMX, standalone)
Check static and colour settings are not all set to zero or slow fade
For DMX operation, check the appropriate Personality mode is set
Check if a static or user program is set with zero light output
Check that XLR leads are connected properly
Check that DMX signal is OK by testing on other equipment
Check that correct address is set in the menu
Ensure that mode is set to DMX and not Slave
Disposal: The “Crossed Wheelie Bin” symbol on the product means that the product is classed as Electrical or
Electronic equipment and should not be disposed with other household or commercial waste at the end of its useful
life. The goods must be disposed of according to your local council guidelines
Errors and omissions excepted.
Copyright© 2015. AVSL Group Ltd.
Powered by TCPDF (www.tcpdf.org)Powered by TCPDF (www.tcpdf.org)Powered by TCPDF (www.tcpdf.org)