QU-AX Only One Installation guide

assembling
instructions for
your unicycle & lots
of tips & tricks about
unicyc
ling

How to assemble your QU-AX
detailed view
tools you will
need: 10mm and 15mm
wrenches
box
content
2 3
Assembling
should be made by
an adult - or at least
checked by an adult!
slot
Lower bearing
Cups

first,
be sure to define
front & back,
left & right - they
are marked on the
cranks
So this is the right hand
(RH) crank (incl. pedal)
slot on
frame must aim
backwards
right
crank (RH)
Now turn the frame and wheel upside-down
and put the bearing cupholders on. The nib
on the screw should fit in the slot of the
upper bearing cupholder:
slot
4 5

Tighten both screws evenly so that distance
between frame & cupholder is the same on
both sides. But not too tight, it should still
turn a few times round after actuating it with
some force. Giving a Torque is not possible
due to Nylok-screws.
Put the washers and nuts on the screws,
tighten to fix the wheel - it should still turn
easily.
tighten in
the same way on
both sides with
10mm wrench
top: slot should be on
the same side as rear
bumper.
left: once again, make
sure the seatclamp is
opened, then, put the
tube in the frame.
Check that the handle
faces forwards, as in
this picture, the crank
in the foreground is the
right side.
Adjust the clamping
force with the knob and
shift the lever so that
it clamps firmly.
6 7
Put seatclamp
on frame with
slot matching
the frame slot.
The Shell has a
stop at one end

I am the left
pedal !
...
& I am the
right one
The
right
pedal belongs
to crank with an
"R" or "R H " on the
inside
tighten firmly right pedal clockwise and left
one counter clockwise. check if pedals and
cranks are well tightened after first ride!
Seatpost must
always be inserted at
least 6 cm in frame!
If seatpost is too long,
use the second, 200 mm
post, which comes with
all Qu-AX Luxus
unicycles.
That way, you do not need
to shorten the original
post. Once you are tall
enough, just mount the
long one again.
Inflate the tire to the
value on the tire flange.
Always
check all
screws
before
every ride,
especially
after the
first ones!!
Leg
should be
nearly straight
with pedal in
lowest
position
89
Check
pedals &
cranks
after the
first rides!

How is this ever going to work?
If you want to ride a unicycle, physical tness and
ability to concentrate will come in handy.
The rst hour of practice can be quite frustrating
- but the sport soon becomes addictive!
Once you learn to ride a unicycle, learning
to snowboard, ski, surf - and indeed any
sport requiring mastery of balan-
ce - will in turn become much
easier to learn.
Before you rst attempt to mount
the unicycle, make sure you wear
a helmet. Knee and elbow pads, and
gloves, are also recommended.
If you have assembled the unicycle
as shown on the previous pages,
you should be aware as to which
end is the front. If your unicyc-
le was assembled by somebody
else, take a closer look: the ver-
tical slot cut into the frame at the
seat-post clamp is at the back, and
the handle on the saddle at the
front. The inside of the crank-arms
are labelled “L” and “R” for the
le-hand and right-hand sides respectively.
The saddle should be ad-
justed so that your leg is
almost straight - but not
locked - when the pedal
is in the lowest position,
as with a bicycle. Whilst
learning, however, it may
be more suitable to delibe-
rately set the saddle 1-2 cm
too low.
Learning to ride with your
friends is great; you can
help each other! If you
prefer learning on your
own, nd a place with at
ground and a handrail or
something at arm height to
hold on to. A doorframe, as shown in the picture,
can work well, too.
And now - let’s go! Rest one hand on the handrail
or on your friend’s shoulder. Try to keep the sadd-
le between your legs and the right-hand pedal
at the 4 o’clock position. As you press down on
10 11

this pedal, the unicycle will roll, under your body.
Now, you are sitting in an upright position on the
unicycle. Congratulations; you are now only about
4 - 6 hours away from riding a unicycle!
The next goal should be to nd the right balance
on the unicycle. It is important that your body
stays in an upright position; do not try to look
down, or at the wheel. Hold on to your friend, or
your handrail.
First step: to nd the balance
In order to ride forward, hold onto your friend or
handrail and pedal forward carefully. When you
master this, or nd it no longer useful, try peda-
ling for a little while without holding a
support. Now you are only 3-4 hours
away from free riding!
Most importantly, when you feel
yourself losing your balance, abandon
the unicycle by jumping or stepping
o; it is designed to withstand these
crashes! It cannot cry - but can you?
Soon, the journey will become its own
reward! You will suddenly nd your-
self able to ride one meter, then two, and soon
you won’t understand how the rst step could
have been so dicult. If you like, you can stop
practicing in private and ride in a public place.
People who see you are likely to be most im-
pressed!
Remember, always keep cool. If you have to step
o, relax and try to nd a handhold, perhaps a
tree or streetlight, to hold onto when you climb
aboard to continue.
I feel I can y!
Now you should practice this over several days.
During this time you will develop an understan-
ding for how your unicycle behaves.
Your riding will not be very smooth or precise, but
do not worry; this is typical for unicycling in the
beginning. Whilst riding, you may discover that
you can exercise some control of the unicycle by
moving your hips. If you feel you are falling from
the front of the unicycle, pedal a little faster and
it will catch you up; if you feel you are falling from
the back, pedal slower and you will catch it up!
12 13

The next exercise will be to free-
mount. Your preferred legs pedal
should be in a 4 o’clock position.
Try to do this in a place that
prevents the wheel from
rolling forward, such as
against a kerb. Press on
the 4 o’clock position pe-
dal, and the unicycle will
roll back and underneath
you, liing you up. Try to
remain in an upright position.
It is very unlikely that you will
do this successfully for quite a
long time! You will need to make
hundreds of attempts - but when
it clicks, you genuinely will feel
like you can y!
Turning without handlebar?
Changing direction will involve a similar technique
to snowboarding or skiing. Your hips initiate the
movement and your upper body indicates the
direction. Point your upper body in the direc-
tion you want to go and the unicycle will follow.
It is vital that you look rmly in the direction you
want to go. Initially, you will describe a broad
circle, but eventually you will be able to turn more
and more tightly. Now you have learned the most
crucial elements of unicycling. As always; the most
important of these is still the ability to keep cool!
The best way to develop your skills is to join a
unicycling club (of course, you can always estab-
lish a new club of your own!) In addition, you can
nd out more about the world of unicycling using
the internet links are provided in the appendix.
By the way - in Japan, unicycling is taught in
school sports lessons, as a matter of course! The
QU-AX founder only scored an “E” in Maths but
merited an “A” in sports! he learned unicycling at
the age of 35, but it is quite normal for younger
people to learn unicycling much faster.
14 15

Pit stop
A unicycle is a comparatively simple machine,
requiring only minimal maintenance. The wheel
and pedals need to bear the greatest stress. Aer
a few days you should ensure the spokes are ten-
sioned correctly and the wheel is trued.
A cycle shop can also do this for you. The pedals
and crank-arms
are handed; they
are labelled “R”
and “L” for the
right-and le-
hand side, respec-
tively. When tting the
le-hand pedals, be aware
that they are counter-threaded and
so must be turned in the opposite di-
rection (counter-clockwise to tighten) to
the right-hand components (clockwise).
Check if pedals and cranks are tightened
regularly and retigthen if needed. Stop riding if
loose, danger of permanent damage! On the next
pages, you will nd general information about
unicycle components. QU-AX manufactures all
parts needed for repairs or aermarket upgrades.
If any components become damaged, your uni-
cycle dealer and we will have spares.
Toolbox
The QU-AX toolbox is specically designed for uni-
cyclists to ensure you always have the right tools
for every part of your unicycle!
- colour-indexed allen keys
- heavy duty tyre levers
- spoke key
- QU-AX ratchet (e.g. for bearing-cup bolts)
- high-end pipe-cutter for seatposts
- heavy duty 15mm pedal wrench
- professional QU-AX bearing extractor
- bearing assembly-tool
- crank-extractor
- Q-Axle-adjusting-tool
This toolbox allows you to
completely strip and reassemble
your unicycle.
16 17

The wheel
The wheel is the most important part of the
unicycle and ought to be of the highest
quality. A good wheel should have a
metal rim made from alloy or steel.
Plastic wheels will quickly break.
For a 20” wheel, 36 spokes
should be the minimum.
For smaller wheels, 12”
to 18” in diameter, 20
- 28 spokes are accept-
able, because their
riders are smaller
& thus weigh less
than 30 kg (65 lbs).
Wheels intended for
more extreme use
can have 48 spokes;
more spokes makes a
wheel stronger, more
reliable and easier
to true. For sports like
hockey, many spockes
have the advantage to
block the ball from passing
through the wheel.
Rims:
Steel rims are heavy. Alloy rims are sturdy, lighter
and rustproof. Double-walled alloy rims are the
strongest and yet lightest rims. This is an example
cross-section of two of our double-walled rims:
18 19
Tires:
Tire designs vary signicantly depending on the
intended use.
Standard tire: Normal bicycle tires are okay for
most ordinary riding.
Indoor/Freestyle tire: These can be ridden at
much higher pressures, oering more smoothness
and less rolling resistance. A white or light color
allows you to ride indoors without marking the
oor.
Muni/Trials tire: Wide tires with an aggressive
tread pattern, these can absorb the impact of
drops and oer better rebound and traction.
<< QU-AX DB-45
QU-AX BX-32 >>

Hub & Cranks
Unlike a bicycle, a unicycle has just one hub; it is
at the same time the centre of transmission, and so
quite unique! It is exposed to much greater stresses
than bicycle hubs, bearing both the weight of the
rider and the entire force of transmission. These
forces can be compounded by aggressive or ex-
treme riding.
Standard unicycles have a square-taper crank-
sha, which is sucient for normal riding. Crank-
shas made of better-quality steel, like Cro-Mo,
are tempered to be harder and stronger. QU-AX
unicycles with such crankshas are colour-coded:
QU-AX black and silver hubs are square-taper,
ISIS-splined hubs are red or yellow and Race hubs
are blue. Q-Axle-hubs are anodized red (shiny).
The Q-axle-crank-system has a wider axle and
pinched cranks - which is the best way to com-
bine strength, lightweight and durability. It is the
hub where we have seen the fewest issues ever in
nearly 20 years of building unicycles.
ISIS crankshas end not in a square-taper but in
ten splines, giving a greater surface area to trans-
fer torque safely from the crank-arms to the hub
than a square-taper axle, yet less than a Q-Axle.
ISIS and Q-Axle also have a large diameter and
bigger bearings (42 mm).
The QU-AX ISIS cranksha is a standard 10-spline
ISIS cranksha. The ISIS standard was established
by the bicycle industry. The Q-axle standard fol-
lows the current bicycle-technique evolution.
The Q-Axle system is the evolution of what was
learned from ISIS. By the way, the rst front-ip
on a unicycle was done on a QU-AX hub!
All high-end QU-AX unicycles are built with up to
36 to 48 spokes for stiness and resilience when
performing tricks or
for extreme
riding.
20 21

Bearings
Unicycle bearings are industry-standard
sealed bearing units. They are fully
enclosed and don’t require servicing.
QU-AX bearings have an outer diam-
eter of 40mm (square-taper) or 42mm
(Q-axle, ISIS), making them compatible
with almost all popular unicycle frames.
Crank-arms
The crank-arm length has a crucial inuence on
the transmission ratio of the unicycle; a longer
cranks gives you more control and a shorter crank
gives you more eciency. The length is a very
personal choice - depending on your riding-style
and type. A long crank, for example, can be help-
ful for small pilots to easily control their speed
down a hill. Typical lenghts are e.g.:
16-18“: 102mm
20“: 114mm
24“: 127mm
For multi-purpose,
cranks with 2 holes are available.
Frames
There are two types of frames: those with
a rounded crown (the ‘shoulders’ of the
frame) and those with a at crown. Free-
style riders prefer a at crown, because
they can place their feet on it for “wheel
walking” and other tricks. Freestylers also
like the so-called “long’necked” frames;
on these, the seatpost clamp is as high
up as possible to keep it clear of the
rider’s knees whilst they perform
tricks.
The material a frame is made from
is less important than that of the
cranks as the frame experiences far
less stress. Cro-Mo and aluminum
frames have the advantage of
being lighter and more resistant
to rust. Some frames already
have disc- or magura-brakemounts
brazed-on, so a brake can be tted at
some point in future without diculty.
Alloy frames are lighter - and still more rigid.
22 23

24 25
Seatposts
A unicycle’s seatpost must be the correct length;
riders measuring about up to 1,60 m (5’ 3”) ought
to be able to ride the unicycle without needing a
longer one than that supplied with the uniycycle.
If you need a shorter one, cutting down a seatpost
is not dicult. Seatposts can have a diamond-
knurled surface which prevents it from twisting
in the frame. A diameter of at least 25.4mm oers
more stability and a wider choice of seatpost
clamps owing to compatibility with bicycle seat-
post clamps.
When you rst slide the seatpost into the
frame you will observe that at some point it
stops - either on the tyre or within the frame.
When this happens and the saddle is still too
high, you need to cut the seatpost shorter. This is
why QU-AX Luxus unicycles come with two seat-
posts; one is made shorter (200mm) for smaller
riders. This removes the need for cutting a seat-
post to length; simply mount the saddle on the
shorter post!
It is vital that the seatpost is inserted at least
60mm into the frame. When riding hard or riding
muni, trials, downhill or jumping it ought to be
inserted even further. #rgb seatposts even have
a diameter of 31,6 mm for more clamping surface
and a lighter overall weight due to thin walls.
For very tall riders, QU-AX oers 700mm seatposts.
Light alloy-seatposts save weight. Long distance
riders oen attach a handlebar-like device under
their seat to provide a hand-rest, something to
lean on and to make steering easier, computers,
GPS or a brake-lever can be mounted on it, too.
The Q-handle oers many positions because it is
very adjustable in angle and length. (photo be-
low). Also, it can be mounted on either frame or
seatpost depending on individual preference.

26 27
Seatpost clamps
The seatpost clamp secures the seatpost to the
frame. This component must be reliable and of
high quality as it is very stressed, even during
casual riding. Of course, these stresses are even
greater during Muni, Trials and Downhill
riding, or during certain tricks.
There are single-bolt, twin-bolt
and quick-release seatpost clamps;
the latter are most commonly used
in clubs, schools and other situ-
ations where the seat height
may need to be adjusted fre-
quently and without tools, but
bolted clamps have the advan-
tage of being lighter, more secure and
able to withstand being tightened
to a much greater torque.
Saddles
On a unicycle, the design and performance of
the saddle is more important than on a bicycle;
it is the only instrument of control and, with-
out handlebars to lean on, must bear the entire
weight of the rider. Dierent riders, of course, may
have quite dierent ideas about what saddles are
comfortable!
A good saddle ought to have a tough, rigid base-
plate for security and responsiveness. For Trials,
Muni and certain tricks, it will need a handle
at the front, which must also be tough and
rigid, as under some conditions it
bears a very large part of the riders
weight. An integrated handle makes
the saddle more handy and compact
for tricks. A smooth surface underneath
prevents ngers from getting in-
jured. As the handlebar and/or
bumpers are located at the very
front and rear of the saddle,
they bear the brunt of any impact
when the unicycle is dropped or falls
over; they ought to be replaceable. In
this way they can protect the rest of
the saddle from being damaged. All
QU-AX Luxus unicycles from a 20” wheel
and upwards are equipped with such a handle.
For smaller unicycles (12” to 18”), look for a small-
er, child-sized saddle. QU-AX also oers special
saddles for long distance riders, the QX-Eleven
saddle is built with a special dual-compound
material for maximum comfort.

28 29
Stands
Unfortunately, unicycles cannot stand on their
own! QU-AX has unicycle stands available; check
out our website for details: www.QU-AX.de
Pedals
The pedals’ surface, on which the
rider’s foot is placed, shouldn’t be
slippery. The surrounding cage ought
to be rounded for indoor riding to mini-
mize damage to oors if the unicycle
falls over or is dropped. Most of the
time, plastic pedals are good enough.
Flatland riders, however, oen prefer magnesium
or composite-material pedals, for their reduced
weight. Other extreme riders prefer aluminum,
magnesium or steel pedals, which are more sturdy
and oer better grip.
Some riders perform tricks, such as grinds and
pedal grabs, which requires pedals with a stron-
ger axle, better quality bearings and sometimes
a completely dierent shape. Most of such pedals
have pins along their surface, for better grip; on
some high-end pedals these pins are exchange-
able. With any pedals that have pins, an angular
cage or sharp surface, protective clothing and
equipment must be worn to prevent injuries.
The dierent types of unicycles
Unicycle sports have evolved rapidly and widely,
as a result, new types of unicycles and disciplines.
This section will describe some of the more preva-
lent forms:
Race unicycle
During a race, overall weight and rolling resis-
tance (the resistance to motion caused by friction
between the tyre and the ground) are important
considerations. A narrow wheel and thin tyre
helps increase cadence as the wheel-ratio is xed:
In competition, international regulations impose
limits on the tyre dimensions and crank lengths
that can be used.
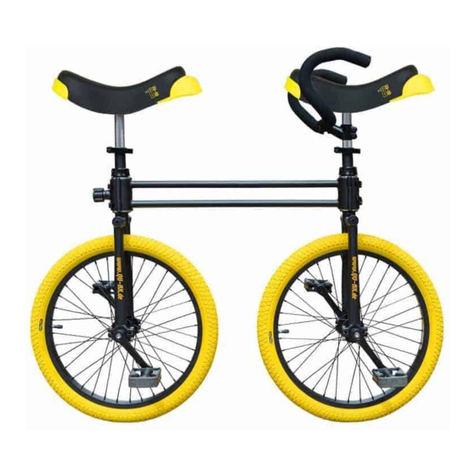
Long distance / Touring unicycle:
This type of unicycle has become more popular,
for road riding, touring, commuting and so forth.
Most have 29” or 36” wheels, and they can be
equipped with a brake, geared hub, a handlebar
and other practical accessories. They can usually
handle an amount of light o-road duties.
Mountain Unicycle (Muni)
Typically with a wheel size between 20” and 27,5”,
in the past mostly 24” but now shiing to 27,5” for
being lighter and more versatile (except when to
high for children), use to have largest tyres with
knobbly treads that can be run at relatively low

30 31
pressures for traction over loose surfaces and to
dampen out the jolts and jars of Muni riding.
Some models can be equipped with a brake. Of
late, there are even dierent types of Muni! Sub-
disciplines may have their own types of equip-
ment adapted to the conditions they encounter.
Downhill (24” wheel) and long distance, trips (29”
and 27,5” wheel) are two good examples of this.
Trials and Flatland Unicycles
These are very similar in design to Munis. They are
never equipped with brakes or handlebars, they
have 19” or 20” wheels, they can have forks with a
at crown, useful for certain tricks, and occasion-
ally tyres with a less knobbly tread.
Downhill (24”), Flat & Trials (19”), long distance
(29” and 36”) and all of them have some special
equipment adapted to their kind of practice.
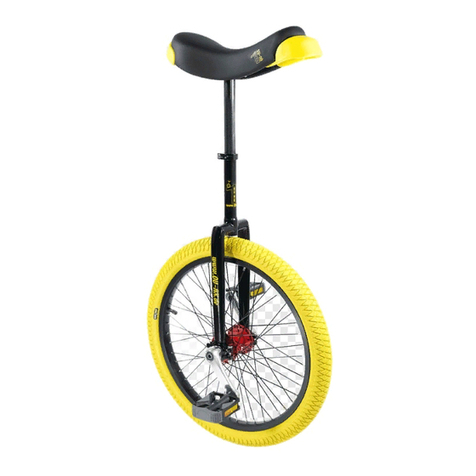
Classic unicycle
The classic unicycle usually has a 20“ wheel. Bet-
ter quality ones have a wide 20“x1.95“ tire.
Those unicycles are pretty versatile. Some people
play hockey or basketball on them, other people
do Freestyle-tricks on them. The main dierence
between a bad and a good unicycle lays in the
materials they are made from.
Some more help...
QU-AX Videos:
www.youtube.com/user/QUAXUni-
cycles
contact:
Publisher, distributor, Copyright:
QU-AX Vertriebs-GmbH
Dieselstraße 92
33442 Herzebrock-Clarholz
Germany
Credits:
Thanx to Roland & Petra for some
pictures in the assembling instruc-
tions. Copyright therefore:
www.municycle.com
www.QU-AX.de
race-unicycle
muni-unicycle
Luxus-unicycle

So baust Du Dein QU-AX auf:
Der Kleinkram
An Werkzeug
brauchst Du nur einen
10er und 15er Maul-
schlüssel...
Karton-
inhalt
32 33
Der
Aufbau sollte
durch einen
Erwachsenen
erfolgen, oder
zumindest über-
prüft werden!
Schlitz
Untere
Lagerschalen

zu-
nächst ganz
wichtig: Wo ist
vorne & hinten? an
der Kurbel erkennt
man es:
Das ist also ganz klar die
rechte Kurbel !
Der
schlitz an
der Gabel muss
nach hinten
Rechte
Kurbel
Nun die Gabel auf den Kopf drehen und die
Lagerschale auflegen. Die Schrauben mit dem
Keil in die Aussparungen der oberen lager-
schale (an der Gabel) einlegen:
Keil
34 35

Beide Schrauben abwechselnd anziehen, aber
nur so fest, dass sich das Lager noch schön
frei dreht: ca. 7-10 Umdrehung nach einem
kräftigen Schubs. Die Angabe eines Drehmo-
ments ist leider nicht möglich, u.a. wegen
der selbstsichernden Muttern.
Auf die anderen Seiten der Schrauben setzt
Du die Unterlegscheiben und Muttern, gleich-
mäßig anziehen aber achtung! nur so fest,
dass es nicht mehr wackelt...
mit dem
zehner-Schlüs-
sel gleichmäßig
anziehen
Oben: Schlitz, Schnell-
spanneröffnung und
Schutzecke sind hinten.
Links: Jetzt prüfe noch
einmal, ob der Schnell-
spanner geöffnet ist,
dann schiebst Du die
Sattelstütze in die Ga-
bel - achtung !
Auch hier darauf ach-
ten, dass der Griff Vorn
ist - auf dem Bild ist
also im Vordergrund die
rechte Kurbel.
Die Klemmkraft über
das Rad einstellen so
dass beim Umlegen des
Hebels die Stütze sicher
geklemmt wird.
Beide Schlit-
ze sollten etwa
gleich groß sein.
36 37
Die Schnell-
spannKlemme
mit dem Schlitz
an der Gabel
ausrichten
Die schelle hat
an an einer SEite
einen Anschlag

Ich bin das
linke Pedal
...und
ich das
rechte
Das
Rechte Pedal
in die mit "R" oder
"R H " beschriftete
Kurbel
Pedale FEST anziehen. Das Rechte Pedal wird
Im, das linke gegen den Uhrzeigersinn ange-
zogen, nach der ersten Fahrt Kurbel+Pedale
nachziehen!
Die Sattelstütze sollte
immer mindestens 6 cm
in der Gabel Stecken!
Falls die Stütze doch
zu lang ist, greife zur
zweiten, 200 mm Stütze,
die ebenfalls im liefer-
umfang der QU-AX-LUXUS
Einräder ist.
So brauchst DU die lan-
ge Stütze nicht abzusä-
gen und wenn du groß
genug bist, wechselst
du einfach wieder auf die
lange.
Reifen entsprechend
der Reifenbeschriftung
aufpumpen.
Das
Bein sollte
durchgestreckt
sein, dann sitzt du
richtig !
38 39
Pedale &
Kurbeln nach
den ersten
Fahrten nach-
ziehen!
Prüfe vor
jeder Fahrt
sämtliche
Schrauben,
vor allem
nach den
ersten Aus-
fahrten!!!
Other manuals for Only One
2
Table of contents
Languages:
Other QU-AX Bicycle manuals
