ewheels EW-54 User manual
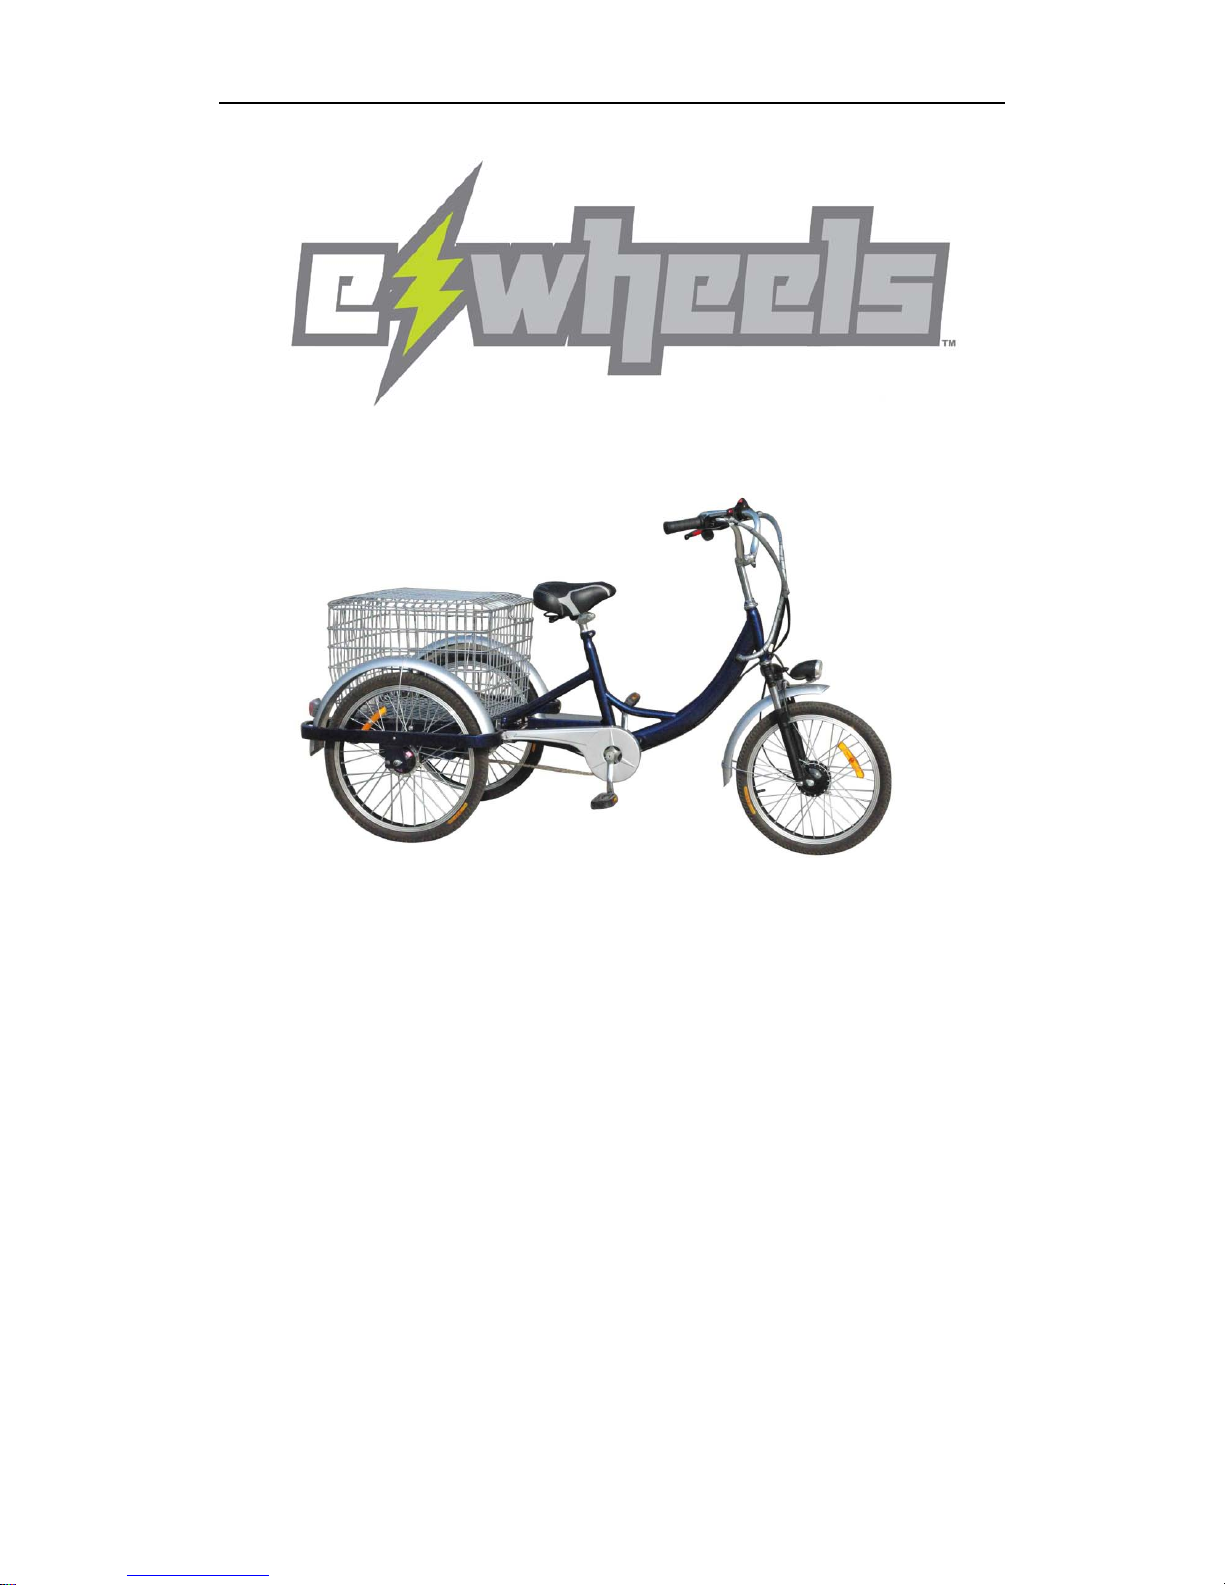
EW-54
Owners Manual
www.ElectricWheelstore.com

Committed to Quality and Reliability!
1
Foreword
Dear consumers,
Welcome to the big family of Electric Wheels, and thank you for your
choice of Electric Wheels electric tricycle!
The electric tricycle is very popular with the customers for its perfect
streamlined design, strong and reasonable structure, flexible and intelligent
controller, powerful motor and maintenance-free battery. It is easy to operate,
comfortable to drive. And what is more is that the electric tricycle is
environmental friendly. So your right choice is the contribution to the green
world.
Electric Wheels electric tricycle is an ideal light-duty transportation vehicle
to solve your trouble of walking. It will facilitate your work and make you enjoy
life more!
Please read this manual carefully before use. It will help you in operation
and maintenance of the electric tricycle. Please do not use the electric tricycle
before reading the manual carefully and getting acquaintance of its
performances.
Finally, you are sincerely welcomed to provide your valuable comments
and suggestions on Electric Wheels electric products.

Committed to Quality and Reliability!
2
Contents
1. Main Components ………….………………………………………3
2. Technical Parameters ……….……………...………….…….…….3
3. Safety Notice ………………………………………………….…….4
5. Assembly and Setup………………………….…………………….4
6. Routing Operation……………………………...…………………...5
7. Battery Charging and Maintenance… ……………………………6
10. Scheduled Maintenance……………………………………………7
11. Trouble Shooting Guide……………………………………..….…..8
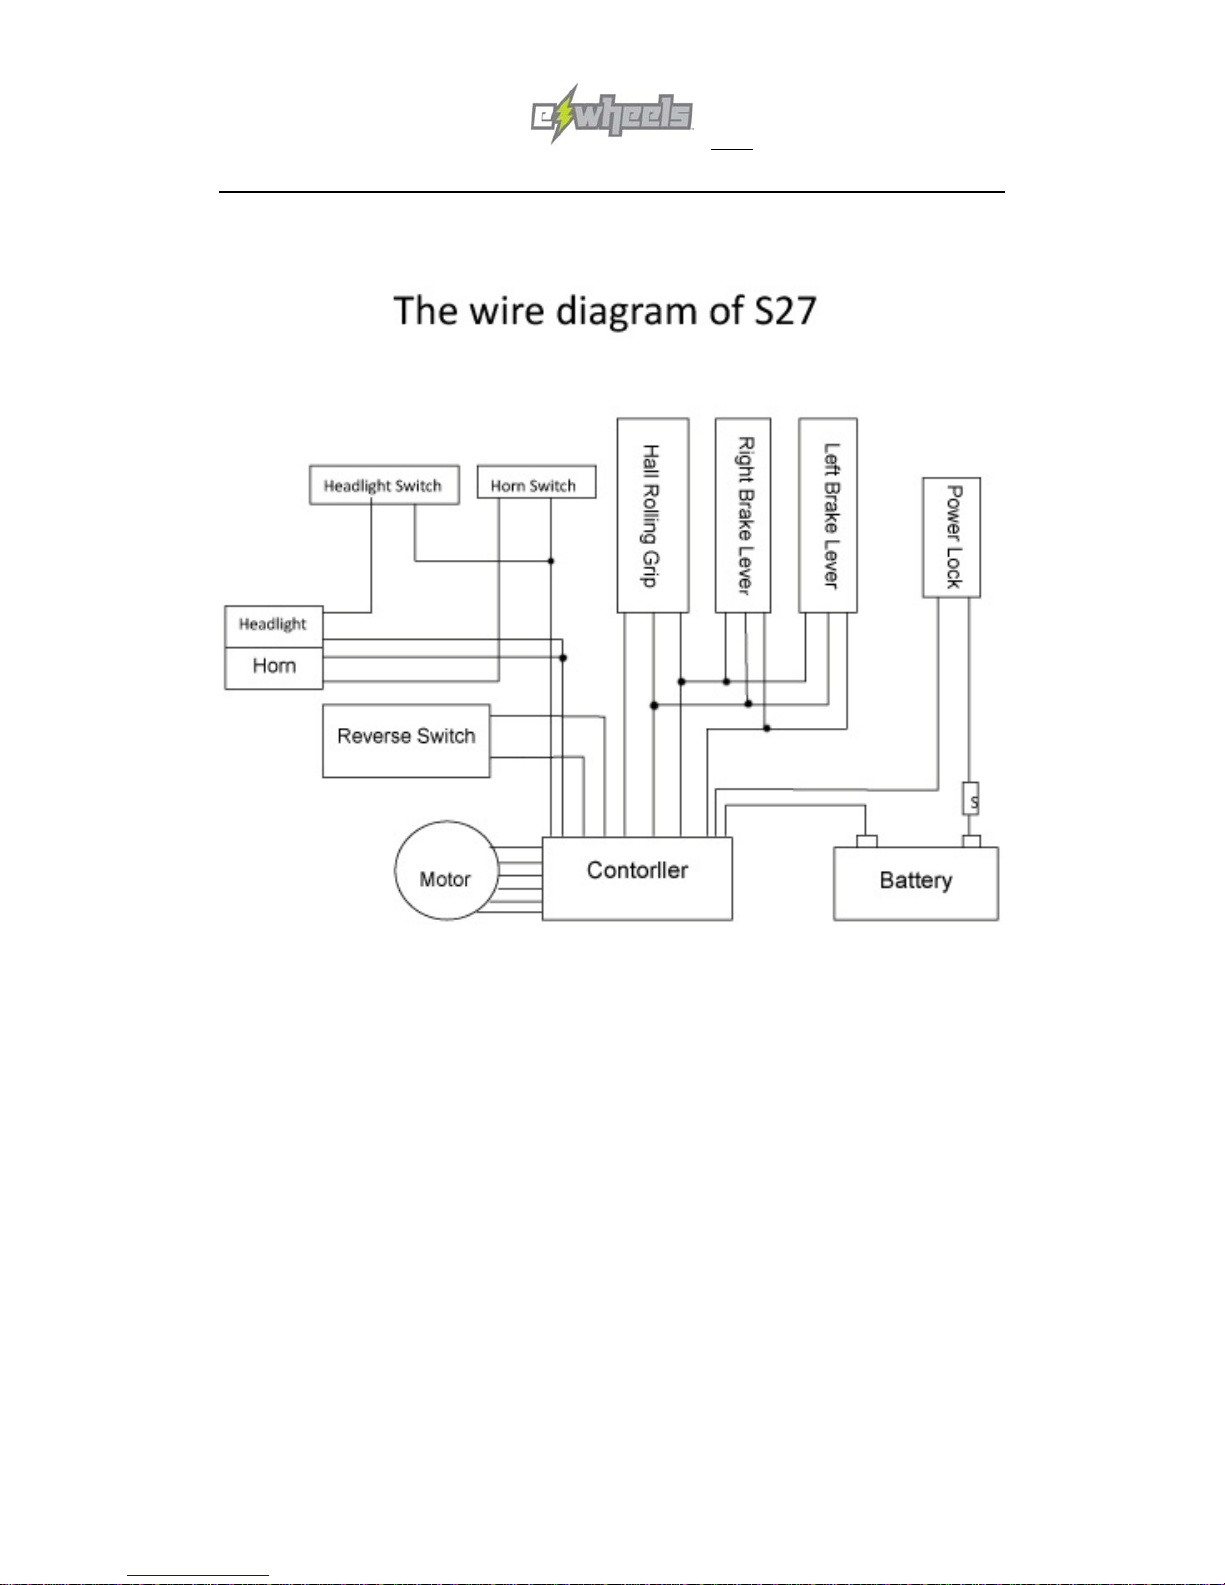
12. Wiring diagram………………………………..……………………..9
Committed to Quality and Reliability!
3
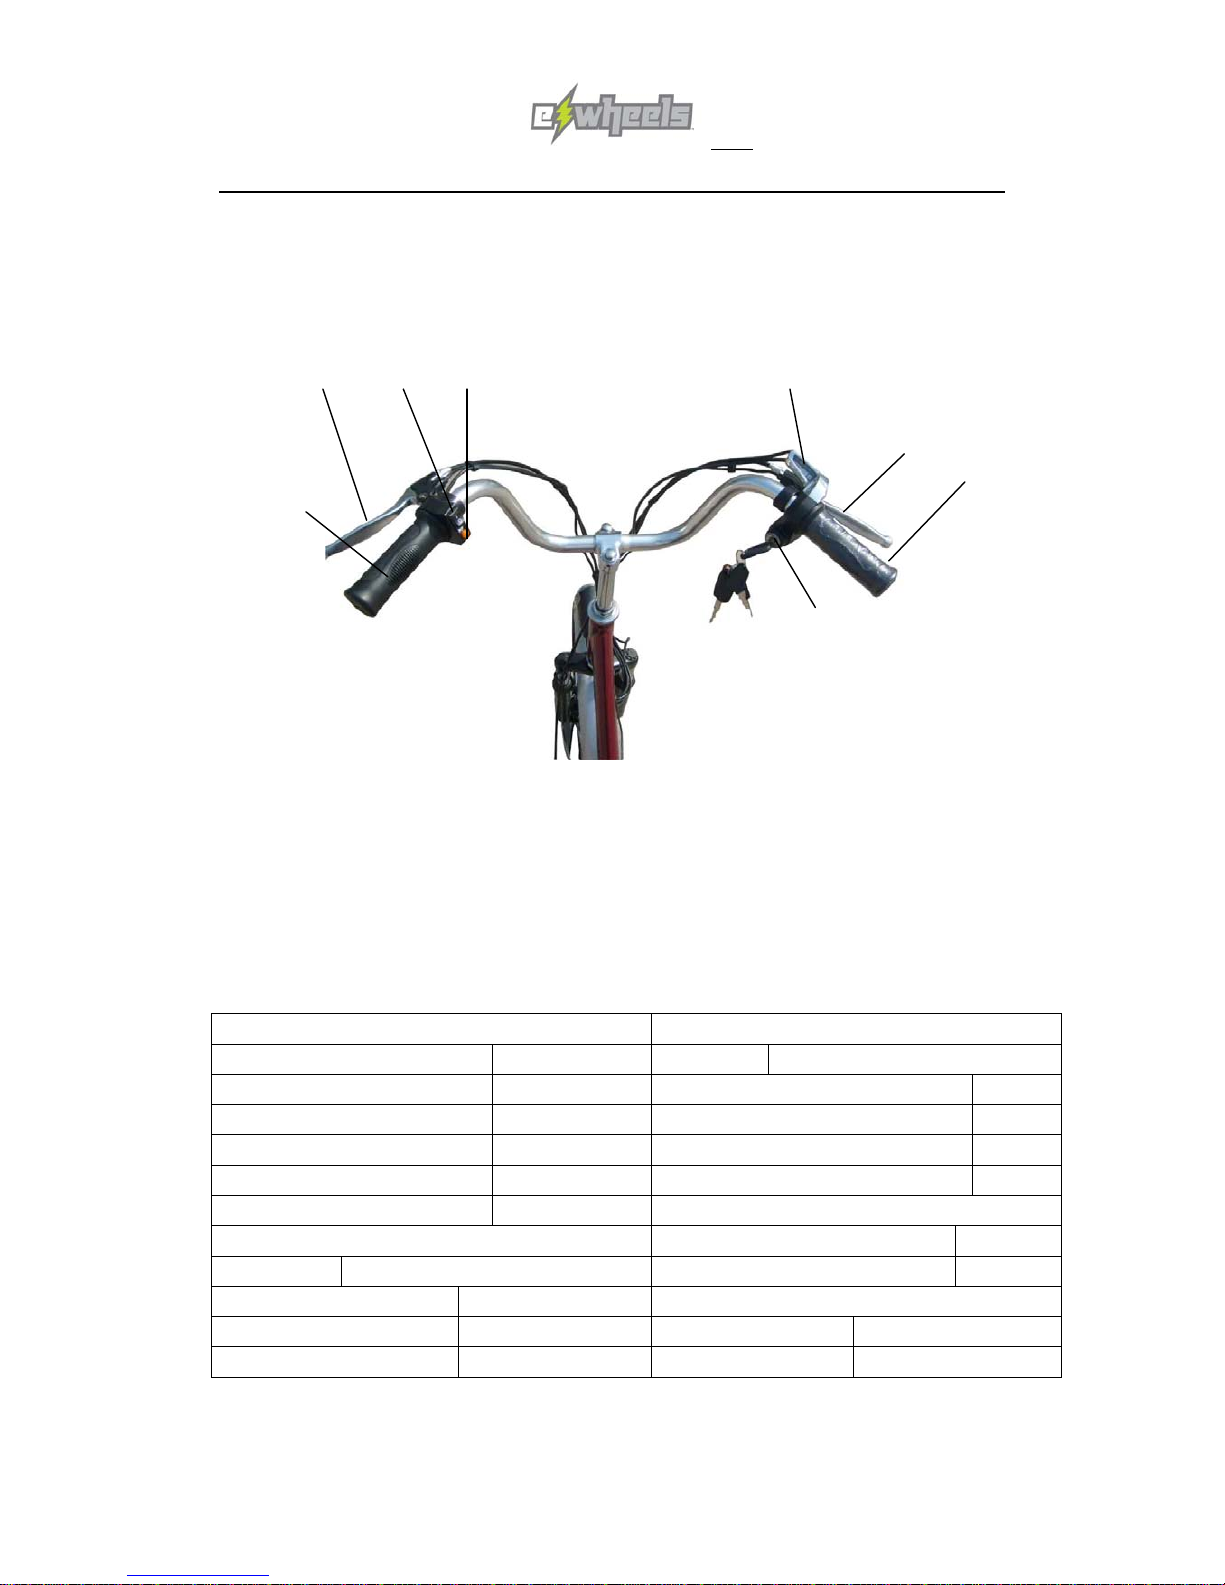
Main Components
②③④⑤
⑦
⑧
①
⑥
①the left handlebar ②the rear brake grip ③the front light switch
④the horn button ⑤the power indicator ⑥the ignition switch ⑦the front
brake switch ⑧the rolling handlebar
Main Technical Parameters
Main technical parameters of whole vehicle Main technical parameters of motor
L×W×H(mm) 1800×800×1120 Motor type Brushless wheel hub motor
Wheel track(mm) 1400 Rated continuous output power(W)250/350
N.W.(kg) 36 Rated output rotation speed(r/min)240±10
Rated Loading Capacity(Kg) 150 Rated voltage(V) 36
Max. Forward Speed(km/h) 28 Rated output torque(N. m)12
Distance per charge(km) 30-50 Controller
Main technical parameters of storage battery Under-voltage protection value(V) 31.5±0.5
Battery type Lead-acid Maintenance-free battery Over-current protection value(A) 15±1
Battery capacity(Ah) 12 Charger
Nominal voltage(V) 36/48 Input Voltage AC110V/220v 50Hz
Weight of battery pack(kg)16.8/26.8 Max. output power(w) 110
Committed to Quality and Reliability!
4
Safety notice (Cautions)!
★Please do not ride the electric tricycle before you carefully read the Manual and know its
performances, and do not lend it to those who do not know its operation.
★For you and others’ safety consideration, please initiatively observe traffic regulations.
★In case of snow or rain or poor road conditions, please be careful to slow down the
scooter before parking brake.
★The electric tricycle can work under snow or rain, but cannot go through water. Please
ensure that the water level shall not be higher than the level of controller, circuits of
motor, otherwise short circuit will be resulted and the electronic parts will be damaged.
★Please charge the battery to full capacity and put it in a cool and dry place if you do not
use the electric scooter for a long time, and it is also recommended to charge at least
once a month in this case.
Assembly and Setup
1) To make sure the alignment is correct, stand in front of the vehicle, using both legs
to hold the front wheel in a straight-forward position. Use both hands to grab the
handle bar and turn it into normal driving position (90 degree angle from the front
wheel).
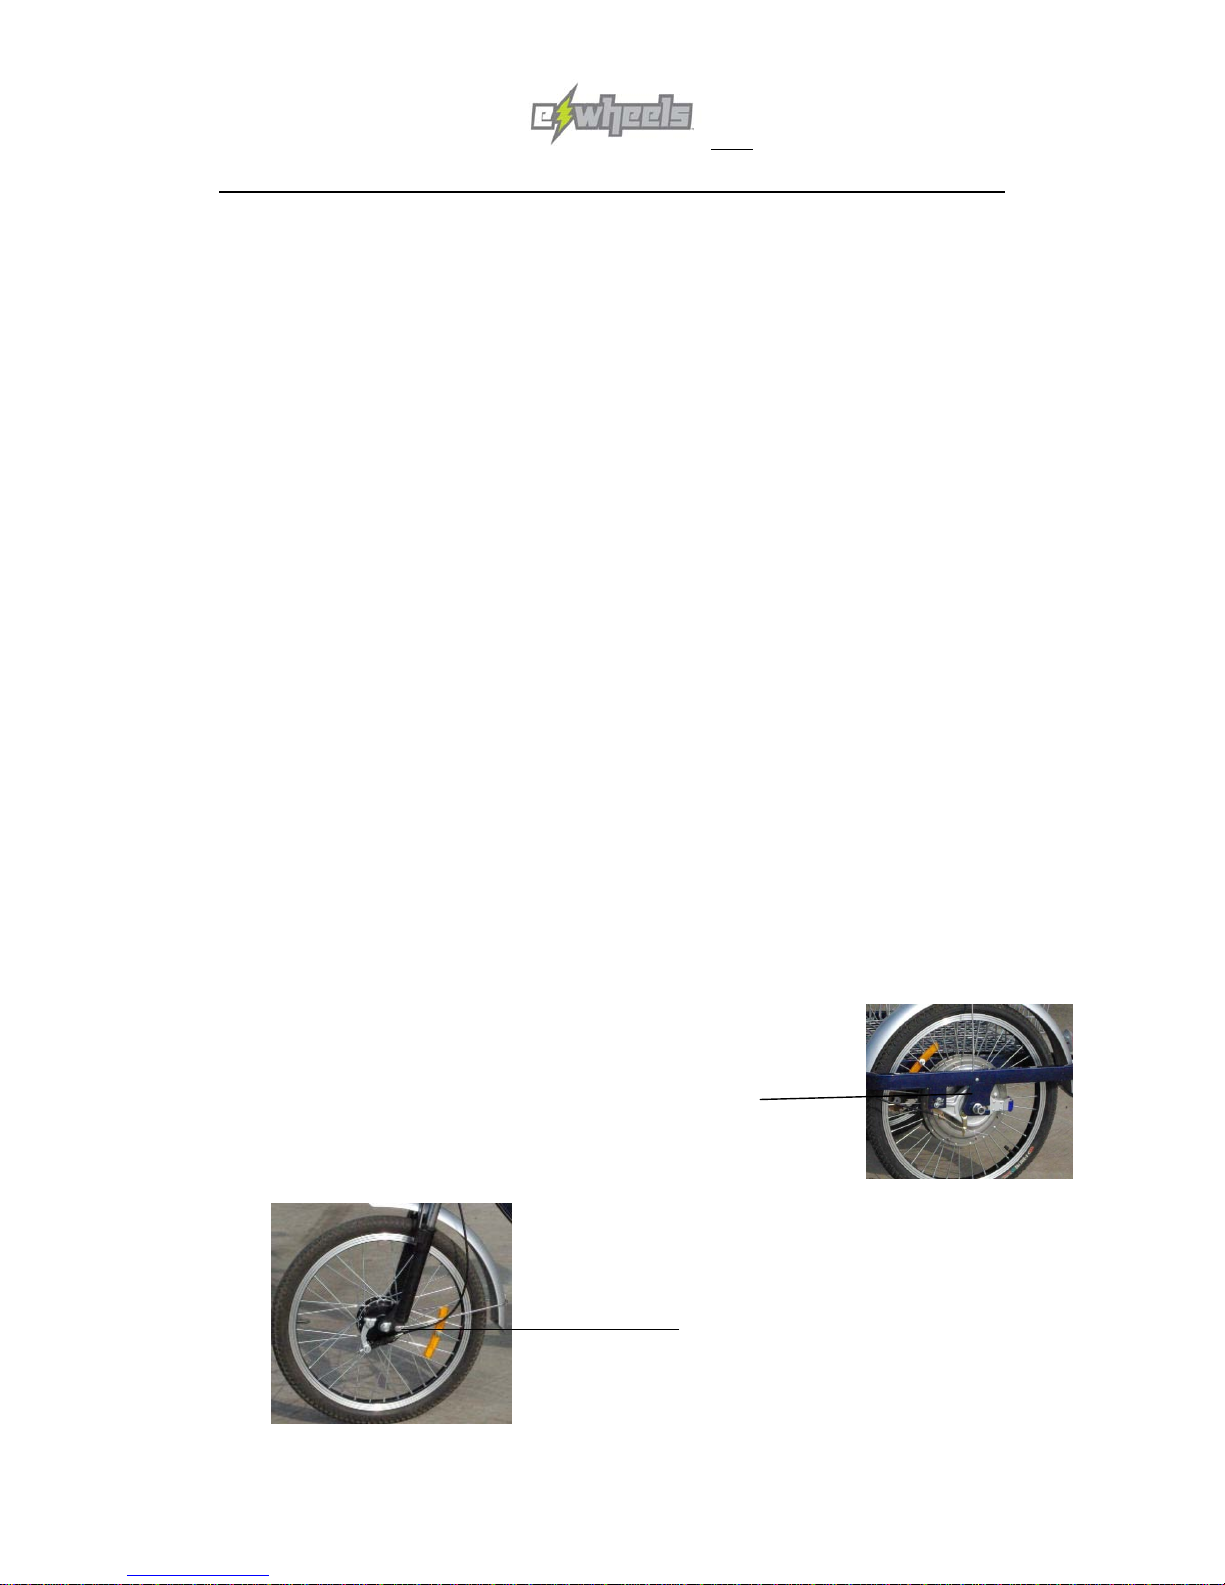
2) Check if the brakes are properly adjusted. The brake handles should stop short of
touching the handgrip, when fully engaged. The rear brake
cable can adjusted at the cable end bracket.
Adjustment of rear brake cable
The front brake is adjusted at the end of the cable, at the saddle
nut.
Adjustment of front brake cable
Committed to Quality and Reliability!
5
3) Sometimes the front wheel is taken off
for the convenience of packing. So when the electric tricycle is taken off from the
frame, please assemble the front wheel and adjust the handlebar at first.
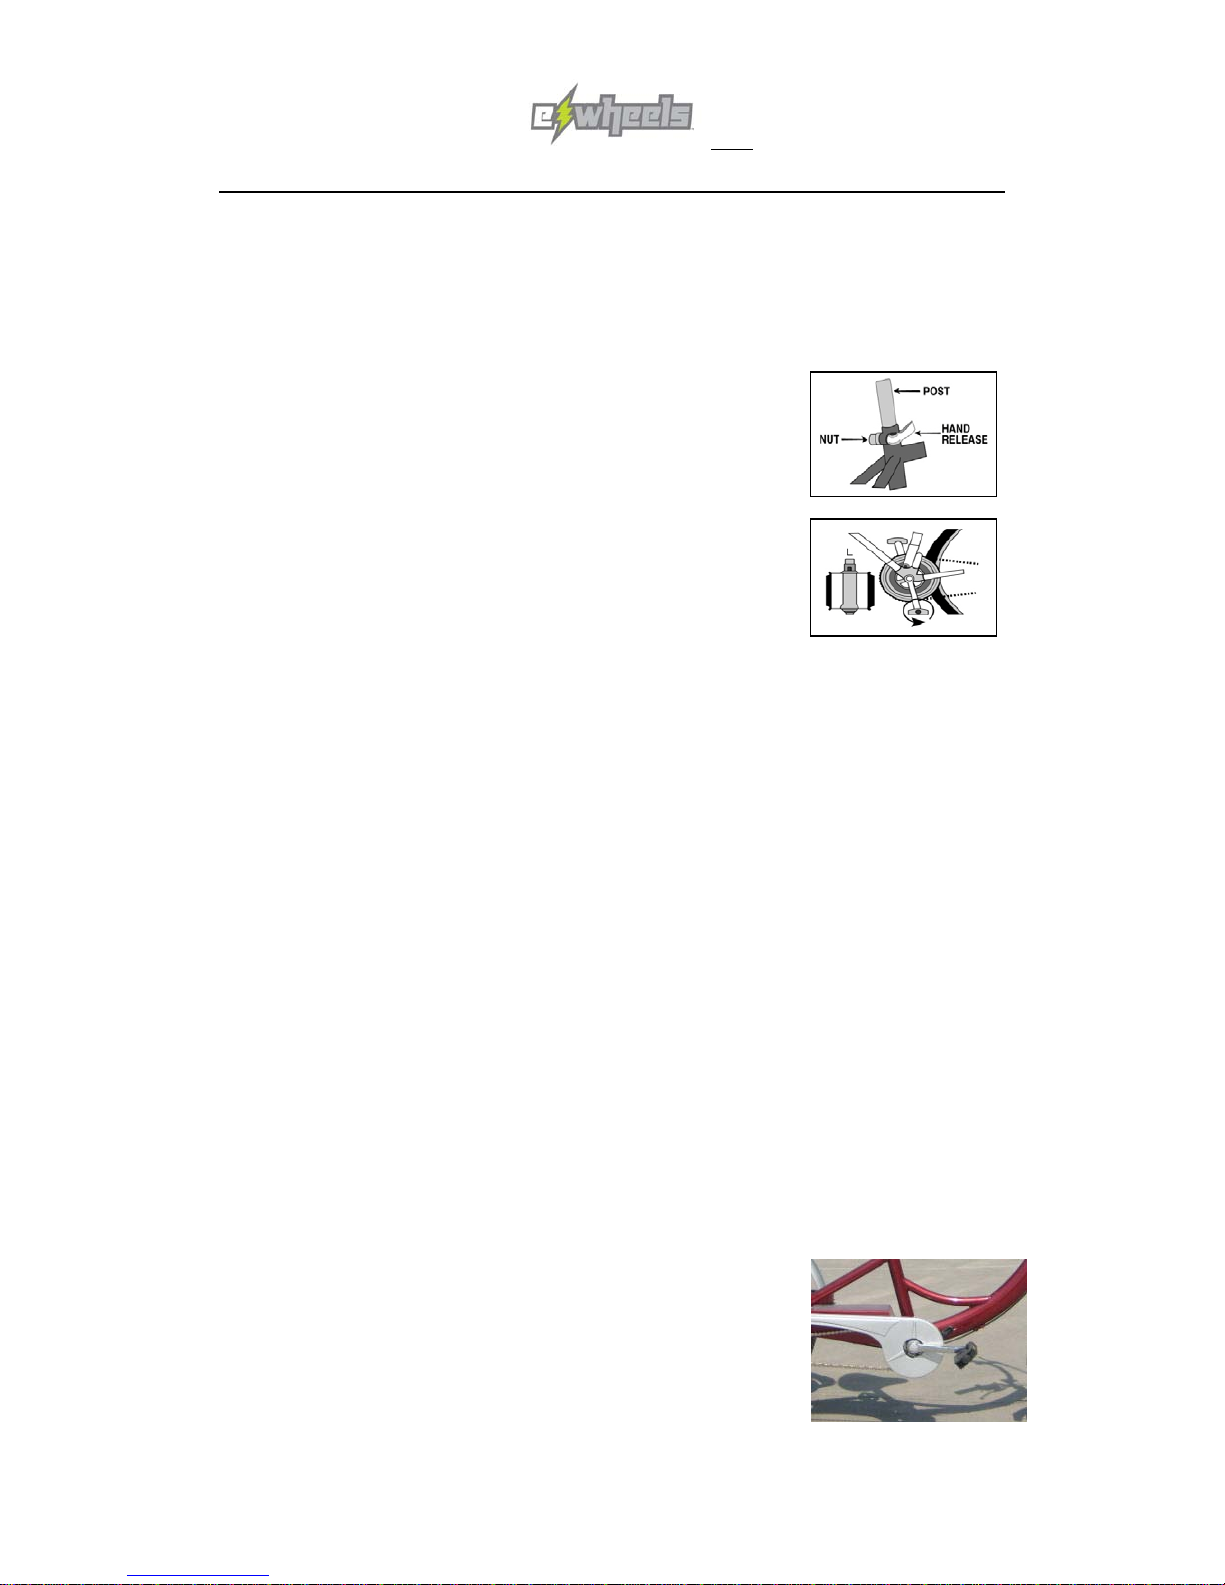
4) The seat is
adjustable; please adjust the seat post according to your
height. The seat height is adjusted with either a quick
release lever or a nut and bolt. Insert seat post to at least
the minimum insertion line marked on the post. Tighten
the adjusting nut by hand and move the hand release
lever to the closed position.
5) Pedals are marked “L” and “R” on end. Screw pedal
marked “L” into left side of crank.
6) Please check the battery wire
connection to make sure the power supply of the electric tricycle.
Routing Operation
★Fix the properly charged battery into the battery trough on the body and lock it properly.
★Please firstly check whether the power is low, and you have to charge the battery before
ride if it is low.
★Be sure the tires have enough air. A low tire pressure risk rim pinching (tube failure) and
lowers your range (distance per charge). The tire pressure should be 2.1-2.5kg/cm²
★Verify the proper adjustment and function of the brakes.
★Insert the key into the power switch key hole and turn to the position ON to connect the
power and then you can ride.
★Hold onto the handlebars with both hands.Assume a well-balanced position. Your right
hand will control the accelerator. Twist the accelerator slowly to avoid a sudden rush of
speed forward. The speed of the electric tricycle will increase as you twist the
accelerator more. Release the accelerator and apply the brakes to stop the tricycle.
You will control the speed of the electric tricycle by using both the accelerator and the
brakes. When the brake handle is squeezed it cuts power to the accelerator.
★The electric tricycle is 1:1 pedal assisted tricycle, when you turn
on the power of the tricycle by the ignition switch, you can also
pedal it to start the motor. Also if the battery runs out the power,
you can pedal it like normal tricycle.
Committed to Quality and Reliability!
6
Battery Charge and Maintenance
★For a newly purchased electric tricycle, please charge the battery to full capacity before
the first ride as the battery may become low after delivery, transportation and storage for
long time. Please use electric drive after the battery performance is activated.
★The special chargers supplied or designated by our company must be used, otherwise
the battery may be damaged, even there is a risk of fire.
Charging steps
★Please carefully check whether the rated input voltage of charger matches the voltage
of power supply.
★The battery may be charged when it is fixed on the electric tricycle or when it is
dismounted and taken to an appropriate place inside room
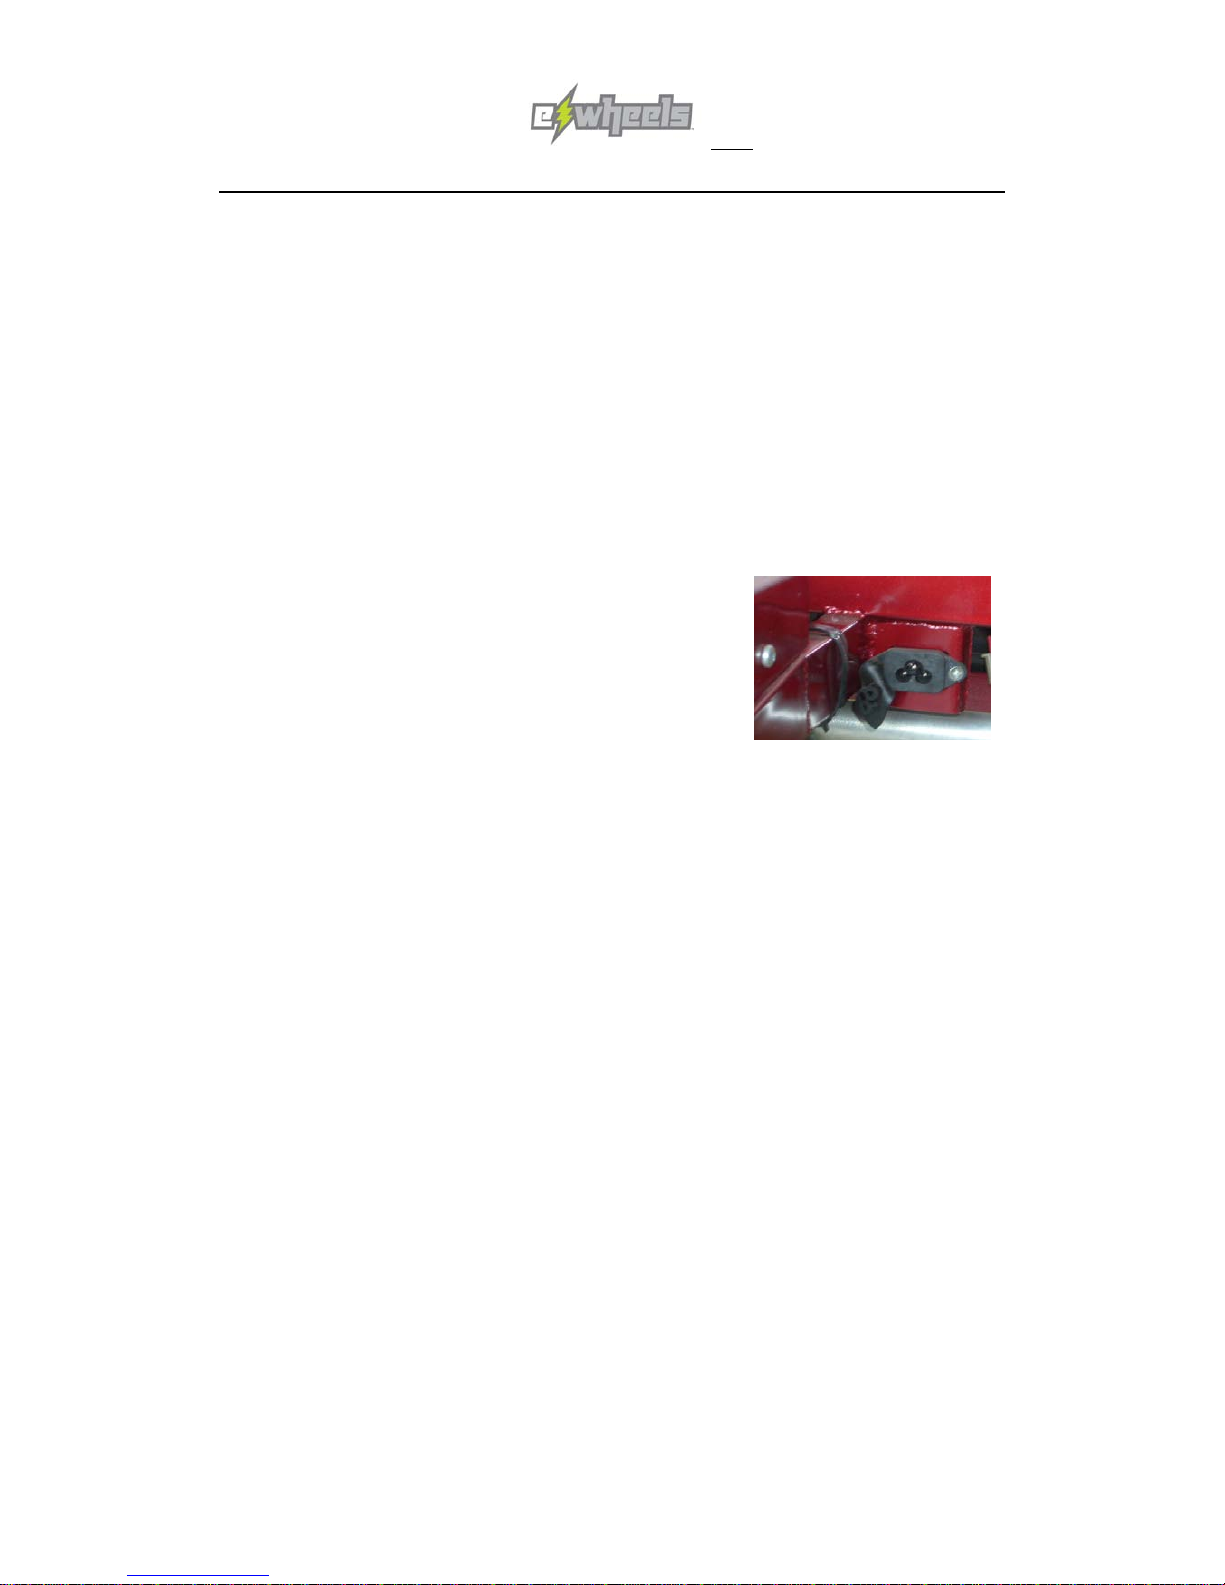
★Please firstly connect the output plug to the charging
hole of battery properly. Then connect the input plug of
charger to the AC power supply. When the power indicators
and the charging indicators are on, the power is connected.
★It takes about 6-8 hours to charge the battery. The
charging status can be checked through the charging indicator. When the charging
indicator turns green, it is full.
Then the charger will be in float charging status. It is recommended to continue to charge
for 1-2 hours after the charging indicator turns green in order to charge the battery fuller
and extend the service life of battery. After charging is completed, please disconnect the
power supply plug and then disconnect the plug to the battery.
★It is forbidden to connect the charger to the AC power supply when it does not charge
the battery so as to ensure its service life and prevent other risks.
Advice on battery Maintenance
The consumers are kindly requested to pay attention to the following operation principles
of battery protection.
★During daily operation, a 6-7 months new battery shall be charged to full capacity after
ride for the sake of service life of battery. The batteries used for a long time shall be
charged punctually whenever the power is low. The battery will automatically discharge
if it is idle for over two months. In this case, it is recommended to charge the battery
properly before use.
★To minimize electricity consumption, frequent braking should be avoid when facing
uphill, excessive headwind, traffic congestion , so as to protect the battery and extend
its service life.
★It is forbidden to charge excessively or insufficiently and discharge excessively so as to
prevent battery damage during use.

Committed to Quality and Reliability!
7
★Regular deep discharge by every two months is recommended. Namely, long-distance
riding until the under-voltage indicator lights to indicate electric power exhaust. Then
switch off the power and do not continue to use it. Please only use it again after
charging to full capacity.
★Please do not put the battery near open fire or high-temperature heat sources. It is
forbidden to put the battery under the sunshine directly.
★Please store the battery in a cool, dry and well-ventilated place after you dismount the it
from the vehicle if you do not plan to use it for a long time. The battery shall be charged
to full capacity before storage and then recharged once every 20-30 days. The charger
shall be put in a dry dust-free place.
Scheduled Maintenance
The electric tricycle should be checked from time to time. Refer to the
maintenance schedule in the following chart:
Check • Adjust ◊ Lubricate ∆
Parts
Daily
30 days
180
days
Bolts, nuts, screws etc-
to ensure that nothing is
loose.
••◊ •∆
Footboard-to ensure it is not worn out
••∆ •∆
Tire pressure-to ensure good tire pressure •
Drive equipment-
to ensure good position; not too
loose, nor too tight
••◊ •∆
Brake pads-to ensure it is not worn out
•◊ •◊
Wheel rim-to ensure it is not distorted
••
Steering Linkage-to ensure it is not distorted ••∆
Front light, bugle-to ensure functioning properly •
Brake-to ensure it is working properly ••◊ •◊
Throttle-to ensure that it is working properly •
Steering system-to ensure operation is normal •∆
Wheel axle-to ensure if it is loose •∆
Motor-to see if it is working properly
•◊◊
If you find problems that you cannot solve them yourself during your inspection and
maintenance, please send your scooter to your servicing dealer for help. Never take
apart or repair the bike by yourself. If it causes any problem and voids the warranty, a
service fee will be imposed.

Committed to Quality and Reliability!
8
Faults and Troubleshooting
Faults Causes Troubleshooting
Sometimes there is no showing of
electric quantity
1.Battery has no electricity
2.Fuse burned
3.Battery contacts is damage
4.Bad fuse or heat deformation
1.Recharging
2.Replace fuse
3.Replace contacts
4. Replace safety socket and fasten
it.
Having power but the motor does
not work
1.Loosened connection between
the controller and motor
2.The brake grips does not revert
3.speed handle connection is off
1.make them tightened
2.Loosen the brake
3. Tighten the connections.
Abnormal motor sound
Low Voltage
Faulty motor
Re-
charging
Replace or repair the motor
Charger does not operate or the
green light is bright when start
charging
1.Faulty fuse
2.Bad contact between the battery
and charger plug
3.Cable for contacting battery is
off
4. Controller shares cable with the
power cable.
1.Replace the fuse (3A)
2 Plug in or replace the plug
3. connect the cable
4.open the power lock and
recharging
Motor runs at max. speed after the
power is turned on 1.Speed grips is bad (
three cable
disordered)
2.Controller damaged
1、
Adjust the cable
2.Replace the controller(by
distributor)
The battery fails to power to the
design mileage after charging to
full capacity
Handle bar suffers damp and rain ,
motor watered or short-circuit
Send to the franchised store for
repair
Short recharging time Re-charging
Aging battery or reduction
capacity
Replace battery
Low temperature result in bad
performance of the battery
Do not use it temporary and place
the battery indoor for recharging
Long time no use Re-charging
frequent uphill, excessive
headwind, frequent braking and
starting
Insufficient air pressure within tire Always blow
up the tire
sufficiently
Mechanical faults Readjustment
Tips: turn off the power and then press the button of the horn. When rotating the motor the horn was loud, it
indicates the motor operates well.
Committed to Quality and Reliability!
9

Committed to Quality and Reliability!
10
ELECTRIC WHEELS
Address: One Riverway, Suite 1700
Houston, Texas 77056
Tel: 713-840-6372
Fax: 713-583-9019
E-mail: info@electricwheelstore.com
Website: www.electricwheelstore.com
Table of contents
Other ewheels Bicycle manuals

ewheels
ewheels EW-29 User manual

ewheels
ewheels EW-1200 User manual

ewheels
ewheels EW-1200 Manual

ewheels
ewheels EW-1500 Manual

ewheels
ewheels EW-475 Manual

ewheels
ewheels EW-400 Manual

ewheels
ewheels EW-18 Operating instructions

ewheels
ewheels EW-1400 Manual

ewheels
ewheels EW-624 Manual

ewheels
ewheels EW-1100 User manual


