manuals.online logo
Brands
  1. Home
  2. •
  3. Brands
  4. •
  5. Quadratec
  6. •
  7. Automobile Accessories
  8. •
  9. Quadratec QuadraTop Adventure Top S With Flip Back... User manual

Quadratec QuadraTop Adventure Top S With Flip Back... User manual

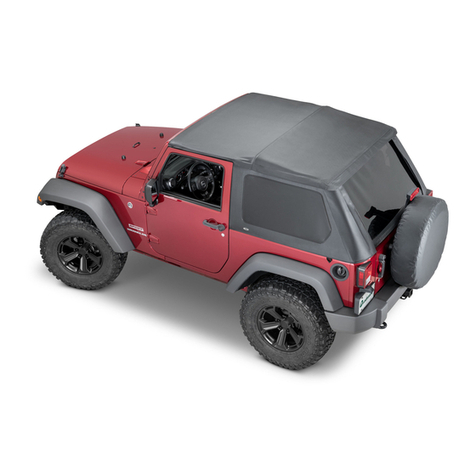
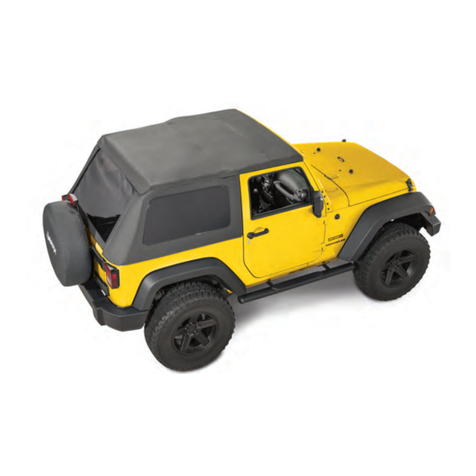
QuadraTop® Adventure Top
S
With Flip Back Sunroof
for 2007-2018
2 Door Jeep®Wrangler JK
Item #11113.1435
Loss of vehicle control involves risk of death or serious injury, particularly to
parts of your body not restrained within vehicle. This product is intended for
weather protection only and should not be relied upon to contain occupants
in the event of an accident or to protect from either ground contact or falling
objects. To reduce risk of accident or injury:
•ALWAYS WEAR SEATBELTS
• Always keep head, arms & body parts within vehicle.
• Fully secure or stow the soft top before driving according to instructions.
Never try to latch or fold soft top while driving. Do not use if damaged or
worn.
• Read and follow all instructions & warnings accompanying this product, in
your vehicle owner’s manual and Off Road Driving Supplement.
RISK OF EYE INJURY. Safety glasses should be worn at all times while insta-
lling or maintaining this product.
PART LIST:
TOP DECK/HEADER ASSEMBLY QTY 1
DRIVER SIDE QUARTER WINDOW QTY 1
PASSENGER SIDE QUARTER WINDOW QTY 1
REAR WINDOW QTY 1
DRIVER SIDE OVER DOOR BOW QTY 1
PASSENGER SIDE OVER DOOR BOW QTY 1
CENTER BOW ASSEMBLY QTY 1
DRIVER’S SIDE DOOR SURROUND QTY 1
PASSENGER SIDE DOOR SURROUND QTY 1
DOOR SURROUND KNOBS QTY 4
ROLL BAR BOW MOUNT BRACKETS QTY 2
REQUIRED TOOLS:
SAFETY GLASSES
PHILLIPS SCREW DRIVER
FLAT HEAD SCREW DRIVER
T-30 TORX DRIVER
PLIERS
This Replacement Top kit is designed to t on your 2 Dr Jeep® Wrangler when
the original soft top or hard top has been completely removed. Before begin-
ning your installation of this product, you will need to remove your existing soft
top fabric, hardware or Hard top.
WARNING
CAUTION
NOTICE
Important Safety information
Your QuadraTop® Fabric Replacement Top
is intended to be used with other QuadraTop
Products to increase the fair weather enjoy-
ment of your off-road capable vehicle. Before
installation,
please take a moment to review the following
safety information and installation instructions.
Important safety information is generally prece-
ded by one of three signal words indicating the
relative risk of injury.
The signal words mean.
a hazardous situation which, if not avoided, could result in death or serious in-
jury. You CAN be KILLED or SERIOUSLY HURT if you don’t follow instructions.
WARNING
CAUTION
NOTICE
a hazardous situation which, if not avoided, could result in minor or moderate
injury. You CAN be moderately HURT and also may suffer property damage if
you don’t follow instructions.
Careful attention is required to this instruction or operation but does genera-
lly not relate to personal injury. Damage to your Quadratec® product or other
property may result if you don’t follow instructions.
Before you begin Installation:
We are excited that you have chosen the
Adventure Top. This high-quality soft top is
designed to provide protection from the
elements and a stylish look on your Jeep®.
Please note that it is important that you
become familiar with the installation process
of this top
reading the following instruction sheet and
warnings thoroughly.
When unpacking, carefully check to make sure
all parts are included. If any part is missing
or broken, please call Quadratec customer ser-
vice at 800-745-6037. When unpacking, check
to make sure all parts are included.
For a smooth t and ease of installation, this top should be installed at tempe-
ratures above 72 degrees. Below this temperature, the fabric may contract an
inch or more making it difcult to install. We highly recommend taking the top
out of the package and letting it sit inside a warm place or direct sunlight for
1-2 hours before you install the top. When warm, this top will install quickly.
NOTICE
2
Step 1: Install Over Door Bows to Front
Header Assembly
Locate the Fabric/Header assembly and
the two over door bows as shown in Figs
1 & 2 and place the assembly on a table
top or on a soft
towel with the underside facing up and the
two “header legs” facing away from the
header. Locate the over door bow
assembly (Fig 3) and round bow/header
sleeve (round tube).
Slip the round door “sleeve” over the
header leg and insert the “knuckle”
installed on the
over door bow into the Header leg (Fig 4)
making sure the quick release knuckle is
facing outward (Fig 5).
FIG 2
FIG 1
FIG 3
FIG 4
Step 2: Install Bow Mount Brackets to Roll Bar
Locate the (2) bow mounting brackets and (4)
Allen head pivot bracket bolts shown in FIG 8.
Carefully unzip the roll bar padding on the vertical
side tube to expose the two factory holes in the
roll bar. With a razor knife, trim the hard foam
where the top of the bracket will sit (FIG 9).
Step 3: Assemble and Install Door Surrounds
Locate the Drivers and passengers over door
assemblies and the “drip rail” inserts shown in
FIG12.
Separate out the driver’s side over door assembly
and corresponding drip rail insert as shown in
FIG13.
Locate and line up the three round tabs on the
drip rail with the holes located in the over door
assembly as shown in FIG14. Firmly Squeeze the
round tabs down into the holes permanently secu-
ring them to the over door assembly (See FIG15).
NOTE: It may take a lot of force to squeeze these
tabs into the over door assembly. You may need
to use a rubber mallet or the edge of a table to
secure them completely.
Repeat this procedure for the Passenger side
over door assembly.
3
Secure the over door bow to the Header leg with
the attached set screw (Fig 6).Slide the bow
sleeve over the knuckles as shown in Fig 7.
Repeat this procedure on the opposite side.
Locate the bow mounting brackets over the fac-
tory holes and using the Allen head pivot bracket
bolts, install brackets to the roll bar (FIG’s10 &
11). Slip the roll bar padding back over the insta-
lled brackets carefully slipping the bracket
mounts through the slits in the roll bar padding.
Repeat on passenger side.
FIG 8 FIG 9
FIG 10 FIG 11
FIG 13
FIG 12
FIG 5
Fig 7
FIG 6
Pillar and Over Door Surround Assembly
Locate the driver’s side Rear over door assembly
and the driver’s side Pillar assembly shown in
FIG16.
Turn the two pieces over as shown in FIG17 and
line up the slot on the pillar assembly with the “T”
on the over door assembly. Notice in Fig 17 that
there is a secondary “T” that will be lined up when
you slide the long “T” into the long slot. Slide the
two pieces together lining up both “T’s”
to secure the top over door assembly with the
Pillar assembly. See FIGs 18 &19.
Locate the small screw packet in the hardware kit
found in the door surround box. Using a Phillips
head screw driver, install the screw into the two
screw holes on the two assembled parts securing
them permanently together. See FIG20
Repeat the above assembly on the Passenger
side Rear over door and pillar assemblies.
Install Foam to Front Door Surrounds
Locate the driver’s side front door surround and
the rectangular piece of foam found in the door
surround hardware pack. Line up the foam with
the rear of the door surround and measure the
length between the rear of the door surround and
the top of the curve (FIG21).
With a pair of scissors, cut the foam to size.
Remove the backing on the foam and secure
it to the front of the door surround as shown in
FIG 22. Make sure not to cover the hole in the
door surround.
Repeat this procedure on passenger side door
surround.
4
FIG 15
FIG 14
FIG 16
FIG 17
FIG 18
FIG 19
FIG 20
FIG 22
FIG 21
Install Door Surrounds to Jeep
Locate the assembled Passenger side rear door
surround (Fig23). On the bottom of the vertical
pillar portion of the assembled door surround is a
pin that will be inserted into the body tub (FIG 24).
NOTE: as shown in Fig 25, if you have the rubber
seal installed on the body tub, you must remove it
before putting the door surround on!
Insert this pin into the body tub as shown in FIG
26. After inserting the pin, locate the upper portion
of the door surround “C” attachment and push
onto roll bar (FIGs 27& 28).
Make sure the front seal is snug against the
windshield seal as shown in FIG 29. The “C”
should t in the cutout of the roll bar pad.
Line up the threads in the “C” with the top hole in
the roll bar.
Repeat this procedure on the Driver's side.
5
FIG 24
FIG 23
FIG 26
FIG 27 FIG 28
FIG 29
FIG 30
FIG 31
Secure Front Door Surrounds to Roll Bar
Locate the two sets of screw knobs in each Door
surround box. There should be (2) sets of two
knobs. Line up the door surround “C” attachment
holes with the vertical holes in the roll bar. Slip the
front knob through the hole in the front door sur-
round (FIG30).
FIG 32
Tighten the knob securing the front door surround.
Repeat this procedure on the back of the door
surround and on the other side of the vehicle.
Finally, tighten all four knobs. All knobs on both
sides of the vehicle should be secured to the roll
bar. This completes the installation of the door
surrounds to your vehicle.
Step 4: Install Center Bow to the Vehicle Locate
the center bow assembly (Fig 32). With a friend,
place the bow assembly over the roll bar and line
up the assembly to the original upper bow mount
bracket (Fig 34) that were left on the vehicle. The
center bow should be towards the rear of the
vehicle as shown in Fig 33.
Line up the Quick release knuckle with the upper
bow mount bracket attachment and attach each
side of the center bow assembly to the bracket
(Figs 35, 36, 37 & 38).
Repeat on other side of vehicle.
FIG 25
6
FIG 33 FIG 34
FIG 35 FIG 36
FIG 37 FIG 38
FIG 39 FIG 40
Step 5: Installing the Header/Deck Fabric Fa-
bric to the Center Bow
With the help of a friend, locate the completed
header assembly created in Step 4 and place this
assembly over the windshield with the two “header
legs” towards the rear of the vehicle. The over
door Bow legs should it inside the Door
surrounds (Figs 39 & 40). Line the quick release
knobs on the header legs up with the Center bow
mounting
hole (Fig 41) and attach the quick release knuc-
kles to the center bow (Fig 42). Repeat on other
side of vehicle.
With the over door bows mounted to the center
bow, drape the fabric attached to the front header
back towards the rear of the vehicle as shown in
Fig 43. Locate the center bow webbing attached
to the center bow and the spring assembly that is
attached to the top deck. Figs 44 & 45.
FIG 42
FIG 41
7
FIG 47
FIG 43
FIG 46
FIG 44
FIG 45
Step 6: Installing the Top Deck to the Jeep®
With the header resting on the windshield, close
the front header latches to secure the front of the
top to the wind- shield. See FIGs 48, 49 & 50.
With the fabric installed on the header and draped
over the back of the vehicle, go to the rear corner
of the Top deck and locate the rear corner straps.
Thread the straps down
Attach the spring end to the webbing as
shown in figs 46 and 47.
Using pliers, crimp the spring end so it does
not come loose.
Do not tighten this strap yet.
and under the seat belt mount as shown in FIGs
51 & 52 and thread the strap through the buckle
(Figs 53 & 54). Repeat this on the other side of
the vehicle and while pulling towards the rear of
the vehicle, slightly tighten one strap and then
the other side strap tightening up the top deck.
When first tightening the rear straps notice the
location of the rear bar sewn into the pocket on
the top deck. It needs to be centered on the rear
roll bar legs.
FIG 48 FIG 49
Note: FIG 47 Shows a D-ring attached to the
strap/spring. There is no D-ring on this strap.
This picture is for reference only
8
NOTE:
Do not completely tighten these straps yet.
They should be holding the top but not pulled as
tight as possible. You will do nal “tightening” after
you install the windows.
IMPORTANT: The top deck MUST be centered on the rear of the vehicle for the
windows to t properly.
NOTICE
Step 7: Installing the Quarter and rear Win-
dows to the top Deck
To ensure the top is centered on the vehicle you
will be installing the two quarter windows and the
rear window to the top deck and to each other
before securing it to the vehicle body.
Pro-Install TIP: To make this as easy as possible,
you may have to release the front windshield hea-
der (release but not un-hook) and loosen the rear
corner straps installed in step 4. This will allow
you to line up all window zippers and attachments.
The rear corner straps and header will need to be
re-tightened/clamped before using the top.
Locate the drivers rear quarter window. Line up
and slide the rear quarter window into the “C”
Channel as shown
in FIGs 55, 56 & 57. Repeat this on the passenger
side of the vehicle.
Locate the rear window and line up and slide the
rear window into the “C” Channel located at the
top of the rear portion of the top deck (FIGs 58,
59 & 60).
Once both quarter windows are secured to the top
deck, line up the driver’s side rear zipper on the
Quarter window to the zipper on the rear window
and zip it down a few inches (FIG 61).
Repeat this on the passenger side of the rear
window. You may have to lift the quarter window
up to secure this second zipper. Once both side
zippers are secure, zip the rear window zippers
down about half way (Fig 62). You will close these
zippers completely at the end of the install.
FIG 50 FIG 51
FIG 52 FIG 53
FIG 54
FIG 55 FIG 56
9
FIG 57 FIG 58
FIG 59 FIG 60
FIG 61 FIG 62
When removing the quarter and rear windows from the Top deck be sure to sli-
de them out completely before pulling down. Disengage the side hook and loop
before sliding the windows out. DO NOT “Peel” the windows out!
Failure to completely disengage the windows from the “C” Channel will damage
the Top and quarter window! See Fig 63 below.
NOTICE
FIG 63 Each Time you remove the windows:
Completely pull the windows out of the “C” Chan-
nel before pulling the windows down!
Do not “Peel” the windows out. See Fig 63.
There may be times when the “P” extrusion may come out of the “C” Channel
ends due to extreme downward pressure. This is normal. If this occurs, slide
the “P” extrusion out of the C channel and re install securing the window back
into the “C” Channel.
NOTICE
Step 8: Installing the Top to the Jeep Body
Starting at the driver’s side front, attach the side
belt rail into the vehicle body by “rolling” the plastic
into the slot (FIG 64).
Once secure move to the rear driver’s side corner
and “roll” the plastic into the Jeep body corner belt
rail as shown in FIG 65. Repeat this procedure on
the pas- senger side.
NOTE: as shown in FIG 66 there is a web loop
installed on the side of the quarter window.
This is to be used for unhooking the quarter win-
dow only and is not designed to be pulled down
on for installation!
Repeat the quarter window install on the passen-ger
side of the vehicle. You may have to pull the corners
around towards the front or back of the vehicle to
center the top on the vehicle.
Go inside the Jeep and locate the long center bow
flap. Wrap this bow flap tightly around the center
bow and secure it with the hook and loop fastener
(FIGs 67 & 68). you can now reach through the rear
zipper on each side and tighten the corner straps.
Alternate tightening to keep the top centered.
Seal hook and loop around windows (Figs 69 & 70).
10
FIG 64 FIG 65
FIG 66
FIG 67 FIG 68
FIG 69 FIG 70
Step 9: Installing the Tailgate Bar and Rear
Window to the body of the Jeep®
Take the factory bar and orient the “C“-Channel
with the round seal facing down and slide the “C”
Channel onto the rear window retainer as shown
in FIGs 71 & 72. After sliding the retainer all the
way through the “C” Channel, roll the tailgate bar
into the mounts with the outside of the fabric
facing towards the rear of the Vehicle (Figs 73 &
74).
Once the Tailgate bar in secure, lower zippers on
both sides of the rear curtain (FIG 75) and then
secure the rear zipper cover ap as shown in Figs
76 & 77.
FIG 71 FIG 72
Make sure the hook and loop fastener are tightly secured to the center bow
after the front sun roof is folded back. Both rear corner straps must also be se-
cure when the top is folded back These safety measures are designed to secure
the top deck to the vehicle and if not adhered to can cause injury, death and a
serious accident. Always wear your seat belts when using this product!
WARNING
Top Installation is now complete!
11
Step 9B: Installing the Tailgate Bar and Rear
Window to the body of the Jeep®
Once the Tailgate bar is secure, lower zippers on
both sides of the rear curtain (FIG 75) and then
secure the rear zipper cover flap as shown in Figs
76 & 77.
FIG 73 FIG 74
FIG 75 FIG 76
FIG 77
Care and Maintenance:
Your QuadraTop is made of the finest ma-
terials available but to keep it looking new
and for the maximum possible wear, it will
need periodic cleaning and basic mainte-
nance. The main threats to your soft top are
pollutants, dirt and grime. By keeping your
soft top clean you will prolong the life of your
top.
We recommend the following to keep your
top like new:
Washing: The soft top fabric should be was-
hed often using a mild soap, warm water and
a soft bristle brush (do not use the brush on
the window glass!). You can also use special
soft top cleaners available on our website.
Make sure that after cleaning you rinse with
clear water to remo-ve all traces of soap.
Zippers: Keeping the zipper cleaned and
lubricated with a silicone lubricant will help
prevent damage and keep the zippers in a
smooth working condition. If zipper opens
behind the slider, the slider may have been
spread apart. This problem can usually be
fixed
by using an ordinary pair of pliers to bring
the sides back into parallel. Return slider to
the end of the zipper in the nor- mal Open
position. Squeeze lightly at
First and test zipper. If the zipper continues
to remain open squeeze more rmly with
pliers and try the zipper again. Repeat proce-
dure until your zipper operates correctly.
Windows: It is very important that you keep
your QuadraTop windows clean! Use a mild
soap and water solution to gently clean your
windows. NEVER wipe your windows clean
with a dry cloth! Dust and dirt on a dry cloth
can scratch your windows causing “fogging”
and permanent damage. When re- moving
your windows, store them with a towel be-
tween the panels/rear windows to protect
them from damage. If frost or ice forms on
the outside of your windows during the win-
ter, DO NOT use an ice scraper to remove
this frost. Over time you will see small micro
scratches in your windows which are natural
wear and tear. These Micro scratches can be
“polished” out using window polish (Available
at Quadratec.com).
Water/Fabric: In the event of seeping
through the seams, 3M Scotchgard® may
be applied on the inside of the seams to stop
the see. Rips in the fabric may be repaired
with Bondex® iron on patches. Iron the
patches to the Inside of the top, carefully
following the Bondex® instructions.
Snaps: Keep snaps cleaned and lubricated
with silicone to help prevent snaps from
sticking to the studs. If a snap does beco-
me stuck to a stud, use a screwdriver and
GENTLY pry apart to prevent permanent
damage to the snap or the top fabric.
12
Quadratec Limited Warranty
for QuadraTop® Replacement Soft Tops
Your QuadraTop® replacement soft top is
covered by the following Limited Warranty
provided exclusively by Quadratec, Inc. 1028
Saunders Lane, West Chester, PA 19380.
This Limited Warranty is the only warranty
made in connection with purchase. Qua-
dratec neither assumes nor authorizes any
vendor, retailer or other person or entity to
assume for it any other obligation or liability
in connection with this product or Limited
Warranty.
What is Covered:
Subject to the terms, exclusions and limita-
tions herein and with respect only to soft tops
rst sold in the United States, Quadratec
warrants to the initial retail purchaser only
that your QuadraTop soft top shall be free of
defects in material and workmanship for a
period of 3 years from date of initial retail
sale.
All other warranties are hereby disclaimed,
except to the extent prohibited by applicable
law in which case any implied warranty of
merchantabil- ity or tness for a particular
purpose on this prod- uct is limited to 3 years
from date of initial retail sale. Quadratec
reserves the rights to: (a.) require invoice or
other proof your soft top is within the terms
of this Limited Warranty as a condition of
warranty service and, (b.) make future revi-
sions to this product and Limited Warranty
without prior notice or obligation to upgrade
your soft top.
What is Not Covered:
Your Quadratec Limited Warranty does not
cover products or parts Quadratec determi-
nes to have been damaged by or subjec-
ted to: (a.) installation damage, alteration,
modication, failure to maintain or attempted
repair or service by anyone not authorized
by Quadratec, (b.) normal wear and tear,
cosmetic damage or damage from
water immersion, (c.) Acts of God, accidents,
misuse, negligence, inadequate mounting
or impact with vehicle(s), obstacles or other
aspects of the environment, (d.) theft, vanda-
lism or other intentional damage.
Remedy Limited to Repair/Replacement:
The exclusive remedy provided hereun-
der shall, upon Quadratec inspection and
at Quadratec’s option, be either repair or
replacement of product or parts (new or
refurbished) covered under this Limited
Warranty. Customers requesting warranty
consideration on QuadraTop soft top should
rst contact Quadratec to obtain a RGA
number (610-701-3336). All labor, removal,
shipping and installation costs are custo-
mer’s responsibility.
Other Limitations - Exclusion of Damages
- Your Rights Under State Law:
In consideration of the purchase price paid,
neither Quadratec nor any independent
Quadratec distributor/licensee are responsi-
ble for any time loss, rental costs, or for any
incidental, consequen- tial, punitive or other
damages you may have or incur in connec-
tion with any part or product purchased. Your
exclusive remedy hereunder
for covered parts is repair/replacement as
described above.
This Limited Warranty gives you specic
rights. You may also have other rights that
vary from state to state. For example, some
states do not allow limitations of how long an
implied warranty lasts and/or do not allow the
exclusion or limitation of incidental or con-
sequential damages, so the limitations and
exclusions herein may not apply to you.
The terms Quadratec®, QuadraTop®
Essentials® and Essential® are Registered
Trademarks of Quadratec Inc. Registered in
U.S. Patent and Trademark Ofce.
©Quadratec, Inc. 2020. All Rights Reserved.
Version 11.20.20
Part # 12999.1001
14

This manual suits for next models

1

Other Quadratec Automobile Accessories manuals

Quadratec JL User manual

Quadratec

Quadratec JL User manual

Quadratec 16400.0010 User manual

Quadratec

Quadratec 16400.0010 User manual

Quadratec 12033.1000 User manual

Quadratec

Quadratec 12033.1000 User manual

Quadratec Rock Sliders User manual

Quadratec

Quadratec Rock Sliders User manual

Quadratec QRC JK User manual

Quadratec

Quadratec QRC JK User manual

Quadratec QuadraTop Adventure Top S User manual

Quadratec

Quadratec QuadraTop Adventure Top S User manual

Quadratec 12226.3011 User manual

Quadratec

Quadratec 12226.3011 User manual

Quadratec QuadraTop Adventure Top S User manual

Quadratec

Quadratec QuadraTop Adventure Top S User manual

Quadratec QRC User manual

Quadratec

Quadratec QRC User manual

Quadratec QuadraTop Premium 11000.2335 User manual

Quadratec

Quadratec QuadraTop Premium 11000.2335 User manual

Quadratec 92034.1018 User manual

Quadratec

Quadratec 92034.1018 User manual

Quadratec 506-Rock Operator's manual

Quadratec

Quadratec 506-Rock Operator's manual

Quadratec 12057.0261 User manual

Quadratec

Quadratec 12057.0261 User manual

Quadratec QuadraTop 11113.2435 User manual

Quadratec

Quadratec QuadraTop 11113.2435 User manual

Quadratec QuadraTop 11028.0235 User manual

Quadratec

Quadratec QuadraTop 11028.0235 User manual

Quadratec 11081.02 Series User manual

Quadratec

Quadratec 11081.02 Series User manual

Quadratec 92034.1091 User manual

Quadratec

Quadratec 92034.1091 User manual

Quadratec QuadraTop 11113.2435 User manual

Quadratec

Quadratec QuadraTop 11113.2435 User manual

Quadratec 12120.0793 User manual

Quadratec

Quadratec 12120.0793 User manual

Quadratec QuadraTop 11113.2335 User manual

Quadratec

Quadratec QuadraTop 11113.2335 User manual

Quadratec 13111.0401 Quick guide
Quadratec

Quadratec 13111.0401 Quick guide
Quadratec 14018.1213 User manual

Quadratec

Quadratec 14018.1213 User manual

Quadratec Ski & Snowboard Rack User manual

Quadratec

Quadratec Ski & Snowboard Rack User manual

Quadratec Brute Strength 12057.0271 User manual

Quadratec

Quadratec Brute Strength 12057.0271 User manual

Popular Automobile Accessories manuals by other brands

Kolpin Outdoors 29315 Product instructions

Kolpin Outdoors

Kolpin Outdoors 29315 Product instructions

Whispbar K713W Fitting instructions

Whispbar

Whispbar K713W Fitting instructions

Autoadapt Tilda user manual

Autoadapt

Autoadapt Tilda user manual

Bestop 17175 installation instructions

Bestop

Bestop 17175 installation instructions

DEFA CLU MK1 quick guide

DEFA

DEFA CLU MK1 quick guide

INDIWORK A-LINK HD NTG5.5 instruction manual

INDIWORK

INDIWORK A-LINK HD NTG5.5 instruction manual

AMP Research BedStep 75306-01A instructions

AMP Research

AMP Research BedStep 75306-01A instructions

ZZ2 ITZ-CDR31-A manual

ZZ2

ZZ2 ITZ-CDR31-A manual

Brodit Tablet PC Holder brochure

Brodit

Brodit Tablet PC Holder brochure

VW TR Series Operator's manual

VW

VW TR Series Operator's manual

AUTHOR Alarm OBD BLOCK operating manual

AUTHOR Alarm

AUTHOR Alarm OBD BLOCK operating manual

Nokia CK-15W brochure

Nokia

Nokia CK-15W brochure

Ecco ED9215 Installation and operation instructions

Ecco

Ecco ED9215 Installation and operation instructions

Sony RM-X1S operating instructions

Sony

Sony RM-X1S operating instructions

Hilti SI-AT-A22 Original Operating Instruction

Hilti

Hilti SI-AT-A22 Original Operating Instruction

Prime Design DEPLOYPRO LOCK N GO Assembly instructions

Prime Design

Prime Design DEPLOYPRO LOCK N GO Assembly instructions

ECB BIG TUBE BH39SY Fitting instructions

ECB

ECB BIG TUBE BH39SY Fitting instructions

DNA BHK900 instruction manual

DNA

DNA BHK900 instruction manual

manuals.online logo
manuals.online logoBrands
  • About & Mission
  • Contact us
  • Privacy Policy
  • Terms and Conditions

Copyright 2025 Manuals.Online. All Rights Reserved.