manuals.online logo
Brands
  1. Home
  2. •
  3. Brands
  4. •
  5. Quadratec
  6. •
  7. Automobile Accessories
  8. •
  9. Quadratec QuadraTop User manual

Quadratec QuadraTop User manual

QuadraTop®AdventureTop Conversion Soft Top
Installation Manual: for 2003-2006 LJ Wrangler #11113.1035
Throughout this
instruction sheet pictures
of a TJ Wrangler are used.
Install on LJ Wrangler is
the same.
PARTS & REQUIRED TOOLS
REQUIRED TOOLS: Safety
Glasses
Phillips Head Screwdriver
T30 Torx Head and Driver
Drill Motor
1/4” Drill Bit
3/32” Drill Bit
Large towel or Blanket
PART LIST:
A)Top Deck QTY 1
B)Drivers Side Quarter Window QTY 1
C)Passenger Side Quarter Window QTY 1
D)Rear Window QTY 1
E)Side Tubes QTY 2
F)Door Surround Brackets QTY 2
G)Center Bow QTY 2
IMPORTANT: This Top requires the
use of your factory Soft top
hardware including door surrounds
and Tailgate bar. This kit does not
include these components.
WARNING
TO REDUCE RISK OF SERIOUS INJURY OR PROPERTY DAMAGE:
READ ALL SAFETY MESSAGES AND UNDERSTAND ALL INSTRUCTIONS AND PROCEDURE NOTICES BEFORE
ATTEMPTING TO INSTALL OR USE THIS PRODUCT.
Loss of vehicle control involves risk of death or serious injury, particularly to parts of your body not restra-
ined within vehicle. This product is intended for weather protection only and should not be relied upon to
contain occupants in the event of an accident or to protect from either ground contact or falling objects. To
reduce risk of accident or injury:
• ALWAYS WEAR SEATBELTS
• Always keep head, arms & body parts within vehicle.
• Fully secure or stow the soft top before driving according to instructions. Never try to latch or fold
soft top while driving. Do not use if damaged or worn.
• Read and follow all instructions & warnings accompanying this product, in your vehicle owner’s
manual and Off-Road Driving Supplement.
RISK OF EYE INJURY! SAFETY GLASSES MUST BE WORN AT ALL TIMES WHILE INSTALLING OR MAINTAI-
NING THIS PRODUCT. TORQUE AND RECHECK FASTENERS AFTER 250 MILES AND FREQUENTLY THEREAF-
TER. DO NOT USE IF DAMAGED.
CAUTION
A FEW WORDS ABOUT PRODUCT SAFETY:
Your QuadraTop® Soft top is intended to enhance the utility and enjoyment of your off-road capable vehicle. Follow safety information
and installation recommendations. Throughout these instructions is important safety information that is generally preceded by one of
three signal words indicating the relative risk of injury, property damage or adverse consequence.
The signal words mean:
A HAZARDOUS SITUATION WHICH, IF NOT AVOIDED, COULD RESULT IN DEATH OR SERIOUS
INJURY. YOU CAN BE KILLED OR SERIOUSLY HURT IF YOU DON’T FOLLOW INSTRUCTIONS
A HAZARDOUS SITUATION WHICH, IF NOT AVOIDED, COULD RESULT IN A MINOR OR
MODERATE INJURY. YOU CAN BE MODERATELY HURT AND ALSO MAY SUFFER PROPERTY
DAMAGE IF YOU DON’T FOLLOW INSTRUCTIONS
CAREFUL ATTENTION IS REQUIRED TO THIS INSTRUCTION OR OPERATION BUT DOES
GENERALLY NOT RELATE TO PERSONAL INJURY. DAMAGE TO YOUR QUADRATEC® PRODUCT
OR OTHER PROPERTY MAY RESULT IF YOU DON’T FOLLOW INSTRUCTIONS.
WARNING
CAUTION
BEFORE YOU BEGIN INSTALLATION:
Congratulations on your purchase of the Quadratec® QuadraTop for your Jeep® Wrangler. This custom t soft accessory has been
designed for protection, long life, and great looks. When unpacking, check to make sure all parts are included and not damaged due
to shipping. If any part is missing or broken, please call Customer Service at 800-745-6037 as soon as possible. Thank you again for
your purchase and let’s start the installation process.
NOTICE
READ ALL SAFETY MESSAGES AND ALWAYS WEAR SAFETY GLASSES WHEN WORKING
WITH TOOLS.
CAUTION
Step 1
Factory Hardware Requirement:
This product is designed to fit over your original factory soft top hardware, Door Surrounds, Windshield header and fac tory soft
upper metal door frames (if applicable).your vehicle.
Remove Existing Soft Top Fabric
Put on safety glasses. After verifying that you have the correct hardware, remove the existing soft top from the vehicle. This will in-
clude removing the existing soft top fabric from the front windshield header. This will require the use of a Phillips head screw driver.
To remove the fabric from the front header, fold the top completely down to the rear of the vehicle (see FIG1). With the tailgate open,
unscrew all header screws (8 or 14 screws depending on model year) and two corner screws (see FIG2). Save these screws!
Once the soft top is removed, Remove the door surrounds and prepare to remove the bows and Windshield header from the vehicle.
Remove Door Surround Seals Please Note: If you have the rubber seal shown in Fig A this seal must be removed before you install
the fabric top to your vehicle. See FIG’s A & B.
Step 2
Remove the Factory Front, Rear and Over Door Bows
After removing the soft top fabric from your existing hardware, you will need to disengage the factory front, rear and over door bows.
The front and rear bows are removed from the bow mounts on the vertical roll bar using a T-30 Torx head and driver or quick release
knobs (Fig1). The bow mount brackets can be left on the Roll bar or removed if you wish as they will not be used again. The front bow
will be attached to the Windshield Header. Using a Philips head screw driver, remove the front over door bows from the windshield
header (Fig 2). On the door surround, there is a pin that holds the over door bows to the Door surrounds. This pin must also be re-
moved from the door surrounds (FIG 2A). Once the front over door bows are removed from the vehicle, Set the front/rear bow assem-
bly aside and locate the windshield header. Remove the existing fabric from the windshield header by removing the header screws.
SAVE these Screws!
FIG 1 FIG 2 FIG 2A
Step 3
Install Top Fabric on the Front Windshield Channel
Place the soft top fabric on the ground (on top of a large blanket or towel) with the underside facing up and the front of the fabric
facing you (FIG 3). Lay the front windshield header with the underside facing up into each corner pocket with the header plastic strip
sewn on the top facing up on top of the windshield header. Locate the center hole or two center holes on the plastic strip and secure
the center of plastic header using the screw(s) that were removed in step one. See Fig 4. Proceed to install the remaining seven or
thirteen header screws (depending on model year) along the plastic header lining them up with the holes on the front header itself.
Lift up the header and wrap the corner pockets around the ends of the front Header lining up the corner screws with the corner holes
in the header. Install the two corner screws (see Fig 5).
Preparation for Installing Fabric Only Replacement Top:
Step 4
Install the Side over door tubes to the windshield Header
Locate the two over door bows. These bows have the quick release knuckles preinstalled on the rear of the bow ends and have the
set screw installed on the other end of the bow. The “knob” on the bow end must be facing inward on the header/Top deck
assembly and the slot of the quick release must be facing up as shown in Figs 7 & 8. Remove the set screw on the non-quick release
end. Slip the front bow end into the Header mount as shown in Fig 9 making sure it is as far forward as possible. Using a 3/32” drill
bit and drill, drill a pilot hole through the predrilled hole located on the over door tube (Fig 10). Repeat this on the opposite side
(Fig11). Remove the Bow end from the Header and again using the 1/8” drill bit, drill a hole through the previous drilled pilot holes
into the inner steel rod of the header until you feel the drill go through the steel inner. This may take some force. Once the hole is
drilled, locate the set screw and using a Phillips head screw driver, install the over door bow to the Header (Fig 12). Repeat this on
the other side of the header so you have both side tubes installed to the header/top deck assembly. Set this completed header/fab-
ric/over door bow assembly aside.
FIG 3
FIG 6
Step 5
This step requires you to install the center bow/over door bracket on top of the factory door surrounds (FIG 13). Before
you install these brackets, you will need to remove the factory over door “pin” from the door surround. This can be done
with a Phillips head screw driver. Locate the Door surround brackets. Place the bracket as shown in FIG 14 and line up
the slit in the bracket as shown in FIG’s 14&15 with the vertical tab on the outside of the door surround and the rear of
the bracket hanging off the end of the door surround (Fig 16). Mark the three-hole locations through the bracket and
using a 1/4” drill bit, drill three holes in the door surround. Note that one of the three holes in the door surround may
already line up with the bracket so you may only have to drill two holes. Using the enclosed screws and a Phillips head
screw driver, install the bracket to the door surround using the enclosed backing plate to “sandwich” the bracket to the
door surround (FIG 17). Repeat on the other door surround.
FIG 13
FIG 14
FIG 15
FIG 16
FIG 17
Step 6
FIG 18 FIG 19 FIG 20 FIG 21
After installing the side tubes to the door surround brackets please check the location of the front header to make
sure it its snug and does not “over-hang” the front of the windshield.
NOTICE
FIG 22 FIG 23
Locate the Header and Top Deck assembly completed in step one. With the help of a friend, place the header/deck
assembly on the vehicle locating the front header on the top of the windshield and the rest of the fabric spread back
on the rear of the vehicle (FIG18).Under the fabric, locate the over door bow installed in step one and place the quick
release end in the top- front hole of the preinstalled bow mount bracket pulling the knob out until you hear a
“click” (FIGs 19, 20, 21 & 22).
Repeat this on the opposite side of the vehicle and fold back the front portion of the top as shown in FIG 23.

Other manuals for QuadraTop

1

Other Quadratec Automobile Accessories manuals
Quadratec 12052.0904 User manual

Quadratec

Quadratec 12052.0904 User manual
Quadratec 13111.0411 Quick guide

Quadratec

Quadratec 13111.0411 Quick guide
Quadratec Ski & Snowboard Rack User manual
Quadratec

Quadratec Ski & Snowboard Rack User manual

Quadratec 11147.10 Series User manual

Quadratec

Quadratec 11147.10 Series User manual
Quadratec 12057.0263 User manual

Quadratec

Quadratec 12057.0263 User manual
Quadratec EXPOSED RACKS User manual

Quadratec

Quadratec EXPOSED RACKS User manual

Quadratec 07-Current Wrangler User manual
Quadratec

Quadratec 07-Current Wrangler User manual

Quadratec 12226.3011 User manual

Quadratec

Quadratec 12226.3011 User manual

Quadratec 506-Rock Operator's manual

Quadratec

Quadratec 506-Rock Operator's manual
Quadratec 12033.1000 User manual

Quadratec

Quadratec 12033.1000 User manual
Quadratec 12057.0102 User manual

Quadratec

Quadratec 12057.0102 User manual
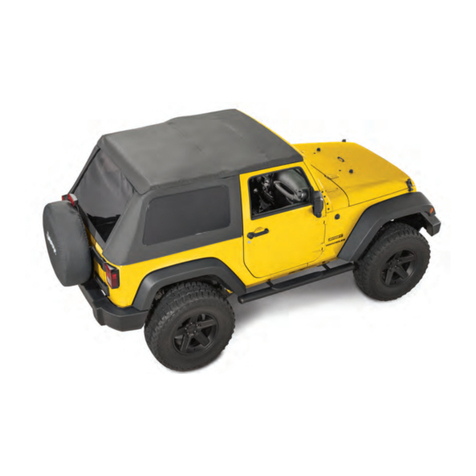
Quadratec QuadraTop Adventure Top S User manual
Quadratec

Quadratec QuadraTop Adventure Top S User manual

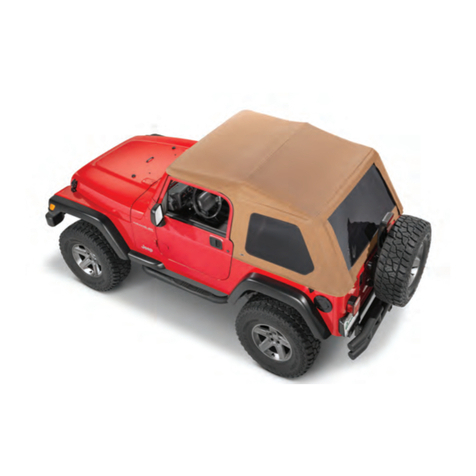
Quadratec QuadraTop Adventure Top 1113.00 Series User manual
Quadratec

Quadratec QuadraTop Adventure Top 1113.00 Series User manual

Quadratec QuadraTop 11000.1135 User manual

Quadratec

Quadratec QuadraTop 11000.1135 User manual

Quadratec QuadraTop Adventure Top S User manual
Quadratec

Quadratec QuadraTop Adventure Top S User manual

Quadratec 16053.5300 User manual

Quadratec

Quadratec 16053.5300 User manual
Quadratec QuadraTop 11051.0415 User manual
Quadratec

Quadratec QuadraTop 11051.0415 User manual

Quadratec QR3 User manual

Quadratec

Quadratec QR3 User manual
Quadratec QRC User manual

Quadratec

Quadratec QRC User manual
Quadratec 12033.1001 User manual

Quadratec

Quadratec 12033.1001 User manual

Quadratec QRC JK User manual

Quadratec

Quadratec QRC JK User manual

Quadratec 12057.0261 User manual

Quadratec

Quadratec 12057.0261 User manual

Quadratec QRC User manual

Quadratec

Quadratec QRC User manual

Quadratec 12057.014 Series User manual

Quadratec

Quadratec 12057.014 Series User manual

Popular Automobile Accessories manuals by other brands

Magneti Marelli AC161 Installation instruction

Magneti Marelli

Magneti Marelli AC161 Installation instruction

FDI uEZ GUI Start here

FDI

FDI uEZ GUI Start here

JCROffroad JT Install instructions

JCROffroad

JCROffroad JT Install instructions

Rostra VOXXElectronics 250-1930 owner's guide

Rostra

Rostra VOXXElectronics 250-1930 owner's guide

TOP VEHICLE TECH GR3FORD5 installation manual

TOP VEHICLE TECH

TOP VEHICLE TECH GR3FORD5 installation manual

Safe Fleet PRIME DESIGN AR-2000-BLK manual

Safe Fleet

Safe Fleet PRIME DESIGN AR-2000-BLK manual

Skoda Fabia Combi 5J Fitting instructions

Skoda

Skoda Fabia Combi 5J Fitting instructions

Camcar 40077 Al Mounting instructions

Camcar

Camcar 40077 Al Mounting instructions

Camcar 40089 AL Mounting instructions

Camcar

Camcar 40089 AL Mounting instructions

Impac Tradesman 2000 installation manual

Impac

Impac Tradesman 2000 installation manual

DVB OFFROAD BRSB-01 installation manual

DVB

DVB OFFROAD BRSB-01 installation manual

Safari Snorkel SS385HF installation guide

Safari Snorkel

Safari Snorkel SS385HF installation guide

ULTIMATE SPEED 279746 Assembly and Safety Advice

ULTIMATE SPEED

ULTIMATE SPEED 279746 Assembly and Safety Advice

SSV Works DF-F65 manual

SSV Works

SSV Works DF-F65 manual

ULTIMATE SPEED CARBON Assembly and Safety Advice

ULTIMATE SPEED

ULTIMATE SPEED CARBON Assembly and Safety Advice

Witter F174 Fitting instructions

Witter

Witter F174 Fitting instructions

WeatherTech No-Drill installation instructions

WeatherTech

WeatherTech No-Drill installation instructions

TAUBENREUTHER 1-336050 Installation instruction

TAUBENREUTHER

TAUBENREUTHER 1-336050 Installation instruction

manuals.online logo
manuals.online logoBrands
  • About & Mission
  • Contact us
  • Privacy Policy
  • Terms and Conditions

Copyright 2025 Manuals.Online. All Rights Reserved.