manuals.online logo
Brands
  1. Home
  2. •
  3. Brands
  4. •
  5. Quark-Elec
  6. •
  7. Media Converter
  8. •
  9. Quark-Elec QK-A034 User manual

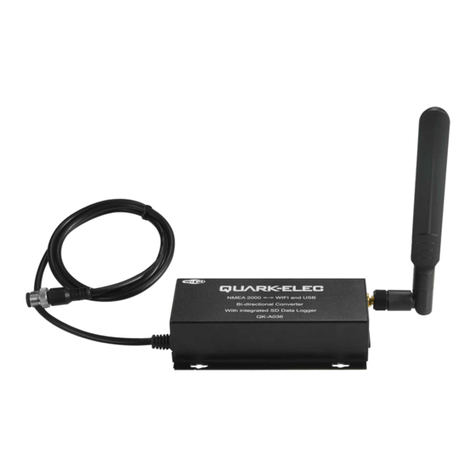
Quark-Elec QK-A034 User manual

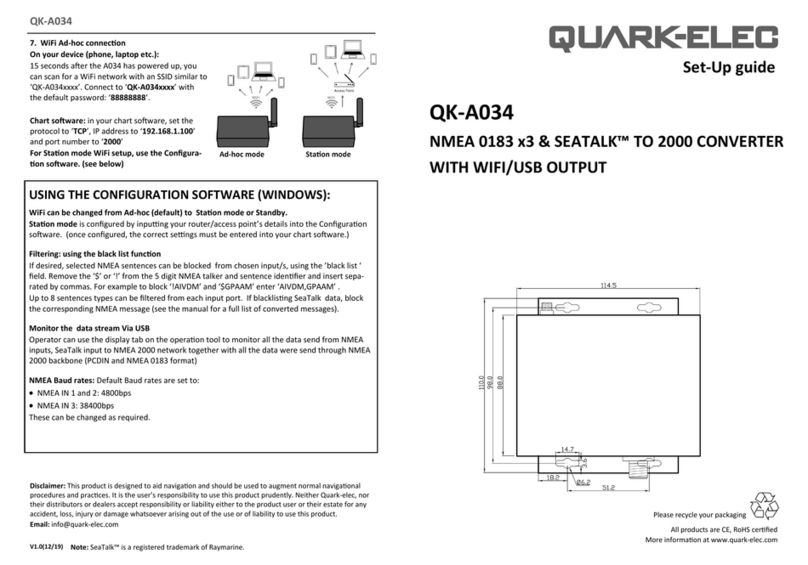
7. Standard WiFi Ad-hoc connecon
On your wireless device (tablet etc.):
15 seconds aer the A034 has powered
up, scan for a WiFi network with an SSID
similar to ‘QK-A034xxxx’.
Connect to ‘QK-A034xxxx’ with the de-
fault password: ‘88888888’.
Chart soware: in your chart soware,
set the protocol to ‘TCP’, IP address to
‘192.168.1.100’ and port number to ‘2000’
For Staon mode WiFi setup or to disable WiFi, use the Conguraon soware. (see below)
Disclaimer: This product is designed to aid navigaon and should be used to augment normal navigaonal
procedures and pracces. It is the user’s responsibility to use this product prudently. Neither Quark-elec, nor
their distributors or dealers accept responsibility or liability either to the product user or their estate for any
V2.0(12/19)
QK-A034
Note: SeaTalk™ is a registered trademark of Raymarine.
USING THE CONFIGURATION SOFTWARE (WINDOWS):
Ad-hock WiFi passwords can be changed for security and memorability.
WiFi can be changed from Ad-hoc (default) to Staon mode or Standby.
Staon mode is congured by inpung your router/access point’s details into the Conguraon
soware. (once congured, the correct sengs must be entered into your chart soware.)
Filtering: using the black list funcon
If desired, selected NMEA sentences can be blocked from chosen input/s, using the ’black list ‘
eld. Remove the ‘$’ or ‘!’ from the 5 digit NMEA talker and sentence idener and insert sepa-
rated by commas. For example to block ‘!AIVDM’ and ‘$GPAAM’ enter ‘AIVDM,GPAAM’ .
Up to 8 sentences types can be ltered from each input port. If blacklisng SeaTalk data, block
the corresponding NMEA message (see the manual for a full list of converted messages).
Roung your data.
As a default, all inputs’ data (excluding any ltered data) is routed to all outputs . Data can be
routed to limit the data ow to certain output/s by un-cking the corresponding boxes in the
Conguraon soware.
Monitor the data stream Via USB
Use the ‘Display’ tab on the Conguraon tool to monitor all input data with all the data send
through NMEA 2000 backbone. (both PCDIN and NMEA 0183 format)
NMEA Baud rates: Default Baud rates sengs are:
• NMEA IN 1 and 2: 4800bps
• NMEA IN 3: 38400bps
These can be adjusted as required.
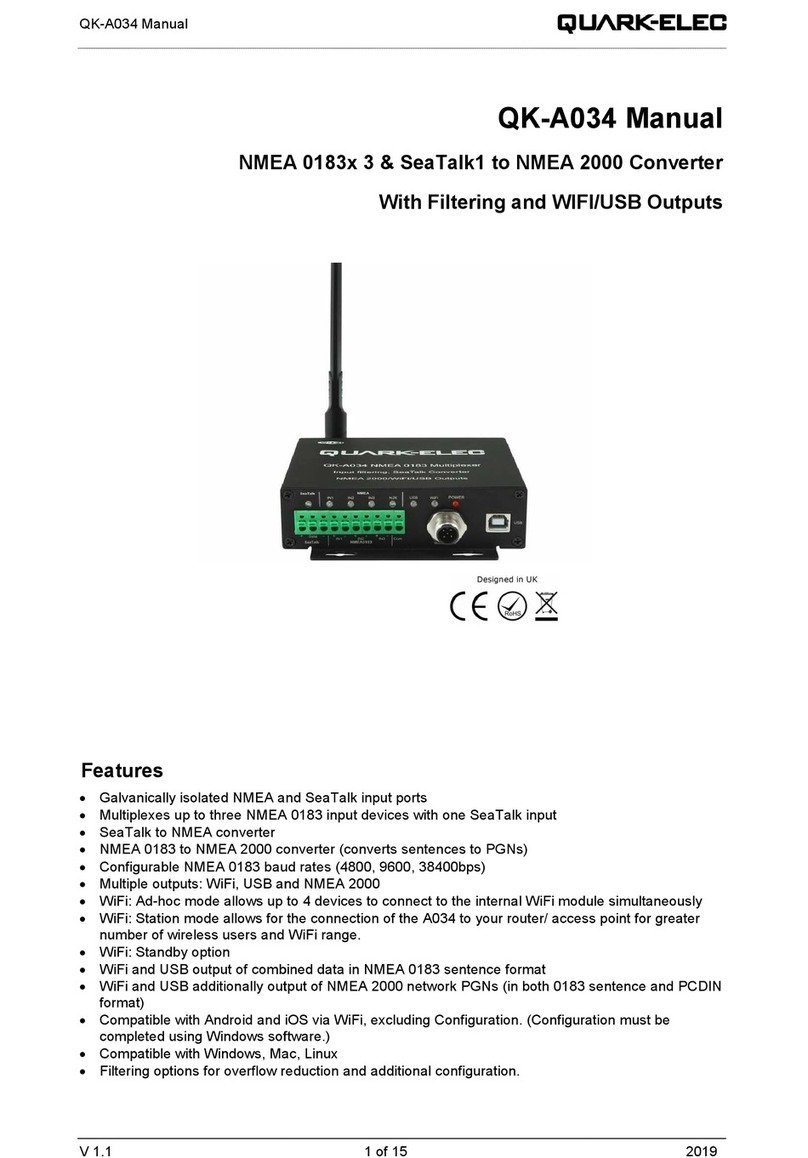
Set-Up guide
QK-A034
BI-DIRECTIONAL NMEA 2000 TO WIFI AND USB MULTIPLEXER
WITH NMEA 0183 AND SEATALK INPUT OPTIONS
All products are CE, RoHS cered
More informaon at www.quark-elec.com
Please recycle your packaging
This is an overview only. Familiarize yourself with the manual and the manuals of
any connecng devices before installaon. It is always recommended that electronic
equipment be installed by an experienced installer.
QK-A034
Before leaving home:
NMEA 2000 power required
Conguraon soware is oponal and only needed for specic features.
To use any of the following features, you will require the Conguraon Soware:
• Changing WiFi mode from Ad-hoc to Staon mode or Standby
• Adjusng Baud rates from their default sengs
• Filtering unwanted or excess data
• Roung Data away for certain output devices
• Full Diagnoscs monitoring of the data streams
Conguraon soware (Windows) will be required to adjust these sengs. (see back of Setup
Guide for more informaon). Driver may be required for older Windows PCs. This may install
automacally to Windows 10 systems (if not, it is on the free CD and at quark-elec.com)
The Cong Soware, driver and full manual are on the included CD and on www.quark-elec.com.
Consider whether there is a CD reader/internet access on site, if not, pre-congure your device
or pre-install the Conguraon soware and driver if needed.
Installaon
1. Mounng: Consider your locaon…
• Dry, sturdy locaon 0.5m from other WiFi equipment.
• Ensure you have the correct length of cables needed. If drilling holes for your cabling, seal
around any holes to prevent damage to your vessel or equipment.
2. Disconnect power from NMEA 2000 Backbone and
Disconnect power from all NMEA and SeaTalk devices to be connected.
3. Connect any input devices.
• NMEA 0183: Connect the ‘+’ and ‘-‘ terminals of the NMEA input/output on the A034 to the ‘+’
and ‘-‘ terminals of the output/input on the instrument.
The A034 uses NMEA 0183-RS422. If your connecng device uses the older NMEA 0183-RS232
and you are having issues with your NMEA connecon, you may nd swapping these terminals
works for your device. Alternavely, connect it using a Quark-elec Protocol Bridge (QK-AS03).
• SeaTalk: Take care to connect the ‘+’, ‘Data’ and ‘-’ correctly. Swapping any of these wires
could permanently damage the A034 mulplexer.
4. Connect the A034 to your un-powered NMEA 2000 backbone
5. Re-Connect power to your connected devices and NMEA 2000 backbone. The A034 is
powered by the NMEA 2000 backbone.
6. Check LED lights are working as expected
• SeaTalk and NMEA IN1/2/3 LEDs will ash for each valid message received.
• USB and WiFi LEDs ash for each valid NMEA message sent to USB/WiFi outputs.
• N2K LED will ash for each valid NMEA 2000 PGNs sent out on NMEA 2000 port.
• Power LED is constantly lit when the device is powered.
QK-A034
SeaTalk IN
NMEA IN 1
NMEA IN 2
NMEA IN 3
N2K
USB
WiFi
Power
7. Follow your marine soware/APP instrucons for adding input/output data sources.
(Standard seng can be found in the A034 manual. WiFi set up instrucons over-leaf.

Other manuals for QK-A034

3

Other Quark-Elec Media Converter manuals

Quark-Elec QK-A034 User manual

Quark-Elec

Quark-Elec QK-A034 User manual

Quark-Elec QK-A036 User manual

Quark-Elec

Quark-Elec QK-A036 User manual

Quark-Elec QK-A015-TX User manual

Quark-Elec

Quark-Elec QK-A015-TX User manual

Quark-Elec QK-A032 User manual

Quark-Elec

Quark-Elec QK-A032 User manual

Quark-Elec QK-A036 User manual

Quark-Elec

Quark-Elec QK-A036 User manual

Quark-Elec QK-A032 User manual

Quark-Elec

Quark-Elec QK-A032 User manual

Quark-Elec QK-A015-RX User manual

Quark-Elec

Quark-Elec QK-A015-RX User manual

Quark-Elec QK-A015-TX User manual

Quark-Elec

Quark-Elec QK-A015-TX User manual

Quark-Elec QK-A032 User manual

Quark-Elec

Quark-Elec QK-A032 User manual

Quark-Elec QK-A015-TX User manual

Quark-Elec

Quark-Elec QK-A015-TX User manual

Quark-Elec QK-A034 User manual

Quark-Elec

Quark-Elec QK-A034 User manual

Popular Media Converter manuals by other brands

McCrometer ProComm HL Installation, operation and maintenance manual

McCrometer

McCrometer ProComm HL Installation, operation and maintenance manual

Sumake ST-2276-4L quick start guide

Sumake

Sumake ST-2276-4L quick start guide

Adaptec VideOh! CD AVC-1100 Getting started

Adaptec

Adaptec VideOh! CD AVC-1100 Getting started

dji N1 user manual

dji

dji N1 user manual

Cypress OSM-2400 manual

Cypress

Cypress OSM-2400 manual

Digi Watchport/H installation guide

Digi

Digi Watchport/H installation guide

TaKo Electronics EBi Direct Interpolation DAC user manual

TaKo Electronics

TaKo Electronics EBi Direct Interpolation DAC user manual

Transition Networks SSETF10XX-200 user guide

Transition Networks

Transition Networks SSETF10XX-200 user guide

Pro-Ject Audio Systems DAC Box DS Instructions for use

Pro-Ject Audio Systems

Pro-Ject Audio Systems DAC Box DS Instructions for use

opticis CNDF-200 user manual

opticis

opticis CNDF-200 user manual

PRO SIGNAL PSG3029 quick guide

PRO SIGNAL

PRO SIGNAL PSG3029 quick guide

StarTech.com DP2DVIS installation guide

StarTech.com

StarTech.com DP2DVIS installation guide

KVMSwitchTech SCA-DVI-VGA user manual

KVMSwitchTech

KVMSwitchTech SCA-DVI-VGA user manual

TP-Link MC200CM quick start guide

TP-Link

TP-Link MC200CM quick start guide

AD Labs RD26 owner's manual

AD Labs

AD Labs RD26 owner's manual

Williams AV Annotation Pro Plus quick start guide

Williams AV

Williams AV Annotation Pro Plus quick start guide

ScienTECH DB15 operating manual

ScienTECH

ScienTECH DB15 operating manual

Cronyx E1 - L/S NSTALLATION AND OPERATING MANUAL

Cronyx

Cronyx E1 - L/S NSTALLATION AND OPERATING MANUAL

manuals.online logo
manuals.online logoBrands
  • About & Mission
  • Contact us
  • Privacy Policy
  • Terms and Conditions

Copyright 2025 Manuals.Online. All Rights Reserved.