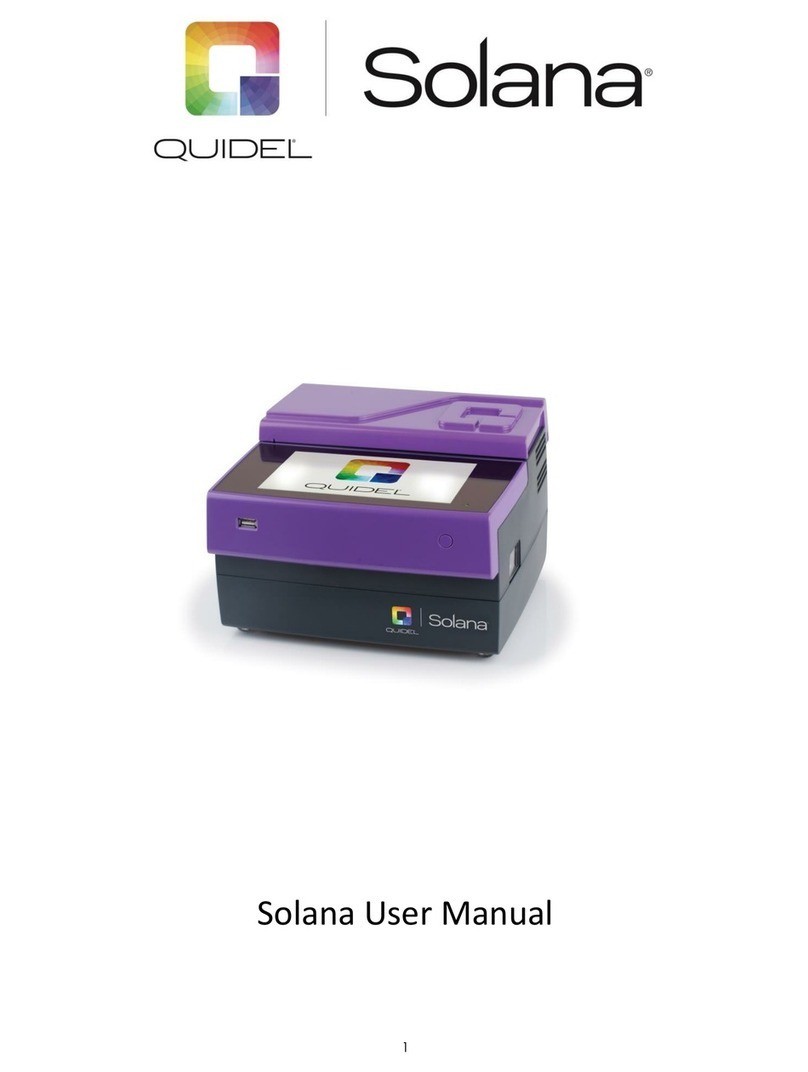
Quidel Solana User manual

1
Solana User Manual

2
Quidel Corporation
Worldwide Headquarters
12544 High Bluff Drive
San Diego, CA 92130
United States
quidel.com
858.552.1100
MDSS GmbH
Schiffgraben 41
30175 Hannover
Germany

3
Table of Contents
Table of Contents ....................................................................................................................................... 3
General Information ................................................................................................................................... 6
Quidel Contact Information ................................................................................................................................ 6
Labels and Symbols ............................................................................................................................................. 7
Brief Warnings, Precautions and Limitations...................................................................................................... 8
Safety Precautions........................................................................................................................................... 8
Intended Use..................................................................................................................................................... 10
Product Description........................................................................................................................................... 10
System Components ......................................................................................................................................... 10
System Display .................................................................................................................................................. 10
Functional Description.............................................................................................................................. 11
Hardware........................................................................................................................................................... 11
Set-up and Connection Procedures............................................................................................................ 13
Unpacking of Solana.......................................................................................................................................... 13
Placement of Solana.......................................................................................................................................... 13
AC Power Connection........................................................................................................................................ 14
Plugging and Unplugging Solana....................................................................................................................... 14
Locking and Unlocking Solana........................................................................................................................... 15
Transport Lock............................................................................................................................................... 15
Startup Solana................................................................................................................................................... 17
Power Up ....................................................................................................................................................... 17
General Operation.................................................................................................................................... 18
Procedural Notes............................................................................................................................................... 18
User Login.......................................................................................................................................................... 19
User Logout ....................................................................................................................................................... 20
Main Menu........................................................................................................................................................ 21
System ..................................................................................................................................................... 22
Settings.............................................................................................................................................................. 22

4
Workflow Settings ......................................................................................................................................... 23
Order settings............................................................................................................................................ 23
Result Handling.......................................................................................................................................... 24
Device Settings .............................................................................................................................................. 25
Date and Time ........................................................................................................................................... 25
Language ................................................................................................................................................... 26
User Access Control................................................................................................................................... 26
Network Settings....................................................................................................................................... 29
Brightness & Sleep Mode.......................................................................................................................... 32
Delete Patient Info in All Records.............................................................................................................. 33
Maintenance ..................................................................................................................................................... 33
Virena Status ................................................................................................................................................. 34
LIS Status ....................................................................................................................................................... 34
Software / Test methods / Report Template................................................................................................. 35
Install software update.............................................................................................................................. 36
Manage methods ...................................................................................................................................... 36
Report template ........................................................................................................................................ 37
Event Log ....................................................................................................................................................... 37
Start New Test.......................................................................................................................................... 39
Starting New Test (Test Selection: Autofill Mode Off)...................................................................................... 39
Starting New Test (Test Selection: Autofill Mode On) ...................................................................................... 40
One Test Method Per Run.............................................................................................................................. 40
Procedure to Run Different Test Methods in the Same Batch....................................................................... 41
Assigning Sample Type and ID........................................................................................................................... 43
Auto Sample Order Off .................................................................................................................................. 43
Manual Entry of Patient Samples.............................................................................................................. 44
Barcode Entry of Patient Samples............................................................................................................. 44
Entry of Patient Samples When Using Virena ........................................................................................... 45
Correcting an Erroneous Sample ID Entry................................................................................................. 45
Auto Sample Order On................................................................................................................................... 45

5
QC Samples.................................................................................................................................................... 46
Manual Entry of Patient Samples.............................................................................................................. 46
Barcode Entry of Patient Samples............................................................................................................. 46
Entry of Patient Samples When Using Virena ........................................................................................... 46
Correcting an Erroneous Manual Sample ID Entry.................................................................................... 47
Correcting an Erroneous Barcoded Sample ID Entry................................................................................. 47
Test in Progress ................................................................................................................................................. 47
Sample Assignment or Editing Sample ID During the Run................................................................................ 48
LIS Orders................................................................................................................................................. 50
LIS Order Assignment........................................................................................................................................ 50
Review and Managing Results................................................................................................................... 53
View Results ...................................................................................................................................................... 53
Managing Results.............................................................................................................................................. 54
Shutdown................................................................................................................................................. 56
Maintenance and Cleaning........................................................................................................................ 57
Troubleshooting ....................................................................................................................................... 58
Technical Specifications ............................................................................................................................ 68
Mechanical Data and Hardware Features......................................................................................................... 68
Optics................................................................................................................................................................. 69
Power Requirements of the Instrument ........................................................................................................... 69
Accessories........................................................................................................................................................ 69
A symbols glossary can be found at quidel.com/glossary

6
General Information
Quidel Contact Information
Website quidel.com
If you have any questions regarding the use of this product, please contact Quidel Technical Support at
1.800.874.1517 (in the U.S.) or technicalsupport@quidel.com. If outside the U.S., further information can be
obtained from your distributor, or directly from Quidel at one of the numbers listed below. Reference
quidel.com to see more options for Support.
Country
Phone
E-Mail Address
Europe, Middle East and Africa
+353 (91) 412 474 (main)
0 1800 200441 (toll free)
emeatechnicalsupport@quidel.com
Austria
+43 316 231239
France
0 (805) 371674
Germany
+49 (0) 7154 1593912
Netherlands
0 800 0224198
Switzerland
0 800 554864
United Kingdom
0 800 3688248
Italy
+39 (800) 620 549
North America, Asia-Pacific, Latin America
858.552.1100
technicalsupport@quidel.com
Canada
437.266.1704 (main)
888.415.8764 (toll free)
technicalsupport@quidel.com
China
0400 920 9366 or
+86 021 3217 8300
chinatechnicalser[email protected]m

7
Labels and Symbols
Label
Description
Manufacturer
In vitro diagnostics
CE mark of conformity (Conformité Européenne)
Consult instructions for use
Authorized representative in the European Community
Temperature limitation
Directive 2002/96/EC on waste electrical and electronic equipment (WEEE)
Serial number
Catalog number
Part number
Information of particular importance
Warning! Indicates a hazardous situation, which if not avoided, could result in
injury to the Operator or a bystander (e.g., electrical shock or UV exposure).
Potential Biohazard! An agent of biological origin that has the capacity to
produce deleterious effects on humans, i.e. microorganisms, toxins, and
allergens derived from those organisms; and allergens and toxins derived from
higher plants and animals.
Caution! Indicates a situation, which if not avoided could result in damage to
the device or incorrect results.

8
Brief Warnings, Precautions and Limitations
NOTE: Within this document, text in bolded, purple-colored font indicates hyperlinks in the electronic
document. The word “Solana” is interchangeable with the word “instrument” or “device” throughout
this manual.
◼Always operate Solana on a surface that is level, dry, and stable, away from direct intense lighting.
◼Operation of Solana should occur at room temperatures between 15°C to 35°C.
◼Highly intense light and vibrations may influence results and must be avoided.
◼Never move Solana while in operation or in the unlocked position.
◼Do not expose Solana to strong electromagnetic radiation.
◼Do not use a power adapter other than the adapter provided with Solana.
◼Do not drop Solana as it could damage the unit.
◼Never place objects on top of Solana.
◼Never start testing without reaction tubes inserted.
◼Do not re-open/open the lid of the reaction tube once it has been closed.
◼Pouring liquids into testing wells can damage Solana. Avoid spilling bleach in the well as this can cause
corrosion of the internal parts, which can cause failure of the instrument.
◼Maintenance and decontamination of workspace and equipment should follow and be performed
according to established laboratory protocols and schedules. Quidel does not require preventative
maintenance for the instrument as a requirement.
◼Turn off Solana when not in use.
Safety Precautions
Solana is designed to provide safe and reliable operation when used in accordance with instructions in this
User Manual. If Solana is used in a manner not specified in the User Manual, the protection provided by the
equipment may be impaired.
All warnings and precautions should be followed to minimize personal injury or damage to the device.
Warning!
To reduce the risk of electrical shock:
◼Unplug Solana before cleaning. Should the Solana instrument need to be moved for bench-top cleaning,
please engage the transport lock prior to doing so. See Transport Lock section for details.
◼Plug the device into an approved, properly installed receptacle or Universal Power Supply.
◼Do not immerse in water or cleaning solutions.
◼Do not open instrument housing or disassemble the device.
◼Use the appropriate power cord for the region.
Failure to follow these warnings invalidates the warranty.

9
Potential Biohazard!
To reduce the risk of biohazard:
◼Treat specimens as potentially biohazardous material.
◼Dispose of used specimens in accordance with applicable local, regional, and national requirements.
◼Clean Solana per the Maintenance and Cleaning section prior to storage, transport, or disposal.
◼Seek specific training or guidance if you are not experienced with specimen collection and handling
procedures.
◼Use well-fitting nitrile, latex, or other impermeable disposable gloves when handling patient specimens or
known positive samples.
Caution!
To reduce the risk of incorrect results:
◼Trained and qualified operators should operate Solana.
◼Refer to the assay-specific package insert for details on specific tests.
◼Use the assay kit before the expiration date.
To reduce the risk of Solana damage:
◼Solana is designed for countertop operation under normal laboratory conditions.
◼Solana is not designed to withstand moisture, extreme humidity, or extreme temperatures.
◼Solana is not designed to withstand severe shock or vibration.
◼Do not open instrument housing or disassemble the device.
◼Do not use bleach on the tube holder.
Failure to follow the precautions mentioned above invalidates the warranty.
To reduce the risk of environmental contamination:
◼If the inside of the Solana is contaminated, please contact Quidel Technical Support.
◼Clean Solana per the Maintenance and Cleaning section prior to return or disposal.
◼Dispose of Solana and accessories in accordance with local, regional, and national requirements.

10
Intended Use
Solana is a stand-alone instrument which is able to run up to 12 tubes of Solana diagnostic assays.
It should only be used according to the safety precautions outlined in the Brief Warnings, Precautions and
Limitations section. Solana is only compatible with Quidel Solana assays run by trained qualified personnel.
Product Description
Solana uses isothermal, helicase-dependent amplification and fluorescent, probe-based detection that is
illuminated by an ultraviolet (UV) and visible light source to generate specific results.
Each reaction tube contains an internal process control that is also read via fluorescence. This ensures that
amplification has occurred within the reaction tube to permit an accurate reading.
Solana then displays the test results to the user (e.g., Positive, Negative, Invalid) on the screen. These results
can be printed on an integrated or networked printer, label printer, saved on a USB flash drive, and/or sent to
a Laboratory Information System (LIS).
System Components
The following system components are included:
◼Solana instrument
◼Power supply and cords
◼Ethernet cord
◼Dymo LabelWriter 450 printer
◼Dymo LabelWriter 450 printer labels
◼Stylus
◼Workflow tray
◼Transport rack
To place an order, please contact or fax Quidel Customer Service.
Solana consumable assay reagent kits and External Quality Control materials are provided separately.
Contact Quidel Customer Service or visit the Quidel website for a list of approved Solana assays.
System Display
Solana has a 6 inch × 3.5-inch color touchscreen user interface.

12
Figure 3

13
Set-up and Connection Procedures
Unpacking of Solana
Inspect the shipping container for obvious damage prior to opening. Unpack the contents, placing Solana
upright on a dry, stable, and level surface. Carefully examine the Solana for damage. Check that all other
system components are provided (see System Components section) and are in good condition.
In case of damage or any missing parts, contact Quidel Technical Support.
Placement of Solana
The Solana is portable and can be moved to a suitable location for testing or storage when locked properly.
When moving the instrument, lock the mechanical transport lock. See the Locking and Unlocking
Solana section for instructions on locking and unlocking the instrument and shutting down.
The Solana must be placed on a dry, stable, and level surface and within the operating conditions specified in
the Technical Specifications section. The location needs to be within reach of an appropriate wall electrical
outlet and other wired connections (e.g., Dymo printer). In addition, it should be placed with enough
surrounding space to perform the following functions:
◼Easily open and close the tube lid heater to insert or remove the reaction tubes
◼Easy access to all connection ports on the back of the unit should be considered during placement of
instrument, such as the connector for the power supply, in case of emergency or under abnormal
operating conditions
The measured signal may change due to following:
◼Changes in ambient light levels
◼Contamination of the optical parts (Ex. Corrosion from bleach and sample leakage)
◼Electromagnetic interference
◼Temperature changes (Ex. Placing under air vents and direct sunlight.)
◼Mechanical movements (vibrations). (Ex. Centrifuges and large machines.)
Do not place Solana in a location that is subject to vibrations, such as near machines that vibrate, shake,
or spin. Solana is a highly sensitive and precise optical instrument.
Do not place Solana in a location that will subject it to sources of direct airflow, such as an overhead air
vent or an adjacent instrument with a fan vent. Direct airflow can affect Solana Instrument’s ability to maintain
proper temperature.
Do not place Solana near sources of intense light (e.g., direct sunlight). Solana has internal correction for
normal levels of ambient light, but highly intense light falling into the tube holder port may cause significant
interference with the measurement.
Do not place Solana directly next to a microwave or source of electromagnetic interference.
Do not expose Solana to ambient temperatures outside 15°C to 35C.

14
AC Power Connection
◼Solana operates at: 100–240 VAC, 0.5 A, 50–60 Hz.
◼Use the provided power supply only. Use of a temporary power cord (e.g., extension cords, power strips) is
to be avoided. A Universal Power supply can be used.
◼Connect Solana to a properly installed electrical outlet or Universal Power Supply.
Plugging and Unplugging Solana
◼With the flat side of the instrument connector facing down, hold firmly to the connector and plug into the
power port in the back of Solana (Figure 4).
◼Plug the outlet connector to a properly installed electrical outlet.
Figure 4
◼To unplug the unit, hold firmly to the instrument connector (Figure 5) and unplug from the instrument
port. Do not unplug by pulling on the cord. Pulling on the cord will cause the instrument connector to
loosen and not connect to the instrument correctly.
Figure 5

15
Locking and Unlocking Solana
Transport Lock
The Transport Lock feature is used to lock and shutdown the instrument before moving or shipping.
Upon initial shipment from the manufacturer, the Solana Transport lock will be engaged.
To disengage the Transport Lock upon initial setup and when properly set for relocation:
◼Power up the Solana (see Startup Solana).
◼When the message to unlock the transport lock is displayed (Figure 6) place Solana on a stable surface.
Facing the front of the instrument, tilt the instrument to stand on its left side.
◼Unlock the unit by sliding the lever to the unlocked position (see Figure 7).
Figure 6
Figure 7
◼Touch the button after confirming the instrument is unlocked. Note: This message does not appear
if the unit was powered down using normal shutdown procedures (shutdown without activating the
onboard transport lock or locking the instrument manually).

16
To engage the Transport Lock for relocation or shipment:
◼Proceed to System Maintenance Transport Lock.
◼Touch the Transport Lock button.
◼Touch the button to confirm lock and shutdown.
◼The message below (Figure 8) appears briefly while the instrument prepares for lock.
Figure 8
◼A new message instructs the user to set the transport lock (Figure 9)
Figure 9
◼Lock the device.
◼Keeping Solana on a stable surface, tilt the unit left to sit on its left face.
◼Move the transport lock lever into the locked position.
◼Return the unit to the upright position.
◼Touch the button to confirm the instrument is locked.
The instrument automatically shuts down.

17
Startup Solana
Power Up
◼Press and hold the power button (Figure 1) for approximately 2 seconds. The display screen lights up
with the Quidel logo (Figure 10). The instrument initializes, and the power indicator light turns green.
Figure 10
◼During initialization, Solana displays a self-check screen (Figure 11). An internal self-check is performed to
ensure that values from internal reference standards are within a defined range. Solana compares internal
settings with an internal solid fluorescence standard.
◼While the Solana remains On, an internal self-check will automatically occur every 15 hours.
◼In case of a Self-check failure, please refer to the Troubleshooting section or contact Technical Support.
Figure 11

18
General Operation
Procedural Notes
The default user ID and password for the Administrator is “Admin” and “admin”, respectively. Passwords
should be changed and managed in accordance with your organization’s procedures. A temporary (valid for 24
hours) Administrator-level password can be obtained by contacting Quidel Technical Support and supplying
the instrument serial number, located on bottom of instrument.
Solana has a touchscreen display. Touch an icon to select the desired action. To type information, touch the
entry field to activate the touchscreen keypad and touch the keys on the screen.
◼Touch the green checkmark button to confirm/save changes, selections, or actions on most
screens.
◼Touch the red stop button to exit menus, cancel changes, selections, or processing on most
screens.
◼Touch the blue stop button to delete selections, field information, Method Files, and test runs.
◼Touch the Home button to go to the Main Menu.
◼Buttons that are grayed out represent actions that are not available. For example, the network button
is grayed out because Solana is not connected to the network.
◼Solana goes to sleep after 20 minutes of inactivity while in Sleep Mode and completely shuts down after 2
hours. Press the power button to activate Solana.
◼If Sleep Mode has been turned Off, Solana will always remain on and active.

19
User Login
If User Access Control is turned On, the login screen is displayed (Figure 12) and the user must enter the User
ID and Password to proceed to the Main Menu. If User Access Control is turned Off, login is not required and
the Main Menu appears. See User Logout section below. Refer to the User Access Control section for details
on modifying this feature.
Figure 12
If User Access Control is On, each user should log out after use.
◼Touch the logout icon in the Main Menu (Figure 14).
◼Touch the button to confirm logout (Figure 13).
◼Type in the User ID and Password information.
◼Alternatively, scan a barcode with user ID.
◼Touch the Enter (return) key to enter the settings.
◼The Main Menu (Figure 14) appears if the login information entered is correct regardless of internal
calibration pass/fail status, the Main Menu will always appear.
Other manuals for Solana
1
Table of contents
Other Quidel Laboratory Equipment manuals
Popular Laboratory Equipment manuals by other brands

PASCO
PASCO ME-9430 Instruction manual and experiment guide

Hettich
Hettich UNIVERSAL 320 operating instructions

Tuttnauer
Tuttnauer E Series Technical manual

SI Analytics
SI Analytics TitroLine 6000 operating instructions

Thermo Scientific
Thermo Scientific Accela Pump installation guide

DeNovix
DeNovix CellDrop FL user guide