RA Fischer The Fischer User manual


Instruction Manual The Fischer R13 page 1 of 33
User Manual
The Fischer®Tap Water Iontophoresis Device
Item No. 07-80-000-10
Thank you for choosing RA Fischer Co.
The Fischer®has been designed to be more powerful and easier to use than
conventional iontophoresis devices. Setup and start treating in less than 5-
minutes! This user manual will guide you through setting up The Fischer®,
familiarize you with its 3-button interface and functions, and provide
hyperhidrosis treatment recommendations. Please read the following carefully.

Instruction Manual The Fischer R13 page 2 of 33
1 Scope of Delivery
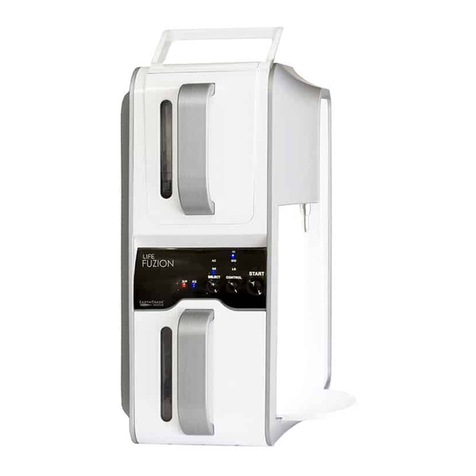
The Fischer®Tap Water Iontophoresis
Catalog No. 07-80-000-10
Main control unit, 2 water bath trays, 2 silicone-graphite electrodes, 2 foam
inserts, 2 electrode cables, power adapter, user manual, storage bag.

Instruction Manual The Fischer R13 page 3 of 33
2 Accessories and Spare parts
The Fischer®can be supplemented with the following add-ons:
Set of silicone-graphite
electrodes with sponge pads for
underarms,
(size sponge pad: 3.7” x 2.6”)
Catalog No. 07-80-007-02
Material (electrode): silicone-
graphite-compound
Buffer: none
The foam inserts and sponge pads are wearable parts and need to be replaced
approx. every 18-months. Any spare parts are deliverable upon request.
3 Safety Guidelines
Caution: U.S. Federal law restricts this device to sale by or on
the order of a physician. In other words, if you live in the U.S.
you need a prescription to purchase The Fischer®.
The Fischer® may only be powered by the adapter provided,
which has been specially designed for this device. The use of
non-original parts may be hazardous to the user and even lead
to death. Use of accessories, transducers and cables other than
those specified or provided by the manufacturer of this
equipment could also result in increased electromagnetic
emissions or decreased electromagnetic immunity of this
equipment and result in improper operation. Using non-original
spare parts and accessories immediate voids warranty.
Use of this equipment adjacent to or stacked with other
equipment should be avoided because added pressure could
result in accidental damage. If stacking of equipment becomes

Instruction Manual The Fischer R13 page 4 of 33
necessary, The Fischer® and any other equipment should be
observed to verify that they are operating normally.
Place The Fischer® and water bath trays on a firm, level surface.
Please always cover the treatment electrodes with the foam
inserts or sponge pads provided; otherwise, you might risk
burns (electrical burn injuries, current marks). Avoid direct
contact with the electrodes!
Do not use the wearable parts (foam inserts and sponge pads)
for more than 18-months and replace them on time.
Make sure that The Fischer® is stored at room temperature
before you power it up. Depending on storage conditions, the
temperature adaptation may take up to 2 hours.
Prior to starting a treatment session, please remove any metallic
jewelry (rings, watches, bangles etc.), as electric current
concentrations in these regions might result in minor injuries
(local electrical burns, current marks).
Any small skin lesions or breaks must be covered with
petroleum jelly (Vaseline) to insulate them from the current flow.
Depending on the current strength selected, users may
experience tingling or stinging sensations (discomfort) during
the treatment.
If the current is set too high, you may experience painful
sensations all over the treated extremities.
You may remove your hands or feet safely from the treatment
trays any time. In very rare cases, unpleasant electric shocks
may occur; these are, however, absolutely harmless.

Instruction Manual The Fischer R13 page 5 of 33
During the first treatments, you may experience increased sweat
production; these symptoms will spontaneously abate after the
next few treatment sessions.
The treated skin can show signs of dehydration like flaking or
small lesions. Should this be the case, please apply a
rehydrating cream after treatment.
Immediately following a treatment session, occasional redness
may be observed. This is temporary and a sign that the
treatment is working (stimulating capillaries). In rare cases,
blistering may occur. Reducing the treatment intensity can
minimize the appearance of these symptoms. Before
administering a new treatment session, the skin has to heal
completely. In case of an unexpectedly strong skin reaction, a
medical professional must be consulted before further
treatments are administered.
You may not be treated by two devices simultaneously.
The device may not be modified.
Keep out of reach of children unless otherwise supervised. Do
not leave the device unattended. Risk of strangulation and
injuries.
Portable RF communications equipment (including peripherals
such as antenna cables and external antennas) should be used
no closer than 30 cm (12 inches) to any part of the device,
including cables specified by the manufacturer. Otherwise,
degradation of the performance of The Fischer® could result.
Follow the recommended separation distances listed in
appendix 1.
Disconnect the power supply from the socket if a thunderstorm
approaches or if you do not plan to use The Fischer®for an
extended period of time.

Instruction Manual The Fischer R13 page 6 of 33
Position the device so that you can unplug the power supply unit
from the socket anytime.
The Fischer® is designed for indoor use only. Do not expose it to
rain or humidity.
If you wish to clean The Fischer®, pull all plugs from the socket
and switch it off. Use a soft, damp cloth and a mild cleaning
solution to clean the device.
Make sure you do not pull the cable too hard and do not expose
the cable to heat or chemicals. If a cable is damaged, unplug it
from device or electrode, respectively, and have it checked by
RA Fischer Co.
Do not open the device. There are no control elements inside.
The treatment system may only be serviced by RA Fischer Co.
Warning: Potential systemic adverse effects may result from use
of this device. Drugs or solutions delivered with this device have
the potential to reach the blood stream and cause systemic
effects. Carefully read all labelling of the drug or solution used
with this device to understand all potential adverse effects and
to ensure appropriate dosing information. If systemic
manifestations occur, refer to the drug or solution labelling for
appropriate action.
Warning: Do not use when a thunderstorm is in the vicinity.
Warning: The long-term effects of chronic electrical stimulation
have not been established.
According to EN60601-1-2 The Fischer®device does not have any essential
performance characteristics that are not related to the basic safety.

Instruction Manual The Fischer R13 page 7 of 33
4 Symbol Legend
Symbols used in the user manual and on the device:
Specific warnings,
are not otherwise
found on the label
Prescription use
only
Read the user
manual!
Applied part type
BF
Catalog No. Protection class II
– double insulated
Batch Code
Manufacturer
UDI (Device and
product identification)
5 Intended Use
The Fischer® is a Tap Water Iontophoresis (TWI) device intended to treat
hyperhidrosis (pathological sweating) affecting hands, feet, underarms, or all
three. Any other use or usage beyond this scope is considered un-intended use
and may have dangerous consequences.
The Fischer®is intended to be used in closed rooms. Allow the device to reach
room temperature before conducting a treatment. The Fischer®may only be
used in a dry environment. The required minimum distance to shortwave
microwave devices depends on their frequency and transmission power and is
defined in the EMC tables (see attachment 1). For additional information, please
refer to item 9 in the user manual.

Instruction Manual The Fischer R13 page 8 of 33
When starting treatment, sessions should be performed four times per week and
not more than once daily for approx. 15-minutes each. After about 10
treatments, sweat secretion decreases to normal levels. Due to the reversible
character of the therapy, a long-term treatment (maintenance schedule) is
indicated with sessions lasting approx. 15-minutes, to be conducted once or
twice per week, depending on the severity of the clinical symptoms. For cleaning
and disinfecting, please refer to item 12 in the user manual.
Any use beyond this scope is considered “not according to intended use.” The
manufacturer cannot accept any responsibility for personal injury or material
damage that is or might be caused by usage beyond the scope of “intended
use.”
6 How Iontophoresis Works
Treatment with The Fischer®is conducted by directing an electric current to the
affected body regions. A contact of water (by means of a water bath or wet
sponge) facilitates this current flow which leads to a reduction of the sweat
secretion of the treated skin regions.
To put it simpler: imagine your skin is a sponge. The Fischer® uses an electric
current to push the natural minerals found in tap water into the holes (your
sweat pores) “plugging them up” to create a long-lasting dryness barrier.
This therapeutic effect has been validated in numerous medical studies; a
scientifically unambiguous explanation for its mechanism of action is still
outstanding. Medical experts assume that the electrical current irritates the
synaptic connections between sweat-inducing nerves and sweat glands to such
an extent that the sweat glands are no longer stimulated to secrete sweat. This
means the sweat gland itself is not impacted but merely the “supply line“ to the
nerves. The therapeutic effect only occurs after repeated treatment and is
of reversible nature, hence, treatment is to be repeated regularly.
The intensity (amperage) of the current must be adjusted according to the
individual’s sensitivity. There is no danger or risk to you as the current is limited
to certain maximum values.

Instruction Manual The Fischer R13 page 9 of 33
7 Indications
The Fischer®is used to treat hyperhidrosis, a medical condition marked by
excessive sweating of the hands, feet, underarms, or all three.
8 Contraindications and Side Effects
Under no circumstances should Iontophoresis be performed if any
of the following applies:
•User/s with a pacemaker
•User/s with an implanted cardioverter defibrillator (ICD)
•Pregnancy
•Metal-containing intrauterine pessary (only relevant in
case of feet treatment)
•Metallic implants present in the current path (hands or
feet)
•Large skin defects / wounds that cannot be covered with
Vaseline
•Any area where sensation is absent or impaired (e.g.
polyneuropathy)
•User/s with palpitations (cardiac arrhythmia)
•User/s with seizure disorders (epilepsy)
•User/s with potentially malignant lesions, acute localized
infections, skin eruptions, or swollen, broken, or inflamed
areas
•User/s with severe local inflammation or thrombosis
(blood clots)
•User/s with severe vascular disorders
The following side effects may occur:
•A tingling and burning sensation during the treatment
caused by excessive current settings or open areas of
the skin
•Slight, but harmless, shocks when treatment is
interrupted
•Dry skin after the treatment

Instruction Manual The Fischer R13 page 10 of 33
•Short-term reddening of the skin following the
iontophoresis treatment, caused by a stimulated
circulation (hyperemia), amongst others
•Blistering and electric burns caused by excessively high
current strength
9 Initial Operation
The device may only be used with the power supply unit that corresponds with
the power supply specified on the rating plate. To ensure safe operation The
Fischer®, all its cables, plugs, control elements and housing components must
be in faultless condition. Prior to each use, check the device for possible
damage; a defective unit should not be used for treatment. Pay attention to the
references on the unit and in this user manual. Switch the unit off after each
treatment session.
10 Treatment Setup
10.1 Setup for hands and/or feet
Set up your device as follows:
•Place the water bath trays on a level and firm surface. If you only treat
your hands, place both trays next to each other on a table. If you only
treat your feet, place both trays next to each other on the floor. If you
treat hands and feet simultaneously, position one tray on the table and
one on the floor.
•Connect an electrode cable to
each electrode and plug them
into connectors E1 and E2 at the
back panel of the main control
unit (see picture). The selected
connection configuration (e.g. left
electrode to E1 and right
electrode to E2) should be
adhered to for the next treatment
sessions.
•Place an electrode into each water bath tray.

Instruction Manual The Fischer R13 page 11 of 33
•Carefully cover each electrode with a blue foam insert.
•Now fill both water bath trays with enough tap water (approx. 2-5 cups)
so that the foam mat is covered with enough water to cover the area
being treated. A good sign that
you’ve added the right amount of
water: the palms of your hands
and/or soles of your feet are
completely wetted by water and
the outsides of your fingers and/or
toes are partially covered. Unless
you suffer from sweating on the
tops of your hands and/or feet,
refrain from submerging your
entire hand/foot in water.
Tip: Use lukewarm water to
make the treatment more
pleasant and help keep your
skin pores open.

Instruction Manual The Fischer R13 page 12 of 33
10.2 Setup for the underarms
Prior to applying the axillary electrode, clean skin areas. Remove ointments,
creams, and cosmetics.
For hygienic reasons, the sponge pad should only be used by one person.
To avoid possible current-induced skin damage, the silicone-graphite electrode
must be completely and firmly pushed into the sponge pad sleeve.
Before starting a treatment session, thoroughly soak the sponge pad and do not
wring them out! To ensure current flow, the sponge pad must be soaking wet.
It might be necessary to re-soak them during the course of a treatment session.
If necessary, simply pause treatment and soak the sponge pad again.
When ready, insert the moistened sponge pad sleeves, with the connector
cables pointing to the front, under your arms. Keep them in place by applying
slight pressure with your arms. If possible, avoid abrupt movements during the
treatment, since these can cause
current fluctuations.
Should you experience irregular
tingling or a strong burning sensation,
soak the sponge pouches again and
lower the power level.
Tip:
You can wrap a towel around your
chest and protect yourself from the
leaking water.
Note
It is imperative that after every treatment you keep the sponge pads clean and
pull the electrodes out of the pads for drying. Do not store the silicone-graphite
electrodes in the sponge pad sleeves.

Instruction Manual The Fischer R13 page 13 of 33
11 Treatment Recommendation
11.1 Parameter Settings
Before you place your hands/feet into the water bath trays, or insert the axillary
electrodes with the wet sponge pads under your arms, turn on the device. The
main power switch is located on
the back panel of the main control
unit (pictured right). The display
now shows all treatment settings.
Adjust the current setting (which
is always shown in blue) by
pressing the buttons < >.
Pressing the SET-button will take
you to the next line and you can
change these settings (including
treatment time, direct or pulsed current, and automatic or manual polarity
switch).
There is no start button. Once the main control unit has been turned on and
the current level has been set, you’re ready to begin treatment. Place your
hands/feet into the water bath trays. You should feel a mild tingly sensation. On
screen, you’ll notice the Active Treatment Display (ATD) generating a bar graph
as the current level slowly ramps up.
Treatment Duration [min:sec]
The initial factory setting for treatment
duration and current strength is “1 min”
and “1 mA” respectively. After your first
treatment, The Fischer®automatically
saves the last settings used.
Set the treatment duration in minutes.
If you have selected the manual polarity switch (E1 << E2 or E2 << E1), choose
a treatment duration of 10 to 15 minutes. If you chose the AUTO setting
(automatic polarity switch), select a treatment duration of 15 to 20 minutes. If the

Instruction Manual The Fischer R13 page 14 of 33
sensation during treatment becomes too unpleasant, reduce the current level
rather than the duration time.
Current Setting [mA]
For the first treatment, adjust the
setting to a low current from 1 to 3
mA. Thereafter, increase it according
to your personal preference.
Everyone’s body resistance to
iontophoresis is different, so some
patients can start out treating at a
higher level, while others have to start low and work their way up gradually.
Iontophoresis should not hurt. Always treat within acceptable comfort levels. A
tingling or warming sensation is normal and means the treatment is working.
The current strength is displayed in mA (milliampere) units.
Especially at the onset of the therapy, the user must determine for him/herself
which current strength is tolerable. Within limits, the individual tolerance can
also fluctuate between the applications or change over the course of multiple
treatments until a higher current level can be tolerated.
Sensitivity also depends on the extremities being treated – notably, your feet are
the least sensitive, while your underarms and palms of your hands are more
sensitive.
Patients treating both hands and feet at the same time require a higher current
level due to the doubling of skin surface area being treated.
Tip:
For your first treatment session, ask a second person to gradually increase the
current while your hands/feet are in the water bath trays. This helps establish a
baseline for your sensitivity to the treatment. Don’t worry if you start low. You
can always increase over time as you acclimate to iontophoresis.

Instruction Manual The Fischer R13 page 15 of 33
Current form [DC (direct) /PC (pulsed)]
The Fischer®gives you the option to
choose between direct current or
pulsed current treatments. The direct
current setting is symbolized by a solid
bar; pulsed by a broken bar (pictured
right).
Direct current (DC) is more effective than pulsed current based on experience.
With direct current, power slowly ramps up and maintains the maximum value
throughout the treatment.
Pulsed current (PC), on the other hand, it’s perceived as being more
comfortable because patients can tolerate higher currents. However, pulsed
current is not as effective because you is only receiving a small portion of the
treatment at the maximum value. Instead of maintaining the maximum value
throughout the treatment, pulsed current fluctuates the current up and down.
Put it this way: what’s the more effective way of driving down the highway?
Accelerating to 65 mph and keeping a steady speed until you reach your
destination and then slowing to a stop? (direct current) Or accelerating to 100
mph, then decelerating down to 0, then re-accelerating back up to 100, all the
way down the highway? (puled current) Sure, you were technically “going faster”
in our pulsed current metaphor (100 mph vs 65 mph), but did it really get you to
your destination any faster?
Pulsed current should only be selected in those cases where direct current is
perceived as being too painful even at relatively low current values, or if your
skin is highly sensitive. Additionally, patients who are seeing a reduction in
sweating may choose to switch to pulsed current for their regular maintenance
sessions.
Direction of Current Flow [E1/E2]
We recommend starting out in the
AUTO mode. This will automatically
switch the polarity from positive to
negative between the two silicone-
graphite electrodes (labeled E1 & E2).

Instruction Manual The Fischer R13 page 16 of 33
Note: It does not matter if E1 is on the right or left; the electrodes can be placed
interchangeably in either water bath tray.
You can also change the direction of current flow manually by alternating
between the modes (E1 >> E2) and (E1 << E2). The arrows indicate the
selected direction of current between jacks E1 and E2 on the rear of the device.
Why would anyone want to switch
polarities manually? Some patients
have reported seeing a faster sweat
reduction in the extremity being treated
on the positive polarity.
TIP: the arrows always point to the
positive electrode. While it doesn’t matter which electrode is placed on the
left/right or table/floor (for patients treating hands and feet at the same time),
knowing which electrode is positive can help you focus the treatment for faster
results.
For example, instead of taking 2-weeks to see drier results in both hands on
AUTO, you could see a reduction in sweat in your right hand in less than a week
by treating it with the positive electrode on manual.
Pressing the “Set-button” will take you back to the top line (treatment
duration).
11.2 Conducting Treatment
The device is ready to operate after
you confirm the settings are correct by
pushing the SET-button at least once.
Start by placing your hands/feet into
the water bath trays or by placing the
wet axillary electrodes under your arms
(you’ll hear a short “beep” that
indicates you’ve completed the circuit and treatment has begun). As soon as

Instruction Manual The Fischer R13 page 17 of 33
current flows, the Active Treatment Display (ATD) flashes and the treatment
timer starts counting down.
At the onset of therapy, the current flow is slowly increased until the value
indicated has been reached. The ATD shows bars to the left and right of the set
current value, helping you visualize the treatment as it ramps up. A full-bar
indicates that the current flow maximum value has been reached.
Should The Fischer®detect irregularities in the power circuit during a treatment
session (e.g. caused by movements of the hands or feet) the device shuts down
the current and then slowly reboots to the set point. This is the Anti-Shock
Guard.
During treatment, only the milliamperes can be adjusted. All other settings can
only be changed after having turned the device off/on.
The device switches to “pause mode”
when you remove your hands/feet from
the tray and thus interrupt the current
flow. You’ll notice the current symbol
stops blinking on the ATD; the
treatment timer stops and the
remaining time blinks. Additionally, the
device beeps to indicate that the treatment has been paused. Once your hands
and/or feet are placed in the water bath trays again, the treatment session
continues.
The milliamperes are ramped down towards the end of the treatment to allow
your body to gradually readjust. Do not remove your hands/feet from the tray
until the timer reaches zero and the device has beeped three times, thus
indicating that the treatment session is complete.
The device switches to short-circuit
mode if it detects an unnaturally low
total resistance, e.g. because two
electrodes have been placed in a tray.
The short-circuit mode is indicated by a
continuous beep as well as the
“Caution symbol” appearing on screen
(pictured right). Once the error has been fixed, the screen displays treatment
settings again.

Instruction Manual The Fischer R13 page 18 of 33
Only after the treatment session is complete should you turn off The
Fischer® using the main on/off switch.
This manual suits for next models
1
Table of contents
Popular Air Ionizer manuals by other brands

Fagron
Fagron ION-e Standard user manual

GLOBAL PLASMA SOLUTIONS
GLOBAL PLASMA SOLUTIONS GPS-FC48-AC operation & maintenance

Terra Universal
Terra Universal 2006-01 QUICK START OPERATING GUIDE

Plasma Air
Plasma Air PlasmaPURE AutoClean 1500 Installation, operation & maintenance manual

Desco
Desco TB-2016 Technical bulletin

Vessel
Vessel Stat-Clean F-6BF-E instruction manual