manuals.online logo
Brands
  1. Home
  2. •
  3. Brands
  4. •
  5. Rachio
  6. •
  7. Controllers
  8. •
  9. Rachio IRO User manual

Rachio IRO User manual

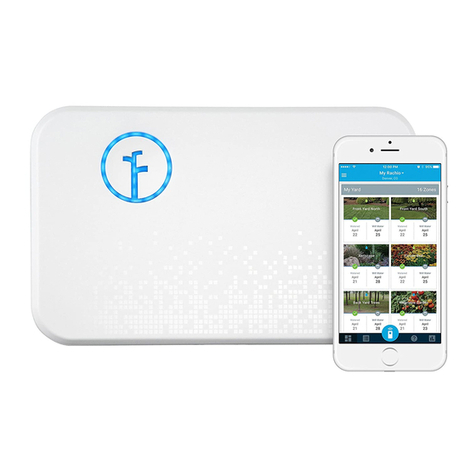
Iro Smart Controller
Installation Guide
WHAT’S INSIDE SUPPORT LINKS
HELPDESK
www.support.rach.io
EMAIL
support@rach.io
TELEPHONE
844-4-RACHIO (844-472-2446)
COMMUNITY
www.community.rach.io
WARRANTY
www.rach.io/warranty
RETURNS
www.rach.io/returns
Do not return to retailer. Contact us first.
RETURNS
If, for any reason, you are not completely satisfied
with your product purchased from the Rachio
store, you can return it within 30 days of shipment
for a full product refund.
TEST
Test your existing timer first. If it does not work,
please make repairs before installing the Iro. Test
WiFi with your smartphone at old timer location.
OUTDOOR
Outdoor Installation?
You NEED a weatherproof enclosure. Visit
www.support.rach.io for additional support.
Front Panel
24v Power Adaptor
Wall Mount
Screws (2)
Enjoy your yard.
RAC-0000020
HARDWARE INSTALLATION
Remove Old Irrigation Timer
A: Unplug your old timer (test system before doing so).
B: Take a picture of your wiring
setup using your iPhone or
Android (for reference).
C: Label the important wires on
the old timer (important wires
include the common wire,
master valve/pump valve, rain
sensor, and any other non-
zone wires).
D: Remove the old timer from the wall.
Mount the Iro
A: Install the Iro Wall Mount to
the wall using 2 screws
(screws included).
B: Reconnect the wires to the Wall
Mount terminals. Zone wires go
in the green slots. Common wires
go in the white slots. Sensor wires
(rain – if present) go in the yellow
slots. Master/pump valve wire (if
present) go in the blue slot.
NOTE: If you connect wires to the
yellow or blue slots, they must be
activated within the app.
Tips for wiring:
- Common wire (C/COM) color is usually white.
- Rain Sensor wire (R/SEN) color varies – diagrams
available in support website.
- 24VAC wires are not needed with the Iro.
- Enclosure required for hard wiring installations
and/or outdoor installation.
- To release wires, push down on wiring terminal
with small screwdriver.
- Only install one wire
per wire slot.
C: Install the Front Panel to
the Wall Mount (simply push
it into place).
Connect Wires
Congratulations on purchasing
the Iro and joining the Rachio
community! If at anytime you need
assistance please feel free to contact
us through our support channels
which you can find on the back of
this manual.
BLINK UP
Download the App
www.rach.io/appstore
Check WiFi at
Controller Location
Apple or Android device
required for Blink Up.
WiFi Credentials Needed
Blink Up the Iro
Tap the BLINK UP button on the
app to “Blink” your WiFi credentials
over to your device using your
smartphone screen.
WiFi Status Lights Troubleshooting
Visit www.support.rach.io for additional information.
APP CONFIGURATION
Set Up Zones (tutorial on app)
Watering Times (pop up after set up zones)
SUPPORT
Included in the app is a ‘Help’
option, which will link you directly
to our support website where you
can keyword search your question(s)
or contact our support team.
Attach Controller
Master/Pump V
alve
*16 Zone Model Only
Sensors
2nd Common Wir
e
Common Wire
910
11
12
13
14
1516
12345678
Zones 1-8
Zones 9-16*
Attach Wall Mount

Other Rachio Controllers manuals

Rachio 680474003150 Specification sheet

Rachio

Rachio 680474003150 Specification sheet

Rachio Generation 2 User manual

Rachio

Rachio Generation 2 User manual

Rachio Iro User manual

Rachio

Rachio Iro User manual

Rachio 3 User manual

Rachio

Rachio 3 User manual

Rachio 8ZULW Specification sheet

Rachio

Rachio 8ZULW Specification sheet

Rachio 3 Specification sheet

Rachio

Rachio 3 Specification sheet

Popular Controllers manuals by other brands

Festo LR G Series operating instructions

Festo

Festo LR G Series operating instructions

Nevco 717 Football Operator instructions

Nevco

Nevco 717 Football Operator instructions

ABB COM600 series user guide

ABB

ABB COM600 series user guide

ABB PSTX30 Spare part instruction

ABB

ABB PSTX30 Spare part instruction

dixell XC660D Installing and operating instructions

dixell

dixell XC660D Installing and operating instructions

Outback Power Systems MX60 Installation, programming, and  user's manual

Outback Power Systems

Outback Power Systems MX60 Installation, programming, and user's manual

Truma MonoControl CS Gastank Operating instructions & installation instructions

Truma

Truma MonoControl CS Gastank Operating instructions & installation instructions

Jecod RW-4 user manual

Jecod

Jecod RW-4 user manual

Auber Instruments SYL-3615 instruction manual

Auber Instruments

Auber Instruments SYL-3615 instruction manual

JED T464 Installation and setup

JED

JED T464 Installation and setup

FASAR ELETTRONICA FE1031 manual

FASAR ELETTRONICA

FASAR ELETTRONICA FE1031 manual

Victron energy BlueSolar MPPT 150/60 manual

Victron energy

Victron energy BlueSolar MPPT 150/60 manual

HTD MC-66 Multi-Zone owner's manual

HTD

HTD MC-66 Multi-Zone owner's manual

Xilinx LogiCORE IP Product guide

Xilinx

Xilinx LogiCORE IP Product guide

Lamptron CM615 instruction manual

Lamptron

Lamptron CM615 instruction manual

IDTECK RFL200V Quick installation guide

IDTECK

IDTECK RFL200V Quick installation guide

Festo ELGS-TB operating instructions

Festo

Festo ELGS-TB operating instructions

Steca Elektronik Solsum F Series operating manual

Steca Elektronik

Steca Elektronik Solsum F Series operating manual

manuals.online logo
manuals.online logoBrands
  • About & Mission
  • Contact us
  • Privacy Policy
  • Terms and Conditions

Copyright 2025 Manuals.Online. All Rights Reserved.