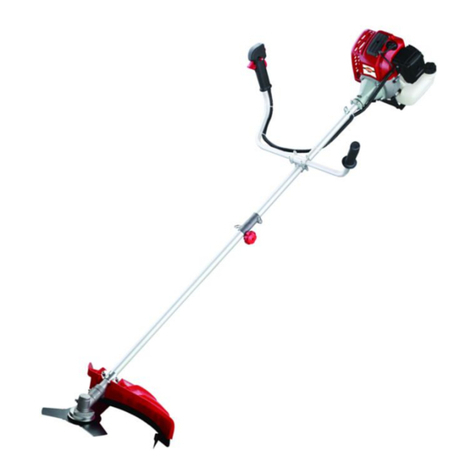
Racing RACD314TB User manual

INSTRUCTIONS ORIGINALES
PETROL BRUSH CUTTER & GRASS TRIMMER
RACD314TB
INSTRUCTION MANUAL
CAUTION : Read the instructions before using the machine !

CONTENTS
SECURITY WARNINGS ............................................................................................................................. 3
YOUR PRODUCT ..................................................................................................................................... 8
TECHNCIAL DATA…………………………………………………………………………………………………………………………………10
ASSEMBLY ............................................................................................................................................ 11
FILLING OIL TANK AND FUEL TANK ........................................................................................................ 14
OPERATION .......................................................................................................................................... 15
MAINTENANCE AND STORAGE.............................................................................................................. 18
CE DECLARATION.................................................................................................................................. 19
WARRANTY…………………………………………………………………………………………………………………………………………..20
PRODUCT FAILURE………………………………………………………………………………………………………………………………..21
WARRANTY EXCLUSIONS………………………………………………………………………………………………………………………22

3
1. SAFETY WARNINGS
Proper safety precautions must be observed. Like all power equipment this unit must be handled carefully. DO
NOT EXPOSE YOURSELF OR OTHERS TO DANGER.
Follow these general rules. Do not permit others to use this machine unless they are thoroughly responsible
and have read, and understand the machine manual and are trained in its operation.
For machines with a clutch, routines for checking that the cutting attachment stops turning when the engine
idles
Always wear safety goggles for eye protection. Dress properly; do not wear loose clothing or jewelry that
could become caught in moving parts of the unit. Safe, sturdy, nonskid footwear should always be worn.
Long hair should be tied back. It is recommended that legs and feet be covered to protect from flying debris
during operation.
Inspect the entire machine for loose parts (nuts, bolts, screws, etc.) and any damage. Repair or replace as
necessary before using the machine. DO NOT USE any attachment with this power head other than the
ones recommended by our company. Serious injury to the operator or bystanders could result as well as
damage to the machine.
Keep the handles free from oil and fuel.
Always use proper handles and shoulder strap when cutting.
Do not smoke while mixing fuel or filling tank.
Do not mix fuel in an enclosed room or near open flames. Assure adequate ventilation.
Always mix and store the fuel in a properly marked container that is approved by local codes and
ordinances for such usage.
Never remove the fuel tank cap while the engine is running.
Never start or run the engage inside a closed room or building. Fumes from the exhaust contain dangerous
carbon monoxide.
Never attempt to make engine adjustments while the unit is running and strapped to the operator. Always
make engine adjustments with the unit resting on a flat, clear surface.
Do not use the unit if it is damaged or poorly adjusted. Never remove the machine’s guard. Serious injury
to the operator or bystanders could result as well as damage to the machine.
Inspect the area to be cut and remove all debris that could become entangled in the nylon cutting head.
Also remove any objects that the unit may throw during cutting.
Keep children away. Onlookers should be kept at a safe distance from the work area, at least 15 meters.
Never leave the machine unattended.
Do not use this unit for any job other than those for which it is intended as described in this manual.
Do not overreach. Keep proper footing and balance at all times. Do not run the unit while standing on a
ladder or on any other unstable footing location.
Keep hands and feet clear of the nylon cutting head or blade while unit is in use.
Do not use this type of machine for sweeping away debris.
Do not use the unit when you are tired, ill or under the influence of medication, drugs or alcohol.
Use nylon cutting head which is free of damage. If a stone or any other obstacle is hit, stop the engine and
check the nylon cutting head.Abroken or unbalanced nylon cutting head must never be used.
Do not store in a closed area where fuel vapors can reach an open flame from hot water heaters, furnaces,
etc. Store in a locked, well-ventilated area only.
Ensure safe and proper performance of your product. These parts are available from your dealer. The use
of any other accessories or attachments may cause a potential hazard or injury to the user, damage to the
machine and void this warranty.
Clean the machine completely, especially, the fuel tank, its surroundings, and the air cleaner.
When refueling, be sure to stop the engine and confirm that it is cooled down... Never refuel when the
engine is running or hot. When gasoline spills, be sure to wipe it up completely dispose of those materials
before starting the engine.
Stay clear of other workers or bystanders by at least 15 meters/50 feet.

4
Whenever approaching an operator of the machine, carefully call his attention and confirm that the
operator stop the engine. Be careful not to startle or distract the operator which can cause an unsafe
situation.
Never touch the nylon cutting head or blade whenever the engine is running. If it is necessary to replace
the protector or cutting attachment, be sure to stop the engine and confirm that the cutting device has
stopped running.
The engine should be turned off when the machine is moved between work areas
Be careful not to hit the nylon cutting head against stones, or the ground.
Unreasonable rough operation will shorten the life of the machine as well as create an unsafe environment
for yourself and those around you.
Pay attention to loosening and overheating of parts. If there is any abnormality of the machine, stop
operation immediately and check the machine carefully. If necessary, have the machine serviced by an
authorized dealer. Never continue to operate a machine which may be malfunctioning.
In start-up or during operation of the engine, never touch hot parts such as the muffler, the high voltage
wire or the spark plug.
After the engine has stopped, the muffler is still hot. Never place the machine in any places where there
are flammable materials (dry grass, etc.), combustible gasses or combustible liquids.
Pay special attention to operation in the rain or just after the rain as the ground may be slippery.
If you slip or fall to the ground or into a hole, release the throttle lever immediately.
Be careful not to drop the machine or hit it against obstacles.
Before proceeding to adjust or repair the machine, be sure to stop the engine and detach the spark plug.
When the machine is placed in storage for a long time, drain fuel from the fuel tank and carburetor, clean
the parts, move the machine to a safe place and confirm that the engine is cooled down.
Make periodic inspections to assure safe and efficient operation. For a thorough inspection of your
machine, please contact a dealer.
Keep the machine away from fire or sparks.
It is believed that a condition called Raynaud’s phenomenon, which affects the fingers of certain individuals,
may be brought about by exposure to vibration and cold. Loss of color and numbness in the fingers. The
following precautions are strongly recommended because the minimum exposure which might trigger the
ailment is unknown.
Keep your body warm, especially the head, neck, feet, ankles, hands and wrists.
Maintain good blood circulation by performing vigorous arm exercises during frequent work breaks and
also by not smoking.
Limit the hours of operation. Try to fill each day with jobs where operating the brush cutter or other
hand-held power equipment is not required.
If you experience discomfort, redness and swelling of the fingers followed by whitening and loss of feeling,
consult your physician before further exposing yourself to cold and vibration.
Always wear ear protection, loud noise for long time can make hearing debase even lost hearing.
Total face and head protection must be wearing to prevent damage from plummet or branch.
Wear no-slip heavy duty work gloves to improve your grip on the brush cutter handle. Gloves also reduce
the transmission of machine vibration to your hands.
WARNING: The cutter area is still dangerous while the machine is coasting to a stop.
When transport, this unit must behandled carefully. Do not expose yourself or others to danger.
Envelop the blade before storage. Keep children awayfrom it.
Never remove the machine’s guard.
Do not store in a closed area where fuel vapors canreach an open flame from hot water heaters, furnaces, etc.
Store ina locked, well-ventilated area only.
Never place the machine in any places where there are flammable materials (dry grass, etc.), combustible
gasses or combustible liquids.
When the machine is placed in storage for a long time, drain fuel from the fuel tank and carburetor, clean
the parts, move the machine to a safe place and confirm that the engine is cooled down.


5
Emission of exhaust gases
National regulation can restrict the use of the machine.
Never modify a trimmer or cutter in any way.
Improper use of the machine can cause SERIOUS OR FATAL PERSONAL INJURY.
The engine exhaust form this product contains chemicals to cause cancer, birth defects, of other
reproductive harm.
•Checking regularly that the cutting attachment stops turning when the engine idles.
•Use recommended cutting attachments and appropriate. Contact your dealer or our service agent to know
which cutting attachment can be used with this tool. There are possible safety consequences from using other
cutting attachments, e.g. metal multi-piece pivoting chains and flail blades.
•Check each time before and after use, after a fall or other impacts to identify any significant damage.
Do not use the tool in case of damage. Bring it to a qualified service agent for inspection and reparation.
•Risks and problems may occur during the operation, follow the instructions in this manual to reduce these risks.
•If the machine or cutting attachment needs to be unlocked, stop using the tool, remove the spark plug. Wear
safety protection to unlock the tool.
•Do not work prolonged with the tool, take regular breaks during the operation.
•Always keep a correct posture, do not use the tool in a position that could create accidents.
Secure the machine during transport to prevent loss of fuel, damage or injury. Always put the protection
devices on the blades. Always transport the tool upright.
Put the protection on the blade when storing the tool.
•Hazards which could be encountered while using the machine (bump a foreign object, blockage of the
cutting attachment, etc.). In order to avoid hazards, inspect thoroughly the working area; remove all
hazardous material and object which may be present.
Kickback and Related Warnings
● Kickback is a sudden reaction to a pinched or snagged rotating wheel, backing pad, brush or any other accessory.
Pinching or snagging causes rapid stalling of the rotating accessory which in turn causes the uncontrolled power
tool to be forced in the direction opposite of the accessory’s rotation at the point of the binding.
● For example, if an abrasive wheel is snagged or pinched by the workpiece, the edge of the wheel that is entering
into the pinch point can dig into the surface of the material causing the wheel to climb out or kick out. The wheel
may either jump toward or away from the operator, depending on direction of the wheel’s movement at the point of
pinching.Abrasive wheels may also break under these conditions.
● Kickback is the result of power tool misuse and/or incorrect operating procedures or conditions and can be
avoided by taking proper precautions as given below.
a) Never place your hand near the rotating accessory.Accessory may kickback over your hand.
b) Do not position your body in the area where power tool will move if kickback occurs. Kickback will propel the tool
in direction opposite to the wheel’s movement at the point of snagging.
c) Use special care when working corners, sharp edges etc. Avoidbouncing and snagging theaccessory. Corners,
sharpedges or bouncing have a tendencyto snag therotating accessory and cause loss of controlor kickback.
Explanation of symbols
Warning symbol
Read instructions manual

6
Wear protective equipment: hearing protection, eye protection, and helmet
Wear protection gloves
Wear protective footwear
Caution to exhaust gases
Do not smoke and do use the tool near naked flame
The accessible part are hot when operate the tool
Caution! Risk of rebound
Keep bystanders away at least 15mm
Caution! The tool can contact to a voluminous material. Loss of control and injuries can be
created.
Cutting attachment speed
Guarantee sound power level

7
Be careful of the cutting attachment!
Residual risks
Even if you use this tool correctly, there are always residual risks. The following hazards may arise in
connection with the structure and manufacture of this power tool:
-Hearing impairment if no suitable hearing protection is worn.
-Cuts if no suitable protective clothing is worn.
-Health damage resulting from vibration in the hands and arms if the device is used for a long period of
time or is not handled and maintained properly.
-Inhalation of particles
-Inhalation of exhaust gases
-Skin contact with oil / gasoline
-Inhalation of gasoline / oil vapors
-Contact with projected objects
-Burns when touching with hot surfaces
-Prolonged use of this product exposes the operator to vibration and can produce so-called "white finger"
disease. To reduce the risk, wear gloves and keep your hands warm.
-If any of the symptoms of "white finger syndrome" occur, seek immediate medical attention. Symptoms
of the "white finger" include numbness, loss of sensitivity, tingling, pain, loss of strength, color changes or
skin condition. These symptoms usually appear on the fingers, hands or wrists. Risk increases at low
temperatures.
Intended use
This machine can be used with the cutting wire as a trimmer for cutting grass and weeds of small thickness
and in small quantity and with the cutting blade as a brush cutter for cutting denser vegetation. This machine
must not be used for cutting or other cutting operations where the cutting tool must be lifted above the
ground. This machine is only authorized for private use. Any other use or modification of this machine is
prohibited and involves high risks.

8
2. YOUR PRODUCT
a. Description
1. Air filter
2. Fuel tank
3. Oil tank
4. Recoil starter
5. Harness
6. Oil cup
7. 3 teethes blade
8. Wrench
9. Metal lock pin/ wrench
10. Nylon cutting head

9
11. Bar assembly
12. Bracket (handle part support)
13. Handle
14. Handle with throttle trigger, ON/OFF switch and throttle trigger lockout
15. Angle drive
16. Carter of protection
17. Cutting line device

10
3. TECHNICAL DATA
Engine displacement
31cm³
Maximum engine speed
Brush cutter: 9300min-¹
Grass trimmer: 8000min-¹
Maximum power
0,7kW
Mass
Empty tank: 7,3kg
Empty tank with specified attachment: 8kg
Full tank and specified attachment: 8,5kg
Volume of fuel tank
0,7l
Volume of oil tank
0,08l
Cutting diameter
Grass trimmer: 480mm
Brushcutter: 255mm
Cutting thickness
Brushcutter: 1,4mm (metal blade)
Grass trimmer: 2,4mm (non-metallic flexible line)
Cutting teeth
Brushcutter: single piece (three teeth metal)
Grass trimmer: 2 lines (non-metallic flexible line)
Blade center hole diameter
25,4mm (metal blade)
Maximum rotational frequency of the
spindle
Brushcutter: 7000min-¹
Grass trimmer: 6000min-¹
Cutting blade
JINLIFU, 10000/min (1.4X255)
Cutting string head
ROYAL, 10000/min
Gear ratio
4:3
Engine
139F ROYAL
Engine idle speed
3100±400min-¹
Clutch engagement speed
4500min-¹
Measured vibration emission value
Brush cutter:
- Left handle: 7,06m/s²
- Right handle: 6,87m/s²
K=1.5 m/s²
Grass trimmer:
- Left handle: 6,86 m/s²
- Right handle: 6,67 m/s²,
K=1.5 m/s²
Measured sound pressure level LpA
dB(A)
Brush cutter: 92.5dB(A) K= 3dB(A)
Grass trimmer: 93.3dB(A) K= 3dB(A)
Measured sound power level LwA dB(A)
Brush cutter: 107.4dB(A) K= 3dB(A)
Grass trimmer: 108.2dB(A) K= 3dB(A)
Guaranteed sound power level
113dB(A)

11
4. ASSEMBLY
a) Installation of the tube on the tool
-Unscrew the bolt (1) and remove the screw cap (2). See Fig 1.
-Insert the attachment into the connector (Fig 2).
-Make sure to fix the pin into the hole of the tube. Put back the screw cap (2) and screw the bolt on it (3).
See Fig 3.
b) Installation of the handle
-Unscrew the bracket and remove it (Fig 4)
-Install the handle in the bracket at the desired position (Fig 5).
-Reinstall the bracket and screw it with the 4 screws (Fig 6).

12
c) Installation of the carter of protection
-Remove the screws which are on the carter of protection (fig7).
-Install the tube on the carter of protection. Make sure that you have installed it in the correct position (Fig
8).
-Screw the carter on the tube with the two screws (Fig 9).
d) Installation of the nylon cutting head (for grass trimmer operation)
-Insert a metal locking tool into the hole on the side of the drive gear and on the tool drive (Fig 10).
-Remove cover bell and the holding nut from the shaft (Fig 11).
-Install and screw the nylon cutting head. Make that it is well installed.
-Remove then the metal locking tool.

13
e) Installation of metal blade (for brush cutter operation)
-Insert a metal locking tool into the hole on the side of the drive gear and on the tool drive (Fig 10).
-Remove cover bell and the holding nut from the shaft (Fig 11).
-Install, in the following order, on the shaft: the blade, the cover bell and then the holding nut (Fig 13).
-Remove the metal locking tool.
NOTE
After installation, always check if the installation is correct. If blade is not well install, it will vibrate
excessively and can cause injury. When operation, if there is abnormal vibration, immediately stop
the tool and check the installation.

14
5. FILLING OIL TANK AND FUEL TANK
a) Fuel
Warning: Gasoline is highly flammable. Keep the fuel in specially designed cans.
Only fill the tank outside and do not smoke during the operation. Avoid sparks or open
flames near the fuel.
Fill the tank before starting the engine. Never remove the fuel tank cap, add fuel while the
engine is still running, or while the engine is still warm.
Avoid overfilling the tank: When excess fuel has escaped, do not attempt to start the engine,
but move the machine away and avoid any sources of ignition in the vicinity until the fuel
vapors have dissipated.
Fully tighten all fuel filler caps and cans.
Fill the tank on the floor.
The engine must be started at a distance of at least 3 meters from where the fuel tank has
been filled.
Switch off the engine before adding fuel. Shake the mixture thoroughly before filling the tank.
Store gasoline in tanks specially designed for this purpose.
Fill the fuel tank of your appliance outdoors and avoid smoking during work.
Fill the tank before starting the engine. Never open the fuel tank cap or fill fuel tank while the
engine is running or the engine is still hot.
Avoid spilling gasoline: When gasoline is spilled, do not start the machine and move it away
from where the gasoline has spilled to avoid possible sources of fire.
Screw all caps and tank cover carefully.
This type of tool is designed to be used with unleaded gasoline. Using unleaded gasoline prevents
unnecessary pollution in the interests of your health and the protection of the environment. Using gasoline or
oil of lesser quality can damage seal rings, ducts or fuel tank.
Exhaust emissions are regulated by the basic technical characteristics of the engine and its components
(carburation, adjustment of spark plugs, control of exhaust opening and closing times) in the absence of
accessories or a catalyst during combustion.
Filling the tank
-Unscrew the tank cap.
-Fill the tank to 80% of its capacity.
-Screw the fuel cap back on. Clean the fuel tank cap and the area around after filling the fuel tank.
Eliminate overfill of fuel mixture by rubbing.

15
b) Oil
-Open the oil tank.
-By using the provided container, pour the oil in the tank. Do not overfill.
-Close the tank. Wipe off all overfill oil.
Information
Recommended oil: We recommend the use of high quality detergent oil classified for SF, SG, SH, SJ or
higher. Do not use special additives.
External temperatures determine the correct oil viscosity for the engine..
Below 4°C, the use of SAE 30 oil causes difficult start-ups.
Above 27°C, the use of 10W-30 oil can increase the oil consumption. Check the oil level regularly.
Checking the oil level
- The tool must be switch off.
- Remove the dipstick from the oil tank and wipe it off.
- Insert the oil tank dipstick into the tank, without screwing it in, and then remove it to check the oil level.
- If the oil level is near or below the lower limit of the dipstick, remove the dipstick and refill the oil tank until
the upper limit of the dipstick (bottom edge of the dipstick). Do not overfill.
Replace the oil tank dipstick.
6. OPERATION
a) Starting the tool
-Move the ON/OFF switch to “ON” position (I).
-Pull the recoil starter until engine starts.
-For the operation, push and hold the throttle trigger lockout (1) and then push the throttle trigger (2).

16
b) Stopping the tool
-Release the throttle trigger and the throttle trigger lockout.
-Move the ON/OFF switch to STOP position (O).
c) Grass trimmer operation
-Trimming
Tilt the head slowly to direct debris away from you. If cutting up to a barrier such as fence, wall or
tree, approach from an angle where any debris ricocheting off the barrier will fly away from you,
Move the line head slowly until the grass is cut right up the barrier, but do not jam (overfeed) the line
into the barrier. If trimming up to a wire mesh or chain linked fence be careful to feed only up to wire.
If you go too far the line will snap off around the wire. Trimming can be done to cut through weed
stems one at a time. Place the trimmer line head near the bottom of the weed-never high up which
could cause the weed to chatter and catch the line. Rather than cut the weed right through, just use
the very end of the line to wear through the stem slowly.
-Scalping and edging
Both of these are done with the line head tilted at a steep angle Scalping is removing top growth
leaving the earth bear.
Edging is trimming the grass back where it has spread over a sidewalk or drive way. During both
edging and scalping, hold the unit a steep angle and in a position where the debris, and any
dislodging dirt and stones, will not come back towards you even if it ricochets off the hard surface.
Although the picture shows how to edge and scalp every operator must find for himself the angles
which suits his body size and cutting situation.

17
d) Brushcutter operation
-Do not the brushcutter for cutting trees
-Do not cut with dull, cracked or damaged meal blade.
-Before cutting growth, inspect for obstructions such as boulders, metal stakes or strands of wire
from broken fences. If an obstruction cannot be removed, mark its location so that you can avoid it
with the blade. Rocks and metal will dull or damage a blade. Wire can catch on the blade head and
flap around or be thrown into the air.
-Use the shoulder harness at all times adjust both harness and harness clamp on the unit so that the
unit hangs a few inches above ground level .The cutting head and the debris shield should be level
in all directions. Harness the unit on the right side of your body.
-Cut only with the side of the blade that the debris is moving away from you.
-If kickback occurs, the blade may be dull, or the material so thick and hard that you should use other
tool instead of this machine.
-Do not force the blade to cut. Do not change the angle of cut after into the wood. Avoid using any
pressure or leverage which could cause the blade to bind or crack.
Scything weeds
This is cutting by swinging the blade in a level arc. It can quickly clear areas of field grass and weeds.
Scything should not be used to cut large, tough weeds or woody growths.
Scything can be done in both directions, or just in one way which results in the debris being thrown away
from you.
That is using the side of the blade that it is rotating away from you. Tilt down the blade slightly on this
same side. You will be hit by some debris if you scythe in both directions.

18
7. MAINTENANCE AND STORAGE
a) Air filter
-Accumulated dust in the air filter will reduce engine efficiency. Increase fuel consumption and allow
abrasive particles to pass into the engine. Remove the air filter as often as necessary to maintain in
a clean condition. Light surface dust can readily be removed by tapping the filter. Heavy deposits
should be washed out in suitable solvent.
-Remove filter cover by loosening air filter cover knob.
b) Adjusting the carburetor
Do not adjust carburetor unless necessary. If you have trouble with the carburetor, see your dealer.
Improper adjustment may cause engine damage and void warranty.
c) Fuel filter
Fuel tank is fitted with a filter. Filter is situated at the free end of fuel pipe and can be picked out through
fuel port with a piece of hooked wire Check the fuel filter periodically. Do not allow dust to enter into fuel
tank. Clogged filter will cause difficulty in starting engine or abnormalities in starting engine or
abnormalities in engine performance.
When filter is dirty, replace the filter. When the inside of the fuel tank is dirty, it can be cleaned by rinsing
the tank out with gasoline.
d) Spark plug
Do not attempt to remove the plug from a hot engine in order to avoid possible damage to the threads.
-Clean or replace the spark plug in case of ozone contamination.
-Replace the spark plug if the end of the center electrode is worn.
e) Handling and transport
-The engine should be turned off when the unit is moved between work areas.
-After the engine has stopped, the muffler is still hot. Never touch hot parts such as the muffler.
-Confirm that the fuel is not leaked from tank.
-Transport the tool in a way to prevent loss of fuel, injuries and damage.
-Dismantle the cutting head and the blade before transport and storage. Put the blade in its packing.
f) Always clean and grind the blade, check whether the blade is firmly installed before use,and check whether the
blade is damaged if it encounters obstacles. If it is not used for a long time, clean the blade surface and apply
lubricant to avoid rust.
g) Storage
-Inspect, clean and have the appliance repaired if necessary
-Empty the tank.
Switch on the appliance to consume all remaining fuel.
-Remove the spark plug and pour a teaspoon of clean engine oil into the cylinder cavity of the spark
plug, replace the spark plug
-Store cutting elements so that they cannot be touched (wrap them, for example.)
-Store in a clean, dry, dust-free area.

19
8. CE DECLARATION
GB / DECLARATION OF CONFORMITY
BUILDER
ZI, 32, rue Aristide Bergès –31270 Cugnaux - France
Tel : +33 (0)5.34.502.502 Fax : +33 (0)5.34.502.503
declares that the machine:
PETROL BRUSH CUTTER & GRASS TRIMMER
RACD314TB
Serial No: 20211189050-20211189433
the people name holding the technical file:Mr. Olivier Patriarca
have been designed in compliance with the following standards:
EN ISO 11806-1:2011
EN ISO 14982:2009
And in accordance with the following directives:
Directive Machine 2006/42/EC
Directive EMC 2014/30/EU
Rohs Directive (EU)2015/863 amending 2011/65/EU
Emission directive (EU) 2016/1628
noise Directive 2000/14/EC Annex V & Directive 2005/88/EC
Measured sound power level LwA dB(A)
Brush cutter: 107.4dB(A) K= 3dB(A
Grass trimmer: 108.2dB(A) K= 3dB(A
Guaranteed sound power level: 113dB(A)
Philippe MARIE / PDG
Cugnaux, 15-11-2021

20
9. WARRANTY
The manufacturer guarantees the product against defects in material and workmanship for a period of 2
years from the date of the original purchase. The warranty only applies if the product is for household use.
The warranty does not cover breakdowns due to normal wear and tear.
The manufacturer agrees to replace parts identified as defective by the designated distributor. The
manufacturer does not accept responsibility for the replacement of the machine, in whole or in part, and/or
ensuing damage.
The warranty does not cover breakdowns due to:
insufficient maintenance.
abnormal assembly, adjustment or operations of the product.
parts subject to normal wear and tear.
The warranty does not extend to:
shipping and packaging costs.
using the tool for a purpose other than that for which it was designed.
the use and maintenance of the machine done in a manner not described in the user manual.
Due to our policy of continuous product improvement, we reserve the right to alter or change specifications
without notice. Consequently, the product may be different from the information contained therein, but a
modification will be undertaken without notice if it is recognized as an improvement of the preceding
characteristic.
READ THE MANUAL CAREFULLY BEFORE USING THE MACHINE.
When ordering spare parts, please indicate the part number or code, you can find this in the spare parts list
in this manual. Keep the purchase receipt; without it, the warranty is invalid. To help you with your product,
we invite you to contact us by phone or via our website:
+33 (0)9.70.75.30.30
https://services.swap-europe.com/contact
You must create a "ticket" via the web platform.
Register or create your account.
Indicate the reference of the tool.
Choose the subject of your request.
Describe your problem.
Attach these files: invoice or sales
receipt, photo of the identification plate
(serial number), photo of the part you need
(for example: pins on the transformer plug
which are broken).
Table of contents
Other Racing Trimmer manuals

Racing
Racing RAC250EGT-UK User manual

Racing
Racing RAC450EPHT-UK User manual

Racing
Racing RACTHT264 User manual

Racing
Racing RAC52PB-AB-3 User manual

Racing
Racing RAC32PB-1 User manual

Racing
Racing RAC27PHT-1 Operation instructions

Racing
Racing RACTHT264-1 User manual

Racing
Racing RAC26PHT-3 User manual

Racing
Racing RAC52PB-C User manual