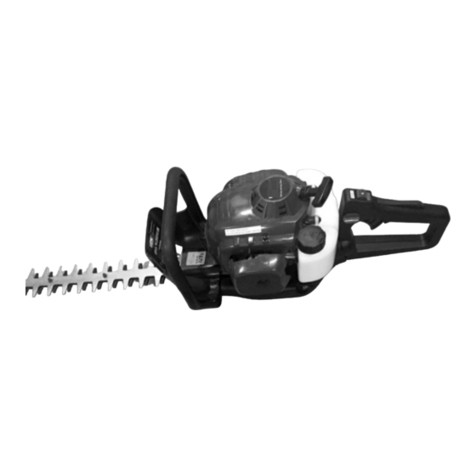
Racing RACTHT264 User manual

1
ORIGINAL INSTRUCTION
INSTRUCTION MANUAL
PETROL HEDGE TRIMMER
RACTHT264
READ THIS INSTRUCTION MANUAL BEFORE USE. KEEP THIS MANUAL FOR FUTUR
REFERENCE
BUILDER SAS
ZI, 32 RUE ARISTIDE BERGES 31270 CUGNAUX, FRANCE
MADE IN PRC 2020

2
CONTENTS
1. SAFETY INSTRUCTIONS 3
2. YOUR PRODUCT 7
3. UNPACKING 9
4. OIL AND FUEL FILLING 10
5. OPERATION 12
6. MAINTENANCE AND STORAGE 16
7. TROUBLESHOOTING 21
8. CE DECLARATION 22
9. WARRANTY 23
10. PRODUCT FAILURE 24
11. WARRANTY EXCLUSIONS 25

3
1. SAFETY INSTRUCTIONS
IMPORTANT
Read carefully before use
Keep for future reference
Safe operating practices
Training
Become familiar with the owner’s manual before attempting to operate the equipment.
Preparation
a) THIS HEDGE TRIMMER CAN CAUSE SERIOUS INJURIES. Read the instructions carefully for the
correct handling, preparation, maintenance, starting and stopping of the hedge trimmer. Become familiar
with all controls and the proper use of the hedge trimmer.
b) Never allow children to use the hedge trimmer.
c) Beware of overhead power lines.
d) Avoid operating while people, especially children, are nearby.
e) Dress properly! Do not wear loose clothing or jewellery, which can be caught in moving parts. Use of
sturdy gloves, non-skid footwear and safety glasses is recommended.
f) Use extra care when handling fuels. They are flammable and the vapours are explosive. The following
points should be observed:
Use only an approved container.
Never remove the fuel cap or add fuel with the power source running. Allow engine and exhaust
components to cool down before refuelling.
Do not smoke.
Never refuel indoors.
Never store the hedge trimmer or fuel container inside where there is an open flame, such as near a
water heater.
If fuel is spilled, do not attempt to start the power source, but move the hedge trimmer away from
the spillage before starting.
Always replace and securely tighten the fuel cap after refuelling.
If the fuel tank is drained, this should be done outdoors.
g) If the cutting mechanism strikes any foreign object or the hedge trimmer starts making any unusual noise
or vibration, shut off the power source and allow the hedge trimmer to stop. Disconnect the spark plug
and take the following steps:
inspect for damage;
check for, and tighten, any loose parts;
have any damaged parts replaced or repaired with parts having equivalent specifications
h) Wear ear protection.
i) Wear eye protection.
j) In case of emergency, stop the hedge trimmer; release the trigger, switch off the tool with the ON/OFF
button. Let it completely stop and be cool before any intervention.
Operation
Use the tool for the intended purpose and follow these provided instructions for use and maintenance
a) Stop the engine before:
cleaning or when clearing a blockage,

4
checking, carrying out maintenance or working on the hedge trimmer,
adjusting the working position of the cutting device,
Leaving the hedge trimmer unattended.
b) Ensure that the hedge trimmer is correctly located in a designated working position before starting the
engine.
c) While operating the hedge trimmer, always ensure that the operating position is safe and secure,
especially when using steps or a ladder.
d) Do not operate the hedge trimmer with a damaged or excessively worn cutting device.
e) To reduce fire hazards, keep the engine and silencer free of debris, leaves and excessive lubricant.
f) Always ensure that all handles and guards are fitted when using the hedge trimmer. Never attempt to
use an incomplete hedge trimmer or one fitted with an unauthorized modification.
g) Always use two hands to operate a hedge trimmer fitted with two handles.
Maintenance and storage
a) When the hedge trimmer is stopped for servicing, inspection or storage, shut off the power source,
disconnect the spark plug wire from the spark plug and make sure all moving parts have come to a stop.
Allow the hedge trimmer to cool before making any inspections, adjustments, etc.
b) Store the hedge trimmer where the fuel vapour will not reach an open flame or spark. Always allow the
hedge trimmer to cool down before storing.
c) When transporting or storing the hedge trimmer, always fit the cutting device transport guard.
Additional instructions
- WARNING - Children should never use this hedge trimmer.
- Work only during the day or with sufficient artificial light.
- Use the machine only at reasonable times - not early in the morning or late at night when people might
be disturbed;
- Before starting to work, check that the tool is in good working order.
- Make sure all parts of the machine are secure and tight.
- Check regularly that the blade is in good condition.
- Always hold the hedge trimmer firmly with both hands.
- Never hold the hedge trimmer by the blade.
- Keep clothing out of the reach of the blade.
- Check that the work area is free from all forms of obstacles and hazardous materials.
- Work carefully, do not be distracted.
- Do not work under the influence of alcohol or drugs or medication as this may interfere with your reflexes
and reactions. There is a great risk of accidents and injuries.
- Do not use the tool if you are tired.
- In the event of blockage, immediately turn off the tool with its switch. Let the tool cool down. Correct the
fault before resuming work.
- When a danger or an unforeseen situation may arise, stop working immediately and switch off the tool.
Restart the operation when there are no more obvious dangers and it is safe to work.
- Cut large branches first with hand shears to prevent the blade from jamming.
- Be careful not to cut wire or other similar material.
- Use only accessories supplied and recommended by the manufacturer.
- Use only the oil / gasoline mixture recommended by the manufacturer.
- Store the mixture in a specific container for gasoline.
- Keep the appliance in a fairly dry place and out of the reach of children.
- Be sure to stay away from the exhaust of gases to avoid the risk of burns.
- Keep people and animals away from the work area.

5
- Do not work in the rain and / or in damp and / or slippery places.
- Do not use the tool in bad weather and when there is a risk of thunderstorms.
- Use protective equipment when using the tool: protective gloves, non-slip shoes, helmet, and eye
protection, hearing protection, protective clothing and a protective mask.
- The machine must not be used in such a way that experience has shown that dangers and / or risks can
arise.
- The starter motor and the carburetor must not be adjusted by the user. This procedure should be
performed by a service center.
- Never use the tool inside a building. Your hedge trimmer produces toxic exhaust gases as soon as the
engine is started. Use of this product may generate dust, fumes, and smoke containing chemicals known
to cause adverse health effects. Be careful when using your machine and protect yourself properly. Also,
avoid deliberately breathing exhaust gases; always hold the machine properly when using it.
- In the event of breakdown or accidents, stop using the tool immediately. The tool should be returned for
repair to a service center. Do not wear repair by yourself.
Residual risks
Even if you use this product in accordance with all safety requirements, the potential risks of injury and
damage remain. The following dangers can occur:
There are adverse health consequences resulting from the emission of vibrations if the product is
used for long periods of time or not properly managed and properly maintained. The vibrations can
produce the so-called “white finger” disease. If any of the symptoms of "white finger" syndrome
appear, seek medical attention immediately. Symptoms of "white finger" include: numbness, loss of
feeling, tickling, tingling, pain, loss of strength, changes in color or skin condition. These symptoms
usually appear on the fingers, hands, or wrists. The risk increases at low temperatures. In order to
reduce this risk, please wear gloves and keep your hands warm. Limit the operating time.
There is a risk of hearing loss with prolonged use, especially if hearing protection is not worn.
Always wear hearing protection and limit the operating time.
Cuts if no suitable protective equipment is worn.
Inhalation of particles and exhaust gases if no protective mask is worn.
Contact with projected objects.
Burns from touching hot surfaces.
Explanation of the symbols
Warning symbol
Read the instruction manual before use
Do not expose to rain.
This CE sticker attests conformity with the European standards of safety.

6
Use anti skidding shoes of work and be maintained quite assured on its two legs.
Wear protective gloves for any intervention on the blade.
Wear ear protection
Wear head protection.
Wear eyes protection.
Caution: do not touch the muffler. He is very hot.
Guaranteed noise level
Do not expose to fire
Do not smoke
Intended use
This product is only intended to hedge trimmer.
The use of accessories other than those provided by the manufacturer can appear dangerous.
Any use different from that recommended or any modification of the device increases the accident risks
considerably. The manufacturer declines any responsibility in the event of incidents resulting from a use
different from that recommended or in the event of modification of the device.
This device was not designed for a professional use.

7
4
3
5
2
6
1
7
8
9
10
2. YOUR PRODUCT
a. Description
1
Choke Button
6
Throttle
2
Primer Bulb
7
On/Off Switch
3
Fuel Tank Cap
8
Oil Tank Cap
4
Starter Grip
9
Muffler
5
Throttle Lockout
10
Protective Cover

8
b. Technical data
Model
RACTHT264
Engine type
Air-Cooled,4-Cycle
Displacement
26.5 cm³
Spark plug gap
0.6-0.8mm
Rated input power
0,65 kW
No-Load speed
7000/min
Lubrication
SAE 10W-40
Crankcase lubrication capacity
60ml
Fuel type
Unleaded gasoline
Fuel tank capacity
280ml
Cutting length
480mm
Sound pressure level(EN ISO 10517)
L
PA
=87
dB(A)
K=3 dB(A)
Measured sound power level (EN ISO 10517)
LWA=103 dB(A) K=3 dB(A)
Guarantee sound power level (EN ISO 10517)
103 dB(A)
Vibration level(K=1.5 m/s2) (EN ISO 10517)
9 m/s2
Weight
4,9 kg

9
3. UNPACKING
Carefully remove the product and any accessories from the box. Make sure that all items listed in the
packing list are included. Inspect the product carefully to make sure no breakage or damage occurred
during shipping. Do not discard the packing material until you have carefully inspected and satisfactorily
operated the product.
INCLUDED PARTS
Quantity
Item
1
Operator’s manual
1
Cutting blade protective cover
1
Spark plug wrench
1
Internal hexagonal wrench
1
60ml Empty Oil Bottle
WARNING:
To prevent an accidental start that could cause serious personal injury, always disconnect the engine
spark plug wire from the spark plug when assembling parts.
WARNING:
Never install, remove, or adjust any attachments while power head is running. Failure to stop the engine
can cause serious personal injury.
WARNING:
Do not allow familiarity with this product to make you careless. Remember that a careless fraction of a
second is sufficient to inflict serious injury.
WARNING:
Always wear eye protection with side shields and hearing protection. Failure to do so could result in
objects being thrown into your eyes and other possible serious injuries.

10
4. OIL AND FUEL FILLING
CAUTION:
Attempting to start the engine before it has been properly filled with lubricant will result in equipment
failure not covered by the warranty.
Engine lubricant has a major influence on engine performance and service life. This engine is shipped
without engine lubricant.
Always use a 4-cycle engine lubricant that meets or exceeds the requirements for API service
classification SJ. SAE 30, 10W30, or 10W40 are all acceptable lubricants to use in this product. Non-
detergent or 2-stroke engine lubricants will damage the engine and should not be used. Check lubricant
level before each use.
ADD ENGINE OIL: INITIAL USE
1. Unscrew the oil cap from the engine and remove.
2. Pour 60 ml of oil into the oil fill hole. Replace and tighten the oil cap.
MAX
CHECK ENGINE OIL: BEFORE EACH USE
1. Set unit on a flat level surface.
2. Unscrew the oil cap and remove.
3. Lubricant level should fall within the top of the oil fill hole (the top of screw thread).
4. If level is low, add engine lubricant until the fluid level rises to the top of oil fill hole (the top of screw
thread).
NOTE: Do not overfill.
5. Replace and tighten the oil cap.
CAUTION:
Do not overfill. Overfilling the crankcase may cause excessive smoke, oil loss, and engine damage.
WARNING:
Operation of this equipment could create sparks that can start fires around dry vegetation. A spark arrestor
may be required. The operator should contact local fire agencies for laws or regulations relating to fire
prevention requirements.
FUELING THE UNIT
WARNING:
Gasoline is extremely flammable. Ignited vapors may explode. Always stop the engine and allow it to cool
before filling the fuel tank. Do not smoke while filling the tank. Keep sparks and open flames at a distance
from the area.

11
WARNING:
Remove the fuel cap slowly to avoid injury from fuel spray. Never operate the unit without the fuel cap
securely in place.
WARNING:
Add fuel in a clean, well-ventilated outdoor area. Wipe up any spilled fuel immediately. Avoid creating a
source of ignition for spilled fuel. Do not start the engine until fuel vapors dissipate.
WARNING:
Gasoline and its vapors are highly flammable and explosive. To prevent serious personal injury and
property damage, handle it with care. Keep away from ignition sources and open flames, handle outdoors
only. Pour fuel outdoors where there are no sparks or flames. Slowly remove the fuel cap after stopping the
engine.
Do not smoke while fuelling. Wipe spilled fuel from unit. Move at least 3 m (10 ft.) away from the fuelling
source before starting engine.
USING THE RIGHT FUEL
The use of old fuel is the most common cause of performance problems. Use only fresh, clean unleaded
gasoline.
This unit has a four-cycle engine. DO NOT mix oil with gasoline.
WARNING:
DO NOT USE E85 FUEL IN THIS UNIT. It has been proven that fuel containing greater than 10% ethanol
will likely damage this engine and void the warranty.
USING FUEL ADDITIVES
Use a fuel additive, such as Fuel Stabilizer or an equivalent, to inhibit corrosion and minimize gum
deposits. Add 0.8 oz. (23 ml) of fuel additive per gallon of fuel, according to the instructions on the
container. NEVER add fuel additives directly to the unit’s
fuel tank.
1. Remove the fuel tank cap by turning counterclockwise.
Rest the cap on a clean surface.
2. Carefully pour fuel into the tank until fuel reaches the
base of the tank spout. Avoid spillage.
3. Immediately replace fuel cap and hand tighten by turning
it clockwise. Wipe up any spilled fuel.
NOTE: Visually inspect to see if fuel level is low. If fuel is low, refill with unleaded fuel carefully without
overfilling and tighten the fuel tank cap immediately.
• The use of old fuel is the most common cause of performance problems. Use only fresh, clean
unleaded gasoline (less than 30 days old). Dispose of old fuel according to federal, state and local
regulations.
• Drain the tank and run the engine dry before storing the unit.
• Do not use E15 or E85 fuel (or fuel containing greater than 10% ethanol) in this product. It will damage
the unit and void the warranty.

12
5. OPERATION
WARNING:
Engine housing can become hot during operation. Do not rest or place your arm, hand, or any body
part against the engine housing. Extended contact with the engine housing can result in burns or other
injuries.
WARNING
Always position the unit on the operator’s right side. The use of the unit on the operator’s left side will expose
the user to hot surfaces and can result in possible burn injury. To avoid burns from hot surfaces, never
operate unit with the bottom of the engine above waist level.
WARNING:
Avoid accidentally starting the unit. To avoid serious injury, the operator and the unit must be in a stable
position when pulling the starter rope. Check for foreign objects in the hedges such as wire fences before
operation.
PREPARATION
Before each use, check the following items to ensure safe working conditions.
PROTECTIVE CLOTHING: make sure to wear the appropriate close- fitting protective clothing such as
protective pants, gloves and safety shoes. Wear a safety helmet with integrated hearing protection and
a face guard.
Before starting the tool, check that the trigger and the safety trigger are working correctly. Also check that
the cooling air vents are not obstructed and that both the front and rear handles are clean and dry.
CAUTION:
Do not overwork. Take regular breaks and change working position to ensure you can concentrate on the
work and have full control over the product.
Maintain firm footing and balance during operation.
CAUTION:
Inspect unit before each use.
Replace damaged parts. Check for fuel leaks. Make sure all fasteners are in place and secure.
STARTING AND STOPPING
To start a cold engine:
1. Slowly press the primer bulb 5-10 times.
NOTE: After the 7th press, fuel should be visible in
the primer bulb. If it is not, continue to press the
primer until you see fuel in the bulb.
2. Push the choke button in to set the choke to
FULL CHOKE position.
NOTE: Do not squeeze the throttle trigger
because the choke will be pop out automatically.
Throttle Control
Throttle
Lockout
On/Off Switch
(I = On / STOP = Off)

13
3. Place the unit on a firm, level surface. Push
down on the front handle to securely hold the
unit in place.
4. Pull the starter grip /cord until resistance is
detected. Rapidly pull 3 to 5 times or until you
hear engine turn over or begin to start.
5. If engine does not start, release choke by
squeezing throttle trigger and the choke button
pops out.
a. Engine is now in the run position.
b. Rapidly pull starter grip/cord until engine starts.
6. Allow the engine to run for 10 seconds, then
squeeze throttle to provide fuel to engine and
use for intended task.
NOTE: The choke button is only used when
starting a cold engine. Never press the choke
button after the machine is running. Doing so
can damage the tool.
Restart a warm engine:
NOTE: DO NOT push choke button in.
1. Make sure the primer bulb has fuel inside.
2. Rapidly pull starter/grip until engine starts.
3. Squeeze throttle to provide fuel to engine.
STOP THE ENGINE:
To stop the engine, depress the switch to the
stop position “STOP”.
HOLDING THE UNIT
• Stand in the operating position (hold the
machine in front of your body.) Stand up
straight. Do not bend over.
• Keep feet apart and firmly planted.
• Hold the rear handle with the right hand. Keep
the right arm slightly bent.
• Hold the front handle with the left hand. Keep
the left arm straight.
• Hold the unit at waist level.
•Keep all parts of your body away from the
rotating cutting attachment and hot surfaces.
WARNING: Do not operate the machine with a damaged or excessively worn cutting device.
Primer Bulb
Choke

14
CLEARING JAMS
If the blades get jammed by a wire or other obstruction and can’t move, follow these important safety
rules:
• NEVER reach for, or try to remove, jammed material while the engine is running.
• ALWAYS switch the unit off and disconnect the spark plug wire before clearing a jam.
• ALWAYS inspect the blades after clearing a jam to make sure all jammed material has been cleared, and
to make sure blades are not damaged.
TRIMMING HEDGES
A hedge trimmer is primarily used to cut hedges, but can also be used on shrubs and bushes as well. For
the best results, angle the blade of the hedge trimmer 15° from the targeted hedge.
A string can be used as a guideline in order to create a level hedge. Position the string at the preferred
height and cut everything that protrudes past it. The unit can be used in either direction. Use a sweeping
motion back and forth for even cuts. Avoid cutting limbs and branches larger than 1 1/8 of an inch.
Do not force the hedge trimmer through heavy shrubbery. If the blades become jammed,
immediately release the trigger and shut off the unit. Disconnect the spark plug wire before
attempting to clear a jam. Always be careful of flying debris during operation. Wear gloves when
trimming thorny or prickly foliage.
USING THE MACHINE
WARNING:
Engine housing can become hot during operation.
DO NOT rest or place your arm, hand or any body part against the engine housing during operation.
WARNING:
Always wear the appropriate Personal Protective Equipment (PPE) when operating this machine.
• Make sure that your hands and feet do not come near the cutting attachment when the engine is
running.
• If any foreign object is hit or if vibrations occur stop the machine immediately.
• Disconnect the HT lead from the spark plug.
• Check that the machine is not damaged. Repair any damage.
• If anything jams in the blades while you are working, switch off the engine and wait until it has stopped
completely before cleaning the blades.
• Disconnect the HT lead from the spark plug.
• Always wear heavy-duty gloves when repairing the cutting attachment. This is extremely sharp and
can easily cause personal injury.
• Work with a swinging action from the bottom upwards when trimming sides.
• When trimming the hedge, the engine should always face away from the hedge.
• Hold the machine as close to your body as possible to get the best balance.
• DO NOT rush the work but work steadily until all the branches have been cut back clearly.

15
Use of the revolving handle
- Push and hold the cutting position adjustment button. Turn the rear handle to change the cutting
position.
- The rear handle can be swiveled to 3 positions, center, left 90°, or right 90°
- Do the same operation to put the handle on the original position.
NOTE: This operation must be done the tool switched off.

16
6. MAINTENANCE AND STORAGE
When servicing, use only identical replacement parts. Use of any other parts could create a hazard or
cause product damage.
NOTE: Users are not allowed to set the carburettor or ignition, if further assistance is required, take the unit
to a qualified service dealer
WARNING:
To avoid serious personal injury, always stop the engine and allow it to cool before cleaning or maintaining
the unit. Never perform cleaning or maintenance while the unit is running. Disconnect the spark plug wire to
prevent the unit from starting accidentally
WARNING: Wear protective clothing and observe all safety instructions to prevent serious personal
injury.
CLEANING
Use a small brush to clean the outside of the unit. Do not use strong detergents. Household cleaners that
contain aromatic oils such as pine and lemon, and solvents such as kerosene, can damage plastic. Wipe off
any moisture with a soft cloth. Correct and regular cleaning is not only important for the safe use of this
product, but also extends its life span.
LUBRICATION
For a long lifespan, make sure that the cutting blades are cleaned and lubricated at regular intervals in order
to ensure the best possible performance. Routinely apply a thin film of lubricating oil.
SHARPENING THE BLADES
Disconnect the spark plug wire then clamp the blade assembly into a vise. Make sure the main body of
the hedge trimmer is adequately supported to avoid damage.
File down the exposed cutting surface of each blade with an 8 inch smooth round file with a diameter of 1/4
to 7/32 of an inch. Make sure to retain the original angle of the cutter teeth when filing.
In order to file both sides of each cutter tooth, you may need to momentarily run the hedge trimmer until the
opposing side of the cutter teeth are exposed.
Do not run the hedge while it is locked into the vise. Make sure all tools for sharpening have been removed
before connecting the spark plug wire. Disconnect the spark plug wire and repeat the sharpening process for
the newly exposed teeth
GEARBOX GREASE
There is a grease nipple on the gearbox to fill the gearbox with grease. Use a grease gun to fill with grease
after every 25 working hours.
Grease Nipple

17
MAINTENANCE SCHEDULE
Item
Hours of Operation
Check engine oil level
Every time before use
Check for loose/lost fasteners
Check for damage
Verify function of control elements
Check fuel level
Check for fuel/oil leaks
Engine oil replacement
Every 20 hours
Lubricate blades
Every 5 hours
Sharpen blades
Every 20 hours
Clean air cleaner
Every 20 hours. Every 10 hours in dusty conditions
Check spark plug
Every 20 hours
Fill gearbox grease
Every 25 hours
REMARKS
• The maintenance interval is only a recommendation for machines in ordinary operating condition.
• If there are any abnormal signs from the machine, please do the proper inspection and maintenance
immediately.
• If anything is unclear to you, contact our service team for help.
• All other repairs or maintenance which are not mentioned here should only be done by the service
team or authorized personnel.
REPLACE ENGINE OIL
WARNING:
Old engine oil is considered special waste and has to be disposed according to your local
environment protection regulation. Do not pour the oil into a garbage can, sewer, soil etc.
The engine oil replacement is easier if engine is warm (NOT HOT!).
1. Open the oil tank cap and drain the old oil to an approved container.
2. Return the engine to an upright position and refill with lubricant following the instructions in the ADDING/
CHECKING ENGINE OIL section in this manual.
3. Clean the oil dropped on the unit if necessary.
MAX

18
CLEAN AIR FILTER
The air filter element should be cleaned to provide the engine abundant clear air which aids in starting,
power, and life time of the engine
1. Open the air filter: press the button localized on the side of the cover to open it.
2. If only cleaning of the air filter is necessary, take the air filter pad out and clean it with dry compressed
air until all dust is removed. Wear protective goggles and mask to protect your health during this
procedure.
Reinstall the air filter. Close the cover.
NOTE: Make sure the filter is seated properly inside the cover. Incorrect installation will allow dirt to enter the
engine, causing rapid engine wear.
ADJUST IDLE SPEED
WARNING:
The cutting blades should never move at idle speed. Turn the idle screw counter clockwise to reduce the idle
speed.
In case of doubt, contact customer service to the adjustment. Do not use the tool until the operation is
completed.
WARNING:
The cutting blades will move when adjusting the idle speed. Wear all protective clothing and keep all
bystanders, children, and pets at least 50 ft. away. Make adjustments with the unit supported by hand
so that the cutting blades do not contact the ground or any object. Keep all parts of your body away
from the cutting blades and muffler. Failure to follow these instructions could result in serious
personal injury.
If the engine will not idle properly:
1. Start the engine.
2. Release the throttle control and let the engine idle.

19
• If the engine stops, increase the idle speed. Use a small screwdriver to turn the idle speed screw
clockwise, 1/8 of a turn at a time, until the engine idles smoothly.
• If the cutting blades move when the engine idles, reduce the idle speed. Turn the idle speed screw
counterclockwise, 1/8 of a turn at a time, until the cutting blades stop moving.
MAINTAINING THE SPARK PLUG
CAUTION:
Do not remove the spark plug when the engine is hot.
CAUTION:
Do not sand blast, scrape or clean spark plug electrodes. Grit in the engine could damage the cylinder
Spark Plug Boot
0.60 mm - 0.80 mm
(0.025 in. - 0.31 in.)
1. Stop the engine and allow it to cool. Grasp the spark plug boot firmly and pull it from the spark plug.
2. Clean around the spark plug. Remove the spark plug from the cylinder head with a 5/8-inch socket,
turning counterclockwise.
3.Inspect the spark plug. If the spark plug is cracked, fouled or dirty, replace it with replacement part
AM5RC or an equivalent spark plug.
4.Use a feeler gauge to set the air gap at 0.6 mm - 0.8 mm (0.025 in. - 0.31 in.)
5.Install the spark plug in the cylinder head. Tighten the spark plug with a 5/8-inch socket, turning it
clockwise until snug.
NOTE: If using a torque wrench, torque to 18 Nm (159 in.lb.). Do not over tighten.
6.Reattach the spark plug boot.
STORAGE
• Never store a fueled unit where fumes may reach an open flame or spark.
• Allow the engine to cool before storing.
• Lock up the unit to prevent unauthorized use or damage.
• Store the unit in a dry, well-ventilated area.
• Store the unit out of the reach of children.
• Store the unit with the cutting blade scabbard installed.
Short-term Storage (1-2 weeks)
Store the unit in a horizontal position. If not possible, store the unit vertically with the engine at the top.

20
Long-term Storage
1. Remove the fuel cap, tip the unit and drain the fuel into an approved container. Reinstall the fuel cap.
2. Start the engine and allow it to run until it stalls. This ensures that all fuel has been drained from the
carburetor.
3. Allow the engine to cool. Remove the spark plug and put 5 drops of any high quality motor oil into the
cylinder. Pull the starter rope slowly to distribute the oil. Reinstall the spark plug.
4. Thoroughly clean the unit and inspect it for any loose or damaged parts. Repair or replace damaged
parts and tighten loose screws, nuts or bolts.
5. Store the unit in a horizontal position. If horizontal storage is not possible, store unit vertically with
engine at top.
6. Install the cutting blade scabbard.
Preparing the Unit for Use after Long-term Storage
1. Remove the spark plug. Tip the unit and drain all of the oil from the cylinder into an approved
container. Reinstall the spark plug.
2.Change the oil. Refer to Changing the Oil.
NOTE: Do not use fuel that has been stored for more than 30 days. Dispose of old fuel and oil
according to federal, state and local regulations.
TRANSPORTATION
CAUTION: Install the guide bar cover when transporting to prevent personal injury.
Transport the unit in a horizontal position. If not possible, transport the unit vertically with the engine at
the top. Secure the unit to prevent damage during transport.
Table of contents
Other Racing Trimmer manuals

Racing
Racing RACD314TB User manual

Racing
Racing RAC52PB-AB-3 User manual

Racing
Racing RACTHT264-1 User manual

Racing
Racing RAC250EGT-UK User manual

Racing
Racing RAC27PHT-1 Operation instructions

Racing
Racing RAC52PB-C User manual

Racing
Racing RAC26PHT-3 User manual

Racing
Racing RAC450EPHT-UK User manual

Racing
Racing RAC32PB-1 User manual