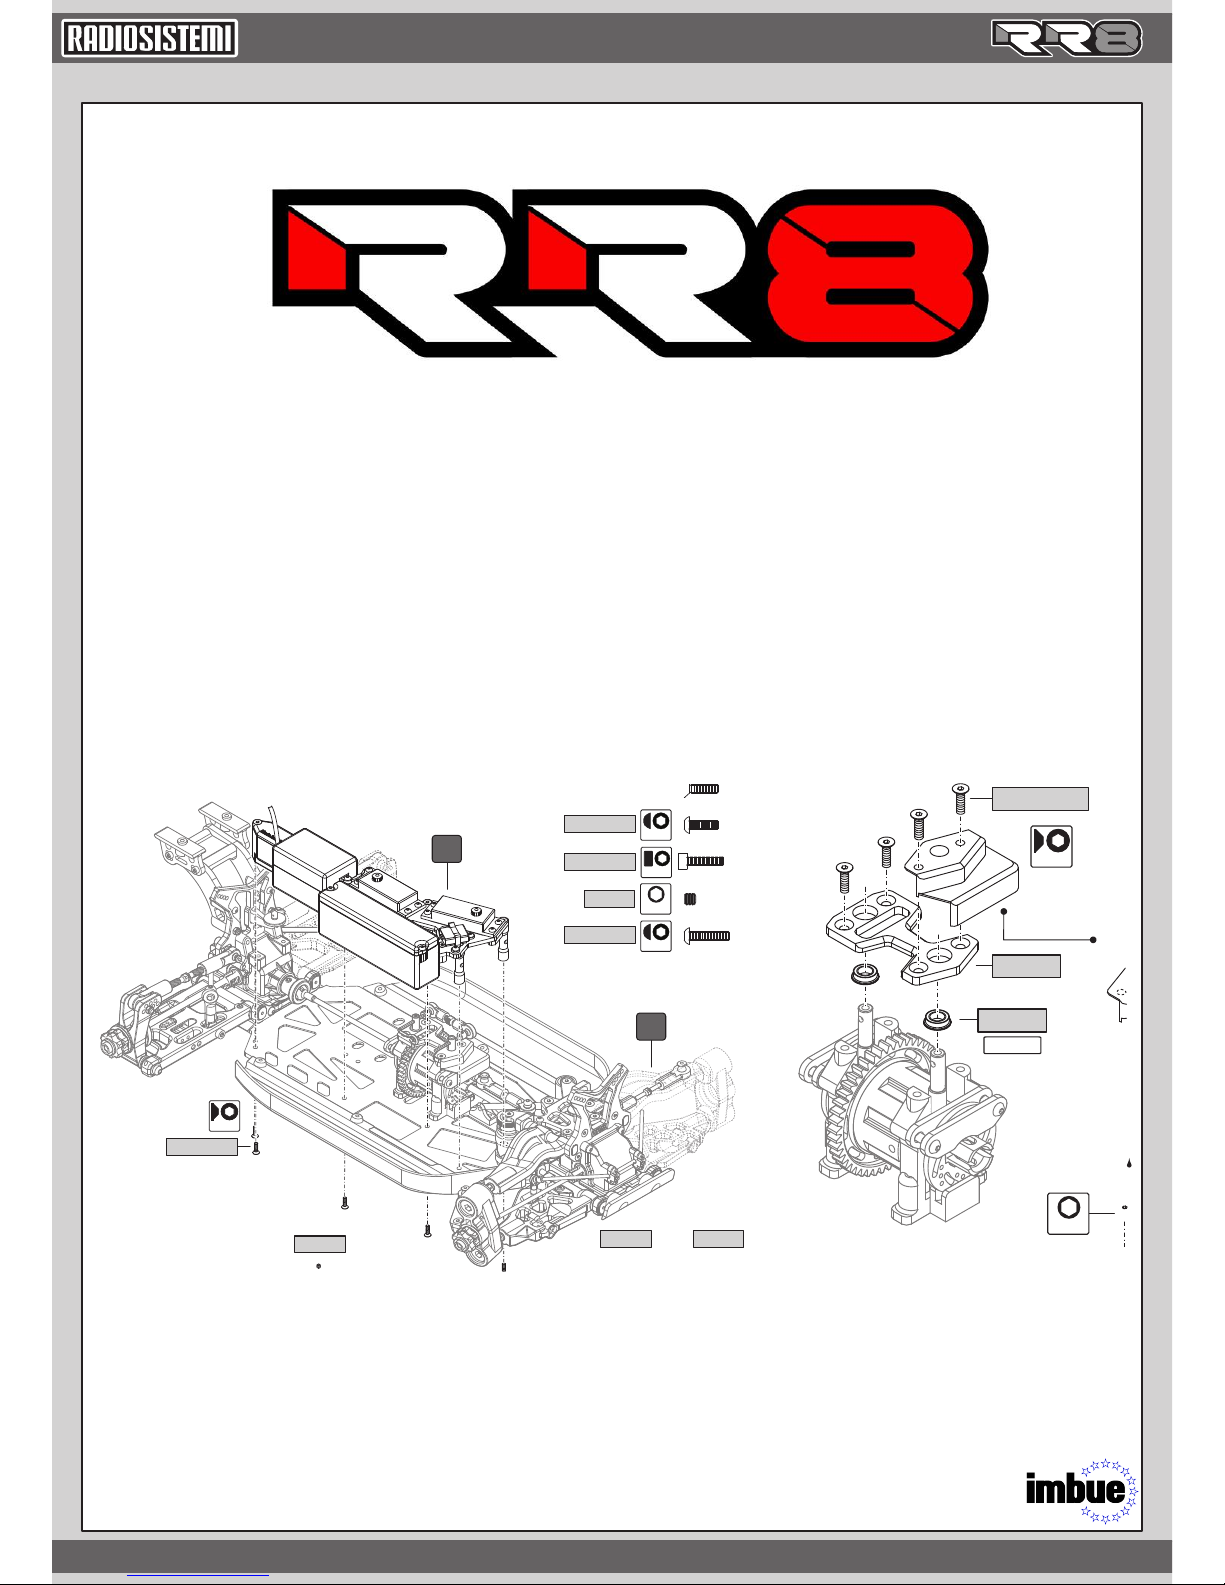
RR8 Build Tips & Tricks
Differentials
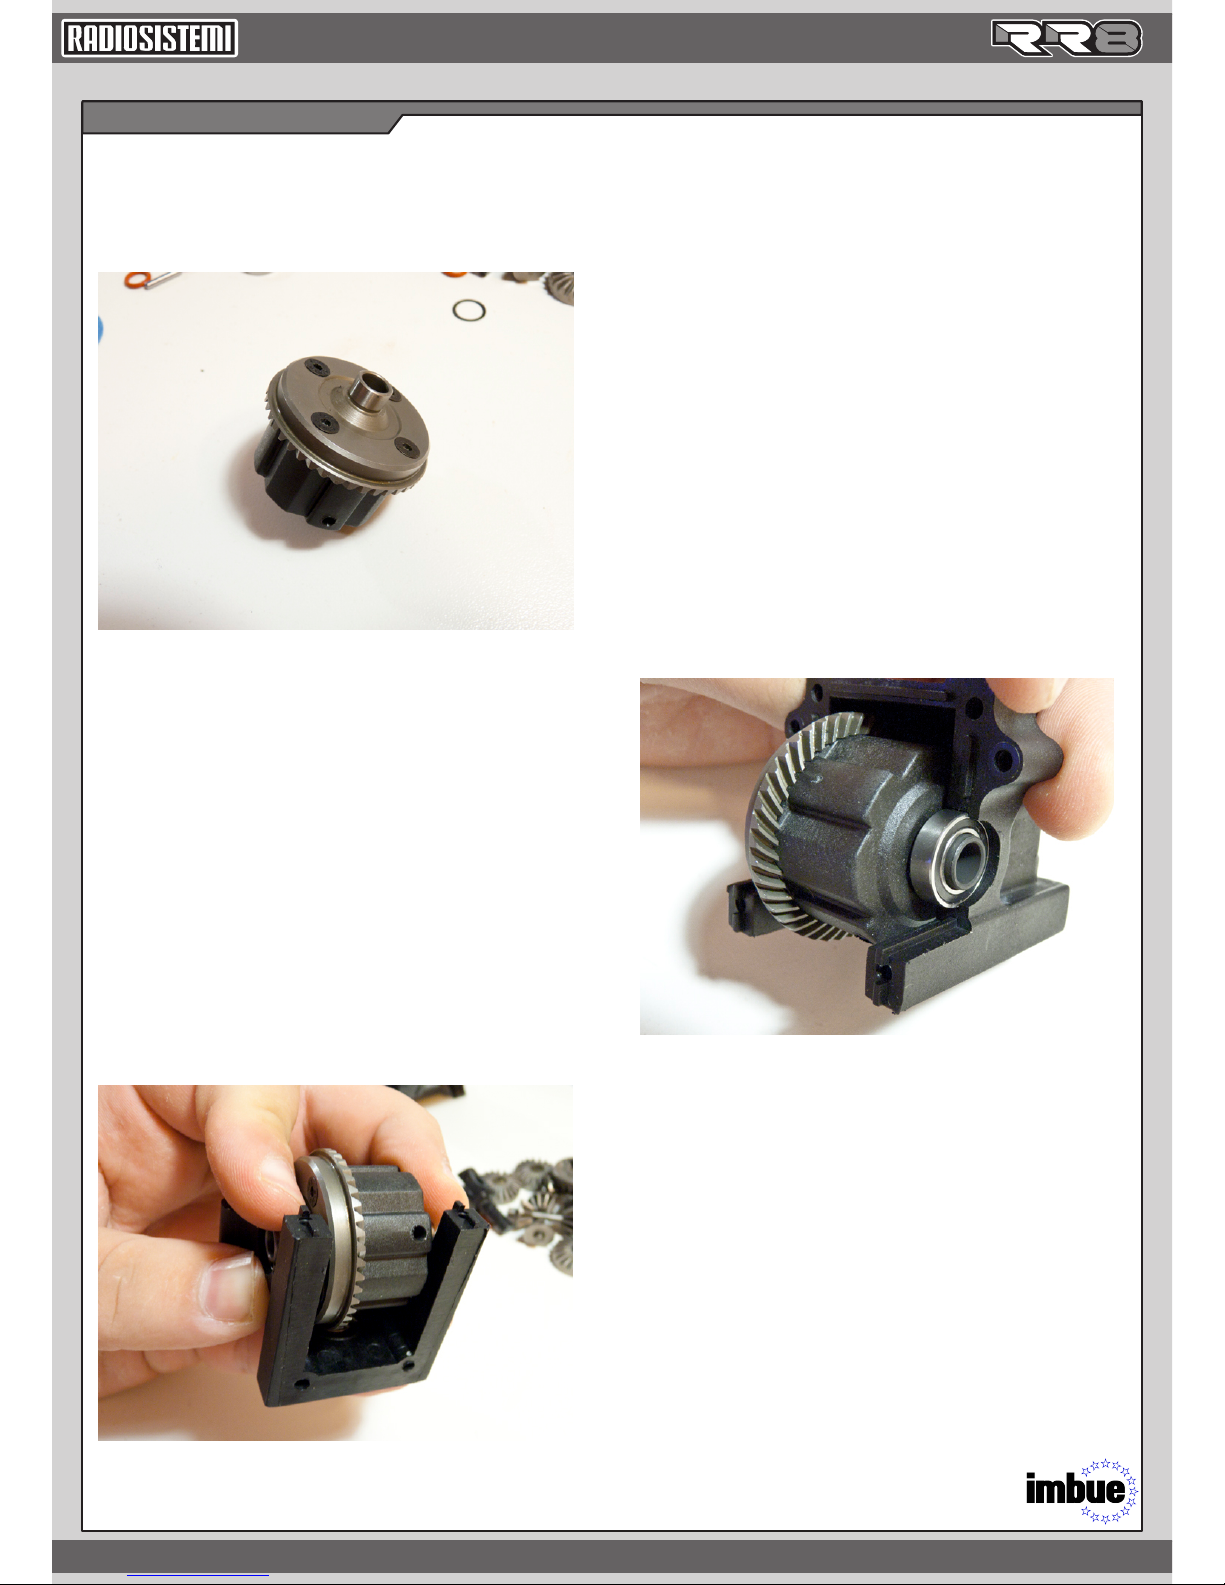
Note: Several steps of the assembly have been omitted.
Quickly check and set backlash by
assembling the diff case and the bevel gear.
Make sure to use the blue diff gasket so the
gear and case will be the correct assembled
width. Do not install any internals yet.
Add shims and the 8x14 bearings to the diff.
You also need to install the 8x16 bearings and
the pinion gear into the bulkhead.
With the pinion and diff installed into the
bulkhead, press on the bearings with your
fingers (holding the gears tight) and check
backlash. You want the gears to rotate
smoothly, with no notchiness and minimal
play. I used one .2mm shim on the gear side,
no shim on the case side. If you need to add
or change the shimming, you can do so now
without having to disassemble the entire
diff. DO THIS FOR BOTH F & R DIFFS.