danke, dass sie sich für unser produkt
entschieden haben.
weitere produkte finden sie unter:
www.radius-design.com
www.absolut-lighting.com
thank you for choosing our product.
you can find more products at:
www.radius-design.com
www.absolut-lighting.com
2/2
DEUTSCH ENGLISH
5
7
8
6
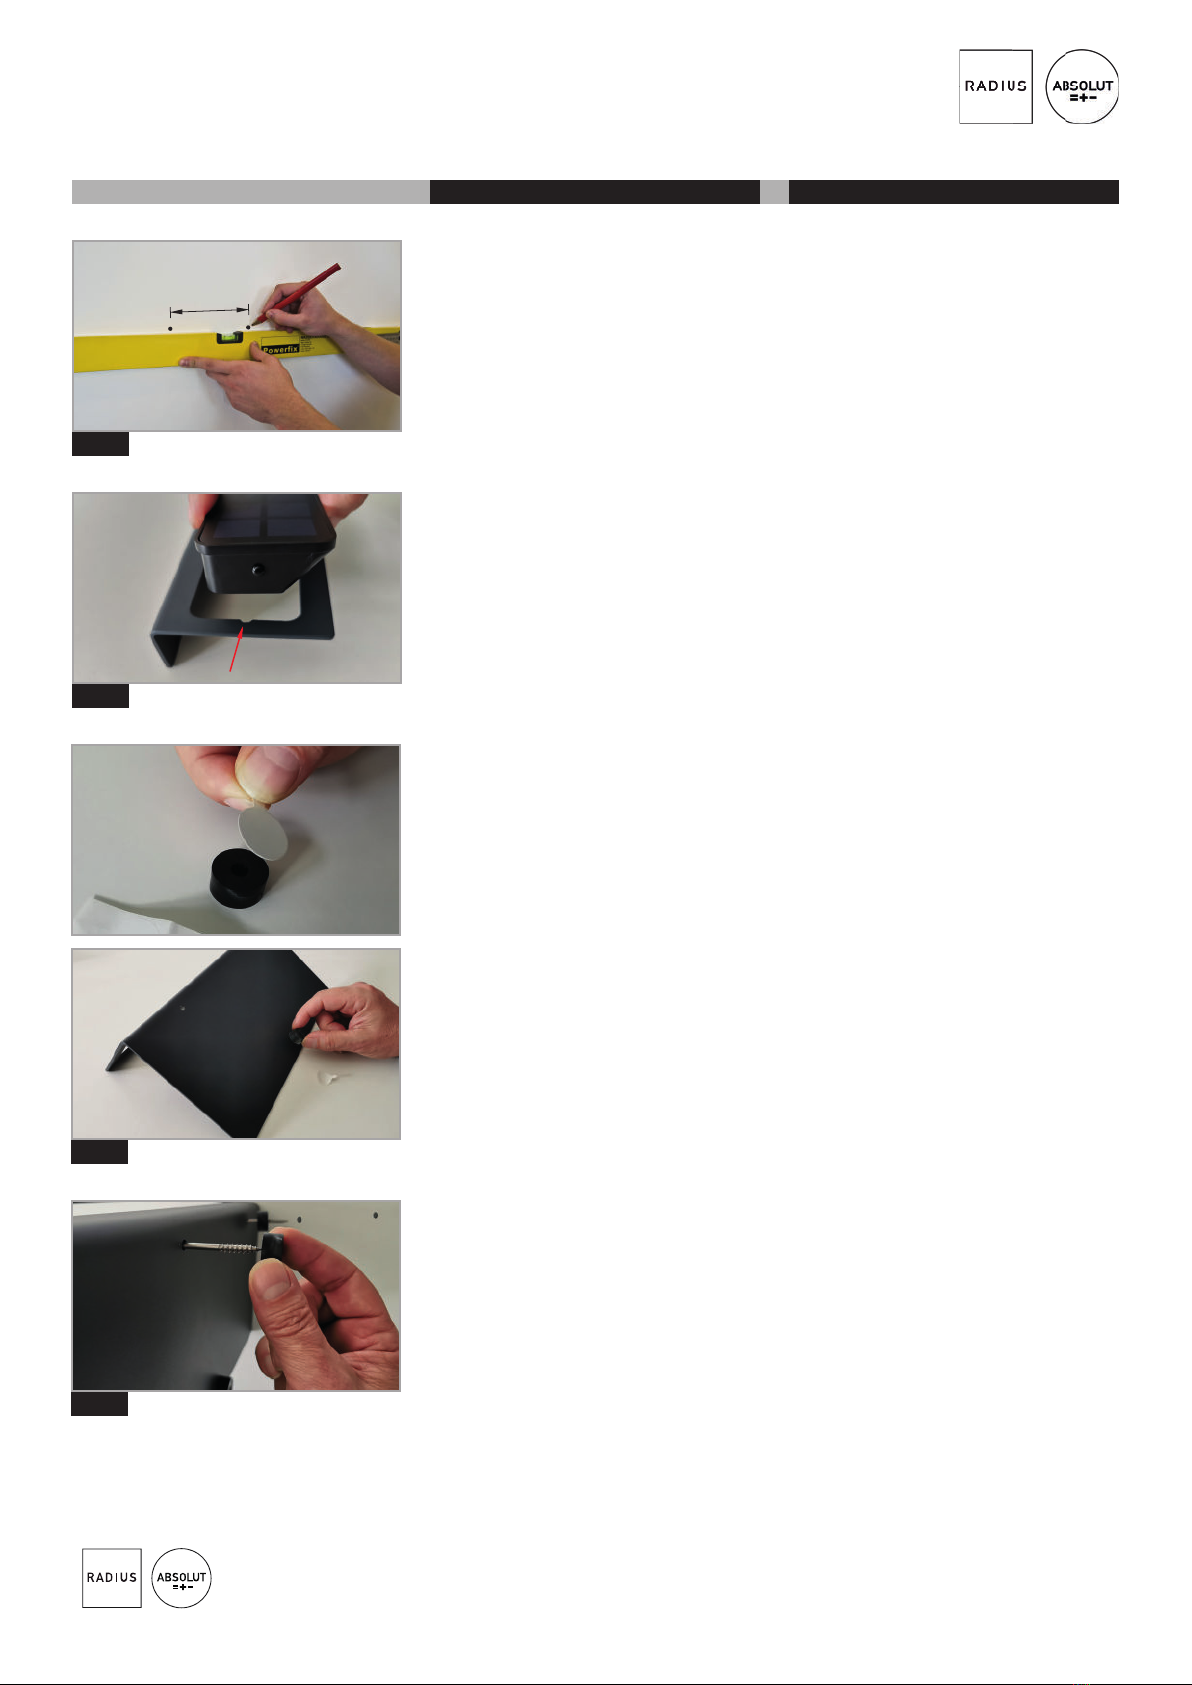
5) mounting:
using a spirit level, mark and drill two
holes at a distance of 16 cm and insert
the dowels.
6) remove the lamp from the bracket.
look for the small notch on the inner
edge of the opening. this is where the
side pinhead of the lamp is inserted.
7) only for art. 950 me, 950 mg, 950
mf, 950 ge, 950 gg, 950 gf:
one spacer must be glued to the back-
side of the bracket.
clean the top side of the spacer and
the gluing spot on the backside slightly
above the lower edge in the center of
the bracket. Use cleaning agent con-
taining alcohol. remove the adhesive
dot from the paper and stick it to the
spacer. then remove the film from the
adhesive dot, place it and press the
spacer firmly.
for optimal adhesion of the dot, a mini-
mum temperature of 12 °C is required.
the final adhesive strength is reached
after 24 hours.
8) insert the two screws through the
holes of the bracket into the dowels.
the spacers are placed between the
wall and the bracket.
9) tighten the screws and insert the
lamp into the opening of the bracket.
start on the side without the notch (see
point 6).
5) montage:
markieren und bohren sie mithilfe einer
wasserwaage zwei löcher im abstand
von 16cm und setzen sie die dübel ein.
6) entnehmen sie den leuchteneinsatz
aus der halterung. achten sie auf die
kleine kerbe am inneren rand der
öffnung. hier wird der seitliche pin des
leuchteneinsatzes durchgeführt.
7) nur für Art. 950 me, 950 mg, 950 mf,
950 ge, 950 gg, 950 gf:
ein abstandhalter wird auf die rückseite
der halterung geklebt. stirnseite des
abstandhalters und klebefläche auf
der rückseite der halterung gründlich
mit alkoholhaltigem reinigungsmittel
säubern. den klebepunkt vom
papier abziehen und auf den
abstandhalter kleben. anschließend
die folie vom klebepunkt lösen und den
abstandhalter mittig etwas oberhalb
des unteren rands auf die halterung
kleben.
für eine optimale haftung des klebe-
punkts wird eine mindesttemperatur
von 12 °C benötigt. die endgültige
haftfestigkeit wird nach 24 stunden
erreicht.
8) führen sie die zwei schrauben durch
die löcher der halterung in die dübel.
die abstandhalter werden zwischen
wand und halterung platziert.
9) schrauben festziehen und leuchten-
einsatz in die öffnung der halterung ein-
legen. auf der seite ohne kerbe begin-
nen (vgl. punkt 6).
ABSOLUT SOLAR LIGHT WANDVERSION
ART. NR.: 950 KE, 950 KG, 950 KF, 950 ME, 950 MG, 950 MF, 950 GE, 950 GG, 950 GF
16 cm


