manuals.online logo
Brands
  1. Home
  2. •
  3. Brands
  4. •
  5. Rain Bird
  6. •
  7. Irrigation System
  8. •
  9. Rain Bird MAXI PAW User manual

Rain Bird MAXI PAW User manual

TECNOTES MAXI-PAW™
General Information, Información General
There are no fixed sides to the arc adjustment of the MaxiPaw. This allows maximum versatility
in positioning the head on its riser assembly. You may then set any arc whether full or part
circle. Setting the arc is discussed under a later heading.
TheMaxi-Paw offers a series of seven interchangeable nozzles in both regular and low angle
configurations. All nozzles are universal to the Maxi-Paw and are discussed under a later
heading.
El Maxi-Paw no tiene arcos fijos. Esto permise maxima versatilidad en la ubicación de la
cabeza sobre su elevador. Usted puede fijar cualquier arco—un circulo completo o parcial.
Como fijar et arco se explica mas adelante.
El Maxi-Paw ofrece una serie de siete boquillas en configuraciones de angulo regular y angulo
bajo. Todas las boquillas son intercambiables y se expIican más adelante.
Tips on Installation, Sugerencias para la Instalación
As with all irrigation products, you must thoroughly flush the system prior to the final installation
steps. This is particularly important in environmental conditions where small stones are a
common feature of the ground structure. Anything which passes through the screen will be
passed through the nozzle. However, without proper flushing of the line prior to mounting the
heads, small stones could become trapped below the level of the screen and interfere with
proper operation of the head.
Al igual a todos los productos de riego, se debe limpiar el sistema cuidadosamente anses de
instalar los aspersores. Esto es particularmente importante en ciertas condiciones ambientales
donde pequenas piedras son una característica comun en el suelo. Cualquier cosa que pase
por la rejilla del aspersor pasara también por la boquilla. Sin embargo, sin una limpieza
apropiada de la Iínea antes de colocar las boquillas en los aspersores, pequenas piedras
podrían quedar atrapadas dentro de la rejilla e interferir con la operación del aspersor.
The plastic material used on most common irrigation sprinklers is highly affected by the use of
chemical bonding compounds such as glue. You must use only teflon tape to make your water
tight sealed connections.
El material plastico en la mayoria de los aspersores es altamente afectado por el uso de
quimicas, coma por ejemplo, pegamentos. Usted debe usar unicamente cinta de teflon en las
conexiones.
The Maxi-Paw has a large flanged area around the outside of the bowl. This area serves as a
barrier to material moving back toward the open cavity of the bowl. The flanged area should be
positioned at the final grade height.
El Maxi-Paw tiene una orilla sobresaliente del casco. Esta orilla sirve como barrera al material
que entraria en la cavidad abierta del casco. La orilla debe quedar al nivel del relleno final de la
tierra.
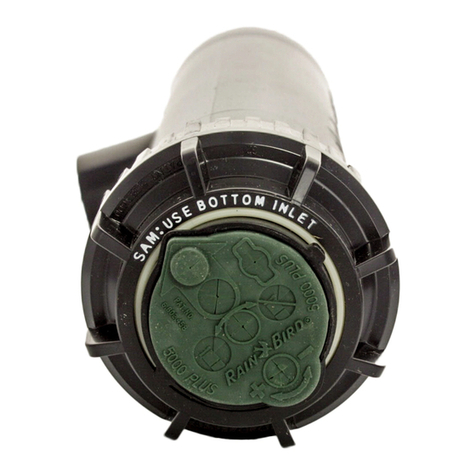
The Maxi-Paw comes with both a bottom and a side inlet. The plug must be moved to the posi-
tion which is not in use. The bottom inlet offert a step-up position from 3/4" to 1/2" for use with
either size connections.
El Maxi-Paw viene con una entrada lateral y otra en la base. El tapón debe ser puesto en la
entrada que no este en uso. La entrada de abajo ofrece dos posiciones, 3/4" y 1/2", para usar
con conexiones de cualquier medida.

You should note that if you are using a Seal-a-Matic unit, you must use the bottom inlet
for proper functioning of the sealing device.
There are several drain holes in the case of the Maxi-Paw. They provide an easy drain
path for water which is in the bowl.
Usted debe notar que si esta usando una unidad Seal-a-Matic debe usar la entrada de
abajo para que el sello funcione correctamente.
Hay varies huecos de drenaje en el casco del Maxi-Paw. Ellos proveen un fácil drenaje
para el agua que queda en el casco.
Nozzling Up the System, Instalación de la Boquilla
Maxi-Paw sprinklers are shipped with a standard nozzle inserted. To change the existing nozzle for another simply
follow these steps:
You may find it easiest to use Rain Bird wrench #42064 to hold up the internal assembly while you change nozzles.
By following the instructions shown below, you will be able to easily insert the tool to hold up the internal assembly
while you are working on the sprinkler.
Los aspersores Maxi-Paw son fabricados con una boquilla estándar. Para cambiarla siga estos pasos:
Si Usted usa la llave inglesa de Rain Bird (No. 42064) será más facil sostener el ensamblaje interno mientras
cambia la boquilla. Siguiendo los dibujos abajo, inserte la llave para sostener el ensamblaje interne mientras
trabaja con el aspersor.
The double weighted arm will be blocking the path of access to the nozzle. Pull the arm
from its resting position so that you can see where the current nozzle resides.
El brazo del aspersor estard bloqueando la boquilla. Hale el brazo de su posición de
descanso para goder ver donde está la boquilla.
Usando los dedos,
presione y aire la
boquilla a la izguierda.
La boquilla se moverá
de su posición.
Cuando la boquilla
baya rotado unes 90
grados, Usted sólo
tendra que sacarla.
Using your thumb and
finger exert pressure in a
counterclockwise direction
on the tab of the nozzle.
The nozzle will move from
his locked position and
you may simply pull out
once the nozzle bas
rotated about 90 degrees.
Align the new nozzle such that the
large flanged area is to the top of the
nozzle orifice. Push the nozzle back
until it properly seats. Turn the nozzle
in a clockwise direction until you hear
a click indicating the nozzle has
moved into the locked position.
Alineé la nueva boquilla en el
hueco de manera que la parte
plana de la boquilla esté hacia
arriba. Presione la boquilla hacia
atrás hasta que se sitúe
correctamente. Cire la boguilla a la
derecha hasta oír que la boquilla
calce.
The low angle interchangeable
nozzles are visibly different in
appearance than regular angle in that
they have a radius adjustment screw
as an integral part of the nozzle body.
The radius adjustment screw on either
nozzle set will allow radius reduction of
up to 25%.
Las boquillas de ángulo bajo son
diferentes a las de ángulo regular
porque tienen un tornillo de ajuste
del radio coma parte integral de su
cuerpo.
El tornillo de ajuste del radio de las
boquillas permite una reducción del
radio hasta un máximo de 25%.
Low Angle Regular
Angulo Bajo Regular
When nozzling, it is
important to note
the location of the
arm spring and
make adjustments
to the spring if
required. The stan-
dard Maxi-Paw is
shipped with the
spring in the A posi-
tion. Only the #6,
#7, and #7 low angle require the posi-
tion of the spring to be changed to the
B position. The lighter tension of the
spring will allow better tripping of the
sprinkler on these light flow nozzles.
Al instalar la
boquilla, es impor-
tante notar la
ubicación del
resorte del brazo y
ajustarlo si es
necesario. El Maxi-
Paw estándar es
fabricado con el
resorte en la
posición "A" (vea
abajo). Solo las boquillas roja y
negras (Nos. 6 y 7 de ángulo
regular y también el No. 7 de
ángulo bajo) requieren que el
resorte sea ajustado a la posición
"B".
La menor tensión que tiene el
resorte en la posición "B" permise
que el brazo se devuelva mejor con
el bajo flujo con que operan esas
boquillas.
Spring placement, Ubicación del resorte
Use the following chars to determine correct spring placement:
Use el siguiente gráfico para determinar la ubicación correcte del resorte:
Regular - RegularLow - Bajo
Nozzle - Boquilla Color - Color Position - Posición
06
07
08
10
12
07
10
Red - Roja
Black - Negra
Blue - Azul
Yellow - Amarilla
Red - Roja
Black - Negra
Yellow - Amarilla
B
B
A
A
A
A
B
Make sure that the arm spring is in its correct position.The red (#6) and the black
(#7) nozzles require "A" position of the spring be changed from position "A" to posi-
tion "B". the spring must be in its correct position for the spring to trip properly.
Assegure se que el resorte del brazo esté en la posición correcta.Las boquillas #6
(roja) y #7 (negra) requieren que la posición del resorte sea cambiada de "A" a "B".
El resorte debe estar en la posición apropriada para que el brazo se devuelva
correctamente.
Setting the Arc – Ajuste del arco
The Maxi-Paw is a universal head offering Part Circle or Full Circle performance in one head.
After mounting the head, pull up on the lid to access the internal assembly of the sprinkler. Residing below the
nozzle and splash arm assembly, you will find two adjustment tabs mounted horizontal to the bowl. There is also a
trip mechanism mounted vertical to the adjustment tabs.
El Maxi-Paw ofrece un número infinito de arcos, de círculo parcial o completo, en un solo aspersor.
Después de instalar et aspersor, levante la tapa para goder alcanzar el ensamblaje interno. Debajo de la boquilla y
el brazo, hay dos ganchos metállicos ajustables alrededor del elevador. Hay también un clip rectangular («trip»)
movible hacia arriba y hacia abajo.
The two adjustment tabs allow setting
of the arc by simply positioning the
arms such that reversing of the arc
occurs at the point you desire. The
tabs each have two fingers. By
pushing on one finger you will be able
to move the tab in one direction, the
other finger will move it in the opposite
direction. Position the two trip tabs as
required, turn on the water source,
and make final fine tuning
adjustments while the system is running.
Los dos ganchos metálicos permiten
el ajuste del arco con solo moverlos a
la posición deseada. Ambos ganchos
tienen dos orejas. Empuje una de las
orejas para mover el gancho en una
dirección, y la otra para moverlo en la
dirección opuesta. Coloque los dos
ganchos en una posición aproximada,
abra la llave del agua y haga los ajus-
tes finales mientras el sistema esté
funcionando.
Cover Removal – Remoción de la tapa
The Maxi-Paw cames with an easy pop off bowl cover in the event that you need to access the internal assembly.
El Maxi-Paw viene con una tapa que se remueve fácilmente en el caso que Usted necesite alcanzar el interior.
In the middle of the cover, you
will find a button which can be
easily pried off with a small
screwdriver. Pop the button off
and retain for re-assembly.
En el media de la tapa, Usted
encontrará un botón fócil de
remover con un pequeño
destornillador. Quite et botón y
guárdelo para reponerlo
después.
The cover is retained by two
half circle flanges pressing
against the inside diameter of
the cover opening. Slide a
screwdriver under the cap and
align it across the top of one of
the flanges through one of the
four openings in the cover
itself. Exert pressure on the
flange while pulling on the
cover with your other hand.
The cover will pop off allowing
easy access to the bowl area
of the sprinkler.
La tapa está retenida por
medio de dos barbas que
presionan contra et diámetro
interne de la abertura de la
tapa. Meta un pequeño
destornillador de pala debajo
de la tapa e insértelo por una
de las cuatro aberturas
alrededor de las barbas,
usando el destornillador como
palanca. Al mismo tiempo hale
la tapa con la otra mano para
quitarla.
By using the tool previously discussed on
page 2, you can remove the internal
assembly of the MaxiPaw for flushing
purposes or service.
Usando la llave mostrada en la página 2,
Usted puede sacar el ensamblaje interna
del Maxi-Paw para drenarlo o repararlo.

This manual suits for next models

1

Other Rain Bird Irrigation System manuals

Rain Bird SR3003 User manual

Rain Bird

Rain Bird SR3003 User manual

Rain Bird EASY RAIN User manual

Rain Bird

Rain Bird EASY RAIN User manual

Rain Bird wtd 2900 User manual

Rain Bird

Rain Bird wtd 2900 User manual

Rain Bird 5000 Plus Series User manual

Rain Bird

Rain Bird 5000 Plus Series User manual

Rain Bird T-Bird T-22 User manual

Rain Bird

Rain Bird T-Bird T-22 User manual

Rain Bird LG3HE Troubleshooting guide

Rain Bird

Rain Bird LG3HE Troubleshooting guide

Rain Bird STP-400i User manual

Rain Bird

Rain Bird STP-400i User manual

Rain Bird 25PJDA User manual

Rain Bird

Rain Bird 25PJDA User manual

Rain Bird 32SA User manual

Rain Bird

Rain Bird 32SA User manual

Rain Bird isa 300/400 Installation guide

Rain Bird

Rain Bird isa 300/400 Installation guide

Rain Bird RSD-BEx User manual

Rain Bird

Rain Bird RSD-BEx User manual

Rain Bird 3500 Series User manual

Rain Bird

Rain Bird 3500 Series User manual

Rain Bird 11000 Series Manual

Rain Bird

Rain Bird 11000 Series Manual

Rain Bird LNDDRIPKIT User manual

Rain Bird

Rain Bird LNDDRIPKIT User manual

Rain Bird T-Bird T-22 User manual

Rain Bird

Rain Bird T-Bird T-22 User manual

Rain Bird Traveler TR Series User manual

Rain Bird

Rain Bird Traveler TR Series User manual

Rain Bird SST-1200s User manual

Rain Bird

Rain Bird SST-1200s User manual

Rain Bird 500 series Manual

Rain Bird

Rain Bird 500 series Manual

Rain Bird 32HE Troubleshooting guide

Rain Bird

Rain Bird 32HE Troubleshooting guide

Rain Bird 500 series Manual

Rain Bird

Rain Bird 500 series Manual

Rain Bird ISDL-2400 Installation guide

Rain Bird

Rain Bird ISDL-2400 Installation guide

Rain Bird GRDNERKIT User manual

Rain Bird

Rain Bird GRDNERKIT User manual

Rain Bird Falcon 6504 Installation guide

Rain Bird

Rain Bird Falcon 6504 Installation guide

Rain Bird 5000 Series User manual

Rain Bird

Rain Bird 5000 Series User manual

Popular Irrigation System manuals by other brands

Tyco Fire Product CENTRAL ELO-231 BV instruction manual

Tyco Fire Product

Tyco Fire Product CENTRAL ELO-231 BV instruction manual

Autopot 9Pot XL System Set-up guidelines

Autopot

Autopot 9Pot XL System Set-up guidelines

Tyco Fire Product Gem STAINLESS STEEL QUARTZOID instruction manual

Tyco Fire Product

Tyco Fire Product Gem STAINLESS STEEL QUARTZOID instruction manual

ARABLE Guard installation guide

ARABLE

ARABLE Guard installation guide

Tyco DS-1 Series manual

Tyco

Tyco DS-1 Series manual

Tyco DS-1 Series manual

Tyco

Tyco DS-1 Series manual

Viking MICROFAST M-4 Technical data

Viking

Viking MICROFAST M-4 Technical data

Tyco TFP MAX manual

Tyco

Tyco TFP MAX manual

Tyco Rapidresponse LFII Series manual

Tyco

Tyco Rapidresponse LFII Series manual

Viking MicrofastHP VK346 Technical data

Viking

Viking MicrofastHP VK346 Technical data

Duramaxx Sprizzz manual

Duramaxx

Duramaxx Sprizzz manual

Reliable F1FR56 manual

Reliable

Reliable F1FR56 manual

Reliable F1FR – 300 quick start guide

Reliable

Reliable F1FR – 300 quick start guide

Lee Valley Tools XB820 manual

Lee Valley Tools

Lee Valley Tools XB820 manual

Tyco Fire Product CENTRAL GB-20 instruction manual

Tyco Fire Product

Tyco Fire Product CENTRAL GB-20 instruction manual

Reliable RFC43 quick start guide

Reliable

Reliable RFC43 quick start guide

Tyco RFII-C Series manual

Tyco

Tyco RFII-C Series manual

Tyco ESFR-22 quick start guide

Tyco

Tyco ESFR-22 quick start guide

manuals.online logo
manuals.online logoBrands
  • About & Mission
  • Contact us
  • Privacy Policy
  • Terms and Conditions

Copyright 2025 Manuals.Online. All Rights Reserved.