RAMBO 750 24 User manual

RAMBO Bikes Owner’s Manual
For Models:
750 24
750 26
750 C26

1
RAMBO Bike Owner’s Manual
and General Warnings
Thank You for purchasing a RAMBO Bike, the finest
electric bike you can buy. Before using your new bike,
please take the time to read and understand the
instructions and warnings. We highly recommend you
seek the assistance of your local bike shop with assembly.
This is a significant investment and if the instructions,
warnings, and maintenance tips are followed, you will
enjoy many years of use from your Rambo Bike. Thank
you and have fun riding!
This owner’s manual must be read in its entirety by
everyone including technicians performing maintenance
before operating and/or riding this bike. This manual
explains how to assemble and operate your new bike
safely. It also shows how to perform basic maintenance
and tuning. Some basic maintenance and tuning can be
performed by using this manual as a guide, however
detailed repairs and general maintenance should be
performed by a qualified technician at a local bike shop as
this manual is not intended as a comprehensive service,
maintenance, use, and repair manual. Contact or consult
your local bike shop for all repairs, service, and
maintenance. There are many classes and riding clinics
available for riders of all skill levels, please consult your
bike shop for more information.
As a parent or guardian, you are responsible for the
activities and safety of your minor child, and that includes
making sure that the bike is properly fitted to the child
and is in good repair and safe operating condition. You
must ensure that your child understands the safe
operation of this bike and also follows all traffic and bike
laws and regulations in the area in which the bike is being
operated.
Meaning of special symbols and lettering
Register your bicycle
Please refer to the web address on the back cover of this
manual and follow the links to register your new bike.
Your registration is very important so Rambo Bikes can
communicate any updated safety information. If you
choose not to register, make sure you check our website
often for any safety instructions or information we may
post or contact Rambo directly.
Assembly of your new bicycle
See Section 4 for Assembly Instructions
IMPORTANT INFORMATION BEFORE
YOUR FIRST RIDE
Your dealer or bike shop should t you with the
proper size of bike.
- The seat may be adjusted
to offer the best comfort
and performance.
- General recommendation
is a minimum of 1” of
stand-over height
WARNING
!
Remove the battery before attempting to service,
making adjustments or performing any mainte-
nance on this Rambo bike. Removing the battery
will help ensure the motor is not started inad-
vertently while service or maintenance is being
performed. See Page 12 for battery removal
instructions. The battery should be removed
anytime the bike is stored or is left unattended to
prevent unauthorized use or accidental
engagement of the motor. Keep out of reach of
children. Failure to remove the battery may
result in serious injury or death.
WARNING
!
Never use a battery that is cracked or broken.
Battery acid is highly corrosive and can cause severe
burns if it comes in contact with your eyes or skin.
CHARGE YOUR BATTERY NOW!
You must charge the battery fully prior
to its first use. We recommend you
charge the battery overnight the first
time. See charging instructions Page 12.

2
SECTION 1 - GENERAL WARNINGS
Brakes & Stopping Power:
e Rambo Bike comes equipped with disc brakes.
These brakes are different from other general types
of brakes associated with bikes. Some bikes
typically have rim brakes which operate by
squeezing the wheel rim between two brake pads.
Disc brakes squeeze a hub-mounted disk between
two pads. Stopping power on your bike can vary
depending on adjustments and pad thickness and
wear. Consult your bike shop about brake options
and adjustments based on your specific needs.
Additional Brake Warnings
Disc brakes have varying amounts of stopping power
depending on adjustments and pad condition. Use
extreme caution when applying the brakes. Nev-
er apply the brakes too hard or too quickly which
could cause you to lose control and fall. Excessive or
sudden application of the front brake could pitch the
rider over the handlebars which may result in serious
injury or death.
Never ride with worn brake pads or improperly
adjusted brakes.
Front Wheel and Foot Contact
Do not pedal when
riding slowly if
the handlebar is
turned. It is possible
for your foot to
contact the front
tire if the handlebar
is turned while
you are pedaling.
This will result in a
dangerous situation
which may cause you to lose control and fall.
This does not occur at normal riding speeds.
INSPECT YOUR BIKES FRAME AND FORK
If you notice during your pre-ride inspection that
the frame or fork has any visible damage, cracks,
dents, or problems, do not ride your bike and have
it repaired immediately. If at any time you notice a
shimmy or wobble immediately slow down and take
your bike to your local bike shop for inspection
and/or repair.
WARNING
!
Improper use of the braking system, including
over-use of the front brake, can cause you to lose
control and fall. Avoid improper braking by
understanding and practicing proper application
of your brakes as explained in this manual.
WARNING
!
Contact between your foot or toe-clip and the front
wheel or fender can cause you to lose control and
fall. Avoid pedaling when turning at slow speed.
WARNING
!
A shimmy or steering wobble can cause you to
lose control and fall. If you experience a shimmy,
slow down immediately. Take your bicycle to your
dealer for inspection and repair.
WARNING
!
Disc brakes may have sharp edges that could cut
you. Also, after extended use, your disc brakes
may get extremely hot, take special care not to
touch them until they have cooled.
TRANSPORT OF BIKE
- Always remove battery from bike before
transporting
- Never lay your bike on the chain side

3
Check the tire ination
- Make sure to check tire
pressures using a tire
pressure gauge. e tires
should be set between
7psi and 15 psi.
- Spin each wheel and check that the tires are in good
shape with no cuts or abrasions. If these are found,
replace the tire immediately.
- Inspect the rim for trueness by spinning it and
watching for any side-to-side or up-and-down
wobble. If any movement is noted do not ride this
bike until the rim is repaired.
Wheel Retention System:
Some bike wheels are designed with
quick release attachments and others
are bolted directly on using a hex-nut.
Your bike comes with a bolt on style
front axle, make sure front tire is
centered on the fork. Once centered
secure wheel to the front fork with a
washer and nut on each side.
Brake Reach
Some bikes have adjustable brake levers. These can be
adjusted to fit each individual rider’s specific needs.
For example, if you have a short reach you may need
the levers adjusted closer to the handlebar. This
adjustment or brake lever replacement should be
done by a qualified bike technician or bike shop.
Handlebar stem and front wheel alignment
Make sure the front wheel and handlebar stem are
aligned in the proper orientation of each other.
Turn the handlebar from side to side with the front
wheel locked between your knees to test the stem
connection of the fork. If any movement is noted do
not ride the bike until this is corrected.
Inspect cable routing to be sure the handlebars can
turn freely without binding or pinching the cables.
Check to be sure that your handgrips on the han-
dlebars are in good condition and the bars are not
protruding through the grip.
Seat Position
e saddle should be adjusted for proper t and is an
important factor in riding safely.
Place your pedals in the 6 o’clock and 12 o’clock
position. Your bottom leg should be very slightly
bent when the ball of your foot is placed on the lower
pedal. If it’s bent too much you need to raise the
saddle. If you have to rock your hips to reach or can’t
easily reach, you must lower the saddle.
Ensure that the saddle is straight and level.
Seat and seat post
Check that the seat is securely mounted on the seat
post by liing up and down on the seat. is should
not tilt or move. Next, check the security of the seat
Tires and Wheels
INSPECTION BEFORE EVERY RIDE
Before every ride, inspect the bike with the
following check list. If any part of the bike fails the
inspection, repair the bike by following the
information provided in this manual or take the
bike to your bike shop for service. Never ride a bike
with a damaged part; have it replaced.

4
RULES FOR SAFE RIDING
You must ensure that you understand the safe
operation of this bike and follow all traffic, bike laws
and regulations in the area in which the bike is being
operated. These may include rules regarding helmets,
reflectors, and lights. A few important general rules
for riding include but are not limited to:
-Wear a helmet
that meets ASTM or
CPSC safety testing
requirements
- Have reflectors
and lights installed
on your bike
- Use proper hand
signals
-Avoid loose
clothing
- Ride on the correct side of the road with flow of
traffic
- Always wear bright color and reflective clothing
- Ride single file if riding with others
- Obey all traffic laws and regulations
-Watch for parked car doors opening unexpectedly
-Watch for pedestrians stepping out, pets and
children playing near roadways
- Never carry a passenger
- Never ride with earbuds or headphones
- Always obey traffic signals
- Use caution when crossing railroad tracks and care-
fully cross at a 90 degree angle
- Mount a horn or bell on to your bike to signal others
of your approach
Before riding fast or in more difficult conditions, try
riding at slower speeds in a flat, open lot to test the
function and performance features on your bike.
Consult your local bike shop if you have specific
needs on parts and functionality of your bike. Many
areas offer cyclist courses or classes which can be
found online or through your local bike shops.
Wet Weather Conditions
Use extra caution when riding in wet weather. Your
brakes stopping power will be diminished in wet
conditions no matter what type of brake system you
have, all are affected by wet weather. In order to
ensure you can stop safely in wet conditions, ride
more cautiously and slowly and brake earlier than
you would in normal road and weather conditions.
Never ride in storms with high winds and lightening
conditions.
post in the frame by attempting to rotate the seat.
If the seat rotates, then the seat tube is not properly
clamped in to the frame.
Check the lights and reectors
Make sure the reectors are mounted in the proper
position and they
do not have any
cracks or visible
damage. All
lighting should
be inspected to
be sure they have
fresh batteries and
working properly.
Check frame, fork,
and components
If you notice that
the frame or fork has any visible damage, cracks,
dents, or you hear any unusual noises while riding or
other problems, do not ride your bike. If at any time
you notice a shimmy or wobble immediately slow
down and take your bike to your local bike shop for
inspection and/or repair. Carefully inspect your bike
before and after each ride.
Certain types of impacts can aect the components
of your bike and cause them to fail unexpectedly.
Aer any impact or crash, thoroughly inspect all
the parts of your bike for damage. A crash or other
impact can put extraordinary stress on the bike. An
impact or high force is any situation such as hitting a
hole or obstacle in the road, such as a bump or curb.
WARNING
!
A bike is a mechanical device. Materials and
mechanisms are subject to fatigue and stress. Over
time, components can fail once they have exceeded
their useful limits and life. Product life is often
related to the kind of treatment and riding you
submit your bike to. Hard and aggressive riding
along with neglect will shorten the projected
lifespan of your bike and its components. If not
properly maintained, your bike and its components
can fail causing serious injury or death.

5
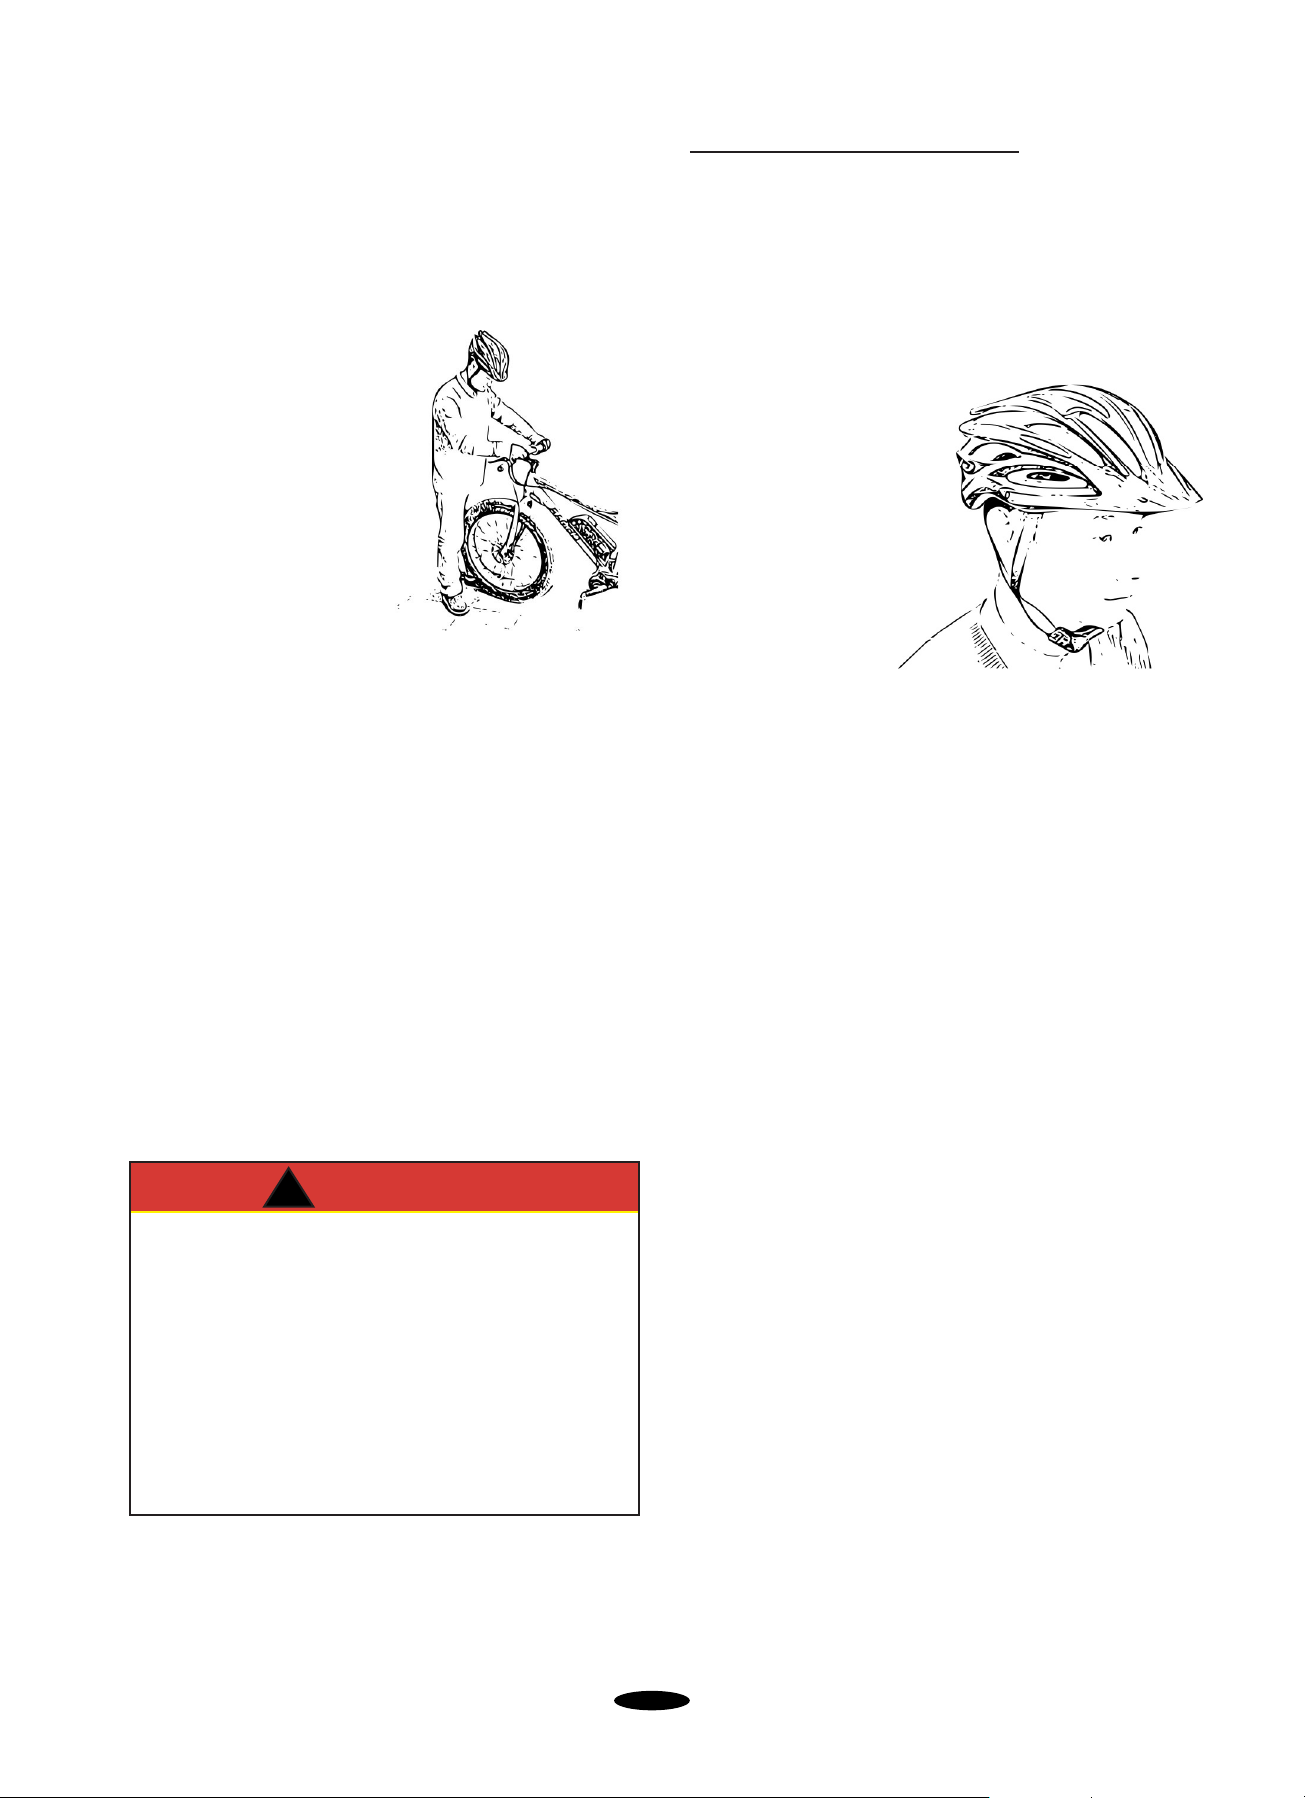
Night Riding and Poor Visibility
Riding at dawn, dusk, during poor visibility or night
riding is extremely dangerous. Your reflectors are
not a substitute for required bike lights. Motorists
and pedestrians may not be able to see a bicyclist
during poor visibility conditions. Consult your local
bike shop for night riding equipment if you choose
to accept the risk of riding during these conditions.
Unsafe Riding
While not all accidents can be avoided the list below
outlines a few examples of things that can decrease
your risk of serious injury or death.
- Pay attention and avoid distractions while riding
- Maintain both hands on the handlebars at all times
-Avoid bike stunts and/or aggressive riding
-When carrying gear make sure it is securely at-
tached to your bike and/or rack.
-Never strap or latch any item to your bike in an area
not designed to carry gear.
- Only carry gear on your racks and within the
standard weight limits of the rack.
- Do not ride while intoxicated or using medications
which might make you drowsy.
- Never carry a passenger while riding
-Avoid riding in mud if possible, mud may cause loss
of traction resulting in loss of control of your bike.
-
WARNING
!
Riding a bicycle in low light conditions without
proper lighting and reectors attached to your bike
impairs your ability to see and be seen by other
motorist or pedestrians. is greatly increases the
chance you will be involved in an accident that
could lead to serious injury or death. Use a light
on the front and rear of your bike and be sure all
reectors are in place before riding in low light
conditions.
WARNING
!
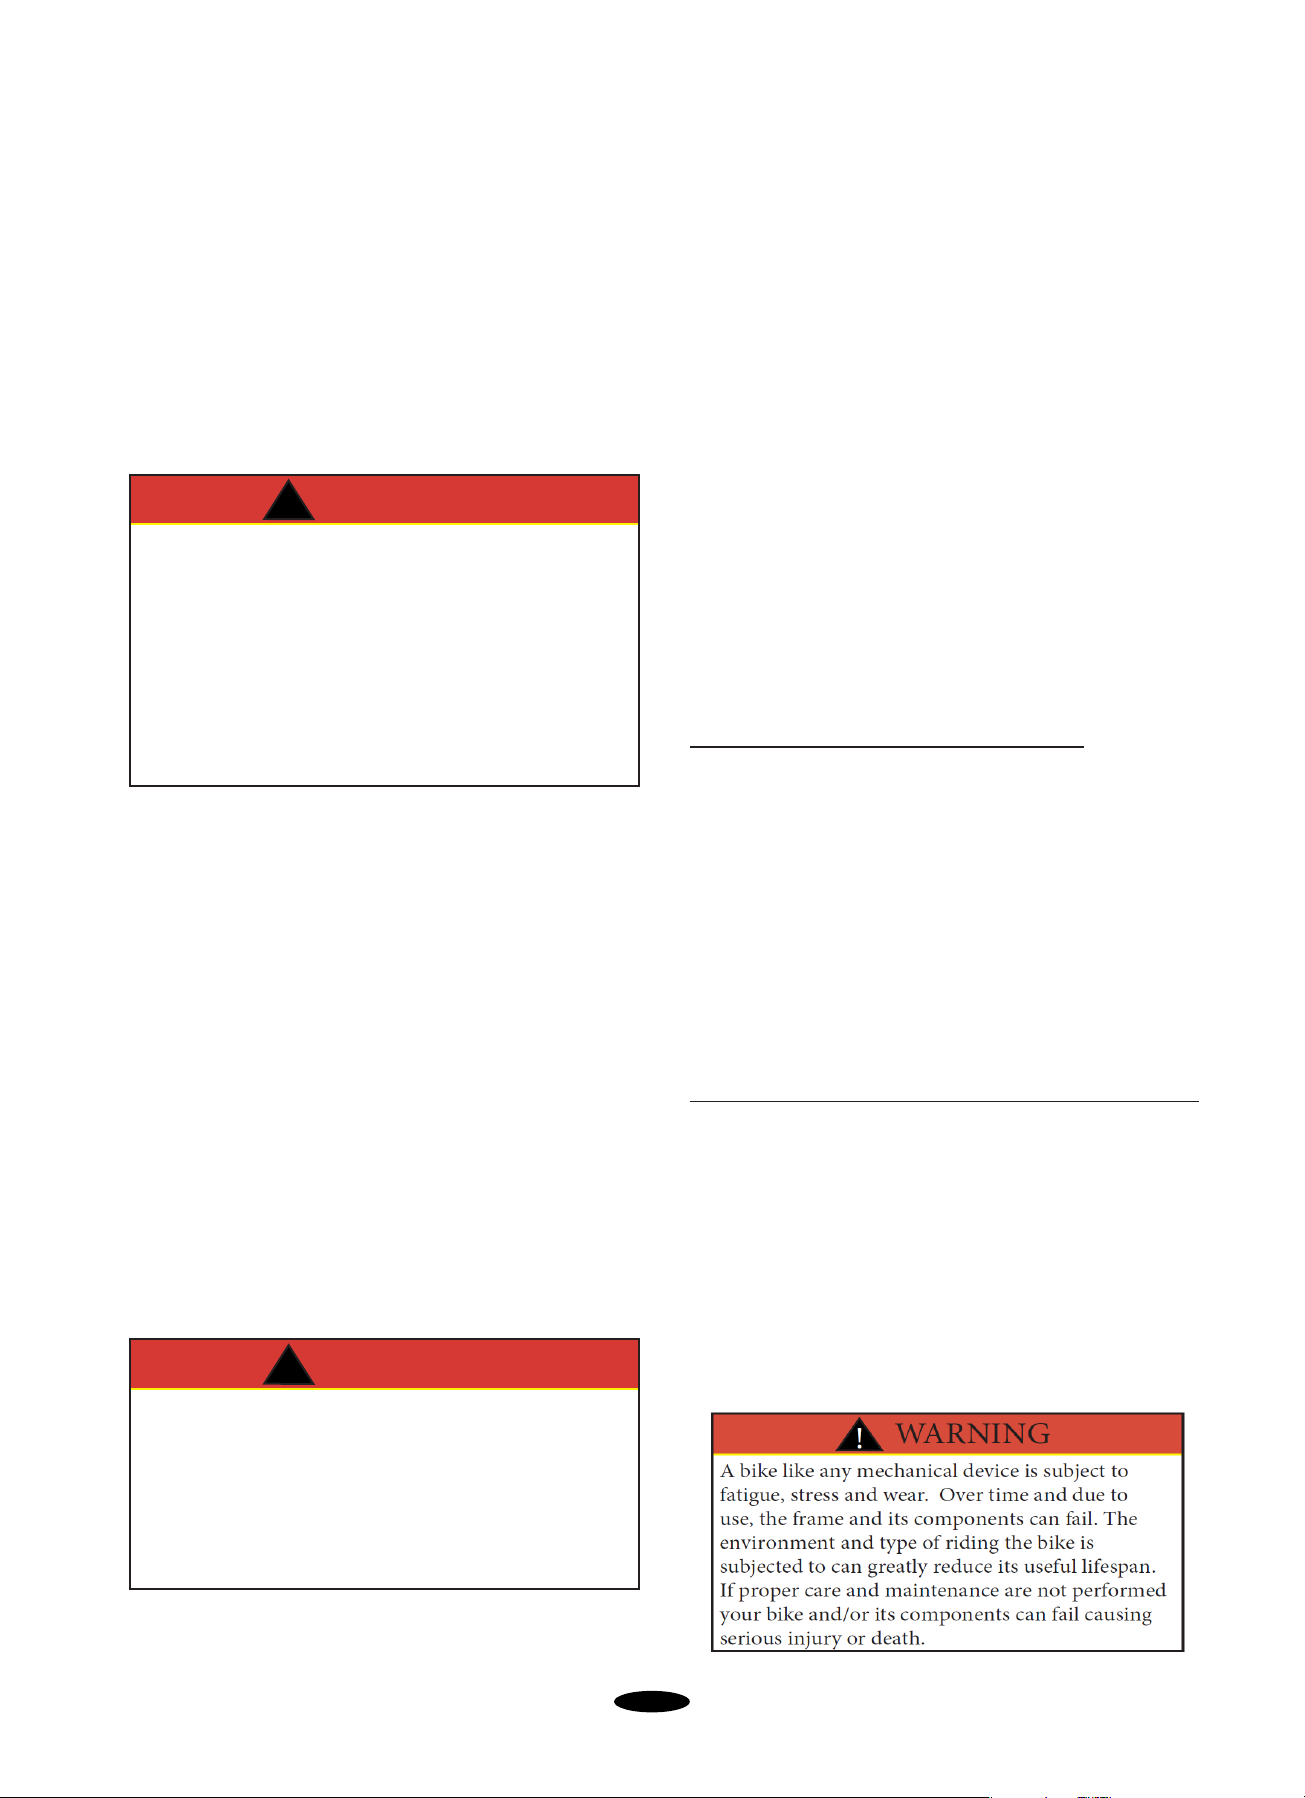
Certain types of riding significantly increase stresses
and abnormal wear and tear on your bike. These are
just a few types of riding that can adversely affect your
safety and lifespan of your bicycle and components.
-competition or stunt riding
-downhill racing/riding
-jumping your bike
Avoid riding too fast
Higher speeds create higher risks and greater forces
in the event of a crash. At higher speeds, it is more
likely that wheels will slip, or that a small bump can
create a significant impact to your frame or fork.
Keep your bicycle under control at all times. For
children, the limit of speed for safe riding is much
lower, so parents should strictly enforce this rule.
Off-Road or Backcountry Riding
Always use special care when riding off-road or in
remote areas. If you are unfamiliar with off-road
riding start out on moderate terrain and slowly build
your skills until you are confident you can ride on
trails and unimproved roads. Remember, keep your
bike under control at all times and never attempt an
obstacle that is beyond your skill level. Riding at an
increased speed in rough conditions greatly increase
your risk of serious injury or death.
Special Considerations for Remote Areas
- While riding on rough terrain even if a short
distance share your destination and route with
another adult
- Never ride alone in remote areas
- Carry a signaling device such as a whistle, cell
phone, or 2-way radio
-Take identification and emergency food and drink
-Wear appropriate clothing and safety gear for the
type of riding you plan
- Carry a first aid kit
Respect local regulations and rules / Private Property
Remember each area in which you may ride your
bike may have specific regulations. Always respect
private property and never trespass. Respect the
rights of others with whom may be sharing the trail
with you; ie: hikers, cyclists, equestrians. Stay on your
designated trail and do not destroy vegetation and
minimize your impact on the environment. If you
are unsure of your local laws or regulations please
contact your local conversation officer before riding
on designated wildlife areas

6
−Strap on your
helmet that meets
ASTM or CPSC
safety testing
requirements
−Have reflectors
and lights
installed on your
bike
−Use proper hand
signals
−Avoid loose clothing
−Ride on the correct side of the roadway with flow
of traffic
−Always wear bright color and reflective clothing
−Ride single file if riding with others
−Obey all traffic laws and regulations and traffic
signals
−Watch for parked car doors opening unexpectedly
−Watch for pedestrians stepping out, pets and
children playing near roadways
−Keep a safe stopping distance between you and
other vehicles
−Never carry a passenger
−Never ride with earbuds or headphones
−Use caution when crossing railroad tracks and
carefully cross at a 90 degree angle
−Mount a horn or bell on to your bike to signal
others of your approach.
Braking
Your bike is equipped with two hand brakes.
One hand brake operates the front brake
and the other operates
the rear. Take time to
familiarize yourself
with which hand
brake stops each
wheel. You can
complete this task by
spinning the front
wheel and squeezing
each brake lever one at a time to determine
which one stops the wheel from spinning; this
would be your front brake.
When preparing to slow down or stop, gently
apply both front and rear hand brakes at the same
time being careful not to
over apply the front
brake which could cause
you to lose control and
fall. Before riding your bike
for the first time please
follow the "Brake Burn in Procedure" in your owners
packet. For more information on your brakes, please
review the Logan brakes manual in your owners
packet. For maintenance of your Logan brakes use
Shimano completable bleed kits and brake fluid.
Replacement Pads and Rotors are available from
Rambo Bikes otherwise they are interchangeable
with Shimano pads and rotors. always replace pads
and rotors at the same time to ensure maximum
performance and lifetime.
Shiing
Your Bike is equipped with a thumb shifter located
on the right side of your handlebar.
The shifter has 3 positions, down, middle and up.
Shifting your bike to the down position will cause the
bike to have the most speed and less torque.
Shifting your bike to the middle positions will give
your bike a mix of speed and torque.
Shifting your bike to up positions will cause your
bike to have the most toque and less speed.
Only shift when there is no motor assistance to the
bike. Do not shift gears while the drivetrain is
powered from the motor. Shifting your bike
under motor assistance could cause damage to
your drivetrain.
NEVER shift gears while using the motor at the same
time. This can cause damage to your drivetrain
system.
For more information on shifting review your SRAM
manual in your owners packet.
WARNING
!
Avoid applying sudden or excessive force to the
front brake system. Doing this can cause your front
wheel to lock up and your rear wheel could li
up and loose contact with the ground. Slide your
weight back on the seat and apply pressure to both
the front and rear brakes at the same time.
SECTION 2 GENERAL RIDING INFORMATION
Once you have inspected your bike and all
components are in proper working condition, you
are ready to test ride your new bike. A few
important general rules for riding include
but are not limited to:

7
SECTION 3 MAINTENANCE AND CARE
Service
Before every ride complete the bike inspection
outlinedin Section 1. If you identify any areas that
need adjustment or service, take your bike to a
qualified bike technician for repair and service.
Before and after every ride:
oCheck wheels and tire inflation
oCheck handlebar and stem
oCheck brakes
oCheck seat and seat post
oCheck lights and reflectors
oCheck frame, fork, and components
oClean your bike and remove any grass or
debris on your bike especially from your
drivetrain system.
oNever clean your brake pads or rotor with
any type of lubricant.
Monthly or every 100 miles:
oClean your bike thoroughly and remove any
grass or debris on your bike especially from
your drivetain system.
oLubricate chain rollers with bike chain
lubricant.
oSqueeze and inspect brakes for wear and proper
working order
oCheck reflectors, lights, and seat/seat post for
excess wear ordamage
oCheck the frame, fork, handlebars, and stem for
cracks and damage
oCheck each pedal to make sure they are not
loose
oMake sure there is no rust or kinks in the
control cables or cable housing
oCheck your wheel rims for excessive wear and
dents or for any loose or damaged spokes
oCheck your tires for tire inflation and excessive
wear, cuts, or abrasions
oInspect shifters and derailleurs and lubricate
derailleurs
oCheck each pedal arm to be sure they are tight
oCheck your wheel rims for excessive wear and
dents and for loose or damaged spokes
oCheck your tires for tire inflation and excessive
wear, cuts, or abrasions
oCheck crankset and bottom bracket
oInspect brake levers, shifters and derailleurs
oLubricate brake levers, shifters, and derailleurs
oLubricate bottom bracket bearings, wheel
bearings, and suspension forks
oCheck each pedal arm to be sure they are tight
If you are uncomfortable with any service or general
maintenance to your bike, please visit your local bike
shop for service and maintenance.
Take your bike to your local bike shop for inspection
aer 30 days or if you think something is wrong with
you bike take it in immediately.
Your bike and components are subject to wear and
fatigue. If a component’s life cycle is exceeded it can
suddenly fail which may cause serious injury or
death.
Take your bike to your local bike shop for repair and
service if you notice any of the following or any other
wear and fatigue:
oAny cracks, fraying, scratches, or discoloration.
oIf your chain is not shifting quietly from gear to
gear the derailleur is out of adjustment.
oIf the brake leverfails
oAny signs of fatigue or excessive wear or damage
NOTE: If you notice any signs of wear, damage or
fatigue, DO NOT RIDE YOUR BIKE.
Take your bike immediately to a local bike
shop for repair and service!
Every 3 months:
oCheck reflectors, lights, and seat/seat post for
excess wear ordamage
oCheck the frame, fork, handlebars, and stem for
cracks and damage
oLubricate handlebar stem and seatpost
oCheck each pedal to make sure they are not loose
and lubricate
oMake sure there is no rust or kinks in the control
cables or cable housing

8
o4mm Allen Key
o5mm Allen Key
o6mm Allen Key
o13mm Open Ended Wrench
o15mm Open Ended Wrench
Figure 1. Unpacking your Rambo Bike:
•Carefully remove bike and components from
the carton as shown in Figure 1.
•Check to be sure all components are present
and not damaged.
oFrame with rear wheel attached
oFront wheel
oThrough axle
oHandlebar assembly
oSeat and seat post assembly
oPedals (left and right)
oMotor (E-Bike only)
oBattery (E-Bike only)
oCharger (E-Bike only)
oController display (E-Bike only)
Serial Number:
•Locate your bike serial number which is
stamped and located on the head tube as
shown in Figure 2.
•Write down the serial number in the owner’s
manual and store in a safe place.
Section 4 - Assembly Instructions
This manual provides instructions on how to assemble your new Rambo Bike as it comes from the factory.
If you feel you do not understand the instructions, have the proper tools or would prefer a qualified
technician perform the assembly, take your new Rambo Bike to your local bike shop.
is manual may contain some illustrations and information that does not apply to the model of bike you
may have. Some of the information contained in this manual refers to bikes in general as there are many
models, with a variety of equipment, so no one manual can cover them all. If you have any questions aer
reading the information in this manual, contact your local bike shop or Rambo directly.
Tools Needed (not included in packaging):
Front Wheel Assembly:
Read all warning labels associated with this product.
Figure 3
Figure 1
Figure 2

9
Check that the front fork is assembled properly as
shown in figure 3.
Important: Never squeeze the brake lever when the
wheel is not installed. Failure to follow this
warning will cause brake pads to over travel and
will not allow brake rotor to fit properly.
Place the wheel assembly into the fork dropouts
being careful to align the brake disc into the caliper
slot as the axle is installed into the fork dropouts as
shown in the pictures in figure 3.1.
Check brake rotor alignment in the caliper slot. The
wheel should rotate freely without the caliper
rubbing or binding.
The tire should be an equal distance from each side
of the fork.
Note: If the lever can easily be pushed,
this means that it is not secured tightly
enough. If this is the case, use wrench to tighten
the tension adjusting nut.
To mount the front wheel to the fork insert washer
and nut on each side, when tightening make sure the
wheel stays centered on the fork and brake
alignment is proper. Continue tightening until nut is
securely fastened.
•Check again that the wheel should rotate freely
without the caliper rubbing or binding. The tire
should be an equal distance from each side of
the fork.
•The rear wheel comes assembled on the frame.
•The rear wheel is secured to the frame with a
through axle and lever.
•You must check the lever tension on the end of
the through axle to be sure they are tight.
•Ensure the disc brake rotor is properly aligned
in the brake caliper and the wheel is properly
aligned in the frame.
•The wheel should rotate freely without the
brake rotor rubbing or binding in the caliper.
The tire should be set evenly between the
closest points on each side of the frame.
Figure 3.1

10
Saddle Assembly:
oLoosen the seat post clamp. If your bike has a
quick release lever rotate the quick release clamp
until it is fully open.
oQuick release levers operate with an adjusting
nut at one end, and a lever on a cam at the other
end.
oAlways adjust the Quick release clamp with the
lever in the open position, and by turning the
nut (not the lever) as shown in Figure 5.2.
−Insert seat post into the frame tube. Slide it
down to desired height, ensuring the minimum
insertion mark cannot be seen as shown in
Figure 5.3
−Check that the saddle is aligned with frame and
set at the correct angle. To align the saddle,
stand over the bike and align the nose of the
saddle to run parallel with the top tube of the
frame. Once the saddle is correctly aligned
tighten the adjusting nut and then close the
quick release lever as shown in Figure 5.4
WARNING
!
Your seat post must be inserted in the frame seat
tube far enough so that the Minimum Insertion
Mark (Figure 5.1) cannot be seen.
Failure to do this may cause the seat post to break,
which could cause you to lose control and fall
resulting in serious injury or death.
Handlebar Assembly:
•Carefully remove protective packaging.
•Inspect cables, levers, electronics ‘if equipped’
and shifters for damage.
•Remove factory installed front plate on the
steering stem as shown in Figure 4.1.
•Place handlebar into stem and replace front
plate making sure the handlebar is equal in
length on both sides.
Beginning with the top left bolt,use the correct size
allen key to turn the bolt clockwise two full turns.
−Repeat this step for the bottom right bolt.
−Repeat this step for top right bolt.
−Repeat this step for bottom left bolt.
•Ensure lengths are equal on both sides for correct
positioning of handlebars as shown in Figure 4.2.
•For flat handlebars the controls are roughly at a
45° angle with the ground. Once desired
handlebar position is found,you will now need to
tighten the bolts on the front plate of the stem.
•Follow these simple steps and repeat until the
handlebar is stable and the recommended torque
settings are reached.
•Repeat this sequence one turn at a time until
spaces between the face plate and stem are even
at all four points as shown in Figure 4.3.
•Torque settings: For a 5/6mm bolts a 9N/M
maximum torque must be applied.
Figure 4.3
Figure 5.2 Figure 5.3
Figure 4.2
Figure 4.1
Figure 5.1

11
−Adjusting seat height for proper fit. Get a friend
to help, lean against a wall or use a trainer.Pedal Assembly:
oIdentify Left vs Right
pedal. There is a “L”
or “R” stamped into
the metal part of the
pedal near the
threaded part that
looks like a screw as
shown in Figure 6.1
Note: they are not
the same!
oInsert the Le Pedal
into the Le pedal arm
and turn the thread
counter clockwise by
hand. Note: The right
hand side of the bike is
the chainwheel
side of the bike.
Fully tighten with a 15mm open ended wrench.
−Insert the Right Pedal into the Right pedal
arm and turn the thread clockwise by
hand.
−Fully tighten with a 15mm open ended
wrench. See Figure 6.2
Figure 6.2
Figure 6.1
Figure 5.4
Place your pedals in the 6 o’clock and 12 o’clock
position. Your bottom leg should be slightly
bent when the ball of your foot is placed on the
lower pedal.
If it’s bent too much you need to raise the
saddle. If you have to rock your hips to reach or
can’t easily reach, you must lower the saddle.

12
Battery Installation/Removal
To install the battery:
Find the battery baseplate that is located on the top of
the down tube. The battery and battery base plate are
designed to lock together to keep the battery from vibrating
on rough terrain. To lock battery to base plate turn key
clockwise.
Center the battery over the base plate and slightly forward,
then slide the battery down to lock into place. Once in place
lock battery onto base plate using the key.
To remove the battery:
Turn key counter clockwise to unlock, then slide battery forward.
Charging Battery
o Keep the Battery & charger away from water and open fire.
oBattery must be charged fully prior to its first use. We recommend charging battery overnight the first time.
oAlways plug charger into battery before plugging in to electrical outlet.
o Do not use the battery & charger for other purposes.
o Do not connect positive and negative terminals.
o Keep the battery away from children and pets.
o Do not subject the battery & charger to shocks (e.g. by dropping).
o Do not cover the battery & charger or place objects on top of it.
o Stop the charging procedure immediately if you notice a strange smell or smoke.
o In the unlikely case that the battery is on fire, DO NOT try to put it out with water. Use sand instead and call
emergency services immediately
oBattery may be charged on or off the Bicycle.
oIt is recommended to charge battery once every 2 months when stored for extended periods of time.
oConnect power cord to charger and only plug into a normal household outlet 120 volt
oPlug charger into battery port as shown. See illustration.
oNever charge your battery when battery temperature is below 32 degrees Fahrenheit, or 0 degrees Celsius.
oNever store your battery in areas susceptible to high heat.
oUse of battery in extreme temperatures will cause battery damage.
LED indicator colors
•Green – not connected or fully charged
•Red – battery is connected and charging normally
•Red Flashing – Battery or charger may be faulty.

Section 5 - Operating Instructions
Operation of control buttons
Use and operation of your Rambo Bike
Press and hold the power button located on the left side of the handle bar to turn on your bike.
Your bike comes with 5 levels of power or pedal assist.
Levels 1-5 can be used with either thumb throttle or pedal assist.
Level 1 is 20% motor power, Level 2 is 40% motor power, Level 3 is 60% motor power,
Level 4 is 80% motor power, and Level 5 is 100% motor power.
Level 0 uses no motor power, it is used as a safety
feature or for pedaling the bike under the rider’s
own power with no assist.
For more information on your LCD display
review the manual in your owners packet.
12
13

How to use Thumb Throttle
When riding your Rambo Bike, the thumb throttle can be used from a complete stop if you choose.
The rider must select the appropriate pedal assist level according to rider skill and terrain. Then by
pushing down on the throttle the motor will engage and the bike will begin to move forward. The
pedal assist level can be changed while the bike is in motion. As the power level from the motor is
increased, the bike will react with more speed and power. When coming to a stop, after the MPH has
reached 0.0, the rider will have 6 seconds to use the same pedal assist level to take off again on the bike.
After 6 seconds, the pedal assist level will return to 0. To use motor power again, press the + button
until the desired pedal assist level has been reached.
How to use Pedal Assist
When riding your Rambo Bike, the pedal assist can also be used from a complete stop if you choose.
The rider must select the appropriate pedal assist level according to rider skill and terrain. Then the
rider can begin to pedal, and after 1 or 2 revolutions on the pedals (depending on speed) the motor will
engage and assist the rider in propelling the bike. The pedal assist level can be changed while the bike is
in motion. As the power from the motor is increased the bike will react with more speed and power.
When coming to a stop, after the MPH has reached 0.0 the rider will have 6 seconds to use the same
pedal assist level to take off on the bike. After 6 seconds, the pedal assist level will return to 0. To use
motor power again, press the + button until the desired pedal assist level has been reached.
Added Features of your Bike
Brakes: Rambo uses E-bike specific brakes on all their bikes. This means that when the brakes are
applied the motor can not run. This allows for safe braking and stopping.
Shift Sensor: Rambo uses an electronic shifting sensor to kill the motor briefly while you are shifting
gears. This ensures a smooth shift and less wear and tear on your drivetrain.
Ergonomic handlebar controls: Rambo has configured the absolute best handlebar configuration for
e-bikes. This ensures all operations can be done with ease. Shifter, thumb throttle, brakes, etc.
14

15
STANDARD LIMITED WARRANTY
Bicycle Lifespan
Rambo Bikes™ have an expected lifespan depending on the level of care and/or use. Misuse, neglect and abuse will significantly
reduce the expected lifespan of your bike. Some types of riding styles - competition, jumping, downhill racing, and extreme
conditions or climates - will all impact the lifespan of your bike and its components. These types of riding may cause premature
failure of your bike and its components. This warranty does not extend to any failures associated with this type of riding, or to
any Rambo products that have been subject to misuse, neglect, abuse, or improper storage, or if the product is modified or altered
in any way other than as directed by official Rambo Bike instructions. Always have your bike periodically inspected by a qualified
bicycle technician. These inspections are crucial for the safety of you and others around you as well as extending the lifespan of
your Rambo.
Limited Lifetime Frame Warranty
Rambo bike frames are warranted against factory defects for the lifetime of the original purchaser as long as they remain the
owner of the Rambo bike. This warranty is non-transferable. Your Rambo frame is warranted against premature failure caused by
faulty workmanship or materials, as determined by Rambo Bikes. Frames must be returned to Rambo Bikes at the owner’s
expense for determination of defect and/or replacement. If a frame replacement is found to be warranted by Rambo Bikes, a
comparable frame (depending on availability) will be issued to the original purchaser. Front forks and suspension forks do not
have a lifetime warranty!
Warranty
Beyond the lifetime frame warranty, Rambo Bikes warrants all bikes, enclosed hardware (where applicable) and accessories to be
free from defects in material and workmanship for a period of twelve months from the original date of purchase. Some
components on your Rambo bike such as brakes, tires, tubes, chains, grips, motors and cables are not warranted against normal
wear. If you find a product to be defective, contact Rambo at 952-283-0777. All components must be returned at the owner’s
expense for inspection. Product repairs and/or updates not covered by warranty will be provided at a set rate. At its sole
discretion, Rambo will determine whether the component will be covered under this warranty. This warranty is in lieu of all
other warranties expressed or implied. You may have certain legal rights that extend beyond this warranty in certain states.
Terms and Conditions of this Limited Warranty
This limited warranty does not cover installation, disassembly, adjustments of components, normal wear and tear,
damage caused by improperly installed parts or components, installation and use of aftermarket accessories or storage
fees. Any installation of a powerplant (motor electric or internal combustion) other than powerplants supplies directly by
Rambo Bikes immediately voids this warranty. Some parts and components may from time to time become obsolete or
discontinued. Rambo Bikes reserves the right to substitute any component at its sole discretion. This is the only warranty
provided or honored by Rambo Bikes, and no other warranty will be honored unless specifically provided for by law. No
implication of merchantability or fitness for a particular purpose has been made by Rambo Bikes.
General
Rambo Bikes™ will not be held liable for any damages resulting from breach of warranty or for sums beyond the purchase price of
the product. Rambo Bikes is not liable for lost profits or goodwill; downtime; damage or destruction of items or equipment used
with, or in conjunction with Rambo Bikes™; personal injury or loss; or any other damages. This agreement is the entire agreement
between you and Rambo Bikes™, and supersedes any prior agreements, representations, or proposals; and may be changed only by
written agreement with Rambo Bikes™. Waiver by any party or breach of this agreement will not constitute a waiver of any
subsequent default or breach of the same of different kind. The invalidity of any provision of this agreement shall not affect the
validity of the other provisions hereof. This agreement shall be governed by laws of the State of Minnesota, U.S.A.
Rambo Bikes™; Lakeville, MN 55044
****************** PRODUCT REGISTRATION ***********************
Please complete this card and mail to Rambo or visit RamboBikes.com and submit registration online to activate your warranty.
Product __________________________ Model Number/Serial Number _____________________________
Owner’s Name ____________________________________ Purchase Date ________________________
Street Address __________________________________________________________________________
City _____________________________ State __________ Zip Code _____________
E-mail Address _________________________________________________ Phone ________________________
Purchased From (Dealer Name) __________________________________________________________________
How did you hear about us: ____ Catalog ____ Webpage ____Friend ____Magazine
Other, Please Explain ____________________________________________________________________

WWW.RAMBOBIKES.COM
21673 Cedar Avenue South • Lakeville, MN 55044 • Tel: 952-283-0777 • Fax: 952-236-6458
Rambo Bikes; Second Edition; December, 2018
This manual suits for next models
2
Table of contents
Other RAMBO Bicycle manuals