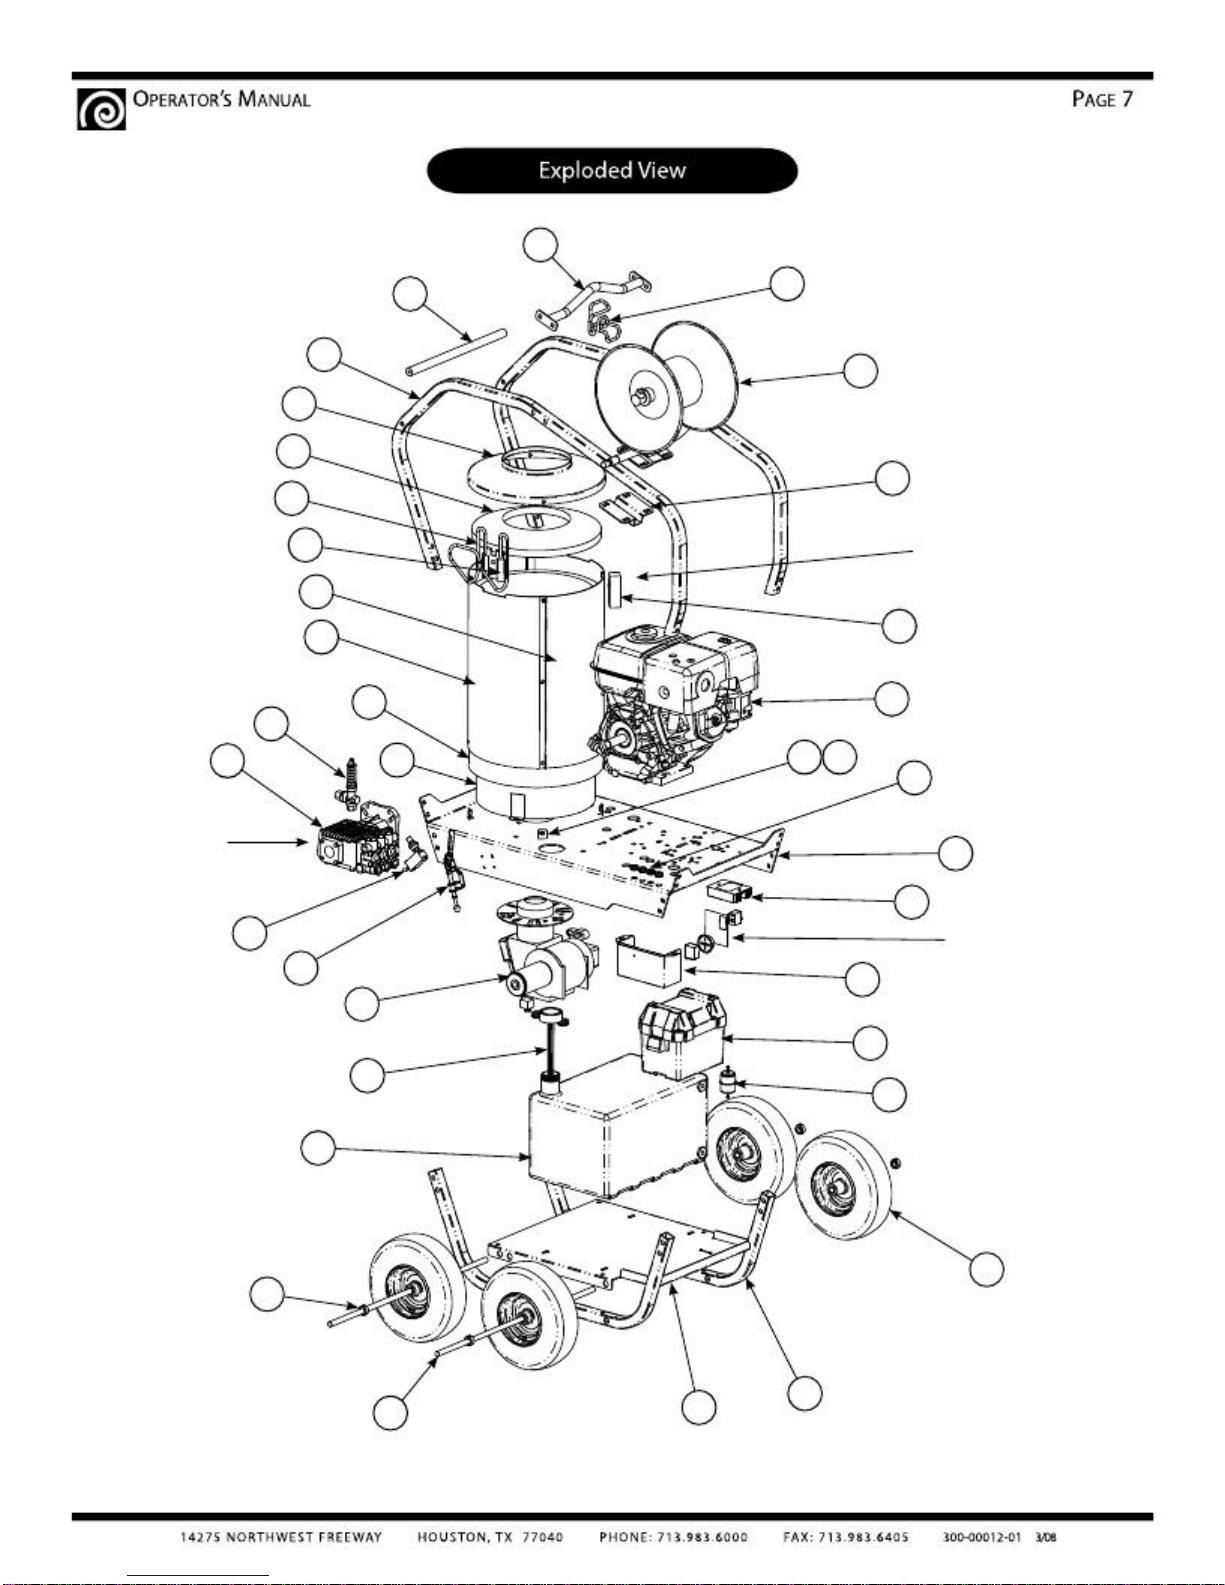
RAMTEQ ® n n n n
1 180-00411-01
2 180-00412-01
3 175-00001-05
4 170-00015-01
5 516-00001-01
6 190-00002-04
7 577-00002-01
8 140-00001-01
9 590-00003-01
10 180-00410-01
11 206-00050-02
12 210-00001-04
13 220-00015-02
14 230-00011-02
15 574-00002-01
16 250-00005-04
17 180-00430-01
18 180-00153-01
19 508-00002-01
20 155-00002-02
21 191-00006-01
22 180-00424-01
23 180-00423-01
24 180-00132-01
25 180-00133-01
26 191-00009-01
27 180-00425-01
28 185-00001-01
29 180-00413-01
30 180-00428-01
31 180-00418-01
32 180-00429-01
33 595-00038-01
34 180-00426-01
35 171-00001-01
36 567-00001-01
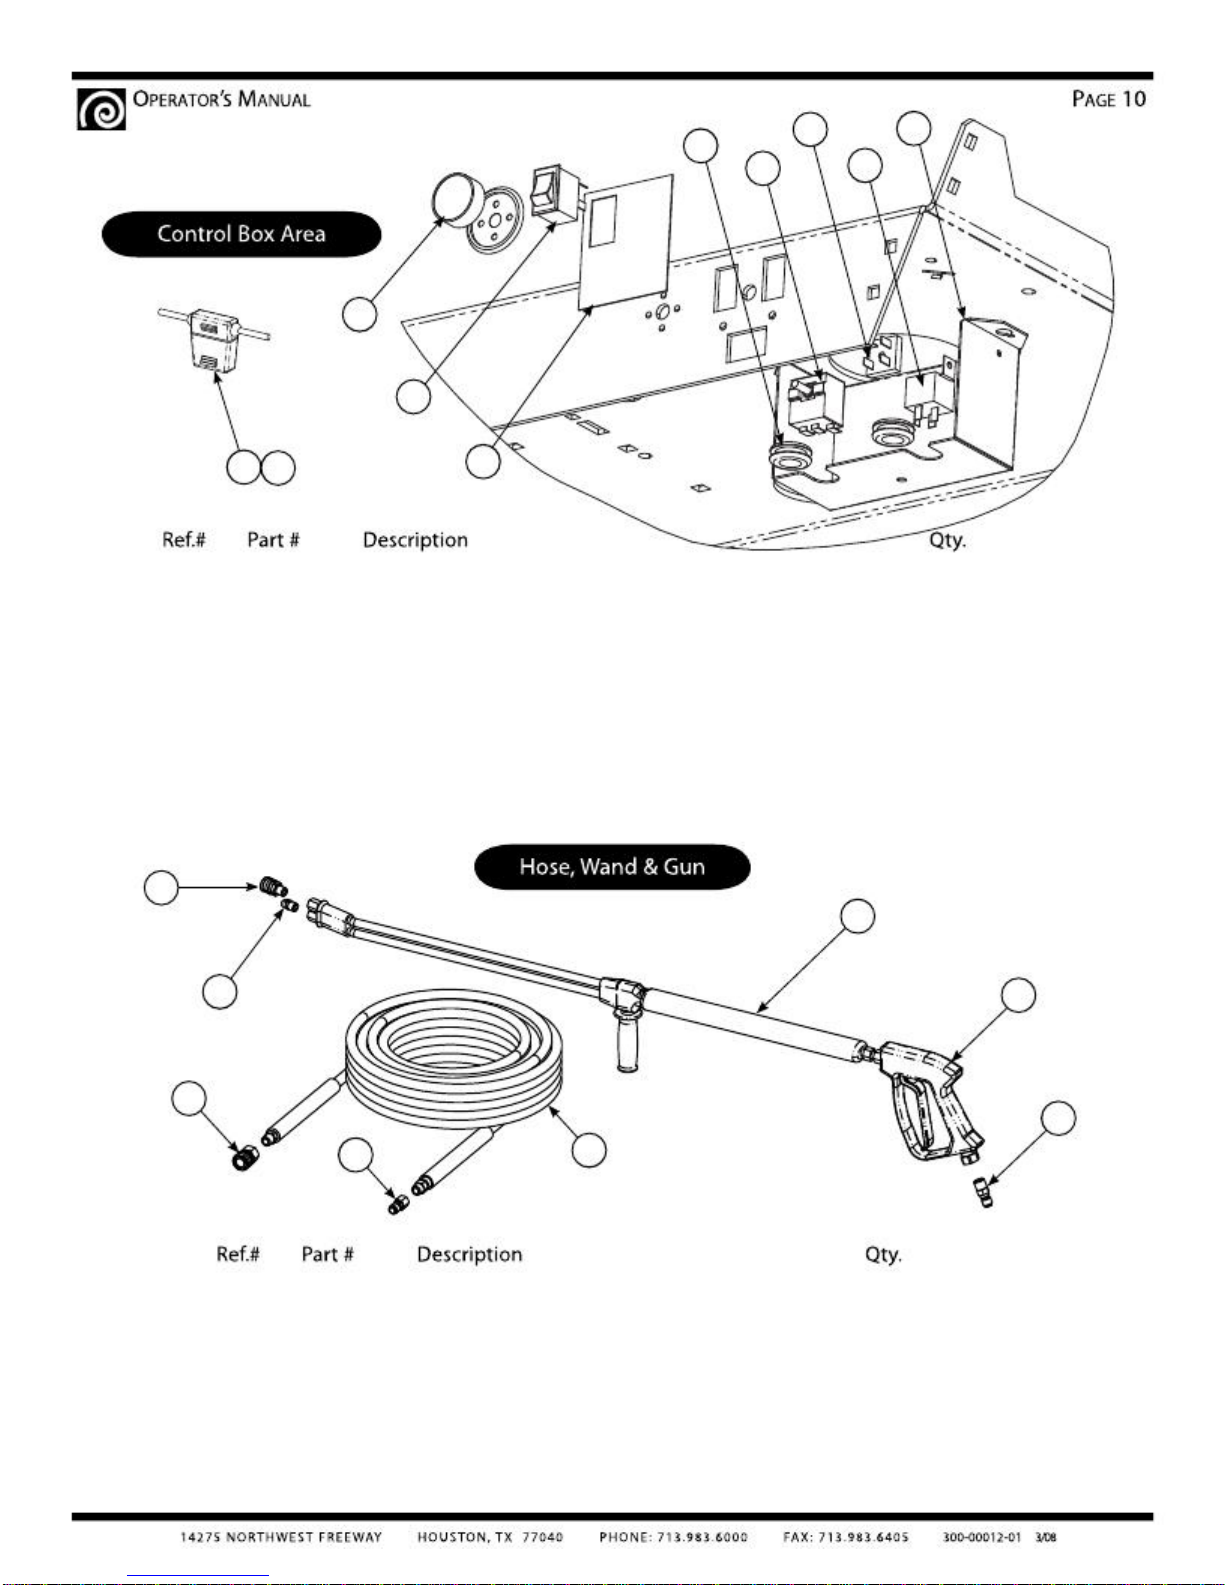
NOT SHOWN
439-00003-12
439-00003-13
457-00002-01
591-00001-02
270-00001-01
270-00001-02
270-00001-03
270-00001-04
Base
Frame, Lower
Axle, SS,5/8"x 30"
Wheel, pneu,12", tubetype, 1 pc hub, 5/8 brg
Bushing, Wheel Collar, 5/8"
Tank, fuel, 9 gal, black, ID0104H
Filter, fuel, inline
Cap, fuel guage, diesel, black, one way vent
Tray, Battery, vented, black, w/hdwr, 9082-1 1
Power Plate
Engine, Diesel 9.1HP, Kohler KD420
Regulator, for 11/13HP Honda engine
Pump, GP, EZ4030G34
Unloader, Pulsar#3HP, without knob
Pressure switch, GP#YPRESSWITCH
Burner assy, oil, ADC-13.5V, #RTQ202, w/ign
Closeout, Controls
Tab, burner plate
Nut, SP, Cage, 1/4-20, .064-.105
Coil, medium, diesel fired
Insulation, blanket, 1", 24"wide, 4#
Shell, Removable, 16", Round
Shell, Stationary, 16", Round
Bracket,Cord Holder
Cord Holder, Bent wire, chrome plate
Insulation, cap, 16"x8"
Cap, 16", Round Shell
Manifold, outlet
Frame, Upper
Handle, Treaded Rod
Lifting Bar Assy
Wand Holder, wire
Hose Reel
Bracket, Hose Reel Mounting
Brake Assy
Grommet,nozzle holder
Cable, batt,w/terms, black, 25"
Cable, batt, w/terms, red, 42"
Boot, red insulator, B&S 281223
Battery 12v, Group U1,230 Crank Amps
Nozzle, water, #3.5, 0 degr, quickconn
Nozzle, water, #3.5, 15 degr, quickconn
Nozzle, water, #3.5, 25 degr, quickconn
Nozzle, water, #3.5, 40 degr, quickconn
1
2
2
4
4
1
1
1
1
1
1
1
1
1
1
1
4
4
1
49 IN
1
1
1
1
1
1
1
1
1
1
1
1
1
1
4
1
1
1
1
1
1
1
1