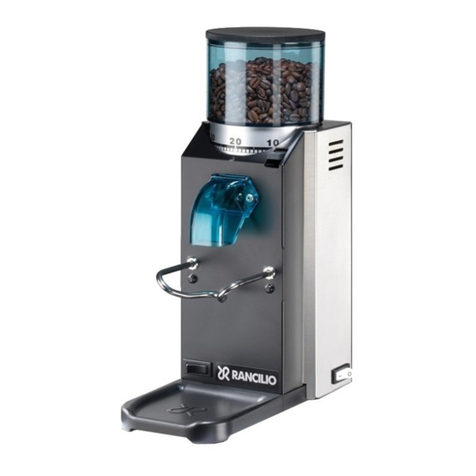
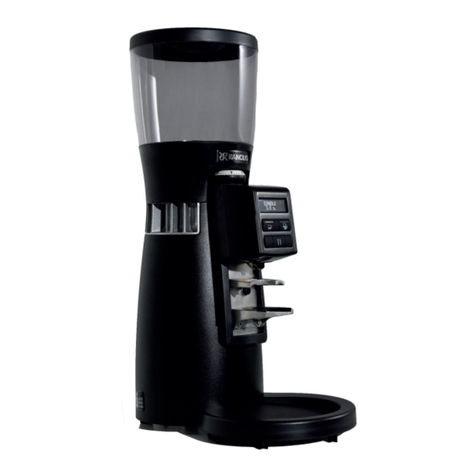
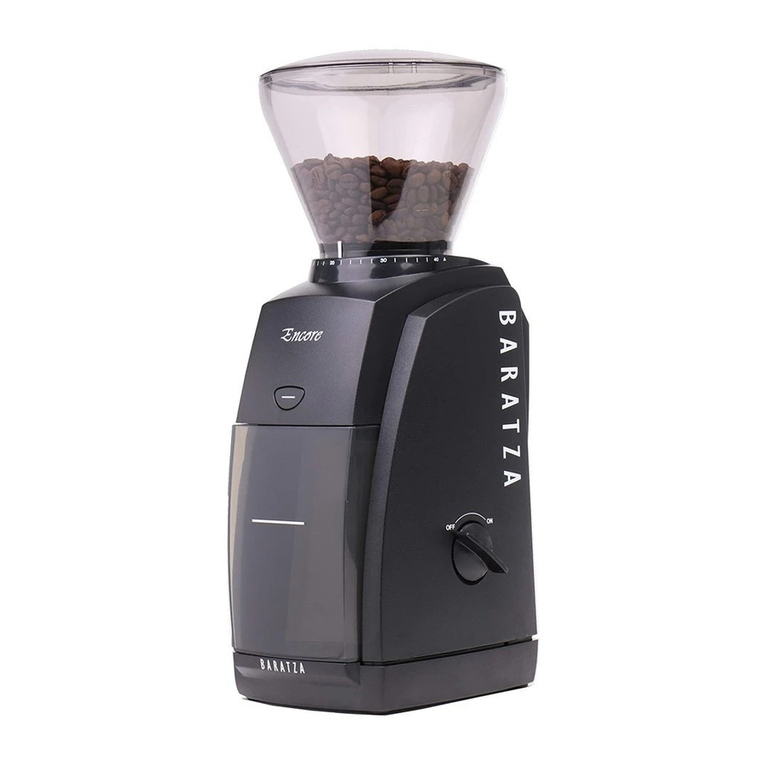
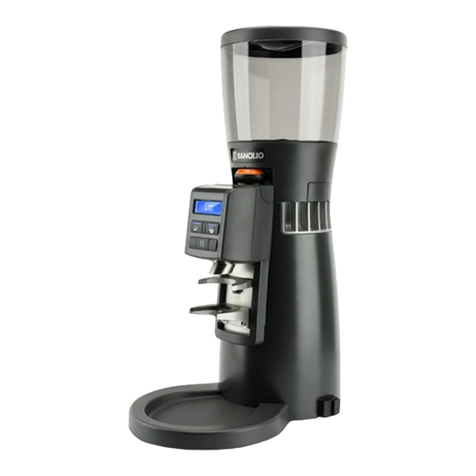
Rancilio STILE User manual

STILE
Installation and user manual
Read these instructions carefully before first use.
TRANSLATION OF THE ORIGINAL INSTRUCTIONS
Rev-- _05/2022
1
0

STILE_05.2022 STILE_05.2022
3
/
2
8
2
/
2
8
STILE
STILE
EN
EN
STILE
STILE
EN
EN
Dear Customer,
Thank you for placing your trust in us. We hope that the product you have purchased
will meet with your full satisfaction. The product you are about to use is based on
considerable research and meticulous testing, and is the most functional, safest and best
appreciated, even in terms of design, currently available on the market. This manual for
correct use and maintenance will help you make the most of your appliance. We hope
you find this manual to be of use, and wish to thank you again for being our customer.
This manual, like the EC Declaration of Conformity, is an integral part of your doser
grinder. It must therefore be handled and stored with care, made available to all users
and kept with the appliance in case the latter is moved or sold to third parties.
To ensure correct and safe use of your coffee grinder, please follow all the
instructions and warnings in this manual with care.
INDEX
1 IMPORTANT SAFETY MEASURES 4
2 IDENTIFICATION OF THE APPLIANCE AND TECHNICAL DATA 6
2.1 Identification of the parts of the doser grinder 6
2.2 Identification of the appliance 6
2.3 Technical details 7
2.4 Safety devices of the doser grinder 7
3 INSTALLATION 8
4 USING THE DOSER GRINDER 9
4.1 Preparation for use of the doser grinder 9
4.2 Appliance controls 10
4.2.1 Switch 10
4.2.2 Display 10
4.2.3 Portafilter button to activate grinding 12
4.3 Choice of dose dispensing mode 12
4.4 Setting of grinding times (single dose / double dose) 13
4.5 Dose dispensing mode 13
4.5.1 Preselection 13
4.5.2 Microless 14
4.6 Adjustment of degree of grinding 16
5 MAINTENANCE OF THE DOSER GRINDER 17
5.1 Routine maintenance 17
5.1.1 Cleaning the appliance 18
5.1.2 Check of condition of the power cable 20
5.1.3 Thorough cleaning of the grinders 20
5.1.4 Temporary decommissioning 20
5.1.5 Replacement of the grinders 21
5.1.6 Final decommissioning 21
6 TROUBLESHOOTING 21
7 ATTACHMENTS 23
7.1 Wiring diagram 23
7.2 Disposal 24
7.3 EU declaration of conformity 25
7.4 Food compliance declaration 26

STILE_05.2022 STILE_05.2022
5
/
2
8
4
/
2
8
STILE
STILE
EN
EN
STILE
STILE
EN
EN
1 IMPORTANT SAFETY MEASURES
IMPORTANT SAFEGUARDS
READ ALL THE INSTRUCTIONS
• The appliance must not be used by children under the age of 8 or by persons with
reduced physical, sensory or mental abilities, or with a lack of experience and
knowledge, unless they are closely supervised and instructed on the use of the
appliance. by a person responsible for their safety.
• Close supervision is required when an appliance is used by or near children.
• Children must be supervised to ensure that they do not play with the appliance either
with or without supervision.
• Maintenance and cleaning cannot be done by children.
• The packaged appliance must be stored in a dry place, sheltered from bad weather
and kept at a temperature not lower than 5 °C.
• Avoid placing heavy packages of any other kind on top of this one. Do not stack more
than three pieces of the same type.
• The packaging (plastic bags, polystyrene foam, nails, cardboard, etc.) must not be
left within the reach of children as they are potential sources of danger.
• Incorrect installation can cause harm to people, animals and property for which the
manufacturer cannot be held responsible.
• Using accessories not recommended or sold by the manufacturer may cause fire,
electric shock or injury.
• Avoid contact with moving parts.
• Do not attempt to defeat any safety interlock mechanisms.
• The maximum inclination of the work surface must be less than 5° to avoid overturning.
• Switch offthe appliance and remove the plug from the socket if not in use and before
assembling or disassembling the parts and before cleaning. To unplug, grasp the
plug and pull it out of the socket. Never pull the power cord.
• Install the appliance on a water-repellent surface (made of laminate, steel, ceramic,
etc.) away from heat sources (ovens, stoves, fireplaces, etc.) and in environments
where the temperature does not drop below 5 °C. FROST CAN CAUSE DAMAGE.
Place the appliance on a level surface.
• Do not install the appliance in places where water jets or high pressure cleaning
machines are used.
• Do not expose the appliance to bad weather or install it in environments where there
is high humidity such as bathrooms.
• Leave sufficient clearance around the appliance to ensure ease of use and
maintenance.
• Use only accessories and spare parts authorised by the manufacturer to avoid
compromising the safety and correct operation of the appliance.
• The appliance must not be cleaned with a water jet.
• In the event of an emergency, such as the onset of fire, abnormal noise, overheating,
etc., intervene immediately by disconnecting the power supply.
• Switch offthe appliance and disconnect it from the mains before changing any of the
accessories or approaching moving parts during normal use.
• Do not obstruct the vents. Do not cover with cloths or anything else.
• Do not let the cord hang over the edge of the table or counter.
• Do not use outdoors.
• To avoid the risk of electric shock, do not immerse the appliance in water or other
liquids.
• Before connecting the appliance, make sure that the data on the plate correspond to
those of the electrical distribution network.
• The use of adapters, multiple sockets and/or extensions is not recommended. If
essential, use only certified products. Check that the current limits indicated on the
adapters are higher than the absorption (A = amperes) of the appliance.
• Do not use the appliance if the cord or plug is damaged, if the appliance does not work
well, or if it has been dropped or damaged in any way. Contact the manufacturer’s
customer service for information on trouble-shooting, repair or adjustment.
• All electrical maintenance operations (e.g. replacement of damaged cables) must
be carried out by qualified personnel and with the appliance disconnected from the
electricity mains.
• The STILE doser grinder is an appliance intended for domestic and non-professional
use.
• The doser grinder was designed exclusively to grind roasted coffee beans. Do not
use the coffee grinder to grind other types of food or other grains.
• Do not use the appliance with damp or wet hands.
• Do not attempt to remove any foreign bodies that have accidentally fallen into the
hopper and/or the grinding area without first disconnecting the appliance from the
power supply.
• Any other use of the doser grinder is to be considered improper and therefore
dangerous. The manufacturer declines all responsibility for any damage due to
improper or incorrect use of the doser grinder.
SAVE THESE INSTRUCTIONS

STILE_05.2022 STILE_05.2022 7
/
2
8
6
/
2
8
STILE
STILE
EN
EN
STILE
STILE
EN
EN
2 IDENTIFICATION OF THE APPLIANCE AND TECHNICAL DATA
2.1 Identification of the parts of the doser grinder
1 Lid of the hopper
1
0
1
5
2
6
10
8
11
4
9
7
12
3
Fig. 1 - Identification of the parts
2Coffee bean hopper
3 Hopper shutter
4 Grinding degree adjustment ring
5 Grinding time display
6 Single Dose Button
7 Double Dose Button
8Micro SW (active only in
"Preselection" mode)
9 Portafilter button
10 Ground coffee outlet
11 Fork for portafilter
12 Main switch
2.2 Identification of the appliance
An identification label on the appliance bears the following data:
Manufacturer brand
Date of manufacture
Symbols and markings
Country of manufacture
Model
Voltage, Frequency, Duty cycle and Power
Manufacturer's address
Barcode
Serial number
2.3 Technical details
Doser grinder STILE
Power supply (EUROPE market)
220-240V 50-60 Hz
Power supply (USA-CANADA market)
110-120V 60 Hz
Power [Watt@110-120V / Watt@220-240V] 249 / 190
Duty cycle @110-120V, 60Hz [ON / OFF ]
8 sec. / 200 sec.
Dimensions of appliance (L x W x H) [mm]
132 x 185 x 315
Net weight [kg]
5.5
Hopper capacity [kg] 0.3
Single dose grinding time [s] 6-7
Double dose grinding time [s] 11-12
Custom grinding time (manual) [s] 20
Grinding time tolerance [s] ± 0.1
Daily grinding [kg]
1-2
Single dose dispensing time recommended for 7g [s] 5
Double dose dispensing time recommended for 14g [s] 10
Noise [dB (A)] (with appliance in operation) 69
2.4 Safety devices of the doser grinder
All doser grinders RANCILIO GROUP S.p.A. are equipped with mechanical and
electromechanical devices designed to ensure the safety of the user and the
integrity/functionality of the appliance during its use.
In particular, the STILE doser grinder is equipped with the following safety devices:
• Motor thermal overload protection
The motor of the appliance has thermal overload protection which cuts out the power
supply to the motor itself in the event of overcurrent or overheating.
• Anti-intrusion button in coffee loading hopper (Fig. 2)
The anti-intrusion button (detail 2) inside the feed hopper (detail 1) allows coffee
beans to enter the grinding chamber while preventing the operator from accidentally
inserting his or her fingers.
• Coffee loading hopper microswitch (Fig. 3)
A microswitch (detail 1), located inside the body of the appliance, allows the
appliance to be started only when the coffee loading hopper (Fig. 2 detail 1) is in the
correct working position. Removing the hopper instantly deactivates the microswitch,
stopping the grinding motor.

STILE_05.2022 STILE_05.2022
9
/
2
8
8
/
2
8
STILE
STILE
EN
EN
STILE
STILE
EN
EN
1
2
1
Fig. 2 Fig. 3
3 INSTALLATION
To start using your new doser grinder, simply:
• Place the appliance on a solid surface away from splashing water and heat sources.
• Make sure that the voltage of the electrical power supply meets the power supply
requirements and that the electrical capacity of the system is sufficient to withstand
the power absorbed by the appliance (see the product identification label on the
bottom of the doser grinder).
• Make sure that there is a socket near the point of installation for electrical connection of the
appliance in compliance with the domestic regulations in force.
WARNING! The socket must be equipped with an efficient earthing system.
WARNING! The electrical power supply system must also be equipped with a
circuit breaker upstream of the socket, in a known position that the operator can
reach easily, in order to protect the appliance against overloading and sudden
changes in voltage and the user against the risk of electric shock.
• Connect the plug of the power cable to the wall socket in the place of use;
•
If the use of power adapters, multiple sockets or extensions cannot be avoided,
it is mandatory to use products that comply with the domestic certification
standards in force.
• If present, set the circuit breaker located upstream of the power socket to the “ON”
position.
• Turn the power switch of the appliance to the "I" position.
At this point the doser grinder is powered and ready to be used.
4 USING THE DOSER GRINDER
4.1 Preparation for use of the doser grinder
To load the coffee beans, you need to:
• Turn on the doser grinder by turning
the power button (detail 1) to the “I”
(ON) position.
• At this point the doser grinder is
ready to be used.
1
Fig. 4

STILE_05.2022 STILE_05.2022 11
/
2
8
1
0
/
2
8
STILE
STILE
EN
EN
STILE
STILE
EN
EN
4.2 Appliance controls
4.2.1 Switch
• In the “O” position: appliance off
(power supply disconnected).
• In the "I" position: appliance on
(electrically powered).
• NOTE: When the appliance is
switched on for the first time,
dispensing in "Preselection"
mode is enabled (factory default);
subsequently, the dispensing
mode in use before switching off
(“Preselection” or “Microless”) will
be loaded automatically when
the appliance is switched on
again. Instructions for changing
the dispensing mode are given in
paragraph 4.3).
1
0
Preselection
(double dose)
Microless
4.2.2 Display
1
0
6
1
4
3
7
2
5
Detail Description
1
2
Key enabled for use only in "Microless" dispensing mode. A short press
starts the grinding of a single dose (1) or double dose (2) of coffee. If
pressed and held for ≥1 sec, it activates the “ ” and “ ” function keys
which allow you to vary the grinding time associated with the selected
dose with 0.1 second decreases (-) or increases (+) (see para. 4.4).
If dispensing in "Preselection" is enabled, the display of the icon (1) or (2)
indicates that the single dose or double dose has been preselected.
3
This function key, active both in “Preselection” and “Microless” dispensing
mode, performs several functions according to the operating status of the
appliance. In particular, this key allows you to:
• Start continuous dispensing by pressing and holding it if the appliance
is stopped and waiting for commands (max dispensing time = 20 sec).
• Pause (short press) and restart (another short press) dispensing of the
current dose. The maximum pause time is 30 seconds, after which the
dose is cancelled and cannot be resumed.
4
It appears only after the key or key has been pressed and held
(≥1 sec) and allows you to decrease the grinding time of the selected
dose with decreases of 0.1 seconds.
5
It appears only after the key or key has been pressed and held
(≥1 sec) and allows you to increase the grinding time of the selected
dose with increases of 0.1 seconds.
6
Countdown according to the set time.
In the case of continuous grinding ( ) it displays an incremental timer
from “0 seconds” until the function key is released (maximum time 20
sec.).
7
When 70 hours are reached, this icon indicates that it is necessary to
replace the grinder.
To reset the warning it is necessary to remove the hopper and press in
succession, within a maximum time of 5 sec., the following combination of
keys: - - - .

STILE_05.2022 STILE_05.2022 1
3
/
2
8
12
/
2
8
STILE
STILE
EN
EN
STILE
STILE
EN
EN
4.2.3 Portafilter button to activate grinding
It starts the grinding cycle when pressed by the portafilter cup.
• In “Preselection” mode, pressing of
the portafilter button will start the
dose. By removing the portafilter, the
dose will be interrupted and can be
resumed by pressing the filter holder
button again or by pressing the icon
on the display within 30 seconds.
1
0
4.3 Choice of dose dispensing mode
Active dispensing:
Preselection
(Double dose)
Active dispensing:
Microless
Activation of
Preselection
(with single dose)
Active dispensing:
Preselection
(Single dose)
+
≥2 sec
+
≥2 sec
4.4 Setting of grinding times (single dose / double dose)
≥1 sec. (to
enable setting)
or
Time
adjustment
≥1 sec.
(to confirm
parameter)
Return to Home
with saving of
the new time
If not confirmed
within 30 sec.,
return to Home
without saving
the new time.
4.5 Dose dispensing mode
4.5.1 Preselection
Appliance
waiting for
command
Pressing of
microswitch.
Dispensing of
dose until the set
grinding time is
reached or until
the microswitch
is released.
Microswitch
released during
dispensing.
Dispensing
paused for 30
sec. with
flashing icon.
Pressing of
microswitch
again within
the 30-second
pause.
Resumption of
dispensing until
the set grinding
time is reached.
Pressing of
key during
the 30-second
pause.
Cancelling of
the dose being
dispensed.

STILE_05.2022 STILE_05.2022 1
5
/
2
8
14
/
2
8
STILE
STILE
EN
EN
STILE
STILE
EN
EN
Below is a graphical example of continuous dispensing in preselection mode.
Short press of
the key to
enable continuous
dispensing of the
dose.
Display of continuous
dispensing of dose
enabled.
Constant pressing of
the microswitch.
Start of continuous
dispensing for a
maximum time of 20
sec.
Release of the
microswitch.
Stop of continuous
dispensing and return
to the preselection
page.
4.5.2 Microless
Appliance
waiting for
command.
Short press:
Start of
dispensing of
double dose until
the set “Te” is
reached or until
the key is
pressed.
Short press
during
dispensing:
Dispensing
paused for 30
sec. with
flashing icon.
Second short
press:
Resumption of
dispensing when
the set "Te" is
reached.
Short press
during
dispensing of
dose:
Cancellation of
dispensing and
return to the
standby screen.
Graphical example of continuous dispensing in Microless mode.
Appliance waiting for
command
Pressing and holding of the
key :
Start of continuous dispensing
for a maximum time of 20
seconds.
Release of the key .
Stop of continuous dispensing

STILE_05.2022 STILE_05.2022 17
/
2
8
1
6
/
2
8
STILE
STILE
EN
EN
STILE
STILE
EN
EN
4.6 Adjustment of degree of grinding
The doser grinder is tested with an intermediate grinding setting. You can adjust the
degree of grinding of the coffee to your taste which can, however, also be influenced by
the type of coffee and the freshness of the beans.
To grind the beans more finely or
coarsely, turn the adjustment ring (detail
1) located under the hopper (detail 2).
• Turn the ring clockwise to grind more
coarsely;
• Turn the ring anti-clockwise to grind
more finely;
The ring must be adjusted with the
motor running. It is advisable to grind
small quantities of coffee for a visual
assessment of the degree of grinding.
Prepare a coffee to check that the brewing
time, appearance and flavour meet with
your satisfaction.
For an espresso, take into consideration
that too coarse a grind results in a light
coffee without cream, while too fine a
grind results in a dark coffee without
cream.
1
0
2
1
-
-
+
+
5 MAINTENANCE OF THE DOSER GRINDER
5.1 Routine maintenance
WARNING! All routine maintenance of your appliance is summarised in the
following table and must be carried out following the procedures described in the
relevant sections.
ROUTINE MAINTENANCE
Frequency Type of intervention To be done by Section
At end of daily
use
Thorough cleaning of the
appliance User 5.1.1
With each new
use
Check of condition of the power
cable User
5.1.2
When necessary Replacement of the power cord Specialised
technician
When necessary Thorough cleaning of the
grinders User 5.1.3
When necessary Setting aside of the doser
grinder User 5.1.4
When necessary Replacement of the grinders Specialised
technician 5.1.5

STILE_05.2022 STILE_05.2022 1
9
/
2
8
1
8
/
2
8
STILE
STILE
EN
EN
STILE
STILE
EN
EN
5.1.1 Cleaning the appliance
AFTER USE: clean the appliance thoroughly.
• Extract the shutter (detail 1) to shut off
the flow of coffee beans to the grinding
chamber.
• Run the appliance until all the coffee
between the grinders has been ground.
• Turn offthe appliance [power switch
to the “O” (OFF) position] and take the
power plug out of the socket.
• Remove the hopper (detail 2) from the
doser grinder.
• Remove the lid (detail 3) on the hopper
and empty any coffee beans inside it
into a sealed container to preserve its
aroma.
• Clean the internal and external
surfaces of the hopper using hot water
and a non-perfumed detergent and
food grade degreaser with a neutral
pH. Do not use abrasive sponges and/
or aggressive detergents that could
damage the surfaces of the hopper.
• Thoroughly dry the washed parts using
a soft, dry cloth.
WARNING! The hopper is not
dishwasher-safe.
1
0
3
2
1
• Use a brush and vacuum cleaner to
remove residual coffee powder inside
the grinding chamber (detail 1).
WARNING! Do not use water
and/or detergents to clean
the grinding chamber and the
grinders.
1
• Clean the inside of the coffee outlet
pipe (detail 1) with a (clean and
sanitised) toothbrush or soft bristle
brush.
WARNING! Do not use water
and/or detergents to clean
the grinding chamber and the
grinders.
1
• Clean the body of the appliance with
soft cloths or sponges moistened
with water and neutral food grade
detergents.
WARNING! Do not use metal
tools (steel wool, needles, metal
brushes), abrasive sponges and/
or aggressive products (alcohol,
aggressive detergents) which
could damage the external
surfaces of the appliance.
WARNING! It is forbidden to use
jets of water or steam to clean the
body of the appliance.
1
0
• After cleaning, reassemble the
appliance by inserting the hopper
(detail 1) on the body of the appliance
(detail 2).
• Put the lid (detail 3) on the hopper.
The appliance is ready to be used again
once it has been powered up and refilled
with coffee.
It is advisable to load the coffee into the
hopper only when you intend to use the
appliance, in order to preserve the taste
and aroma of the beans in the original
packaging.
1
0
1
2
3

STILE_05.2022 STILE_05.2022 21
/
2
8
2
0
/
2
8
STILE
STILE
EN
EN
STILE
STILE
EN
EN
5.1.2 Check of condition of the power cable
FOR EVERY NEW USE: check the power cable.
• Before connecting the plug to the
power socket, check visually and by
touch that the protective sheath of
the cable is intact, that the wires are
not exposed and that the plug is not
damaged.
WARNING! If the power supply
cable is damaged in any way,
have it replaced by a specialised
technician.
1
0
5.1.3 Thorough cleaning of the grinders
EVERY MONTH: Clean the grinders with a suitable product (e.g. Grindz ™ Grinder
Cleaner) following the instructions on the package
5.1.4 Temporary decommissioning
If the appliance is to be set aside for a relatively long period of time, it is recommended
that you perform the following operations to keep it in good condition and avoid possible
problems the next time you restart it.
WHEN NECESSARY: cleaning the appliance and setting it aside.
• Carefully clean the coffee grinder as
instructed in section 5.1.1.
• Thoroughly clean the grinders as
instructed in section 5.1.3.
• Unplug the cable from the power socket
and wind it around the appliance.
• Cover the appliance with a tea towel to
protect it against dust and dirt.
• Store the appliance in a dry, safe and
secure place.
1
0
5.1.5 Replacement of the grinders
WARNING! The grinders must be replaced by a specialised technician.
5.1.6 Final decommissioning
If the appliance is to be permanently decommissioned, empty the hopper of any coffee,
remove the plug from the socket and cut the power cord.
Finally, pack the coffee grinder using cardboard or other types of packaging and deliver
the appliance to a collection centre authorised to dispose of electronic waste as indicated
in chapter "7.2 - Disposal"
6 TROUBLESHOOTING
Fault Cause Solution
The doser grinder
does not turn on.
Lack of power. • Make sure that the power plug is
correctly inserted in the socket;
• Make sure that the switch is in the “I”
(ON) position;
• Make sure there is mains power and that
the circuit breaker and the main switch
are switched on.
• Check the condition of the power cord
and plug. If damaged, have them
replaced by a qualified technician.
The doser grinder
starts but does
not grind coffee.
Feed hopper
empty.
• Load the hopper with the coffee beans to
be ground.
Closed shutter. • Open the shutter to allow the coffee beans
to descend into the grinding chamber.
The appliance
does not start the
grinding cycle
when the keys
, ,
or the microswitch
are pressed (see
section 4.2.2).
The hopper is
not correctly
positioned
and the safety
microswitch
in the body of
the appliance
prevents the
motor from
starting.
• Correctly position the feed hopper making
sure to couple it perfectly to the body
of the appliance to activate the safety
microswitch and enable the motor to
function.

STILE_05.2022 STILE_05.2022 2
3
/
2
8
22
/
2
8
STILE
STILE
EN
EN
STILE
STILE
EN
EN
Fault Cause Solution
Grinding takes
a long time (the
correct amount
of coffee is not
ground in the time
set for the single
or double dose).
Dirty grinders • Thoroughly clean the grinders (see section
5.1.3)
Worn grinders • Have the grinders replaced by qualified
technician (see section 5.1.5).
The motor stops
during grinding.
Intervention
of the motor’s
thermal overload
protection due
to hard foreign
bodies between
the grinders
blocking the
system.
• Switch offthe appliance and wait for the
motor to cool down.
• Disconnect the appliance from the power
supply.
• Extract the shutter and remove the feed
hopper.
• Clean the grinders and remove any foreign
bodies.
• Reassemble the appliance and start a new
grinding cycle.
WARNING! If the problem persists even after carrying out the suggested
corrective actions, or if functional anomalies other than those shown in the
table occur, contact your local dealer who will decide whether to contact the
RANCILIO GROUP S.p.A. assistance service or to entrust repair or overhaul of
the appliance to a specialised technician.
.
7 ATTACHMENTS
7.1 Wiring diagram
(0(662
$OOSURSULHWDU \ULJKWVUHVHUYHGE\5DQFLO LR*URXS6S$
7KLVGUDZLQJVKDOOQRWEHUHSURGXFHGRULQDQ\ZD\XWLOL]HGIRUWKH
PDQXIDFWXUHRIWKHFRPSRQHQWRUXQLWKHUHLQLOOXVWUDWHGDQGPXVW
QRWEHUHOHDVHGWRRWKHUSDUWLHVZLWKRXWZULWWHQFRQVHQW
$Q\LQIULQJHPHQWZLOO EHOHJDOO\SXUVXHG
6+((7
RI
6,=(
/$67,668('$7(
5(9
$1(:
'5$:,1*1$0(
(OHWULFGLDJUDP
':*67$786
':*180%(5
352-(&7
6HB
67,/(
'5$)7(5 &+(&.(5
&7, '$7(
8787
9LDOHGHOOD5HSXEEOLFD
9LOODVWDQ]DGL3DUDELDJR0L
,WDOLD7HO
)D[
ZZZUDQFLOLRJURXSFRP
LQIR#UDQFLOLRJURXSFRP
32:(56833/<
)6
)6
)6
)6
6
0DLQ6ZLWFK
0
&
-
-
3RZHU%RDUG
6
*ULQG6ZLWFK
'LVSOD\
9+]
6
6DIHW\6ZLWFK

STILE_05.2022 STILE_05.2022 2
5
/
2
8
24
/
2
8
STILE
STILE
EN
EN
STILE
STILE
EN
EN
7.2 Disposal 7.3 EU declaration of conformity
34

STILE_05.2022 STILE_05.2022 27
/
2
8
2
6
/
2
8
STILE
STILE
EN
EN
STILE
STILE
EN
EN
7.4 Food compliance declaration

46800292 Rev.--_05/2022
WORLDWIDE BRANCH LOCATIONS
HEADQUARTERS, PRODUCTION PLANT AND R&D CENTRES
Rancilio Group S.p.A. with sole shareholder
Viale della Repubblica 40
20015 Villastanza di Parabiago (MI) - Italy
Ph. +39 0331 408200
Fax +39 0331 551437
www.ranciliogroup.com/where-we-are
ranciliogroup.com
Table of contents
Other Rancilio Coffee Grinder manuals

Rancilio
Rancilio ROCKY User manual

Rancilio
Rancilio KRYO 65/ST User manual

Rancilio
Rancilio MD80 User guide

Rancilio
Rancilio KRYO 65 OD User manual

Rancilio
Rancilio KRYO 65 OD User manual

Rancilio
Rancilio ROCKY User manual

Rancilio
Rancilio ROCKY User manual

Rancilio
Rancilio MD User guide

Rancilio
Rancilio KRYO 65 OD User manual