Ratek SWB10D240 User manual

Ratek SWB10D Water Bath - Operating Manual
------------------------------------------------------------------------------------------------------------------------------------------------------------------------------
------------------------------------------------------------------------------------------------------------------------------------------------------------------------------
Page 1 of 24
User Manual
Compact Shaking Hot Water Bath
Model : SWB10D240
Version: 1.0 – 19/0 /2010
English
www.ratek.com.au
www.ratek.com.auwww.ratek.com.au
www.ratek.com.au
60 Wadhurst Dve, Boronia, ictoria 3155, Australia - P: +613 9887 2161 - F: +613 9887 2163 - E: sales@ratek.com.au
© All Rights Reserved
Made in Australia, User Manual printed in Australia
Changes without prior notification reserved
Errors and omissions excepted.
User Manual SWB10D240 Compact Shaking Hot Water Bath

Ratek SWB10D Water Bath - Operating Manual
------------------------------------------------------------------------------------------------------------------------------------------------------------------------------
------------------------------------------------------------------------------------------------------------------------------------------------------------------------------
Page 2 of 24
Thank you
Thank youThank you
Thank you
Thank you for purchasing a Ratek product.
This User Manual will assist you in the correct installation and operation of the SWB10D Water Bath, as well as explain
the safety requirements for its use.
Important: Please read the contents of
Important: Please read the contents of Important: Please read the contents of
Important: Please read the contents of this
this this
this User Manual
User ManualUser Manual
User Manual befor
befor befor
before unpacking and operating the product.
e unpacking and operating the product.e unpacking and operating the product.
e unpacking and operating the product.
Unpacking and Checking
Unpacking and CheckingUnpacking and Checking
Unpacking and Checking
Once you have read these instructions in full and understand the installation and safety requirements including those for
unpacking the carton, please carefully open the packing and slowly remove the product. Carefully inspect the condition of
the product to ensure it has not been damaged in transit. Any damage should be reported immediately to the responsible
carrier. If the product is damaged in any way, re-pack the product into the supplied packaging and notify the responsible
carrier immediately.
Important: Do not operate the equipment if it has been damaged in any way. Any failures resulting through the use of a
Important: Do not operate the equipment if it has been damaged in any way. Any failures resulting through the use of a Important: Do not operate the equipment if it has been damaged in any way. Any failures resulting through the use of a
Important: Do not operate the equipment if it has been damaged in any way. Any failures resulting through the use of a
damaged product will not be covered by the product warranty.
damaged product will not be covered by the product warranty.damaged product will not be covered by the product warranty.
damaged product will not be covered by the product warranty.
Carton Contents
Carton ContentsCarton Contents
Carton Contents
Ensure that you have received all items outlined below before proceeding. If you have not received all components in the
supplied carton, please re-pack the carton and notify a Ratek Service representative immediately. Contact details are
provided in the section of this User Manual titled “Ratek Service Contact Information”
-Ratek
RatekRatek
Ratek SWB10D
SWB10D SWB10D
SWB10D Water Bath
Water BathWater Bath
Water Bath
-Mains power input lead
Mains power input leadMains power input lead
Mains power input lead
-Plastic storage cover
Plastic storage coverPlastic storage cover
Plastic storage cover
-User Manual
User ManualUser Manual
User Manual

Ratek SWB10D Water Bath - Operating Manual
------------------------------------------------------------------------------------------------------------------------------------------------------------------------------
------------------------------------------------------------------------------------------------------------------------------------------------------------------------------
Page 3 of 24
TABLE OF CONTENTS
PAGE
PAGEPAGE
PAGE
Cash Bo
INTENDED USE
INTENDED USEINTENDED USE
INTENDED USE................................
................................................................
................................................................
................................................................
................................................................
................................................................
................................................................
................................................................
..............................................................
............................................................
.............................. 4
44
4
Suitable Articles For Use With This Water Bath ...............................................................................................................4
Unsuitable Articles For Use With This Water Bath ...........................................................................................................4
Suitable Environments For The Water Bath .....................................................................................................................4
General Operation ............................................................................................................................................................4
OPE
OPEOPE
OPERATOR RESPONSIBILITY
RATOR RESPONSIBILITYRATOR RESPONSIBILITY
RATOR RESPONSIBILITY
–
––
– SAFETY CONSIDERATIO
SAFETY CONSIDERATIO SAFETY CONSIDERATIO
SAFETY CONSIDERATIONS
NSNS
NS ................................
................................................................
................................................................
................................................................
......................................................
............................................
...................... 4
44
4
Conditions of Operation ....................................................................................................................................................4
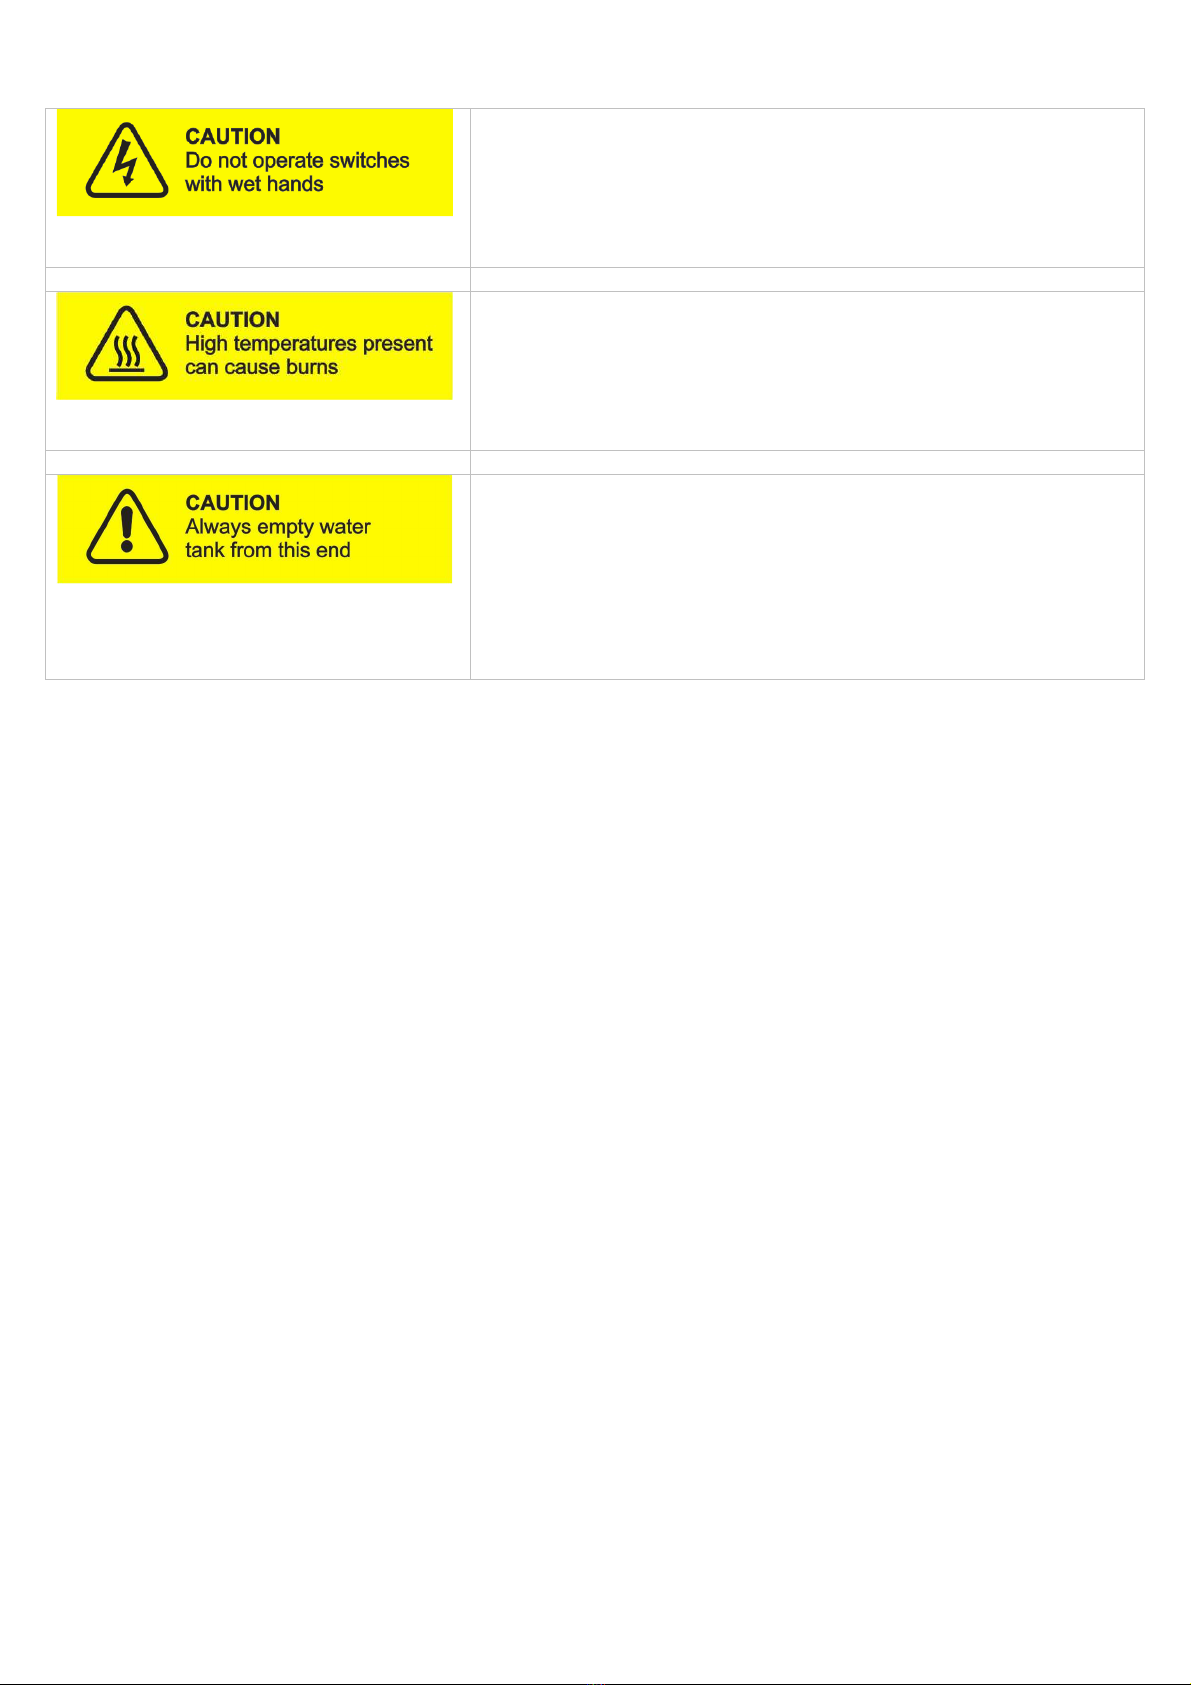
Safety Labels And Markings .............................................................................................................................................5
OPERATING PROCEDURES
OPERATING PROCEDURESOPERATING PROCEDURES
OPERATING PROCEDURES................................
................................................................
................................................................
................................................................
................................................................
................................................................
................................................................
................................................................
..........................................
....................
.......... 7
77
7
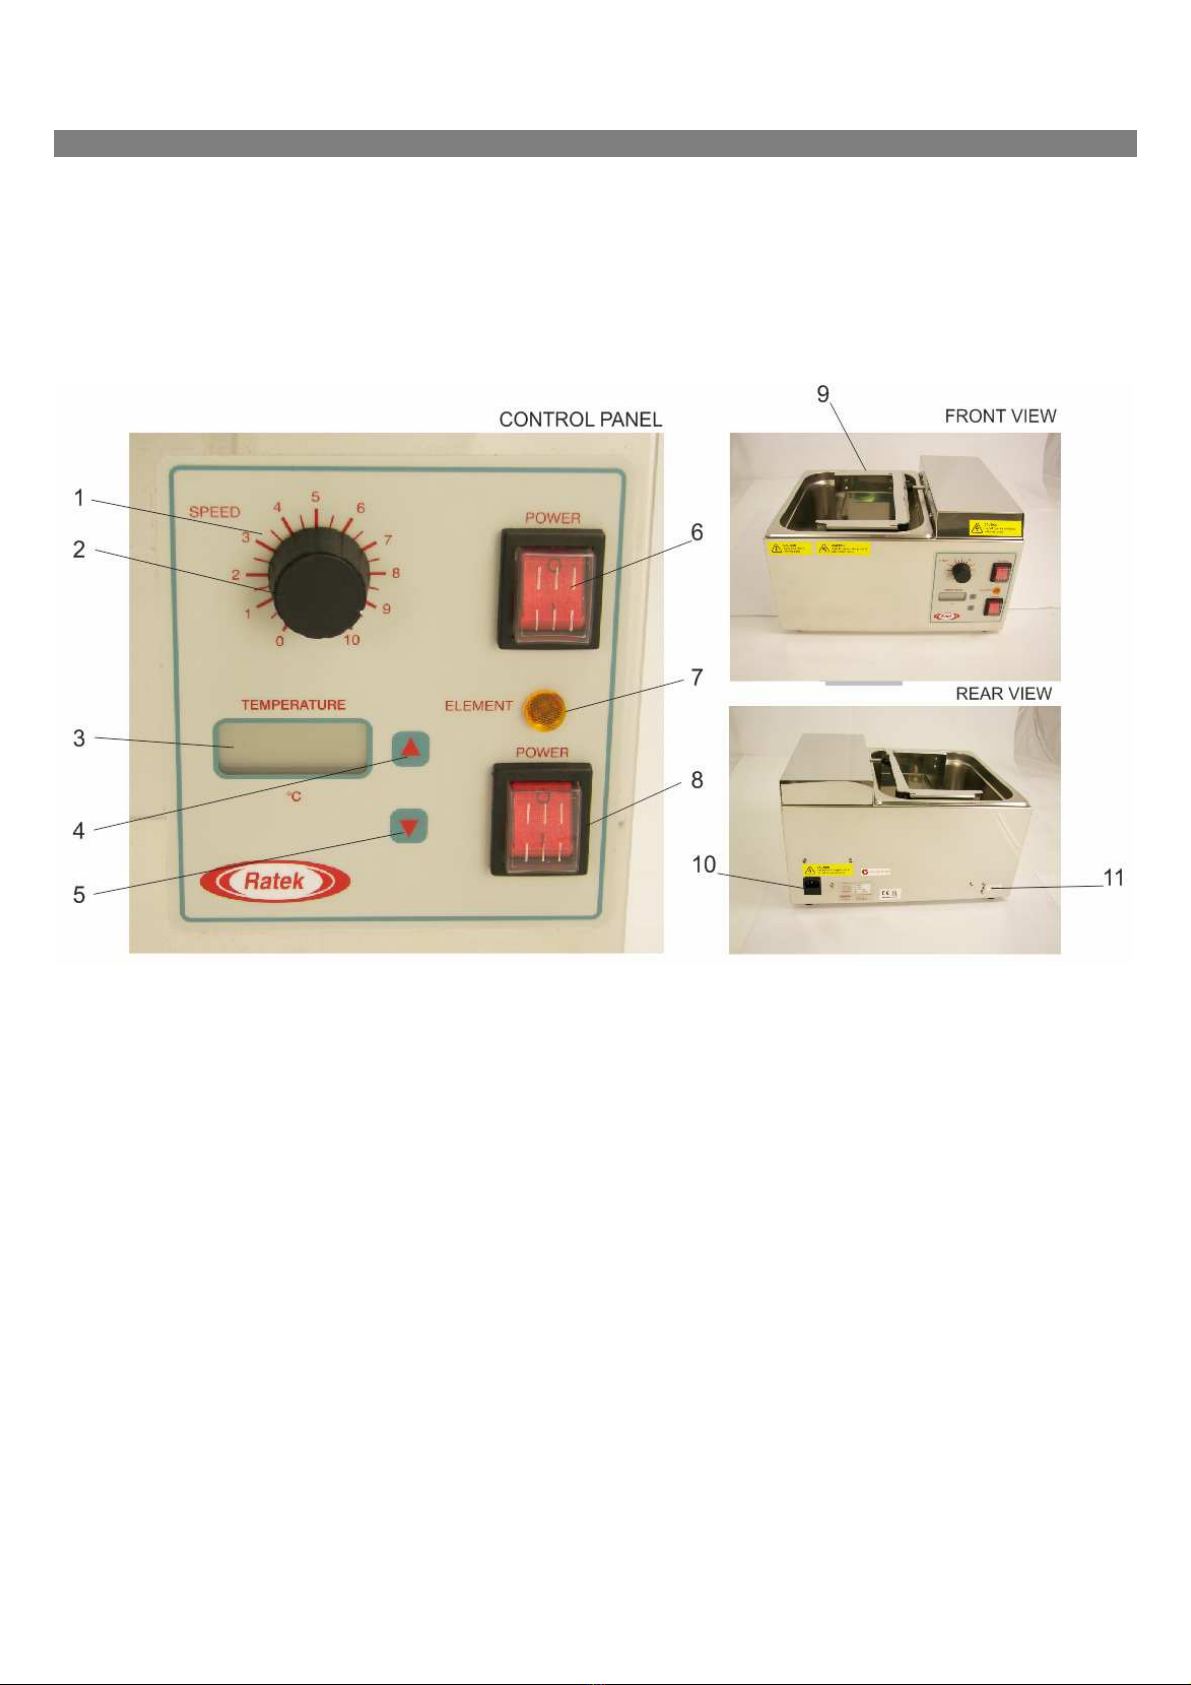
Identification of Controls & Functions ...............................................................................................................................7
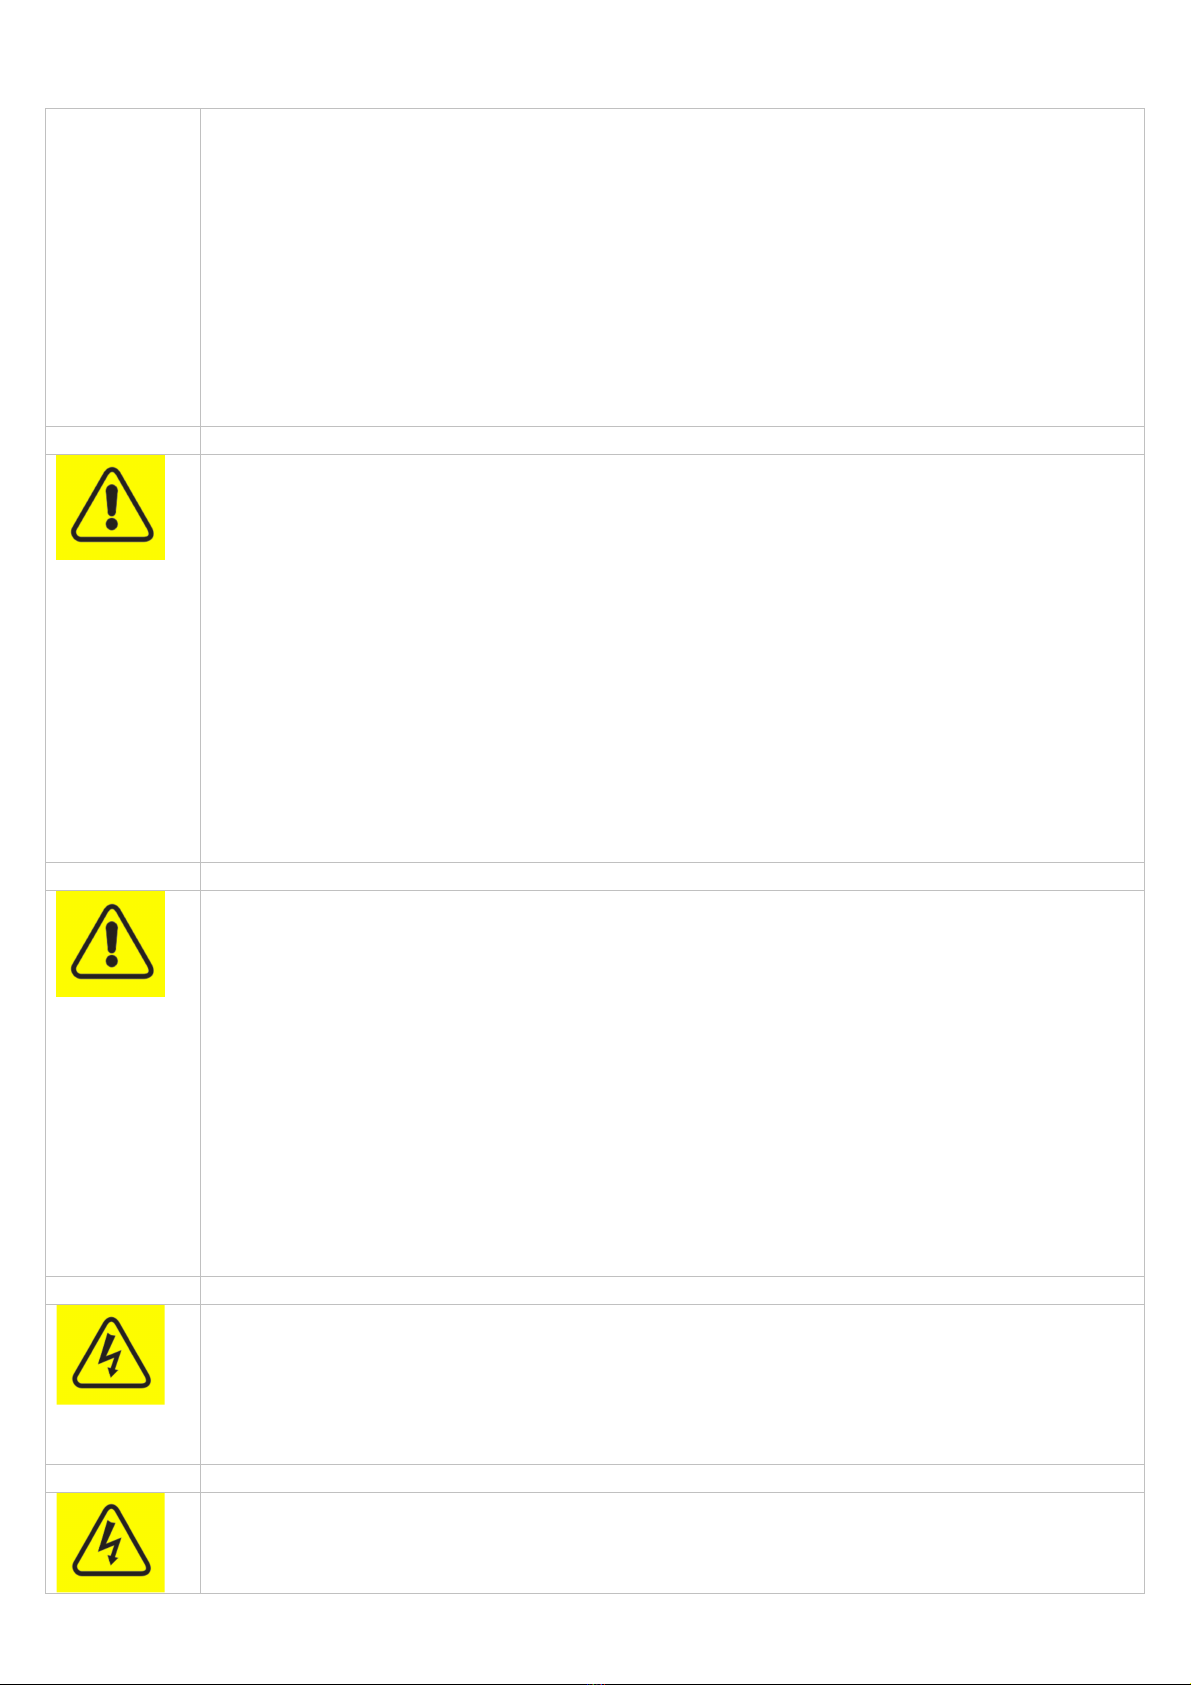
Safety Warnings ...............................................................................................................................................................8
Safety Recommendations.................................................................................................................................................8
Preparation & Installation..................................................................................................................................................9
Using The Water Bath ....................................................................................................................................................11
ROUTINE CLEANING AND
ROUTINE CLEANING ANDROUTINE CLEANING AND
ROUTINE CLEANING AND MAINTENANCE
MAINTENANCE MAINTENANCE
MAINTENANCE................................
................................................................
................................................................
................................................................
................................................................
................................................................
.................................................
..................................
................. 17
1717
17
TECHNICAL SPECIFICAT
TECHNICAL SPECIFICATTECHNICAL SPECIFICAT
TECHNICAL SPECIFICATIONS
IONSIONS
IONS ................................
................................................................
................................................................
................................................................
................................................................
................................................................
................................................................
................................................................
....................................
........
.... 21
2121
21
DISPOSAL
DISPOSALDISPOSAL
DISPOSAL ................................
................................................................
................................................................
................................................................
................................................................
................................................................
................................................................
................................................................
................................................................
................................................................
....................................
........
.... 21
2121
21
ELECTRICAL & SAFETY
ELECTRICAL & SAFETY ELECTRICAL & SAFETY
ELECTRICAL & SAFETY CONFORMITY
CONFORMITYCONFORMITY
CONFORMITY ................................
................................................................
................................................................
................................................................
................................................................
................................................................
......................................................
............................................
...................... 22
2222
22
RATEK SER ICE CONTAC
RATEK SER ICE CONTACRATEK SER ICE CONTAC
RATEK SER ICE CONTACT INFORMATION
T INFORMATIONT INFORMATION
T INFORMATION ................................
................................................................
................................................................
................................................................
................................................................
................................................................
...............................................
..............................
............... 23
2323
23
TROUBLESHOOTING
TROUBLESHOOTINGTROUBLESHOOTING
TROUBLESHOOTING................................
................................................................
................................................................
................................................................
................................................................
................................................................
................................................................
................................................................
...................................................
......................................
................... 23
2323
23
WARRANTY CONDITIONS
WARRANTY CONDITIONSWARRANTY CONDITIONS
WARRANTY CONDITIONS ................................
................................................................
................................................................
................................................................
................................................................
................................................................
................................................................
................................................................
...........................................
......................
........... 23
2323
23

Ratek SWB10D Water Bath - Operating Manual
------------------------------------------------------------------------------------------------------------------------------------------------------------------------------
------------------------------------------------------------------------------------------------------------------------------------------------------------------------------
Page 4 of 24
Intended Use
Intended UseIntended Use
Intended Use
This water bath is intended for the purpose of heating water only, whilst providing agitation via a submerged moving
cradle. The operator may load a suitable article onto the cradle for the purpose of controlled temperature application and
agitation of the article. The water bath is intended for use with tap water or filtered water only.
The water bath is not
notnot
not intended for use with any other medium. The water bath is not
notnot
not intended to provide direct-contact
between the medium (water) and an unprotected medical, food, biological or medico- techno item. In all cases the item
should be enclosed in a suitable vessel as described below.
Suitable Articles For Use With This
Suitable Articles For Use With This Suitable Articles For Use With This
Suitable Articles For Use With This Water Bath
Water BathWater Bath
Water Bath
•Plastic or glass laboratory test tubes that are sealed, waterproof and rated to withstand the intended
temperature.
•Plastic or stainless steel laboratory test tube racks that are rated to withstand the intended temperature.
•
An example of a suitable article would be a sealed plastic laboratory centrifuge tube filled with blood.
Unsuitable Articles For Use With This
Unsuitable Articles For Use With This Unsuitable Articles For Use With This
Unsuitable Articles For Use With This Water Bath
Water BathWater Bath
Water Bath
•Any item where the article is not waterproof or may result in its contents coming into contact with the water
bath medium (water).
•Items weighing more than 1 kilogram.
•
An example of an unsuitable article would be an exposed piece of animal or plant matter.
Suitable Environments For The
Suitable Environments For The Suitable Environments For The
Suitable Environments For The Water Bath
Water BathWater Bath
Water Bath
The water bath is intended for use in a clean laboratory environment only where adequate ventilation, a good
power supply and provisions for routine cleaning are available. The water bath should not be used outdoors or in
dirty, dusty, humid or windy environments. The acceptable operating conditions are outlined further in this User
Manual.
General Operation
General OperationGeneral Operation
General Operation
•The water bath is filled with water following the safety guidelines contained within this User Manual.
•The water bath is plugged into an appropriate power source. It is powered by an alternating current power
supply with protective earth and with the appropriate receptacle, rated voltage and frequency for the country
of its intended use. Further details on power requirements are outlined in this User Manual.
•A suitable article (as defined above) is placed on the shaking platform.
•The water bath is operated via a front panel interface consisting of heating on/off switch, cradle oscillation
on/off switch, heating temperature up/down controls and cradle oscillation speed control knob. These
controls allow the operator to set a required water temperature and cradle oscillation speed.
•The water bath should be operated strictly in accordance with the Operating Procedures outlined further in
this User Manual.
Operator Responsibility
Operator Responsibility Operator Responsibility
Operator Responsibility –
––
– Safety Considerations
Safety Considerations Safety Considerations
Safety Considerations
When operated in strict accordance with this User Manual, plus routine cleaning and maintenance being carried out, the
product shall provide safe operation for the operator. The operator should be aware of the following before installing and
operating the product :
Conditions of Operation
Conditions of OperationConditions of Operation
Conditions of Operation
*Note:
*Note:*Note:
*Note: The term “operator” referred to in this User Manual is the primary person who has been tasked to install,
maintain and train in the usage of this equipment. Other personnel shall be referred to as “Users”.
•The operator shall be aware that the protection provided by the equipment may be impaired if the equipment
is used with accessories not provided or recommended by the manufacturer, is modified in any way or is used
in a manner not specified by the manufacturer.
•The operator is responsible for ensuring all users of the product are qualified to do so, and are well versed in
common safety concepts. The product should only be operated by an adult who has read and understood this
User Manual provided in the appropriate language in its entirety.
•Any user must be informed by the responsible operator of any potential hazards that may arise through the
use of this equipment in the course of their work, including any local environmental hazards not related
directly to the water bath. They should also be able to demonstrate that they understand any preventative
safety measures in operation prior to operating the equipment.

Ratek SWB10D Water Bath - Operating Manual
------------------------------------------------------------------------------------------------------------------------------------------------------------------------------
------------------------------------------------------------------------------------------------------------------------------------------------------------------------------
Page 5 of 24
•The operator shall agree to accept responsibility for the use of the equipment in accordance with this User
Manual, and be fully aware that the equipment is designed for commercial use.
•It is assumed that the user and operator have had experience in a commercial environment, and had
appropriate training in how to perform their work safely in accordance with any local operational health and
safety regulations. The operator and all users should be well versed in local emergency procedures as per the
workplace safety regulations in effect.
•Avoid any direct impact with any surface of the equipment, including the casing, cover panel and most
importantly the control panel.
•Important:
Important: Important:
Important: Do not use any sharp or pointed metal objects anywhere near the equipment, in particular the
control panel.
•Avoid using the equipment near any other vibrating equipment or source of excessive vibration.
•Ensure the equipment is cleaned and maintained in accordance with this User Manual.
•Ensure that all original safety warning labels are in an adequate, legible condition and are firmly affixed to the
equipment before using the product.
•Plug the equipment directly into a wall power outlet. Do not plug the equipment into a multi-socket adapter of
any kind.
•The equipment is intended for operation in a controlled electromagnetic environment. Avoid the use of
transmitting devices (e.g. cellular or mobile telephones) near the equipment whilst operating. A minimum
distance of 2 Metres from the product is recommended for any transmitting device.
•The equipment must only be installed and operated in well ventilated areas. The unit is not intended for use in
explosive atmospheres, in confined spaces or inside any other piece of laboratory equipment such as
humidity cabinets or incubators.
•The allowed operating environment must be between 5° Celsius and 40° Celsius ambient air temperature. Be
aware that the ambient air temperature will limit the minimum controllable water temperature. The ambient air
temperature must be at least 5° Celsius lower than the desired controllable water temperature.
•The maximum allowed relative humidity of the operating environment is 80%.
•The equipment should not be stored in direct sunlight, near chemicals, or other contaminants.
•If any of these safety recommendations cannot be achieved or the equipment has been damaged in any way,
the equipment should not be installed or operated.
•Important :
Important : Important :
Important : If you have any concerns or questions relating to operator or user safety, please contact the
appropriate Ratek Service department before installing and operating the unit. Contact details are provided in
this User Manual.
Safety Labels And Markings
Safety Labels And MarkingsSafety Labels And Markings
Safety Labels And Markings
The equipment is provided with safety caution labels. An explanation of each caution label is provided below. It is
the responsibility of the operator and user to fully understand the meaning of these warning labels prior to
operating the equipment.
ery
ery ery
ery Important: Particular care should be take
Important: Particular care should be takeImportant: Particular care should be take
Important: Particular care should be taken
nn
n when working near the heating element in the bottom of the
when working near the heating element in the bottom of the when working near the heating element in the bottom of the
when working near the heating element in the bottom of the water bath
water bathwater bath
water bath.
. .
. At
At At
At
all times the shaking platform MUST REMAIN FITTED to the
all times the shaking platform MUST REMAIN FITTED to the all times the shaking platform MUST REMAIN FITTED to the
all times the shaking platform MUST REMAIN FITTED to the wat
watwat
water bath
er bather bath
er bath whilst in operation to avoid possible burns or
whilst in operation to avoid possible burns or whilst in operation to avoid possible burns or
whilst in operation to avoid possible burns or
scalds from the heating element plate. The shaking platform MUST NOT BE REMO ED AT ANY POINT.
scalds from the heating element plate. The shaking platform MUST NOT BE REMO ED AT ANY POINT.scalds from the heating element plate. The shaking platform MUST NOT BE REMO ED AT ANY POINT.
scalds from the heating element plate. The shaking platform MUST NOT BE REMO ED AT ANY POINT.
The operator or user must also take extreme care when the bath is working at temperatures above 50° C as s
The operator or user must also take extreme care when the bath is working at temperatures above 50° C as sThe operator or user must also take extreme care when the bath is working at temperatures above 50° C as s
The operator or user must also take extreme care when the bath is working at temperatures above 50° C as steam will be
team will be team will be
team will be
present and can cause scalding.
present and can cause scalding.present and can cause scalding.
present and can cause scalding.
Caution Labels
Caution LabelsCaution Labels
Caution Labels
Definition
DefinitionDefinition
Definition
Colours:
Colours:Colours:
Colours: Black on a yellow background
The water bath has a shaking cradle which should not be touched whilst it
is moving. Keep all body parts away from the moving cradle whilst in
operation. Always stop the cradle using the front panel speed control
before working with the contents of the bath.
This label is fitted by the manufacturer and must not be removed under
any circumstances.
Colours:
Colours:Colours:
Colours: Black on a yellow background
The water bath is powered by an alternating current power supply
sufficient to cause harm if contact with the electrical supply is made.
Under no circumstances should any part of the equipment be opened, un-
screwed, loosened or disassembled whilst power is applied to the unit.
Only authorized service agents are permitted to remove covers.
This label is fitted by the manufacturer and must not be removed under
any circumstances.

Ratek SWB10D Water Bath - Operating Manual
------------------------------------------------------------------------------------------------------------------------------------------------------------------------------
------------------------------------------------------------------------------------------------------------------------------------------------------------------------------
Page 6 of 24
Colours:
Colours:Colours:
Colours: Black on a yellow background
The water bath is powered by an alternating current power supply
sufficient to cause harm if contact with the electrical supply is made.
Under no circumstances should the user operate any part of the control
panel with moist, damp or wet hands.
This label is fitted by the manufacturer and must not be removed under
any circumstances.
Colours:
Colours:Colours:
Colours: Black on a yellow background
The water bath is designed for heating water to temperatures that can
cause burns or scalding. Use extreme caution when working near hot
water to avoid injury. Under no circumstances should the heating element
be touched whilst in operation.
This label is fitted by the manufacturer and must not be removed under
any circumstances.
Colours:
Colours:Colours:
Colours: Black on a yellow background
The water bath is powered by an alternating current power supply
sufficient to cause harm if contact with the electrical supply is made.
When emptying the water tank, the water bath should be disconnected
from the alternating current mains power supply, the water allowed to cool
to ambient air temperature and emptied by allowing the water to flow from
the end of the water tank furthest from the main control panel.
This label is fitted by the manufacturer and must not be removed under
any circumstances.

Ratek SWB10D Water Bath - Operating Manual
------------------------------------------------------------------------------------------------------------------------------------------------------------------------------
------------------------------------------------------------------------------------------------------------------------------------------------------------------------------
Page 7 of 24
Operating Procedures
Operating ProceduresOperating Procedures
Operating Procedures
You must take the time to familiarize yourself completely with the following operating procedures before installing or
operating the water bath in order to achieve the best performance and maximum attainable user safety.
Identification of Controls & Functions
Identification of Controls & FunctionsIdentification of Controls & Functions
Identification of Controls & Functions
Throughout this User Manual, the numerical element representing a control or component of the water bath will be used to
identify it. The figure below indicates all key controls and components of the water bath with their corresponding numerical
element labeled.
Figure 1
N
NN
Numerical Element
umerical Elementumerical Element
umerical Element
Description of component
Description of componentDescription of component
Description of component
1
11
1Oscillation speed setting indicator dial
2
22
2Oscillation speed control knob
3
33
3LCD temperature display
4
44
4Temperature increase key pad
5
55
5Temperature decrease key pad
6
66
6Oscillation On/Off mains power switch (setting O = Off, setting | = On)
7
77
7Heating Element Indicator
8
88
8Heating On/Off mains power switch (setting O = Off, setting | = On)
9
99
9Oscillating cradle
10
1010
10 Mains power input receptacle
11
1111
11 Over-temperature reset button

Ratek SWB10D Water Bath - Operating Manual
------------------------------------------------------------------------------------------------------------------------------------------------------------------------------
------------------------------------------------------------------------------------------------------------------------------------------------------------------------------
Page 8 of 24
Safety Warnings
Safety WarningsSafety Warnings
Safety Warnings
Throughout this User Manual, specific warnings will be supplied which relate to the current operation being referred to.
These warnings are supplied in addition to the main warning labels affixed to the product and the key points outlined in
the section of this User Manual titled ‘Operator Responsibility – Safety Considerations’.
A graphical symbol as pictured below will be used next to each warning with accompanying text, the danger level for each
is described below :
CAUTION
CAUTIONCAUTION
CAUTION
Indicates a possibly dangerous situation which may result in serious injury or threat to life if the situation
is not avoided.
CAUTION
CAUTIONCAUTION
CAUTION
Indicates a possibly highly dangerous situation which may result in serious injury or threat to life if the
situation is not avoided.
CAUTION
CAUTIONCAUTION
CAUTION
Indicates a possibly harmful situation which may result in injury or damage to product or property if the
situation is not avoided.
Safety Recommendations
Safety RecommendationsSafety Recommendations
Safety Recommendations
The following safety recommendations must be followed to prevent damage or injury. In addition to these safety
recommendations, it is assumed that the user and operator have had experience in a commercial environment, and
had appropriate training in how to perform their work safely in accordance with any local operational health and safety
regulations. The operator and all users should be well versed in local emergency procedures as per the workplace
safety regulations in effect.
CAUTION
CAUTIONCAUTION
CAUTION
If the equipment is used in a manner not specified by the manufacturer, the protection provided by the
equipment may be impaired.
CAUTION
CAUTIONCAUTION
CAUTION
The equipment must only be used with a protective earth power socket. The earth contact provides
protection to the user and the equipment. If you do not have a protective earth power socket, or you are
unsure as to whether you have a protective earth power socket, do n
do ndo n
do not
otot
ot connect the equipment. In such
cases you should consult your workplace administrator or electrical maintenance staff to determine if a
protective earth power socket is available.
A surge protected power outlet is strongly recommended as it provides
A surge protected power outlet is strongly recommended as it provides A surge protected power outlet is strongly recommended as it provides
A surge protected power outlet is strongly recommended as it provides so
soso
some
me me
me protection for the
protection for the protection for the
protection for the
equipment in areas of poor electrical quality as well as providing some protection against lightning
equipment in areas of poor electrical quality as well as providing some protection against lightning equipment in areas of poor electrical quality as well as providing some protection against lightning
equipment in areas of poor electrical quality as well as providing some protection against lightning
strikes.
strikes. strikes.
strikes. The equipment should be operated on a good, reliable supply of power at all times.
The equipment should be operated on a good, reliable supply of power at all times.The equipment should be operated on a good, reliable supply of power at all times.
The equipment should be operated on a good, reliable supply of power at all times.
Note: The water bath should not be operated on the same electrical circuit as other high voltage
household appliances such as fridges, clothes dryers, washing machines or other continuous operation
high voltage devices. These types of devices can create power fluctuations that are undesirable for
sensitive medical equipment. Consult your workplace administrator or electrical maintenance staff if you
are unsure.
CAUTION
CAUTIONCAUTION
CAUTION
The water bath is intended for use with tap water or filtered water only
onlyonly
only. De-ionized or distilled water can
cause corrosion.
Use with any other medium is not permitted.

Ratek SWB10D Water Bath - Operating Manual
------------------------------------------------------------------------------------------------------------------------------------------------------------------------------
------------------------------------------------------------------------------------------------------------------------------------------------------------------------------
Page 9 of 24
The use of flammable liquids may cause serious injury or danger to life.
CAUTION
CAUTIONCAUTION
CAUTION
Always work above the level of the water bath to avoid spillage of dangerously hot water. At no point
should the user, operator, animal or any other perishable object be situated directly beneath the water
bath.
-ALWAYS
ALWAYSALWAYS
ALWAYS wear protective eyewear when working with hot liquids.
-ALWAYS
ALWAYSALWAYS
ALWAYS place the water bath on a strong, even, dry, flat waterproof surface which is made of
inflammable material. Placing the water bath on an unstable surface could cause hot water to spill.
-ALWAYS
ALWAYS ALWAYS
ALWAYS empty the water bath before moving the equipment to a new location.
-ALWAYS
ALWAYSALWAYS
ALWAYS turn off both mains power switches (elements 6 and 8 in Figure 1) when the unit is not in
operation and turn off the mains power supply at the outlet.
-ALWAYS
ALWAYSALWAYS
ALWAYS turn off both mains power switches (elements 6 and 8 in Figure 1) and unplug the
equipment from the mains power supply outlet before emptying the water tank or moving the
equipment.
-ALWAYS
ALWAYSALWAYS
ALWAYS be careful of water condensation above or near the water bath and ensure at all times
that the condensation cannot come in contact with the water bath control panel or mains power
input receptacle (element 10 in Figure 1). Ensure benches are kept dry at all times.
-ALWAYS
ALWAYS ALWAYS
ALWAYS operate the water bath in a well ventilated area with adequate clearance around the water
bath as indicated.
-ALWAYS
ALWAYS ALWAYS
ALWAYS be careful of steam and avoid making contact.
-ALWAYS use the water bath with the oscillating cradle moving t
ALWAYS use the water bath with the oscillating cradle moving tALWAYS use the water bath with the oscillating cradle moving t
ALWAYS use the water bath with the oscillating cradle moving to improve temperature uniformity
o improve temperature uniformityo improve temperature uniformity
o improve temperature uniformity.
..
.
-ALWAYS
ALWAYS ALWAYS
ALWAYS use only the supplied mains power lead. Non-genuine leads may not be suitable.
-NE ER operate the water bath without water in the water tank.
NE ER operate the water bath without water in the water tank.NE ER operate the water bath without water in the water tank.
NE ER operate the water bath without water in the water tank.
-NE ER
NE ERNE ER
NE ER empty the water bath while it contains hot water. Always allow the water to cool to ambient
room temperature before emptying.
-NE ER
NE ERNE ER
NE ER operate the equipment if you believe it is damaged in any way.
-NE ER
NE ERNE ER
NE ER operate the water bath if the mains power supply cable is damaged in any way
-NE ER
NE ER NE ER
NE ER use any sharp or metal objects near the water bath control panel or mains power input
receptacle (element 10 in Figure 1).
-NE ER
NE ERNE ER
NE ER lift the water bath if you have an existing injury that impairs your ability to lift.
Preparation & Installation
Preparation & InstallationPreparation & Installation
Preparation & Installation
The water bath should be installed and operated in strict accordance with the following instructions.
CAUTION
CAUTIONCAUTION
CAUTION
The water bath is not for use in explosive atmospheres as there is a risk of fire, explosion, burns or
scalding present under these conditions.
CAUTION
CAUTIONCAUTION
CAUTION
Be careful when lifting and observe your local operational health and safety requirements for lifting
before unpacking the carton.
Unpacking and Installing
Unpacking and InstallingUnpacking and Installing
Unpacking and Installing
-Carefully remove all packaging material from the water bath, as well as the supplied mains power
lead, User Manual and any other supplied accessories. The oscillating cradle (element 9 in Figure 1)
inside the water bath should not be removed
should not be removedshould not be removed
should not be removed.
..
.
-Carefully inspect the water bath, mains power lead and all packaging for any signs of damage. If any
signs of damage are present, do not
do notdo not
do not install or operate the equipment. Contact the supplier of your
equipment if you have a received a damaged product.
-Place the water bath in an upright position as per Figure 1 on a strong, even, flat waterproof surface
which is made of inflammable material.

Ratek SWB10D Water Bath - Operating Manual
------------------------------------------------------------------------------------------------------------------------------------------------------------------------------
------------------------------------------------------------------------------------------------------------------------------------------------------------------------------
Page 10 of 24
-Ensure that there is a minimum unobstructed distance of 100 millimetres between the left, right and
rear panels of the water bath and any other object or wall.
-Ensure that there is a minimum unobstructed distance of 500 millimetres above the top of the water
tank to allow for adequate ventilation.
-Ensure that there is a suitable mains power supply outlet within reach of the supplied mains power
lead without placing any strain whatsoever on the lead, socket or plug. The water bath should not be
plugged into any double-adapter, power board, or power point splitter of any kind but instead directly
into a correctly earthed wall mounted power socket.
-Ensure that there is a minimum unobstructed distance of 1,000 millimetres in front of the water bath to
allow adequate room for the user to maintain a safe operating distance of 300 millimetres.
CAUTION
CAUTIONCAUTION
CAUTION
The water bath is designed for the purpose of heating immersed plastic or glass sealed
sealedsealed
sealed laboratory test
tubes, flasks or bottles suitable for use at the water temperature selected by the operator whilst being
agitated.
The contents of these test tubes is the sole responsibility of the user or operator, and the use of
corrosive, flammable, combustible, hazardous, environmentally unsafe or otherwise dangerous
materials within the immersed container is done so at the risk and liability of the user or operator.
ALWAYS
ALWAYSALWAYS
ALWAYS be 100% sure of the contents of your containers, the expected behavior once heated and
agitated and the applicable safety measures that should be employed when handling such substances.
ALWAYS
ALWAYSALWAYS
ALWAYS ensure your containers are firmly sealed and there is no chance of the sample leaking into the
water bath.
ALWAYS
ALWAYSALWAYS
ALWAYS use plastic, stainless-steel or plastic powder-coated tubes racks and accessories in the water
bath. This will assist to prevent corrosion and thus help to extend the useful life of the water bath.
CAUTION
CAUTIONCAUTION
CAUTION
Poor water quality can lead to corrosion of the water bath even though it is constructed from stainless
steel, and eventually lead to a potentially hazardous situation. The water bath is intended for use with
tap water or filtered water only.
A soft, decalcified water is the recommended
A soft, decalcified water is the recommended A soft, decalcified water is the recommended
A soft, decalcified water is the recommended liquid
liquidliquid
liquid for use with the
for use with the for use with the
for use with the
water bath
water bathwater bath
water bath.
..
.
Depending on local conditions, the water supply may be ferrous or overly chlorinated. Both of these
conditions may lead to corrosion if used with the water bath.
Distilled or de-ionized water may lead to corrosion if used with the water bath.
Use of any liquid other than that recommended above will void the product warranty.
Contact the supplier of your water bath before filling the water tank if you are unsure of your water
supply.
CAUTION
CAUTIONCAUTION
CAUTION
Before filling the water tank, ensure the mains power supply outlet is switched off
offoff
off and that the mains
lead is remo
remoremo
removed
vedved
ved from the mains power input receptacle (element 10 in Figure 1).
The nature of pouring water is unpredictable and should be done carefully away from any electrical
supply to avoid the risk of electric shock.
CAUTION
CAUTIONCAUTION
CAUTION
Do not over-fill the water bath. If the water bath is over-filled, the movement of the oscillating cradle may
cause water to spill out of the water tank and create a hazardous situation if the water comes near an
electrical current.

Ratek SWB10D Water Bath - Operating Manual
------------------------------------------------------------------------------------------------------------------------------------------------------------------------------
------------------------------------------------------------------------------------------------------------------------------------------------------------------------------
Page 11 of 24
The maximum water depth is 35 millimetres below the tank rim. This level is just beneath the cradle
wheels support rail and you should use this rail as a guide.
The minimum filling level is 30 millimetres above the bottom of the oscillating cradle, or approximately 50
millimetres from the bottom of the water tank.
If the water level falls below this minimum level during operation, the water bath should be powered off,
disconnected from the mains electrical supply and the water level topped up with cold water. Be aware
that this will result in the rapid decrease in the water bath water temperature and the effect of this in
relation to the current procedure being carried out must be considered.
No liability will be accepted if in the normal course of operation the contents of the containers being
heated and oscillated are damaged due to insufficient water levels or inappropriate temperatures being
applied as a result of re-filling.
Using The
Using The Using The
Using The Water Bath
Water BathWater Bath
Water Bath
Filling The Water Tank
Filling The Water TankFilling The Water Tank
Filling The Water Tank
- The water bath should be filled by slowly pouring cold water (below 25° Celsius) into the end of the
water bath furthest from the control panel, initially to 50% of the desired water level.
-Place the empty container/s to be used in the appropriate rack or tray and submerge in the water to
gauge the displacement created by the containers.
-Continue filling the water tank the desired working level.
-Remove the containers.
-Avoid splashing as much as possible.
Connecting Power
Connecting PowerConnecting Power
Connecting Power
CAUTION
CAUTIONCAUTION
CAUTION
The equipment must only be used with a protective earth power socket. The earth contact provides
protection to the user and the equipment. If you do not have a protective earth power socket, or you are
unsure as to whether you have a protective earth power socket, do not
do notdo not
do not connect the equipment. In such
cases you should consult your workplace administrator or electrical maintenance staff to determine if a
protective earth power socket is available.
The mains power supply must be rated to match the power requirement as identified on the product
identification label on the bottom left corner of the rear panel. This is normally expressed in the format of
oltage Range and Frequency.
A surge protected power outlet is strongly recommended as it provides some protection for the
A surge protected power outlet is strongly recommended as it provides some protection for the A surge protected power outlet is strongly recommended as it provides some protection for the
A surge protected power outlet is strongly recommended as it provides some protection for the
equipment in areas of poor electrical quality as well as providing som
equipment in areas of poor electrical quality as well as providing somequipment in areas of poor electrical quality as well as providing som
equipment in areas of poor electrical quality as well as providing some protection against lightning
e protection against lightning e protection against lightning
e protection against lightning
strikes. The equipment should be operated on a good, reliable supply of power at all times.
strikes. The equipment should be operated on a good, reliable supply of power at all times.strikes. The equipment should be operated on a good, reliable supply of power at all times.
strikes. The equipment should be operated on a good, reliable supply of power at all times.
Note: The water bath should not be operated on the same electrical circuit as other high voltage
household appliances such as fridges, clothes dryers, washing machines or other continuous operation
high voltage devices. These types of devices can create power fluctuations that are undesirable for
sensitive medical equipment. Consult your workplace administrator or electrical maintenance staff if you
are unsure.
IMPORTANT : Use of an incorrect power supply will void the product warranty waive all liability for any
IMPORTANT : Use of an incorrect power supply will void the product warranty waive all liability for any IMPORTANT : Use of an incorrect power supply will void the product warranty waive all liability for any
IMPORTANT : Use of an incorrect power supply will void the product warranty waive all liability for any
and all damage caused by such use. If you are unsure about the rating of your power supply,
and all damage caused by such use. If you are unsure about the rating of your power supply, and all damage caused by such use. If you are unsure about the rating of your power supply,
and all damage caused by such use. If you are unsure about the rating of your power supply, consult
consult consult
consult
your workplace administr
your workplace administryour workplace administr
your workplace administrator or electrical maint
ator or electrical maintator or electrical maint
ator or electrical maintenance staff to determine if
enance staff to determine ifenance staff to determine if
enance staff to determine if your power supply is suitable
your power supply is suitable your power supply is suitable
your power supply is suitable
for use with this product before connecting the power lead.
for use with this product before connecting the power lead.for use with this product before connecting the power lead.
for use with this product before connecting the power lead.
CAUTION
CAUTIONCAUTION
CAUTION
Regularly check the mains power lead condition over the life of the product, and do not operate the
equipment if you suspect there is damage to any part of the equipment or the mains power lead.

Ratek SWB10D Water Bath - Operating Manual
------------------------------------------------------------------------------------------------------------------------------------------------------------------------------
------------------------------------------------------------------------------------------------------------------------------------------------------------------------------
Page 12 of 24
Replace the mains power lead if you suspect it has been stretched, over-extended or damaged in any
way.
- Using the supplied mains power lead, insert the socket end of the lead firmly into the mains power
input receptacle (element 10 in Figure 1) until it will move no further.
- Insert the plug end of the mains power supply lead firmly into a properly rated, protective earthed wall
mounted power supply outlet.
If there are double-adapters or oversized DC power packs causing obstruction of the mains power lead
plug, these should first be removed.
- Ensuring your hands are dry, switch on the power on the mains power supply outlet.
Switching On The Water
Switching On The WaterSwitching On The Water
Switching On The Water Heating
Heating Heating
Heating
CAUTION
CAUTIONCAUTION
CAUTION
Ensure you have filled the water bath to at least the minimum required level before switching on power
to the heating system. Failure to do so may create a hazardous situation that can cause burns, scalding
and create a fire risk.
- The water heating control circuit will retain the last used temperature set-point set on the control
panel, so for many applications it will only ever need to be set once.
-Before switching on the water heating, determine the temperature you wish to operate the bath at.
-If you wish to heat your containers from ambient temperature, you should load the cradle with a
suitable rack, tray and containers prior to switching on the heating system, see the section titled
“Loading the Water Bath” below.
-If you wish to add your containers to warm or hot water, this should be done with extreme care once
the temperature of the water bath has stabilized.
- Once you are ready to begin heating the water, switch the Heating On/Off mains power switch
(element 8 in Figure 1) down to the position marked with a vertical line. The Heating On/Off mains
power switch (element 8 in Figure 1) will light up red to indicate the heating system is active.
-The heating control system will begin its startup, after several seconds the LCD temperature display
(element 3 in Figure 1) will read the current water temperature in degrees Celsius.
-If the last set temperature is greater than the current water temperature, the Heating Element
Indicator (element 7 in Figure 1) will light up and either flash to indicate intermittent heating or remain
lit constantly to indicate constant heating.
CAUTION
CAUTIONCAUTION
CAUTION
The heating element is the round disc visible in the bottom of the water tank, directly underneath the
oscillating cradle.
Once the Heating Element Indicator (element 7 in Figure 1) is lit, the heating element is active and the
surface of the element will remain extremely hot whilst heating and for many minutes even after power
to the unit has been disconnected. Once the Heating Element Indicator has lit, under no circumstances
should you place any part of your body near the bottom of the water tank. The residual heat of the
element creates a hazardous situation sufficient to cause burns or scalding if contact with the element
is made.
IMPORTANT :
IMPORTANT :IMPORTANT :
IMPORTANT : Under no circumstances should the oscillating cradle ever be removed from the
Under no circumstances should the oscillating cradle ever be removed from the Under no circumstances should the oscillating cradle ever be removed from the
Under no circumstances should the oscillating cradle ever be removed from the water
water water
water
bath
bathbath
bath. If the oscillating cradle is removed, a hazardous situation will be created sufficient to cause burns
. If the oscillating cradle is removed, a hazardous situation will be created sufficient to cause burns . If the oscillating cradle is removed, a hazardous situation will be created sufficient to cause burns
. If the oscillating cradle is removed, a hazardous situation will be created sufficient to cause burns
or scalding if contact with the element is made.
or scalding if contact with the element is made.or scalding if contact with the element is made.
or scalding if contact with the element is made.
Setting t
Setting tSetting t
Setting the Required Water Temperature
he Required Water Temperaturehe Required Water Temperature
he Required Water Temperature
- The LCD temperature display (element 3 in Figure 1) indicates the current water temperature in
degrees Celsius in its default operating mode.
-When the temperature is being set, the LCD temperature display (element 3 in Figure 1) will
temporarily read the temperature set-point value that the operator is adjusting.

Ratek SWB10D Water Bath - Operating Manual
------------------------------------------------------------------------------------------------------------------------------------------------------------------------------
------------------------------------------------------------------------------------------------------------------------------------------------------------------------------
Page 13 of 24
-Use the temperature increase key pad (element 4 in Figure 1) to increase the required temperature
by pressing quickly for single digit increments, or holding the key to increase the temperature setting
by larger amounts. The value on the LCD temperature display (element 3 in Figure 1) will alter.
-Use the temperature decrease key pad (element 5 in Figure 1) to decrease the required temperature
by pressing quickly for single digit increments, or holding the key to decrease the temperature setting
by larger amounts. The value on the LCD temperature display (element 3 in Figure 1) will alter.
-Once the adjustments have been made, the LCD temperature display (element 3 in Figure 1) will
return to show the current water temperature after a few seconds.
-If the last set temperature is greater than the current water temperature, the Heating Element
Indicator (element 7 in Figure 1) will light up and either flash to indicate intermittent heating or remain
lit constantly to indicate constant heating.
-Once the water temperature nears the set point, the PID temperature control circuit will start to
intermittently engage the element to reduce the rate of heating.
-It is norma
It is normaIt is norma
It is normal for the temperature to exceed the set point slightly whilst the temperature in the bath
l for the temperature to exceed the set point slightly whilst the temperature in the bath l for the temperature to exceed the set point slightly whilst the temperature in the bath
l for the temperature to exceed the set point slightly whilst the temperature in the bath
stabilizes. The bath temperature will drop back down to the set temperature and then the proportional
stabilizes. The bath temperature will drop back down to the set temperature and then the proportional stabilizes. The bath temperature will drop back down to the set temperature and then the proportional
stabilizes. The bath temperature will drop back down to the set temperature and then the proportional
temperature control will attempt to maintain the set temperature
temperature control will attempt to maintain the set temperaturetemperature control will attempt to maintain the set temperature
temperature control will attempt to maintain the set temperature.
..
.
CAUTION
CAUTIONCAUTION
CAUTION
If the temperature of the water in the water bath is critical to your application, ensure the water bath is
left for at least 30 minutes to stabilize after the temperature has reached the set-point before you insert
your containers and samples into the water.
CAUTION
CAUTIONCAUTION
CAUTION
Temperatures above 50 degrees are sufficient to cause steam and are also capable of causing burns or
scalding. Exercise extreme care paying particular attention to steam and splashing of water when the
water bath is operating at these high temperatures, particularly whilst loading and unloading,
containers, racks or accessories. ALWAYS use appropriate tools (such as silicon insulated tongs) to
lower such containers into the water to avoid your hands coming into contact with hot water.
IMPORTANT : The maximum attainable temperature in t
IMPORTANT : The maximum attainable temperature in tIMPORTANT : The maximum attainable temperature in t
IMPORTANT : The maximum attainable temperature in the
he he
he water bath
water bathwater bath
water bath is approximately 80
is approximately 80 is approximately 80
is approximately 80° Celsius
° Celsius° Celsius
° Celsius
(depending on environmental factors such as
(depending on environmental factors such as (depending on environmental factors such as
(depending on environmental factors such as volume of water,
volume of water, volume of water,
volume of water, ambient air temperature, water quality
ambient air temperature, water quality ambient air temperature, water quality
ambient air temperature, water quality
and humidity)
and humidity)and humidity)
and humidity), however the control circuitry
, however the control circuitry , however the control circuitry
, however the control circuitry will allow a set
will allow a setwill allow a set
will allow a set-
--
-point of up to 99.9° Celsius. Due to
point of up to 99.9° Celsius. Due to point of up to 99.9° Celsius. Due to
point of up to 99.9° Celsius. Due to
environmental factors including the size of the water tank, the power of the heating element, the water
environmental factors including the size of the water tank, the power of the heating element, the water environmental factors including the size of the water tank, the power of the heating element, the water
environmental factors including the size of the water tank, the power of the heating element, the water
being open to the air and the resulting evaporation, the
being open to the air and the resulting evaporation, the being open to the air and the resulting evaporation, the
being open to the air and the resulting evaporation, the water bath
water bathwater bath
water bath is rated
is rated is rated
is rated for practical use onl
for practical use onl for practical use onl
for practical use only up to
y up to y up to
y up to
70
7070
70° Celsius whilst maintaining accurate temperature stability. The
° Celsius whilst maintaining accurate temperature stability. The ° Celsius whilst maintaining accurate temperature stability. The
° Celsius whilst maintaining accurate temperature stability. The water bath
water bathwater bath
water bath will not achieve a water
will not achieve a water will not achieve a water
will not achieve a water
temperature of 99.9° Celsius by design.
temperature of 99.9° Celsius by design. temperature of 99.9° Celsius by design.
temperature of 99.9° Celsius by design.
Loading/Un
Loading/UnLoading/Un
Loading/Un-
--
-Loading the
Loading the Loading the
Loading the Water Bath
Water BathWater Bath
Water Bath
CAUTION
CAUTIONCAUTION
CAUTION
NE ER load or unload items from the cradle whilst the cradle is in operation. The moving cradle is
capable of causing injury if any part of the body becomes lodged around it.
ALWAYS load items ONLY onto the bottom of the cradle platform which is suspended above the bottom
of the water tank, and ensure that no part of the item extends beyond the width of the cradle (outside the
retaining walls). Items that extend beyond the width of the cradle may cause the water bath to jam or
create a hazardous situation whereby personal injury could occur.
NE ER load items directly onto the bottom of the water tank as this will result in the oscillating cradle
becoming jammed. The bottom of the water tank is also in direct contact with the element and any items
that come into contact with it may be destroyed.
CAUT
CAUTCAUT
CAUTION
IONION
ION
NE ER touch the bottom of the water tank whilst the water bath is heating as serious burns and scalding
could result.
ALWAYS use appropriate tools (such as silicon insulated tongs) to load and unload items from the water

Ratek SWB10D Water Bath - Operating Manual
------------------------------------------------------------------------------------------------------------------------------------------------------------------------------
------------------------------------------------------------------------------------------------------------------------------------------------------------------------------
Page 14 of 24
to avoid your hands coming into contact with hot water or the heating element.
CAUTION
CAUTIONCAUTION
CAUTION
When working with glass tubes, flasks, bottles, breakable or other brittle or fragile articles it is important
to use an appropriate retaining rack or fixture that ensures individual vessels are supported
independently and cannot come into contact with one another.
For example, if using glass test tubes, each tube should be retained in it’s own division of a test tube
rack, and the rack itself should be wide enough to be retained by the base of the oscillating cradle
without sliding around during oscillation. A powder coated stainless steel test tube rack is
recommended for retaining test tubes.
No vessel should be allowed to come into contact with any other vessel during high speed oscillation in
order to prevent breakage and a potentially hazardous situation from being created.
ALWAYS use appropriate tools (such as silicon insulated tongs) to load and unload items from the
water to avoid your hands coming into contact with sharp, broken or contaminated vessels.
- Turn power Off to the oscillating cradle by setting the Oscillation On/Off mains power switch (element
6 in Figure 1) up to the setting marked with a circle.
-When loading, use appropriate tools (such as silicon insulated tongs) to place the required rack,
container or accessory onto the oscillating platform. Ensure the item is adequately retained by the 2
retaining walls on the bottom of the cradle. If the item is too small to be adequately retained, it should
be loaded into another suitable rack or tray which will be adequately retained by the retaining walls.
-When unloading, use appropriate tools (such as silicon insulated tongs) to slowly remove the items
and place them onto a water-proof and heat-proof surface.
-Continue to load or unload your containers, racks or accessories until complete.
CAUTION
CAUTIONCAUTION
CAUTION
Be careful when working with hot items removed from the water bath as burns or scalding may occur if
contact occurs.
Always wear eye protection when loading or unloading items from a hot water bath.
Do not use explosive or volatile containers with this water bath.
Ensure all containers remain tightly sealed at all times whilst loading and unloading the water bath.
Only use containers suitable for the water temperature selected.
Starting the Oscillating Cradle
Starting the Oscillating CradleStarting the Oscillating Cradle
Starting the Oscillating Cradle
CAUTION
CAUTIONCAUTION
CAUTION
Always turn the Oscillation speed control knob (element 2 in Figure 1) down to setting 0 before starting
the oscillating cradle. This will assist in preventing any splashing or unexpected behavior once the
cradle starts to move.
- Turn the Oscillation speed control knob (element 2 in Figure 1) down to setting 0.
-Turn power On to the oscillating cradle by setting the Oscillation On/Off mains power switch (element
6 in Figure 1) down to the setting marked with a vertical line. The Oscillation On/Off mains power
switch (element 6 in Figure 1) will light up red to indicate the speed control is now active.
-Slowly turn the Oscillation speed control knob (element 2 in Figure 1) clockwise up towards the
required oscillation speed, the cradle will begin to move.
-Continue to increase the speed until the desired oscillating speed is reached.
-Note : In cases where the required oscillation speed is very slow, it may be necessary to increase the
oscillation speed to slightly more than the required speed, and then reduce the speed back to the

Ratek SWB10D Water Bath - Operating Manual
------------------------------------------------------------------------------------------------------------------------------------------------------------------------------
------------------------------------------------------------------------------------------------------------------------------------------------------------------------------
Page 15 of 24
required set-point once the cradle is carrying enough momentum to maintain the lower speed.
Stopping the Oscillating Cradle
Stopping the Oscillating CradleStopping the Oscillating Cradle
Stopping the Oscillating Cradle
- Slowly turn the Oscillation speed control knob (element 2 in Figure 1) anti-clockwise down to setting
0.
-Turn power Off to the oscillating cradle by setting the Oscillation On/Off mains power switch (element
6 in Figure 1) up to the setting marked with a circle. The Oscillation On/Off mains power switch
(element 6 in Figure 1) will go dark which indicates the speed control is now inactive.
Switching Off The Water Heating
Switching Off The Water HeatingSwitching Off The Water Heating
Switching Off The Water Heating
- Switch the Heating On/Off mains power switch (element 8 in Figure 1) up to the position marked with
a circle. The Heating On/Off mains power switch (element 8 in Figure 1) will darken which indicates
the heating system is now inactive.
CAUTION
CAUTIONCAUTION
CAUTION
Although the heating system may now be inactive, the residual heat in the heating element may be
sufficient to cause serious burns or scalding.
The residual water temperature may also be sufficient to cause burns or scalding.
Allow at least 10 minutes after switching off the heating system to allow the heating element to cool.
Allow the water temperature to reach ambient room temperature before proceeding to empty the water
tank.
Emptying The Water Tank
Emptying The Water TankEmptying The Water Tank
Emptying The Water Tank
CAUTION
CAUTIONCAUTION
CAUTION
Do not empty the water tank while the water is hot as burns or scalding may result.
- Turn off both mains power switches (elements 6 and 8 in Figure 1) by setting these to the up position
marked with a circle.
-Unplug the equipment from the mains power supply outlet.
-Remove all containers, racks and accessories from the water tank and place them in a safe place, do
do do
do
not remove the oscillating crad
not remove the oscillating cradnot remove the oscillating crad
not remove the oscillating cradle
lele
le.
-Allow the water bath water to cool down until it reaches ambient room temperature.
-If emptying the water into another container, ensure the container is place below the level of the water
bath on a firm, hard, flat surface.
-If emptying into a sink or drain, ensure you have clear and unobstructed access to it.
-Ask for assistance to empty the water tank. Depending on the volume of water in the tank, you may
require 2 people to lift the water bath. The water bath should be lifted in accordance with any local
operational health and safety guidelines in place.
-The water must be emptied towards the end of the water bath furthest from the control panel. This
reduces the volume of water that may come into contact with the control panel. This end is indicated
by the following caution label on the case of the water bath.

Ratek SWB10D Water Bath - Operating Manual
------------------------------------------------------------------------------------------------------------------------------------------------------------------------------
------------------------------------------------------------------------------------------------------------------------------------------------------------------------------
Page 16 of 24
Colours:
Colours:Colours:
Colours: Black on a yellow background
-Important: Whilst emptying the water bath, the oscillating cradle will become free to move as the bath
Important: Whilst emptying the water bath, the oscillating cradle will become free to move as the bath Important: Whilst emptying the water bath, the oscillating cradle will become free to move as the bath
Important: Whilst emptying the water bath, the oscillating cradle will become free to move as the bath
is tipped up. Ensure you support the cradle at
is tipped up. Ensure you support the cradle atis tipped up. Ensure you support the cradle at
is tipped up. Ensure you support the cradle at all times whilst emptying the water bath to avoid
all times whilst emptying the water bath to avoid all times whilst emptying the water bath to avoid
all times whilst emptying the water bath to avoid
damage to the cradle mechanism.
damage to the cradle mechanism. damage to the cradle mechanism.
damage to the cradle mechanism.
-Using one hand under each end of the water bath, slowly lift the control panel end of the water bath to
direct the water out the opposing end and into the relevant water tank, drain or sink. Where possible,
empty the water from the corners of the water bath to reduce splashing. Slowly increase the lift angle
of the bath until all water has emptied from the tank.
-Slowly lower the water bath back down to the flat surface until it is fully supported by the surface
before letting go. Do not drop the water bath.
-Allow the remaining water to evaporate, or use a soft dry cloth to dry around the water bath water
tank.
-Using a soft dry cloth, dry around the control panel if this has become wet.
-Dry your hands before operating any electrical equipment.
Over Temperature Safety Cutout
Over Temperature Safety CutoutOver Temperature Safety Cutout
Over Temperature Safety Cutout
The water bath features a manually reset over-temperature safety cutout which cuts power to the
heating element in cases where the heating element has become too hot as a result of an insufficient
water level being maintained in the bath.
When the cutout activates, a small click sound may be heard.
Depending on the quality of the water being used, an unpleasant smell may also be noticed as a result
of the impurities in the water becoming hot. This is normal.
- If the over-temperature cutout activates, turn off all power to the water bath immediately by setting
both mains power switches (elements 6 and 8 in Figure 1) to the up position marked with a circle.
-Turn off the mains power supply at the outlet.
-Allow the unit to cool for at least 10 minutes.
-Refill the water tank by referring to the section in this User Manual labeled “Filling The Water Tank”.
-On the rear panel of the water bath, the Over-temperature reset button (element 11 in Figure 1)
should be pressed in firmly until it remains in place. A small click sound should be heard.
-The water bath is now ready to be re-operated as per the section of this User Manual labeled
“Switching On The Water Heating”.
Storing & Relocating The
Storing & Relocating The Storing & Relocating The
Storing & Relocating The Water Bath
Water BathWater Bath
Water Bath
The water bath should be stored out of direct sunlight at an ambient temperature below 30° Celsius in a
clean and dry location which meets the environmental conditions required as detailed in the technical
specifications of this User Manual.
-Turn off both mains power switches (elements 6 and 8 in Figure 1).
-Unplug the equipment from the mains power supply outlet.
-If the water bath is empty, clean and dry, you may relocate it to an appropriate storage location.

Ratek SWB10D Water Bath - Operating Manual
------------------------------------------------------------------------------------------------------------------------------------------------------------------------------
------------------------------------------------------------------------------------------------------------------------------------------------------------------------------
Page 17 of 24
-If the water bath is filled with water, it should not
not not
not be moved for storage. If you wish to keep dust and
dirt out of the water tank, the supplied plastic cover can be fitted for short periods of time to filled
water baths (maximum 48 hours).
-If the water bath is clean and dry, the plastic cover can be used indefinitely to keep dust and dirt out
of the water tank.
-Before fitting the plastic cover, ensure that the water tank is either empty, or if filled, ensure the water
temperature is back to ambient room temperature before fitting the cover.
-To fit the cover, simply slide the cover over the control end of the bath first, and then the opposing
end until the whole water bath is covered.
-Ensure the water bath is stored in a clean and dry location away from potential damage by accidental
knocks and bumps.
CAUTION
CAUTIONCAUTION
CAUTION
Be careful when lifting and observe your local operational health and safety requirements for lifting
before relocating the water bath. Ask for help if you are unable to move the water bath by yourself.
CAUTION
CAUTIONCAUTION
CAUTION
Do not fit the plastic cover if the bath is filled with heated water. The heated water will cause
condensation on the plastic cover, which can in-turn damage the electrical circuits of the water bath and
potentially create a hazardous situation.
The cover should only be fitted to either a dry empty water bath, or a bath filled with ambient
temperature water (for a maximum of 48 hours when filled with water).
Routine Cleaning And Maintenance
Routine Cleaning And MaintenanceRoutine Cleaning And Maintenance
Routine Cleaning And Maintenance
To maintain the water bath in good, safe working order and ensure maximum product lifespan, regular cleaning and
general maintenance is required. The water bath should be cleaned at least once every month for a unit being used on a
daily basis, for infrequently used water baths a cleaning frequency of once every 3 months is recommended. On each
occasion, the general maintenance routine should be employed following cleaning with the exception of the over-
temperature safety cutout test which need only be conducted every 2 years of normal operation.
Cleaning The
Cleaning The Cleaning The
Cleaning The Water Bath
Water BathWater Bath
Water Bath
CAUTION
CAUTIONCAUTION
CAUTION
If the water bath has been operated recently the heating element may be hot enough to create a hazard
sufficient to burn or scald if contact is made.
Allow the
Allow the Allow the
Allow the water bath
water bathwater bath
water bath to co
to co to co
to cool for at least 20 minutes after it has last been operated prior to starting the
ol for at least 20 minutes after it has last been operated prior to starting the ol for at least 20 minutes after it has last been operated prior to starting the
ol for at least 20 minutes after it has last been operated prior to starting the
cleaning procedure
cleaning procedurecleaning procedure
cleaning procedure.
..
.
CAUTION
CAUTIONCAUTION
CAUTION
Do not use alcohol based cleaners or solvents on the water bath as these may break down certain
components of it’s construction, reducing it’s life and potentially creating a hazardous situation. Use only a
mild household detergent when cleaning the water bath.
CAUTION
CAUTIONCAUTION
CAUTION
If the water bath has been used with any dangerous, chemical or biological substances it should be
decontaminated prior to cleaning. Decontaminate the water bath using a decontamination procedure
appropriate to the contaminant, however in all cases ensure the following :
-No decontamination or cleaning agents are used which could cause a hazardous situation to arise

Ratek SWB10D Water Bath - Operating Manual
------------------------------------------------------------------------------------------------------------------------------------------------------------------------------
------------------------------------------------------------------------------------------------------------------------------------------------------------------------------
Page 18 of 24
as a result of a reaction with parts of the water bath or with any materials contained in it. For
example, substances that may compromise the integrity or function of electrical insulation,
electrical components, stainless steel components or water seals.
-Ratek and the manufacturer are consulted prior to decontamination or cleaning being undertaken
if there is any doubt about the compatibility of decontamination or cleaning agents with parts of the
water bath or with any materials contained in it.
CAUTIO
CAUTIOCAUTIO
CAUTION
NN
N
When cleaning the unit, only use a damp sponge. Do not use a sodden wet sponge.
Do not use a sodden wet sponge.Do not use a sodden wet sponge.
Do not use a sodden wet sponge. Do not make any part
of the control panel, any exposed control or receptacle or any part of the water bath excessively wet. If
these receptacles and controls remain wet once electrical power is restored they can create a hazardous
situation sufficient to cause serious injury or risk to life due to electrical shock. Always ensure the unit and
in particular all controls and receptacles are completely dry before restoring electrical power.
- Turn off both mains power switches (elements 6 and 8 in Figure 1).
-Unplug the equipment from the mains power supply outlet.
-Empty all water from the water tank as per the section of this User Manual titled “Emptying The Water
Tank”.
-Allow the water bath to air dry, or use a dry cloth to remove water from all surfaces.
-Using a mild detergent and damp sponge, clean around the cradle and the sides of the water tank as
required.
-NE ER
NE ERNE ER
NE ER remove the oscillating cradle during cleaning. If the water bath element disc is excessively
dirty, the equipment should be passed to a qualified service technician for disassembly and cleaning
(NOT covered by this User Manual and NOT to be carried out by the user or operator).
-Once the water bath is clean, use a soft dry cloth to dry all surfaces of the water bath paying particular
attention to any controls or receptacles.
-Once cleaning has been completed, it may be re-installed and operated in accordance with this User
Manual.
Maintenance
MaintenanceMaintenance
Maintenance
- Turn off both mains power switches (elements 6 and 8 in Figure 1).
-Unplug the equipment from the mains power supply outlet.
-Under good light, carefully inspect the mains power input lead and check for any signs of wear, over-
extension or damage. If you believe the lead to be damaged in any way, contact your supplier to
purchase a new genuine replacement lead.
-Carefully check to ensure all safety warning labels are affixed and in a good readable condition. Refer
to the section in this User Manual titled “Safety Labels & Markings” for a table of factory-fitted warning
labels. If any labels are missing, illegible or otherwise not functional, contact your supplier to obtain new
replacement labels before operating the equipment.
-Ensure all controls and input receptacles are fitted firmly and are good condition. If any are found to be
loose or in poor condition, have an authorized service technician repair the unit before operating it.
CAUTION
CAUTIONCAUTION
CAUTION
If any controls or input receptacles are found to be loose or in poor condition, do not operate the
equipment. Loose or damaged electrical controls and connections create a hazardous situation sufficient
to cause serious injury or risk to life. Refer the equipment to an authorized service technician for repair.

Ratek SWB10D Water Bath - Operating Manual
------------------------------------------------------------------------------------------------------------------------------------------------------------------------------
------------------------------------------------------------------------------------------------------------------------------------------------------------------------------
Page 19 of 24
Ove
OveOve
Over
rr
r-
--
-Temperature Safety Cutout Test
Temperature Safety Cutout TestTemperature Safety Cutout Test
Temperature Safety Cutout Test
The over-temperature safety cutout should be tested periodically to ensure correct operation. This test
should be conducted once every 2 years of normal operation.
-Turn off both mains power switches (elements 6 and 8 in Figure 1).
-Unplug the equipment from the mains power supply outlet.
-Empty the water bath by referring to the section in this User Manual labeled “Emptying The Water
Tank”.
-Fill the water tank with 300mL (approximately 1.5 cups) of cold water by referring to the section in this
User Manual labeled “Filling The Water Tank”, ensuring water is covering the element plate in the
bottom of the water tank.
CAUTION
CAUTIONCAUTION
CAUTION
NE ER touch the water tank or heating element whilst conducting the Over-Temperature Safety Cutout
Test as serious burns and scalding could result.
The test involves water reaching boiling temperature and the resulting steam present could cause serious
burns or scalding.
ALWAYS wear eye protection during the Over-Temperature Safety Cutout Test.
ALWAYS maintain a safe working distance from the water bath during the Over-Temperature Safety
Cutout Test.
-Connect power to the water bath as per the section of this User Manual labeled “Connecting Power”.
-Switch on the heating system as per the section of this User Manual labeled “Switching On The Water
Heating”. There is no need to switch on the oscillating cradle for the test.
-Ensure the temperature set-point is set higher than the temperature of the water used to fill the tank,
this ensures the heating element will remain on during the test. Refer to the section of this User Manual
labeled “Setting the Required Water Temperature”.
-The water bath will begin heating the water and the Heating Element Indicator (element 7 in Figure 1)
will light up.
-Prepare 600mL of cold water ready to fill the water tank on completion of the test.
-The water in the water tank will gradually boil away until the heating element plate is dry, this may take
some minutes. Do not leave the water bath unattended during the tes
Do not leave the water bath unattended during the tesDo not leave the water bath unattended during the tes
Do not leave the water bath unattended during the test.
t. t.
t.
-After a period of less than 60 seconds following the surface of the heating element being completely
dry, the over-temperature cutout should activate. When the cutout activates, a small click sound may be
heard and the Heating Element Indicator (element 7 in Figure 1) light will go out. If the over-temperature
cutout has failed to operate within 60 seconds of the heating element being completely dry, the test has
failed and the water bath should be turned off immediately to prevent damage to the water bath.
-Depending on the quality of the water being used, an unpleasant smell may also be noticed as a result
of the impurities in the water becoming hot. This is normal.
-Once the test has been completed (either the cutout activated or 60 seconds has passed following the
element being completely dry and the cutout has not activated), turn off all power to the water bath
immediately by setting both mains power switches (elements 6 and 8 in Figure 1) to the up position
marked with a circle and refill the water tank with 600mL of cold water to cool the element by referring
to the section in this User Manual labeled “Filling The Water Tank”. This will help to maintain the
working life of the over-temperature safety device.
-If the over-temperature cutout has failed to operate, contact Ratek using the contact details provided in
the section of this User Manual titled “Ratek Service Contact Information”.

Ratek SWB10D Water Bath - Operating Manual
------------------------------------------------------------------------------------------------------------------------------------------------------------------------------
------------------------------------------------------------------------------------------------------------------------------------------------------------------------------
Page 20 of 24
CAUTION
CAUTIONCAUTION
CAUTION
NE ER
NE ERNE ER
NE ER operate the water bath if the over-temperature safety cutout test has failed. Operating the water
bath without a functional over-temperature safety cutout may result in serious injury, threat to life, fire or
damage to property.
-Turn off the mains power supply at the outlet.
-Allow the unit to cool for at least 10 minutes.
-Refill the water tank by referring to the section in this User Manual labeled “Filling The Water Tank”.
-Connect power to the water bath by referring to the section in this User Manual labeled “Filling The
Water Tank”.
-On the rear panel of the water bath, the Over-temperature reset button (element 11 in Figure 1) should
be pressed in firmly until it remains in place. A small click sound should be heard.
-If the over-temperature safety cutout test passed, the water bath is now ready to be re-operated as per
the section of this User Manual labeled “Switching On The Water Heating”.
Table of contents
Other Ratek Laboratory Equipment manuals