manuals.online logo
Brands
  1. Home
  2. •
  3. Brands
  4. •
  5. Raycus
  6. •
  7. Measuring Instrument
  8. •
  9. Raycus RFL-FDDL100X User manual

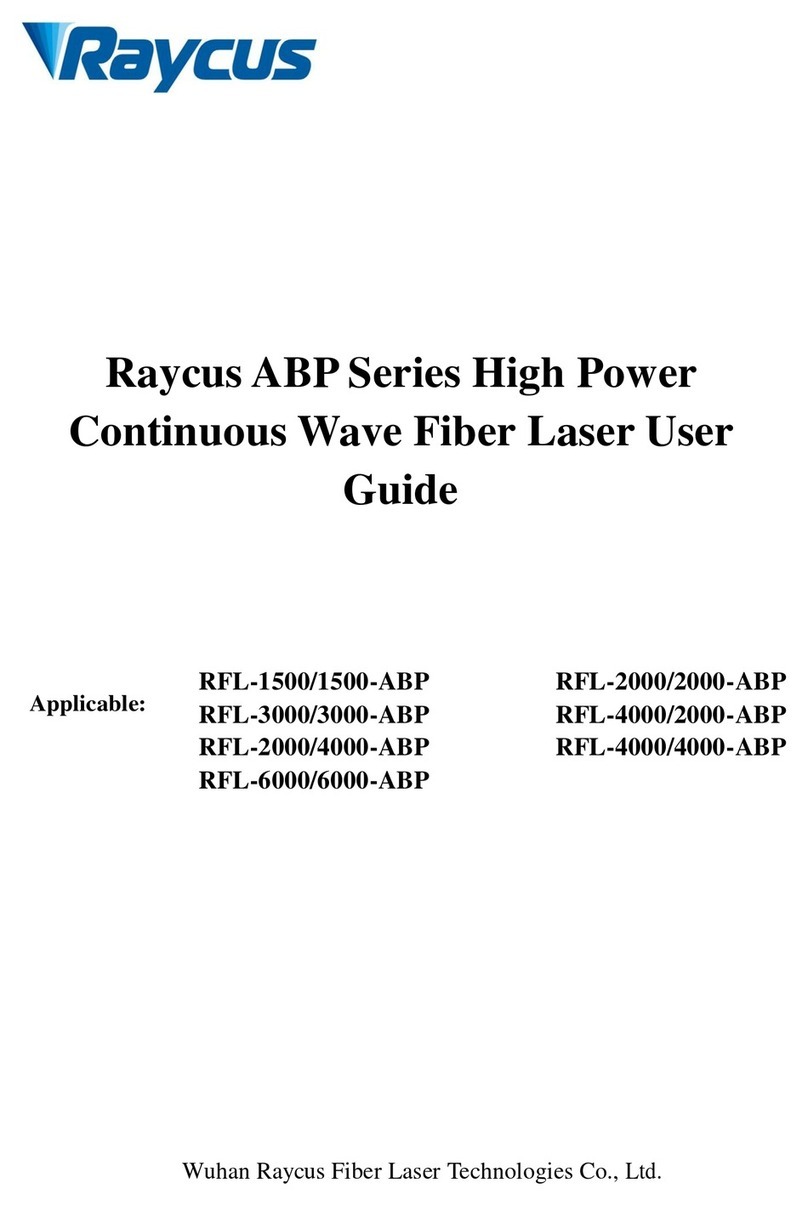
Raycus RFL-FDDL100X User manual

Fiber Delivered Direct Diode
RFL-FDDL50-100X
Laser User Guide
(compact module)
Wuhan Raycus Fiber Laser Technologies Co., Ltd
武汉锐科光纤激光技术股份有限公司
WUHAN RAYCUS FIBER LASER TECHNOLOGIES CO. LTD.
2
1. Safety Information
Thank you for choosing Raycus Fiber Delivered Direct Diode laser. This
User Guide providesimportant safety, operation, warranty and other
information. Please read it carefully beforeyou use this product. In order
to ensure safe operation and optimal performance of the product,please
follow the warnings, cautions, operating procedures and other instructions
accordingly.
1.1 Symbols Used in this User Guide
WARNING: Describes a hazard that lead to a personal injury or death.
CAUTION: Describes a hazard that lead to a minor personal injury
orproduct damage.
1.2 Laser Classification
This series of lasers are classified as a high power Class 4 laser
instrument according to theEuropean Community standards EN 60825-1, clause
9. This product emits invisible laserradiation at or around a wavelength
of 915 nm, and the total light power radiated from theoptical output is
greater than 100W. Direct or indirect exposureof this level of light
intensity may cause damage to the eye or skin. Despite the radiation
beinginvisible, the beam may cause irreversible damage to the retina and/or
cornea. Appropriate andapproved laser safety eyewear must be worn all the
time while the laser is operational.
武汉锐科光纤激光技术股份有限公司
WUHAN RAYCUS FIBER LASER TECHNOLOGIES CO. LTD.
3
WARNING: You must use appropriate laser safety eyewear whenoperating
this device. The laser safety eyewear is selected according tothe
range of wavelengths emitted from this product. The end usermust
ensure that the laser safety eyewear used protects against
lightemitted by the device over its entire range of wavelengths.
Pleasecheck the safety labeling on the productand verify that
thepersonal protective equipment (e.g. enclosures, viewing windows
orviewports, eyewear, etc.) being utilized is adequate for the
outputpower and wavelength ranges listed on the product.
1.3 Safety Labels
These include warning labels, aperturesthrough which laser radiation
is emitted and labels of certification and identification, etc.
Specifications of these labels are as follows:
Laser Radiation Hazard
Identification Plate
Electrical Hazard
1.4 Optical Safety
Any dust on the end of the collimator assembly can burn the lens and
damage the laser.
CAUTION: If the output of the device is delivered through a lens withan
anti-reflection coating, make sure that the lens is of good qualityand
clean.
CAUTION: DO NOT emit when the protective cap is not removed, orthe laser
will be damaged.
1.5 Electrical Safety
a) Make sure your product is grounded through the PE line of the AC power
cord. Thegrounding must be firm and reliable.
武汉锐科光纤激光技术股份有限公司
WUHAN RAYCUS FIBER LASER TECHNOLOGIES CO. LTD.
4
WARNING: Any interruption from the protective earth will electrify
theenclosure, which may result in personal injury.
b) Make sure that the correct voltage of the DC power source is used.
CAUTION: Failure to connect the laser to the correct voltage
coulddamage the product.
c) There are no operator serviceable parts inside, so do not try to
remove covers, or electricalshock may be caused, and warranty will
be void.
1.6 Other Safety Rules
a) Never look into the laser output port when power is supplied to the
laser.
b) Avoid using the laser in a dim or darkened environment.
c) If this device is used in a manner not specified in this document,
the protection provided bythe device may be impaired and the warranty
will be voided.
d) Do not remove the covers of the laser, or the warranty will be voided.
All maintenance mustbe performed in Raycus or by qualified Raycus
personnel.
2. Product Description
2.1 Features
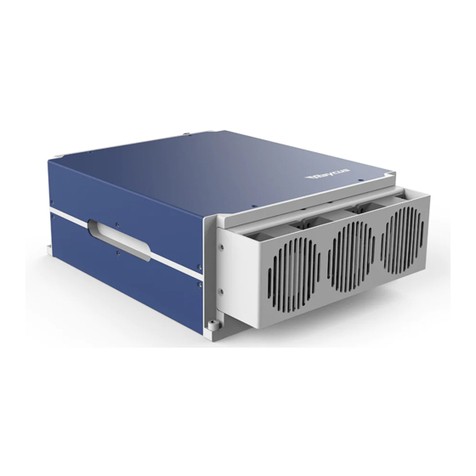
Your Raycus Fiber Delivered Direct Diode laser is designed for
industrial and scientific researchapplications with high pump conversion
efficiency, low power consumption and excellent beamquality. It is compact
and ready to use. It can be used as a stand-alone unit or easily insertedinto
user’s apparatus.
Main Features:
Fiber delivery
武汉锐科光纤激光技术股份有限公司
WUHAN RAYCUS FIBER LASER TECHNOLOGIES CO. LTD.
5
Reliable, long lifetime
Maintenance free operation
High wall-plug efficiency
Convenient control interface
Fast modulation
Applications:
Soldering Tin
Welding plastics
Scientific research
2.2 Package Contents
Please refer to the packing list accompanying the shipment to check
actual items included.
2.3 Unpacking and Inspection
Your Raycus fiber delivered direct diode laser is shipped in a package
designed to providemaximum protection. Upon delivery, please inspect all
packaging for evidence of mishandlingor damage. If you find any evidence
of mishandling, please save the damaged material andcontact the shipping
agent and Raycus immediately.
Remove all the contents from the packing case. Take extra care when
removing the unit fromthe packing case to ensure that the fiber optic cable
is not snagged and damaged. A comprehensive packing list is included with
the system documentation. Check all items against the list and contact Raycus
immediately if there is any missing item or evident damage to the unit.
DO NOT attempt to install or operate the laser, if there is any evident
or suspected damage to the unit.
It is recommended that you do not discard the packing materials, as they
will be necessary if you ever need to ship the unit back for service at a
later date.
武汉锐科光纤激光技术股份有限公司
WUHAN RAYCUS FIBER LASER TECHNOLOGIES CO. LTD.
6
CAUTION: The fiber optic cable and output head are precise
opticinstrument, ANY vibration or impact to the output head, and
twist orexcessive bend to the cable will damage the instrument.
2.4 Operation Environment
Table 1: The Operation Conditions for the Laser
Installation Environment
Flat and no vibration
Ambient Temperature
0℃~40℃
Relative Humidity
<70%
It is recommended to install the product in an environment with air
conditioning.
2.5 Precautions for Use
a) Make sure the instrument is properly grounded before you use it;
b) Make sure that the correct voltage of 24VDC power source is used.
Failure to connectpower source correctly will damage the device;
c) There are no user serviceable parts, equipment or assemblies inside
the product. All serviceand maintenance shall be performed by
qualified Raycus personnel. In order to preventelectric shock,
please do not break the seal or uncover the shield. Failure to comply
withthis instruction will void the warranty;
d) Please inspect the output head carefully for dust or other
contamination. Use appropriatelens paper to clean it if necessary.
Do not touch the output lens at any time;
e) Please cap the output head when it is not in use, and make sure the
cap is clean;
f) It is not allowed to install the output head when the laser is in
operation;
g) Do not look into the output head directly. Wear appropriate
protective eye glasses all thetime when operating the laser;
h) Failure to follow the instructions may cause malfunction and damage
to the device, suchdamage is not covered by warranty.
武汉锐科光纤激光技术股份有限公司
WUHAN RAYCUS FIBER LASER TECHNOLOGIES CO. LTD.
7
2.6 Specifications
The specifications are listed in the following table.
Table 2: Product Specifications
Model
*RFL-FDDL100X
RFL- FDDL80X
RFL- FDDL50X
Max Power
Consumption (W)
>600
>500
>300
Power Supply
24VDC±10%
Nominal Output
Power(W)
>100
>80
>50
Output Power
Unstability
≤1%
Emission
Wavelength(nm)
915±10
Red Guide Laser
650±10nm,0.25~1mW
Core Fiber (μm)
200
105/200
Fiber NA
0.22
Connect model
SMA905/D80
Connect Port
DB25、DB9
Operation Mode
EXT control/RS232
Modulation
Frequency (Hz)
1Hz~10KHz
Cooling Method
wind
Operating Ambient
Temperature(℃)
0~40℃
NOTE:
*RFL-FDDL100X——coderule:
100——output laserpower
2.7 Dimensions and Installation
Figure1and Figure2 show dimensions and Installationof the product.
武汉锐科光纤激光技术股份有限公司
WUHAN RAYCUS FIBER LASER TECHNOLOGIES CO. LTD.
8
Figure 1: dimensions (unit: mm)
Figure 2: Installation(unit: mm)
2.8 Installation Procedure
a) Check if the power supply has the correct voltage (24VDC±10%), and
the earthline is connected, make sure it is firm and reliable;
b) Place the product in an appropriate position, immobilize it if
necessary;
c) Connect the power cable and control cable to the product when power
supply is OFF;
d) Check the output head and clean it if necessary. This procedure must
武汉锐科光纤激光技术股份有限公司
WUHAN RAYCUS FIBER LASER TECHNOLOGIES CO. LTD.
9
be performed byRaycus personnel or person authorized by Raycus. Make
sure the environment is clean, orthe output head may be contaminated.
It is prohibited to use fan during installation, whichwill cause dust
in the air;
e) Prevent the delivery cable from treading, pinching or excessive
bending during installation.
CAUTION: All the cables can only be connected when power supply is
off.Hot plug may damage the laser.
CAUTION:Ensure that there are no fiber bends with radius less than 20cm
when theproduct is installed. Avoid excessive twisting and tight bends
during therobotic arm movements. Tight bends will damage the laser
deliverysystem.
When the product is in storage, the bending radius of the delivery
cableshould be more than 20cm.
CAUTION: Avoid vibration and impact to output head, or it may bedamaged.
CAUTION:Make sure the aperture and the cavity of the processing head
is clean;
Keep the protective cap properly, prevent it from contamination; Or
theaperture will be contaminated when capped.
3. Using the Product
3.1 Front Panel
武汉锐科光纤激光技术股份有限公司
WUHAN RAYCUS FIBER LASER TECHNOLOGIES CO. LTD.
10
Figure 3: Front Panel View
1Power Cord ,USE M16 cable connector
Figure 4: The Power Cord of the Laser
1:+24V ;2:GND ;3:PE
2Laser output
3Status Leds
PO:power led
IN:interlock led
SI:signal led
LA:laser emmit led
LD:laser error led
IO:LD driver alarm led
TM:tempture alarm led
武汉锐科光纤激光技术股份有限公司
WUHAN RAYCUS FIBER LASER TECHNOLOGIES CO. LTD.
11
TE:tempture controller alarm led
4RS-232 serial port, this interface is a male DB9 connector, and will
be used in RS-232 mode.
5Control Interface,a female DB25 connector,multiple function port.
3.2 Interface Definitions
3.2.1 Control InterfaceDB25
The definitions of the control interface are as follows:
Table 3 Control Interface Definitions
PIN
NAME
DESCRIPTION
1
Interlock+
input
Interlock plus signal
0V:enable
forbidden
2
EXT_Laser_EN
input
Enable laser outputin
external mode
5V:enable
forbidden
3
MODE_CHS
input
Control Mode select
5V:external
mode
internal mode
4
Ext_ADC
input
Analog Voltage Signal
0-10V
5
②EXT_ON/OFF
input
Power unit switch
enable
5V:forbidden
6
Ext_Foot_EN
input
Foot padel
5V:enable
forbidden
7/19
EXT_+5V
output
+5V
/
8
③Ext_Red_Alway
s
input
always enable red light
in external mode
5V:enable
forbidden
11
④ALARM-COM
output
Common point
/
12
④ALARM-NO
output
Normal open piont
/
13
④EXT_Laser-NC
output
Normal colse piont
/
14
Interlock-
GND
Interlock minus signal
/
16/18
+24V_GND
GND
external power GND
/
15
Ext_MOD
input
Modulation signal in
external mode
5V:enable
forbidden
17
①Ext_Red_EN
input
enable red light in
external mode
5V:enable
forbidden
23
④ALARM-NC
output
Normal colse piont
/
24
④EXT_Laser-COM
output
Common point
/
25
④EXT_Laser-NO
output
Normal open piont
/
others
reserve
Connect forbidden
NOTE:
①Ext_Red_EN:laser emmits red light when this signal is high;red light
shuts down automatically when laser emmits;
②EXT_ON/OFF:switch on/off power unit inside laser;
武汉锐科光纤激光技术股份有限公司
WUHAN RAYCUS FIBER LASER TECHNOLOGIES CO. LTD.
12
③Ext_Red_Always:use with Ext_Red_EN signal,red light keeps on when these
two signals are high;
④use relay to provide normal colse piont and normal open piont of laser
emmit signal and alarm signal.
3.2.2 RS-232 Serial Port
Definitions of the pins are in the following table:
Table 4 RS-232 Serial Port Definitions
PIN
DESCRIPTION
2
RX
3
TX
5
GND
others
NC
3.3 Rear Panel
Figure 5 shows the rear panel.
Figure 5: Rear Panel View
1cooling fans
3.4 Control Modes
There are two different modes of operation:external AD mode and RS232
mode.
The following diagram shows the process of entering a certain control
mode.
1
武汉锐科光纤激光技术股份有限公司
WUHAN RAYCUS FIBER LASER TECHNOLOGIES CO. LTD.
13
Figure 6: The Process of Entering Different Control Modes
3.4.1 AD Mode
AD mode is a remote control mode.There are two working modes in AD Mode:CW
mode and pulse mode.
The output power is set by analog signal,and pulse mode is available
in this control mode.
3.4.1.1 CW mode
In this mode, the laser emissionis continuous, so just one parameter
needs to be set-AD signalaccording tooutput power.
Wiring in AD Mode
Figure 7: Wiring Diagram in ADmode
CW mode wave diagram
武汉锐科光纤激光技术股份有限公司
WUHAN RAYCUS FIBER LASER TECHNOLOGIES CO. LTD.
14
Figure 8: CW mode wave
3.4.1.2 Pulse mode
In this mode, the laser emissionis under modulation, sosetparameters
including Ext_MOD, EXT_Laser_ENand EXT_AD to switch onlaser emission.When
the parameters are set, laser emission is enabled, and the remote modulation
signal inputs from EXT_MOD, the laser emits.
Pulse mode wave diagram
Figure 9: Pulse mode wave
3.4.2 RS232 Mode
RS-232 mode is a remote control mode. In this mode, we have a protocol
for communicationbetween the laser and the upper computer, and you can set
emission parameters and getinformation from the laser.
武汉锐科光纤激光技术股份有限公司
WUHAN RAYCUS FIBER LASER TECHNOLOGIES CO. LTD.
15
Wiring in RS-232 Mode
Figure 10: Wiring Diagram in RS-232 Mode
There are three working modes in RS-232Mode:CW mode,modulation mode and
preset mode.
Six groups of laser power can be set in CW mode.
Six groups of parameters including laser power,frequency and duty cycle
can be set in modulation mode.
Six groups of parameters devided into 16 segments including laser power
and time can be set in preset mode.
Communication Protocol:
Table 5: The Communication Protocol for RS-232 Mode(HEX)
NO.
function
header
code
data
postamble
Response
1
Get working
humidity
AA
A1
00,00,00,01
E0
D1 02 00 X X F0
2
Get working
temperature
AA
C1
00,00,00,01
E0
D1 01 00 X X F0
3
Get preset alarm
working temperature
AA
C2
00,00,00,00
E0
D2 00 X X F0
4
Get LD alarm
temperature
AA
C3
00,00,00,00
E0
D3 00 X X F0
5
enable LD with
preset power
AA
A4
X,X,X,X
E0
B4 F0
6
get LD preset power
AA
C4
00,00,00,00
E0
D4 X X F0
7
Set LD power of
group X segment Y
AA
A5
X,X,X,X
E0
B5 01 F0
8
get LD power of
group X segment Y
AA
C5
X,X,00,00
E0
D5 X X X X F0
9
Set time of group X
segment Y
AA
A6
X,X,X,X
E0
B6 01 F0
10
get time of group X
segment Y
AA
C6
X,X,00,00
E0
D6 X X X X F0
武汉锐科光纤激光技术股份有限公司
WUHAN RAYCUS FIBER LASER TECHNOLOGIES CO. LTD.
16
11
Set workign mode
AA
A7
00,00,0,X
E0
B7 F0
12
get workign mode
AA
C7
00,00,00,00
E0
D7 01 F0
13
get workign status
AA
A9
00,00,00,00
E0
B9 00 F0
14
Save parameter
AA
AA
00,00,00,01
E0
BA F0
15
enable LD
AA
AB
00,00,00,55
E0
BB F0
16
Set power in
selected group
AA
AC
0,0,X,X
E0
BC F0
17
Get version
AA
E9
0,0,0,0
E0
E9 56 32 2E 31 2E 33
F0
18
Get time
AA
EA
0,0,0,0
E0
EA 19 07 05 14 54 36
F0
19
Set power of
selected group
AA
AE
0,0,X,X
E0
BE F0
20
get power of
selected group
AA
CE
0,0,0,0
E0
DE X X F0
21
Set frequency of
selected group
AA
AF
0,0,X,X
E0
BF F0
22
get frequency of
selected group
AA
CF
0,0,0,0
E0
DF X X F0
23
Set duty cycle of
selected group
AA
A8
0,0,X,X
E0
B8 F0
24
get duty cycle of
selected group
AA
C8
0,0,0,0
E0
D8 X X F0
25
get time of errors
AA
E1
0,0,0,0
E0
E1 X X X X X X F0
26
sleeping/working
mode switch
AA
E2
0,0,0,X
E0
E2 X F0
27
Set group number in
preset mode
AA
E3
0,0,0,X
E0
E3 X F0
28
get group number in
preset mode
AA
E4
0,0,0,0
E0
E4 X F0
29
Set group number in
CW mode
AA
E5
0,0,0,X
E0
E5 X F0
30
Get group number in
CW mode
AA
E6
0,0,0,0
E0
E6 X F0
31
Set group number in
modulation mode
AA
E7
0,0,0,X
E0
E7 X F0
32
get group number in
modulation mode
AA
E8
0,0,0,0
E0
E8 X F0
33
enable red light
AA
EB
0,0,0,X
E0
EB X F0
RS232 parameters set: N,8,1
Paud:9600
Data type:HEX
4. Common errors
Error instructions and solutions are as follows:
武汉锐科光纤激光技术股份有限公司
WUHAN RAYCUS FIBER LASER TECHNOLOGIES CO. LTD.
17
Table 6:common errors and solutions
NO.
error
error instructions and solutions
1
Led PO not on
Laser power error.
Check DC power input and make sure Power Cord is connected
firmly;Restart laser system is a way to solve the problem.
2
Led TM/TE on
Make sure working temperatue is under limitted;
Check whether cooling fans are working;
Shut down laserfor a while,then restart laser.
3
Led IN not on
Check connection of interlock pins;
Restart laser system is a way to solve the problem.
4
Led LD on
Restart laser system is a way to solve the problem.
5
No laser emission
Check whether led LA is on,
Check whether led SI is on,
Make sure external signals are connected correctly,
Restart laser system is a way to solve the problem.
6
Led LD and IO on
Laser is locked after Laser emission error or LD driver
error occurs more than 3times
5. Warrantyand Maintenance
5.1 General Warranty
Raycus warrants that all Raycus fiber delivered direct diode laser
products are conformed toapplicable product specifications under normal use
and are free from defects in materials andworkmanship. The warranties start
on the date of shipment from Raycus for a period of time asset forth in the
applicable purchase contracts or product specifications.
Raycus has the right to choose to repair or replace any product that
proves to be defective in materials andworkmanship selectively during the
warranty period. Only products with particular defects areunder warranty.
Raycus reserves the right to issue a credit note for any defective
productsproduced in normal conditions.
5.2 Limitations of Warranty
The warranty does not cover the maintenance or reimbursement of our
product of which theproblem results from tampering, disassembling, misuse,
accident, modification, unsuitablephysical or operating environment,
improper maintenance, damages due to excessive use ornot following the
instructions caused by those who are not from Raycus. Customer has
theresponsibility to understand and follow this instruction to use the
武汉锐科光纤激光技术股份有限公司
WUHAN RAYCUS FIBER LASER TECHNOLOGIES CO. LTD.
18
device. Any damage causedby fault operating is not warranted. Accessories
and fiber connectors are excluded from thiswarranty.
According to the warranty, client should write to us within 31days after
the defect is discovered.
This warranty does not involve any other party, including specified
buyer, end-user or customerand any parts, equipment or other products
produced by other companies.
5.3 Service and Repair
Do not open the device. There are no user serviceable parts, equipment
or assemblies foruser in this product. All service and maintenance shall
be performed by qualified Raycuspersonnel.
Please contact Raycus as soon as possible when problems under warranty
aboutmaintenance happened to the product.
The product returned with permission should be placed in a suitable
container.
If any damage happened to the product, please notify the carrier in
documentimmediately.
We reserve the right to make changes in design or constructions of any
of our products at anytime without incurring any obligation to make changes
or install the same on units previouslypurchased.
All the items about warranty and service above provided by Raycus are
for uses’reference;formal contents about warranty and service are subject
to the contract.

This manual suits for next models

2

Other Raycus Measuring Instrument manuals
Raycus RFL-A1500D User manual

Raycus

Raycus RFL-A1500D User manual

Raycus RFL-DDL Series User manual

Raycus

Raycus RFL-DDL Series User manual

Raycus RFL-C4000S User manual

Raycus

Raycus RFL-C4000S User manual
Raycus RFL-P30MX Installation instructions

Raycus

Raycus RFL-P30MX Installation instructions

Raycus RFL-P70QA Installation instructions

Raycus

Raycus RFL-P70QA Installation instructions

Raycus RFL-P200 User manual

Raycus

Raycus RFL-P200 User manual

Raycus RFL-P120MX Installation instructions

Raycus

Raycus RFL-P120MX Installation instructions

Raycus RFL-C1500H User manual

Raycus

Raycus RFL-C1500H User manual

Raycus RFL-P70MX Installation instructions

Raycus

Raycus RFL-P70MX Installation instructions

Raycus RFL-C Series User manual

Raycus

Raycus RFL-C Series User manual

Raycus RFL-P70Q User manual

Raycus

Raycus RFL-P70Q User manual

Raycus RFL-A4000D User manual

Raycus

Raycus RFL-A4000D User manual

Raycus RFL-C4000XZ User manual

Raycus

Raycus RFL-C4000XZ User manual

Raycus RFL-P100MX Installation instructions

Raycus

Raycus RFL-P100MX Installation instructions

Raycus RFL-C20000M-CE User manual

Raycus

Raycus RFL-C20000M-CE User manual

Raycus ABP Series User manual

Raycus

Raycus ABP Series User manual

Raycus A6000D User manual

Raycus

Raycus A6000D User manual

Raycus RFL-P200MX Installation instructions

Raycus

Raycus RFL-P200MX Installation instructions

Raycus RFL-C Series User manual

Raycus

Raycus RFL-C Series User manual

Raycus RFL-C3000S-CE User manual

Raycus

Raycus RFL-C3000S-CE User manual

Raycus RFL-P200 User manual

Raycus

Raycus RFL-P200 User manual
Raycus RFL-C Series User manual

Raycus

Raycus RFL-C Series User manual
Raycus RFL-P60M User manual

Raycus

Raycus RFL-P60M User manual

Raycus RFL-B500D User manual

Raycus

Raycus RFL-B500D User manual

Popular Measuring Instrument manuals by other brands

Trolex TX6386 user manual

Trolex

Trolex TX6386 user manual

Acrel AMC Series Installation and operation instruction

Acrel

Acrel AMC Series Installation and operation instruction

VTI Instruments 2008SDH-2AP instruction manual

VTI Instruments

VTI Instruments 2008SDH-2AP instruction manual

Milwaukee 48-22-9802 Operator's manual

Milwaukee

Milwaukee 48-22-9802 Operator's manual

VOLTCRAFT SEM6500 CH operating instructions

VOLTCRAFT

VOLTCRAFT SEM6500 CH operating instructions

Behringer PM1 quick start guide

Behringer

Behringer PM1 quick start guide

CRYOMAGNETICS LM-510 Operating instructions manual

CRYOMAGNETICS

CRYOMAGNETICS LM-510 Operating instructions manual

VSpeak ECU Konverter Swiwin manual

VSpeak

VSpeak ECU Konverter Swiwin manual

Gigaset N720 SPK PRO manual

Gigaset

Gigaset N720 SPK PRO manual

Fluke Calibration 1586A Super-DAQ Calibration manual

Fluke Calibration

Fluke Calibration 1586A Super-DAQ Calibration manual

SMART365 SM-06-05030G manual

SMART365

SMART365 SM-06-05030G manual

A.B.Energy ABE 1500 user manual

A.B.Energy

A.B.Energy ABE 1500 user manual

TESTO 610 instruction manual

TESTO

TESTO 610 instruction manual

Agilent Technologies OmniBER OTN J7232A Technical data sheet

Agilent Technologies

Agilent Technologies OmniBER OTN J7232A Technical data sheet

PeakTech 5145 Operation manual

PeakTech

PeakTech 5145 Operation manual

id LAB FOTOMETER 2008 user guide

id LAB

id LAB FOTOMETER 2008 user guide

Benstone Impaq Elite user manual

Benstone

Benstone Impaq Elite user manual

Amprobe ACD-45PQ user manual

Amprobe

Amprobe ACD-45PQ user manual

manuals.online logo
manuals.online logoBrands
  • About & Mission
  • Contact us
  • Privacy Policy
  • Terms and Conditions

Copyright 2025 Manuals.Online. All Rights Reserved.