rba STERI+SHIELD RBA490 Straight Series Manual

INSTALLATION, OPERATION AND MAINTENANCE INSTRUCTIONS
SYDNEY | MELBOURNE | BRISBANE | PERTH | AUCKLAND
Australia 1300 788 778 www.rba.com.au | New Zealand 0800 722 111 www.rbagroup.co.nz1 of 5
As improvements in the design and performance of RBA products are continuous, specications may be subject to change without notice.
The illustrations and descriptions herein are applicable to production as of the date of this Installation Instructions Sheet. Revised 03/23 © 2023 by RBA Group II/Model RBASteri+ShieldTMRails/0923
RBA490X-Straight-Series Steri+ShieldTM Straight Grab Rail
RBA490X-450 Steri+ShieldTM Ambulant Grab Rail | 450mm x 450mm
RBA490X-711 Steri+ShieldTM Shower T-Rail
RBA490X-721 Steri+ShieldTM Shower T-Rail with Handset, Slider & Hose
RBA490X-722 Steri+ShieldTM Shower T-Rail with Handset, Slider, Hose & Mixer
RBA490X-901 Steri+ShieldTM Accessible 90oLH Grab Rail | 950mm x 700mm
RBA490X-911 Steri+ShieldTM Accessible 90oRH Grab Rail | 950mm x 700mm
MODELS STERI+SHIELDTM RAILS
*RBA4901-901 Shown
Sourced/ Supplied under QMS

INSTALLATION, OPERATION AND MAINTENANCE INSTRUCTIONS
SYDNEY | MELBOURNE | BRISBANE | PERTH | AUCKLAND
Australia 1300 788 778 www.rba.com.au | New Zealand 0800 722 111 www.rbagroup.co.nz2 of 5
• 1x Straight rail [for RBA490X-straight-series]
• 1x Ambulant rail [for RBA490X-450]
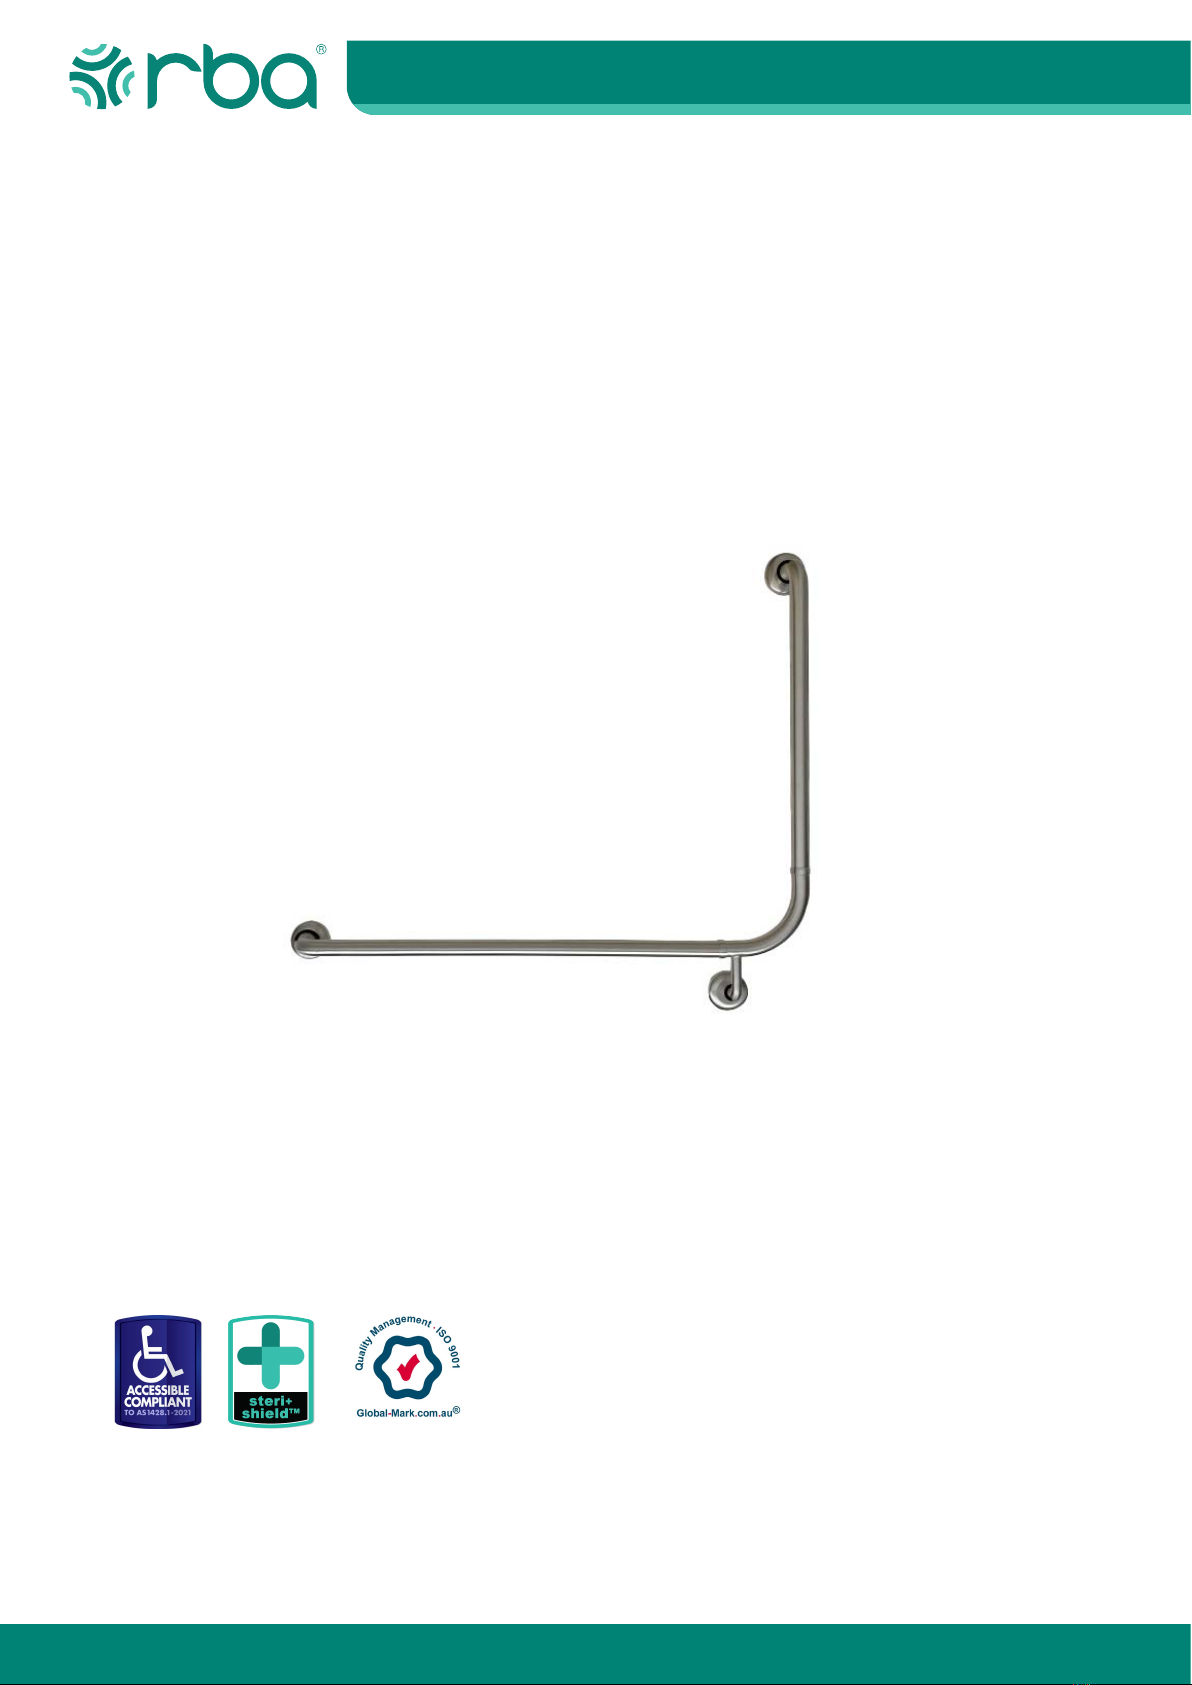
• 2x Flange cover
• 2x Wall plate
Attention
You are responsible for the safe operation of this unit. For optimum installation use at least 4 suitable screws for each wall
plate. Screws should be selected to suit the wall type. Grab rails are no stronger than the anchors or walls to which they are
attached, and therefore must be rmly secured in order to support the loads for which they are intended.
Exceeding the maximum load values may cause permanent product damage. If this happens, cease use until checked by
a specialised maintenance person. Improper use, such as for gymnastic exercises or as a step, may cause accidents with
serious consequences. Reliable operation and product safety depend on the way the products are installed and used.
Ensure installation is performed by qualied personnel. Incorrect installation can seriously compromise product functionality.
Steri+ShieldTM seals ARE NOT intended to be a substitute for, or a replacement of, waterproong membranes or substrates.
Maintenance and Cleaning Instructions
Do not use detergents containing bleach, acids, alkalis, chlorine or abrasive products. Do not use abrasive objects [e.g.
scouring pads]. Do not use chemicals that can damage plastic. Clean the surface with water and a neutral detergent; rinse
carefully and dry with a clean cloth. If alternative cleaning methods and/or chemicals are used, warranty may become void.
Components Supplied for RBA490X-901 & RBA490X-911
• Extended Driver Bit• Screw Driver • Spirit Level
Components Supplied for RBA490X-Straight-Series & RBA490X-450
Tools Required
• 1x Long straight rail [open-ended]
• 1x Short straight rail [open-ended]
• 1x LH connector rail [for RBA490X-901]
• 1x RH connector rail [for RBA490X-911]
• 2x Dress rings
• 2x Large ID ange cover
• 1x Handset, Slider & Hose Kit (RBA490X-721 only)
• 1x Handset, Slider, Hose & Mixer Kit (RBA490X-722 only)
• 1x Open-ended straight rail
• 1x Double-ended straight rail
• 1x Rail connector
• 3x Bolt
• 1x Small ID ange cover
• 3x Wall plate
• 3x Bolts
• 12x Screws
• 12x Wall plugs
• 1x Steri+ShieldTM Accessible Seal Kit
• 3x Flange cover
• 3x Wall plate
• 12x Screws
• 12x Wall plugs
• 2x Steri+ShieldTM Straight/Ambulant/Shower Kits
Components Supplied for RBA4901-Shower-Rails
• 2x Bolts
• 8x Screws
• 8x Wall plugs
• 1x Steri+ShieldTM Straight/
Ambulant/Shower Kit

INSTALLATION, OPERATION AND MAINTENANCE INSTRUCTIONS
SYDNEY | MELBOURNE | BRISBANE | PERTH | AUCKLAND
Australia 1300 788 778 www.rba.com.au | New Zealand 0800 722 111 www.rbagroup.co.nz3 of 5
1. Insert Steri+ShieldTM inner seal into
the interior of the ange
2. Lay rail at with thread facing up. 3. Slide ange cover over rail.
RBA recommends adding a small
amount of dishwashing liquid if the
Steri+ShieldTM seal is tight.
4. Replace the original crimped wall
plate with at wall plate supplied with
Steri+ShieldTM seal kit.
5. Insert bolt through wall plate.
8. Repeat for other xing points.
Installing RBA480X-Straight-Series & RBA480X-450
7. Tighten.
6. Insert wall plate and bolt assembly.
9. Slide on Steri+ShieldTM rear seal,
ensuring the xing points in the seal
align with those in the wall plate.

INSTALLATION, OPERATION AND MAINTENANCE INSTRUCTIONS
SYDNEY | MELBOURNE | BRISBANE | PERTH | AUCKLAND
Australia 1300 788 778 www.rba.com.au | New Zealand 0800 722 111 www.rbagroup.co.nz4 of 5
11. Slide ange covers down into
place. Repeat for all xing points.
12. Follow Steps 1-9 to install
Steri+ShieldTM seals and secure wall
plates to rail, repeating for all xing
points.
15. Ensuring rail is level, slide up
ange cover and secure screws.
Repeat for all xing points.
16. Slide ange covers down into
place.
13. Slide dress rings over connector
piece on both sides.
14. Slide both straight rails into place
over connector piece. Please note the
xing on the connector piece is always
parallel to the vertical straight rail.
10. Ensuring rail is level, slide up
ange cover and secure screws.
Repeat for all xing points.
Installing RBA490X-901 & RBA490X-911

INSTALLATION, OPERATION AND MAINTENANCE INSTRUCTIONS
SYDNEY | MELBOURNE | BRISBANE | PERTH | AUCKLAND
Australia 1300 788 778 www.rba.com.au | New Zealand 0800 722 111 www.rbagroup.co.nz5 of 5
17. Follow Steps 1-9 to install
Steri+ShieldTM seals and secure wall
plates to rail, repeating for all xing
points.
18. Insert rail connector piece into
open-ended rail.
19. Position vertical rail. Refer to
technical datasheet for recommended
mounting locations to suit AS1428.1
20. Ensuring rail is level, slide up
ange cover and secure screws. Once
complete, slide ange cover into
place.
Installing RBA490X-711 & RBA490X-721
This manual suits for next models
16
Table of contents
Popular Safety Equipment manuals by other brands

Dräger
Dräger SPC 4900 Instructions for use

Schreder
Schreder INDU BAY GEN3 Supplementary installation instructions

Safety 1st
Safety 1st HS129 manual

Guardian Fall Protection
Guardian Fall Protection 01300 instruction manual

METOLIUS
METOLIUS Equalizer quick start guide

AddLife
AddLife ROPOX FlexiPlus user guide