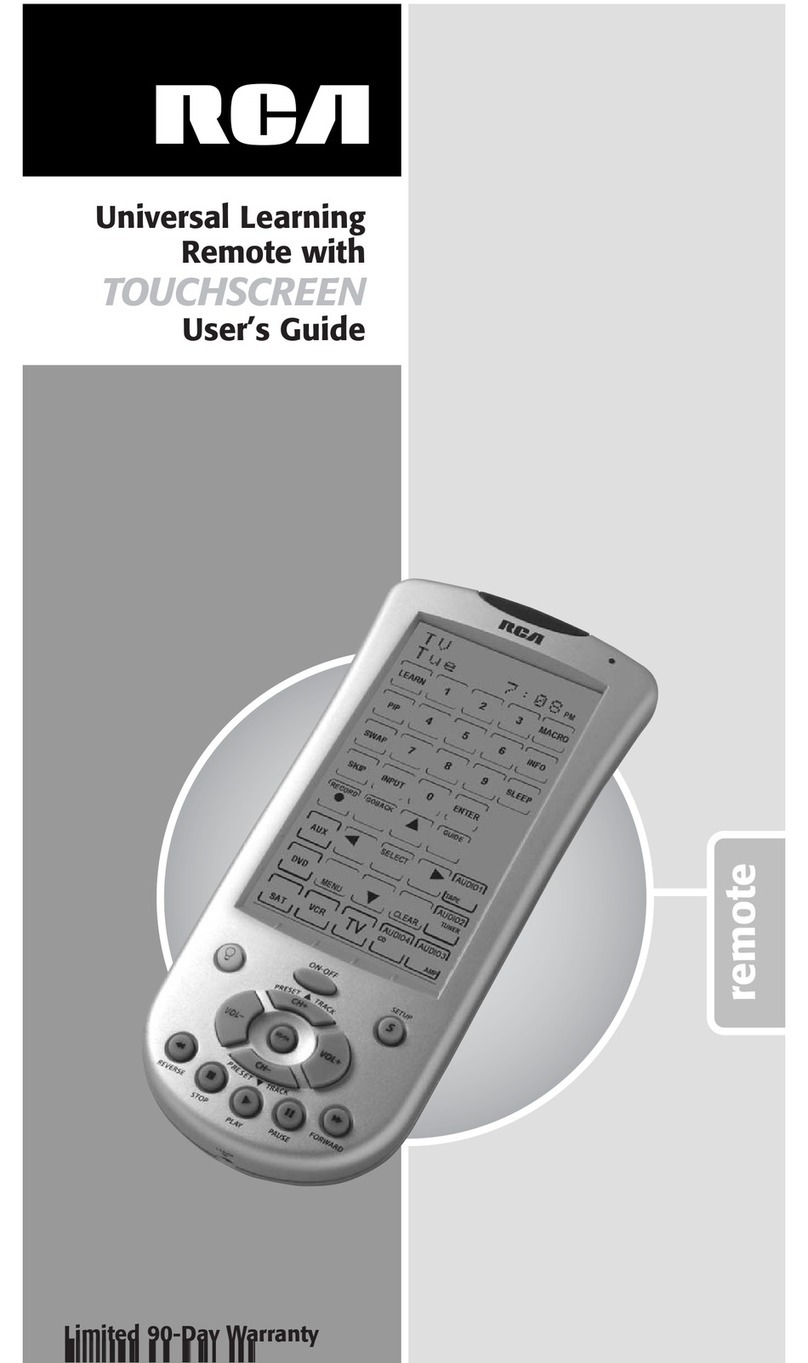
RCA RCU1010RF User manual

Congratulations on your purchase of the RCU1010 Universal Learning Remote with Touchscreen. Your
RCU1010 controls up to nine components, including the most popular brands of TV, VCR, DVD, PVR,
SAT/CBL, CD and AUDIO equipment. This unit has the ability to learn commands from your existing
remotes, and the Smart Macro feature allows multiple commands to be executed in sequence with a
single keypress. The RCU1010 is easy to use, easy to program and gives you total control—at the touch
of your fingertips!
Getting Started
Universal Learning Remote with
TOUCHSCREEN
Quick Start Guide
Before You Begin
This handy Quick Start Guide provides step-by-step instructions regarding some of the most popular
features of this remote control. Use it as a supplement to the User’s Guide, to which you may refer
for further details.
The RCU1010 LCD touchscreen remains blank when the remote is not in use. The touchscreen turns
on automatically when you press and release the SETUP key, the BACKLIGHT key, or any LCD
touchscreen key. The remaining rubber keys do not activate the LCD touchscreen.
For the purposes of this guide, “component” refers to your electronic equipment—TV, VCR, DVD,
satellite receiver, auxiliary or audio components—all of which can be operated using the RCU1010 remote
control unit. When you press and release a component key, you put the remote in that component mode
(e.g., pressing the TV key puts the remote in the TV Mode). The remote remains in that mode until you
press and release another mode key. When you put the remote in a specific component mode, the control
screen that is shown on the touchscreen is the control screen for that mode.
Install the Batteries
Your RCU1010 Universal Learning Remote with Touchscreen requires four AAA alkaline batteries
(sold separately).
SETUP key BACKLIGHT key
Touchscreen keys
1. Push on the tab on the back of the remote and slide the
cover down.
2. Insert the batteries, matching the batteries to the (+) and
(-) marks inside the battery case.
3. Slide the battery cover back into place.
RCU1010
RCU1010_US_QS_revA 3/19/03 16:41 Page 1

Perform Setup Routine and Procedures
The SETUP key is located towards the lower right-hand side of the RCU1010 unit. The SETUP key
is used to walk you through the steps in setting up the remote. To enter the Setup Mode, press and
hold the SETUP key on the rubber keypad for 2-3 seconds until the LED indicator light remains on.
Successive presses of the SETUP key walk you through all the available setup routines. The following
are the screen selections available in the Setup Mode.
1. Code Setup Mode?
2. Code Search Mode?
3. Key Labels Mode?
4. Set Smart Macro?
5. Delete a Macro?
(Only appears once a Macro
function has been programmed.)
6. Macro Key Delay Edit?
(Only appears once a Macro
function has been programmed.)
7. Setup a Timer?
8. Delete a Timer?
(Only appears once a Timer
function has been set.)
9. Learn IR Mode?
10. Delete IR Mode?
(Only appears once an IR
function has been learned.)
11. Delete IR ALL?
(Only appears once an IR
function has been learned.)
12. Set More Options?
13. Set Time?
14. Set Beep?
15. Set LCD On Time?
16. Set Light (Backlight) On Time?
17. Set Volume TV<>AUDIO?
18. Reset ALL?
19. Exit Setup
To exit the Setup Mode, press and release the LCD EXIT key on the touchscreen. Then press and release
the LCD OK key on the Exit Setup Screen or press and release the SETUP key repeatedly until the LCD
displays the Exit Setup Screen. Press and release the LCD OK key. The remote is now in normal
operation mode.
Programming
The RCU1010 can control up to nine components. In order for the remote to control your components
(TV, VCR, DVD, etc.), you must program it with the corresponding code entry from the Code Lists.
If your TV, VCR, DVD, or satellite receiver is an RCA, PROSCAN or GE brand, the RCU1010 may not
need any programming to control them. To program the codes for your components, you can use one
of three methods: Code List Entry, Code Search or Code Autosearch.
While programming your remote, you may wish to extend the LCD touchscreen display time.
Instructions for this adjustment are below, followed by the three programming options.
Set the LCD Touchscreen Display Time
You can choose the length of time (10, 20, 30…90 seconds) that the touchscreen remains on after the last
keypress. The power-on default is 10 seconds from the last keypress, after which the unit automatically
turns off. To adjust this duration in 10-second increments up to 90 seconds, follow these steps:
1. Press and hold the SETUP key until the touchscreen
shows the Code Setup Mode? Screen. Release the
SETUP key.
2. Press and release the SETUP key repeatedly until
the Set More Options? Screen appears.
3. Press and release the LCD OK key. The Set Time?
Screen now appears in the LCD.
4. Press and release the SETUP key repeatedly until the
Set LCD On Time? Screen appears. Press and release
the LCD OK key.
5. The LCD displays the LCD On for 10 Secs Screen
(or the length of time previously programmed). Press
and release the LCD UP or DOWN ARROW keys to
select the desired On Time. You can only change the
time in 10-second increments from 10 to 90 seconds.
Press and release the LCD OK key twice to confirm
and save your settings.
6. The Set More Options? Screen is displayed. The
Touchscreen Display Time setting is now complete.
To exit the Setup Mode, press and release the EXIT key,
followed by the LCD OK key on the Exit Setup Screen.
OR
Program the Remote Control Using Code List Entry
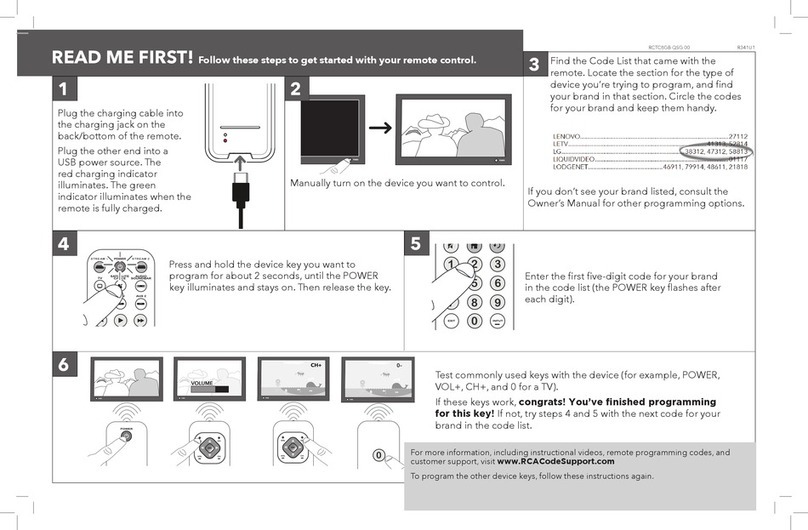
This is the quickest and easiest programming method. Code Lists are specified in the User’s Guide.
1. Manually turn on the component to be controlled
(TV, VCR, DVD, etc.).
2. Press and hold the SETUP key until the touchscreen
shows the Code Setup Mode? Screen. Release the
SETUP key.
3. Press and release the desired component key
(TV, VCR, SAT, etc.) on the touchscreen. For AUX, press
and release the LCD AUX key followed by the desired
component key to be programmed.
Note: The AUX key automatically defaults to CABLE
mode unless another selection is made.
4. Enter the three-digit code for your component brand
from the corresponding Code Lists at the back of the
User’s Guide. If your brand has more than one code
listed, begin with the first code. When a valid code
from the list is entered, the LCD displays the Code
Save Success Screen, followed by the Code Setup
Mode? Screen.
RCU1010_US_QS_revA 3/19/03 16:41 Page 2

Program the Remote Control Using Code List Entry (continued)
5. Before the code can be tested on the chosen component,
return to normal operation by pressing the LCD EXIT
key and then the LCD OK key on the Exit Setup Screen.
6. To test the code, turn the component on. Aim the
RCU1010 at the component and press and release the
ON·OFF key. If the component responds, no further
programming is required.
7. If your component does not respond, repeat steps,
trying all of the codes for your brand. If no other codes
exist for your brand, try the Code Search or Code
Autosearch methods.
Program the Remote Using Code Search
If the component you wish to control does not respond to the codes you have entered, use a Code
Search to scan the entire Code List for a code that will control your component. To conduct a Code
Search, follow these steps:
1. Manually turn on the component to be controlled
(TV, VCR, DVD, etc.).
2. Press and hold the SETUP key until the touchscreen
shows the Code Setup Mode? Screen. Release the
SETUP key.
3. Press and release the SETUP key again. The
touchscreen displays the Code Search Mode? Screen.
4. Press and release the desired component key (TV, VCR,
SAT, etc.). For AUX, press and release the LCD AUX
key followed by the desired component key to be
programmed.
Note: The AUX key automatically defaults to CABLE
unless another selection is made.
5. The LCD displays the Code Search Key? Screen. Press
and release the ON·OFF key repeatedly until the
component responds to the command and turns off.
The current code being sent is displayed in the upper
right-hand corner. Press and release the LCD OK key
to save the code.
6. The LCD displays the Code Search Mode? Screen. The
Code Search Method entry is now complete. To exit the
Setup Mode, press and release the EXIT key, followed
by the LCD OK key on the Exit Setup Screen.
Program the Remote Using Code Autosearch
Your RCU1010 has the ability to automatically scroll through the entire Code Lists
by using the Autosearch feature. To start a Code Autosearch, follow these steps:
1. Manually turn on the component to be controlled (TV,
VCR, DVD, etc.).
2. Press and hold the SETUP key until the touchscreen
shows the Code Setup Mode? Screen. Release the
SETUP key.
3. Press and release the SETUP key again. The LCD
displays the Code Search Mode? Screen.
4. Press and release the desired component key (TV,
VCR,SAT, etc.). For AUX, press and release the LCD
AUX key followed by the desired component key to
be programmed.
Note: The AUX key automatically defaults to CABLE
unless another selection is made.
5. The LCD displays the Code Search Key? Screen. Press
and release the ON·OFF key once. The Autosearch
feature automatically starts in six seconds. The
Autosearch sends the next code in the list every three
seconds. The current code being sent is displayed in the
upper right-hand corner.
6. Once the component to be controlled responds to the
command, press and release the LCD OK key to save
the code.
7. The LCD displays the Code Search Mode? Screen.
Code Autosearch is now complete. To exit the Setup
Mode, press and release the EXIT key, followed by the
LCD OK key on the Exit Setup Screen.
Learning
Codes from the Code Lists include basic functionality for each component they control. Once you have
programmed in the list code for your specific component, you can customize the RCU1010 touchscreen
to include certain functions from your original remote(s) that were not embedded in the preset code.
This allows you to transfer the best features from existing remotes to the RCU1010.
Learn a Command
Your RCU1010 has the ability to learn and store commands from your original remote(s). Only one
original remote can be stored under any one mode. The RCU1010 can learn the commands for one
TV remote, one VCR remote, one DVD remote, etc. All Learned keys are saved automatically.
1. Gather all the remotes that you want to learn and line
them up on a flat surface before going into the Learn
IR Mode.
2. Place the first original remote in the Learning position.
Point the top of the original remote at the base of
the RCU1010. The remotes should be positioned
2-3 inches apart.
3. Press and hold the SETUP key until the touchscreen
shows the Code Setup Mode? Screen. Release the
SETUP key.
4. Press and release the LCD LEARN key. The Learn
IR Mode? Screen is displayed.
5. Press and release the desired component key (TV, VCR,
SAT, AUX, etc.). The Learn IR Key? Screen is displayed.
6. Press and release the LCD key or the rubber key that
you wish to use to store the Learned command. The
Learning Please Wait Screen appears.
NOTE: You cannot learn any commands under the LCD
LEARN, LCD MACRO, SETUP, BACKLIGHT or any
LCD component keys.
7. Press and hold the original remote key you want to
transfer to the RCU1010 until the Success Screen,
followed by the Learn IR Key? Screen, appears.
Release the original remote key.
8. To learn another key, repeat steps 6-7.
9. When all original remote commands have been learned,
press and release the SETUP key. The display shows the
Learning Completed Screen, followed by the Learning
IR Mode? Screen. At this point, you can press and
release the next component key for additional remotes
you want the RCU1010 to learn, and repeat steps 5-8.
10. The Learning process is now complete. To exit the
Setup Mode, press and release the EXIT key, followed
by the LCD OK key on the Exit Setup Screen.
Note: If the EXIT key does not respond, press and
release the SETUP key repeatedly until the Exit Setup
Screen appears.
RCU1010_US_QS_revA 3/19/03 16:41 Page 4

Clear All Stored Learned Commands Under a Mode
Clearing all stored Learned commands under a specific mode allows you to continuously update your
remote with the latest commands. To clear all Learned commands under one mode (e.g., TV, VCR,
DVD, etc.), follow these steps:
1. Press and hold the SETUP key until the touchscreen
shows the Code Setup Mode? Screen. Release the
SETUP key.
2. Press and release the SETUP key repeatedly until the
Delete IR Mode? Screen appears.
3. Press and release the desired component key for
the Learned commands to be cleared (TV, VCR, SAT,
AUX, etc.).
Note: Only the components that have previously
programmed Learned commands are shown on the
LCD touchscreen.
4. The Confirm to Delete? Screen is displayed. Press and
release the OK key on the touchscreen. The display
shows the Deleting Wait Screen. If there are no other
component modes with Learned commands, the Learn
IR Mode? Screen appears. If there are other component
modes with Learned commands, the Delete IR Mode?
Screen is displayed.
5. All Learned commands that were previously stored
under that mode are now cleared. To exit the Setup
Mode, press and release the EXIT key, followed by the
LCD OK key on the Exit Setup Screen.
Master Clear
This feature allows you to simultaneously delete all Learned commands. Clearing all stored
Learned commands is recommended before first-time Learning.
1. Press and hold the SETUP key until the touchscreen
shows the Code Setup Mode? Screen. Release the
SETUP key.
2. Press and release the SETUP key repeatedly until the
Delete IR All? Screen appears.
3. Press and release the LCD OK key.
Note: If, at this point, you wish to abort the Master
Clear operation, press and release the LCD EXIT key.
4. The Confirm to Delete? Screen is displayed. Press and
release the LCD OK key. The LCD touchscreen displays
the Deleting Wait Screen, followed by the Learn IR
Mode? Screen.
5. All Learned commands are now cleared for all
component modes. To exit the Setup Mode, press and
release the EXIT key, followed by the LCD OK key on
the Exit Setup Screen.
SmartMacros
SmartMacros allow you to program your RCU1010 to perform a series of sequential commands with one
keypress. For example, you can program a SmartMacro to turn on your TV, tune it to a specific channel,
turn on your VCR, and record. A total of 20 Learned commands can be programmed under each of the
nine available LCD Macro keys. If you program all 20 keys into a SmartMacro, the Macro is automatically
stored after the twentieth Learned command is completed. The sequence of commands you want a
SmartMacro to execute must be programmed in correct sequential order. Any sequence of commands
that you regularly perform can be programmed as a SmartMacro and reduced to a single keypress.
Program a SmartMacro
To program a SmartMacro, follow these steps:
1. Gather all your original remotes that contain functions
you would like to add to a SmartMacro.
2. Place the first original remote in the Learning position.
(See section on Learning.) The remotes should be
positioned 2-3 inches apart.
3. Press and hold the SETUP key until the touchscreen
shows the Code Setup Mode? Screen. Release the
SETUP key.
4. Press and release the LCD MACRO Key. The Set
SmartMacro? Screen is displayed.
5. Press and release the LCD OK key.
6 The touchscreen displays the SmartMacro Key? Screen.
Press and release the digit key under which you want
to program the SmartMacro (from 1-9).
7. The touchscreen displays the S-MacroX Learn? Screen.
Press and release the LCD LEARN key.
8. The S-Macro X Learning Screen appears on the
touchscreen. Press and hold the key on the original
remote until the LED indicator light on the RCU1010
blinks once.
Note: If no Learned command is detected, the RCU1010
will timeout after 30 seconds.
9. Release the original remote key.
10. Program additional commands in the order you want
them to be stored in the SmartMacro. To add
commands to the SmartMacro, repeat steps 7-9 above,
using original remotes to program. When finished,
press and release the LCD OK Key. You can program
up to 20 learned commands under one SmartMacro.
11. Once you are finished programming the Macro, press
and release the LCD OK key to confirm and save. The
touchscreen returns to the Set SmartMacro? Screen.
12. The SmartMacro programming is complete. To exit the
Setup Mode, press and release the EXIT key, followed
by the LCD OK key on the Exit Setup Screen.
Note: If the EXIT key does not respond, press and
release the SETUP key repeatedly until the Exit Setup
Screen appears.
Execute a SmartMacro
To execute a SmartMacro that has previously been programmed, follow these steps:
1. Press and release the SETUP key, the BACKLIGHT
key, or any LCD touchscreen key to activate the
LCD touchscreen.
2. Press and release the LCD MACRO key.
3. Press and release the programmed LCD MACRO key
number corresponding to the sequence you wish to activate.
4. If the keypress beep is enabled, you hear a series of
beeps as the Macro executes. The number of beeps you
hear corresponds to the number of Learned commands
within the SmartMacro.
RCU1010_US_QS_revA 3/19/03 16:41 Page 6

Delete a SmartMacro
To delete a SmartMacro that has previously been programmed, follow these steps:
1. Press and hold the SETUP key until the touchscreen
shows the Code Setup Mode? Screen. Release the
SETUP key.
2. Press and release the SETUP key repeatedly until the
Delete a Macro? Screen appears. Press and release the
LCD OK key.
3. The LCD displays the Delete Macro Key? Screen. Press
and release the LCD MACRO key (1-9) to select the
previously programmed Macro you wish to delete.
4. The LCD touchscreen displays the Confirm To
Delete? Screen. Press and release the OK key on
the touchscreen.
Note: If you are in the process of deleting a SmartMacro
and you decide not to delete it, you can abort the
deletion process by pressing the LCD EXIT key.
5. If there are additional Macros already programmed,
the touchscreen displays the Delete a Macro? Screen
again. You may delete additional macros at this point,
if you wish.
6. If there are no previously programmed Macros, the
touchscreen displays the Set a Smart Macro? Screen.
7. The Macro deletion is now complete. To exit the Setup
Mode, press and release the EXIT key, followed by the
LCD OK key on the Exit Setup Screen.
Restoring Original Settings
Master Reset
A Master Reset returns all the RCU1010 defaults to the original factory settings. The Master Reset
clears all customer-programmed codes, Learned commands and SmartMacros, and resets all key labels.
To perform a Master Reset, follow these steps:
1. Press and hold the SETUP key until the touchscreen
shows the Code Setup Mode? Screen. Release the
SETUP key.
2. Press and release the SETUP key repeatedly until the
Reset ALL? Screen appears.
3. Press and release the LCD OK key.
4. The LCD displays the Confirm to Reset? Screen. Press
and release the LCD OK key. The Please Wait Screen
appears and the LCD touchscreen turns off.
5. All settings are now reset to the factory default.
RCU1010 US IB Quickstart Guide RevA
RCU1010_US_QS_revA 3/19/03 16:41 Page 8
Other manuals for RCU1010RF
2
This manual suits for next models
1
Table of contents
Other RCA Remote Control manuals

RCA
RCA RCU404 - RCU 404 Universal Remote Control User manual

RCA
RCA RM4100 User manual

RCA
RCA RCRPS04GR User guide

RCA
RCA CRK76TA1 User manual

RCA
RCA RCU704 Series User manual

RCA
RCA RCU400R3 User manual

RCA
RCA RCR504BR Series User manual

RCA
RCA RCU1300 Manual

RCA
RCA RCRBB04GZ User manual

RCA
RCA RCU1300 User manual