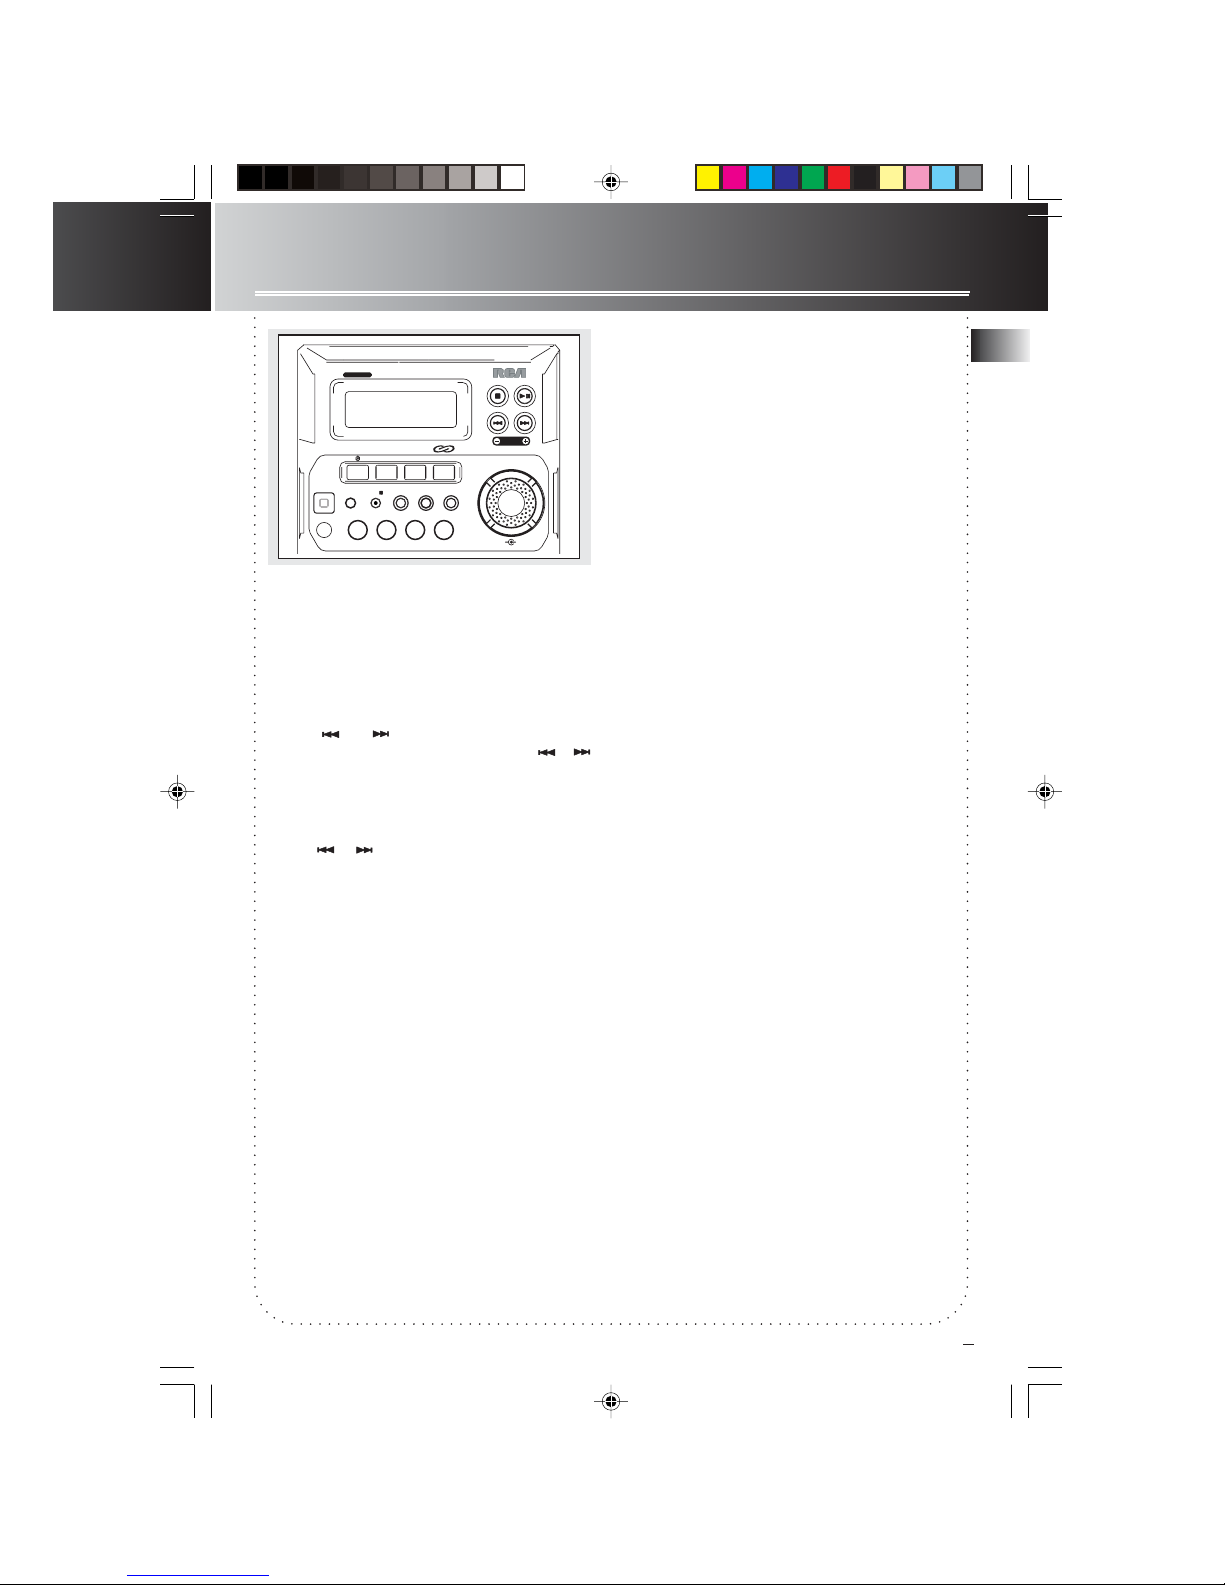
RCA RS2022 User manual

EXPORTER
Thomson multimedia Inc.
P.O. Box 1976
Indianapolis, IN 46206-1976
©2003 Thomson multimedia Inc.
Trademark(s) © Registered
Marca(s) © Registrada(s)
Marque(s) © Deposée(s)
55655270 (Rev. 0 EN/F/E)
www.rca.com
www.rca.com/LatinAmerica
Printed in China/Impreso en China
IMPORTADOR
Comercializadora Thomson de Mexico, S.A. de C.V.
Miguel de Cervantes Saavedra 57
Col. Ampliacion Granada
C.P. 11529 Mexico D.F.
Telefono: (55)25 81 53 20
R.F.C.: CTM-980723-KS5
0151
ON
STAND-BY
TUNER
CD
TAPE
• PRESET •
BAND•APP
IR SENSOR
UP
DN
X-BASS
MULTI FUNCTION FLUORESCENT DISPLAY
DIGITAL MICRO HI-FI SYSTEM
DIGITAL LOGIC DECK
CLOCK/
TIMER
DISPLAY
DEMO
DIGITAL PLL SYNTHESIZEDTUNER
@
AUX
PROG•SET
CLEAR
DIMMERST•MO
˚
REC•
PLAYBACK/ RECORD
RS2022
CD-R / RW COMPATIBLE
RS2022 EN 12/11/02, 11:00 AM2

u s e r m a n u a l
RS2022
IT IS IMPORTANT TO READ THIS INSTRUCTION BOOK PRIOR TO USING YOUR NEW PRODUCT FOR THE FIRST TIME.
ES IMPORTANTE LEER ESTE MANUAL ANTES DE USAR POR VEZ PRIMERA SU EQUIPO.
J
A
Z
Z
F
L
A
T
•
C
L
A
S
S
I
C
R
O
C
K
P
O
P
ON
STAND-BY
TUNER
CD
TAPE
• PRESET •
TUNING
VOLUME
BAND•APP
IR SENSOR
UP
DN
EQ
X-BASS
MULTI FUNCTION FLUORESCENT DISPLAY
DIGITAL MICRO HI-FI SYSTEM
DIGITAL LOGIC DECK
CLOCK/
TIMER
DISPLAY
DEMO
DIGITAL PLL SYNTHESIZEDTUNER
@
AUX
PROG•SET
CLEAR
DIMMERST•MO
˚
REC•
PLAYBACK/ RECORD
OPEN•
CLOSE
RS2022
CD-R / RW COMPATIBLE
RS2022 EN 12/11/02, 11:00 AM3

EN
FCC Information
This device complies with Part 15 of the FCC Rules.
Operation is subject to the following two conditions: (1)
This device may not cause harmful interference, and (2)
this device must accept any interference received,
including interference that may cause undesired
operation.
In accordance with FCC requirements, changes or
modifications not expressly approved by Thomson
multimedia Inc. could void the user’s authority to
operate this product.
This device generates and uses radio frequency (RF)
energy, and if not installed and used properly, this
equipment may cause interference to radio and
television reception.
If this equipment does cause interference to radio or
television reception (which you can determine by
unplugging the unit), try to correct the interference by
one or more of the following measures:
• Re-orient the receiving antenna (that is, the antenna
for the radio or television that is "receiving" the
interference).
• Move the unit away from the equipment that is
receiving interference.
• Plug the unit into a different wall outlet so that the
unit and the equipment receiving interference are on
different branch circuits.
If these measures do not eliminate the interference,
please consult your dealer or an experienced radio/
television technician for additional suggestions. Also, the
Federal Communications Commission has prepared a
helpful booklet, "How To Identify and Resolve Radio TV
Interference Problems." This booklet is available from
the U.S. Government Printing Office, Washington, DC
20402. Please specify stock number 004-000-00345-4
when ordering copies.
This product complies with DHHS Rules 21 CFR
Subchapter J. Applicable at the date of manufacture.
For Your Safety
The AC power plug is polarized (one
blade is wider than the other) and
only fits into AC power outlets one
way. If the plug won’t go into the
outlet completely, turn the plug over
and try to insert it the other way. If it still won’t fit,
contact a qualified electrician to change the outlet, or
use a different one. Do not attempt to bypass this safety
feature.
CAUTION: TO PREVENT ELECTRIC SHOCK,
MATCH WIDE BLADE OF PLUG TO WIDE
SLOT, FULLY INSERT.
WARNING:
TO PREVENTFIRE
OR ELECTRICAL
SHOCKHAZARD,
DO NOTEXPOSETHIS PRODUCT
TO RAIN OR MOISTURE.
SEE MARKING ON BOTTOM / BACK OF PRODUCT
CAUTION
RISKOFELECTRICSHOCK
DONOTOPEN
THE EXCLAMATION
POINT WITHIN THE
TRIANGLE IS A
WARNING SIGN
ALERTING YOU OF
IMPORTANT
INSTRUCTIONS
ACCOMPANYING
THE PRODUCT.
THE LIGHTNING
FLASH AND ARROW-
HEAD WITHIN THE
TRIANGLE IS A
WARNING SIGN
ALERTING YOU OF
"DANGEROUS
VOLTAGE" INSIDE
THE PRODUCT.
CAUTION: TO REDUCE THE
RISK OF ELECTRIC SHOCK,
DO NOT REMOVE COVER
(OR BACK). NO USER-
SERVICEABLE PARTS IN-
SIDE. REFER SERVICING
TO QUALIFIED SERVICE
PERSONNEL.
RS2022 EN 12/11/02, 11:00 AM4

EN
FCC Information
Getting Started ..................1
CD Micro System ................ 2
Remote Control ..................3
Settings ...............................4
Tape / Recording .................5
Tuner ....................................6
CD Player .............................7
Troubleshooting Tips .........8
Maintenance .......................9
More Information ..............10
Warranty
Content
FCC Information
For Your Records
In the event that service should be required, you
may need both the model number and the serial
number. In the space below, record the date and
place of purchase, and the serial number:
Model No.
Remote Control No.
Date of Purchase
Place of Purchase
Serial No.
Service Information
This product should be serviced only by those
specially trained in appropriate servicing
techniques. For instructions on how to obtain
service, refer to the warranty included in this
Guide.
Technical Specification
Product: Ultra Mini System
Brand: RCA
Model: RS2022
Electrical consumption
Power Supply: 120V~60Hz
Power consumption: 35 Watts
IMPORTER
Comercializadora Thomson de Mexico, S.A. de
C.V.
Miguel de Cervantes Saavedra No. 57
Col. Ampliación Granada
C.P. 11529 Mexico D.F.
Telefono: (55)25 81 53 20
RFC: CTM-980723-KS5
RS2022 EN 12/11/02, 11:00 AM5

EN
Installation
To ensure sufficient ventilation, keep the spacing
shown below:
Getting Started
1
10 cm/
4”
RL
Using the Antenna
Before you use your audio system, you’ll want to
make sure the FM antenna is positioned properly.
The FM antenna is the coiled wire connected to
the back of the unit. Uncoil it, making sure it is
fully extended (you may even want to tape it to
the wall behind the unit, if possible. The higher,
the better.)
For better AM reception, move or rotate the AM
loop antenna.
Installing Batteries
The remote control must be inserted with 2
“AAA” batteries prior to use. Follow the steps
below to ensure correct installation.
1. Open the battery compartment door (located at
the back of the remote control) and lift the
door.
2. Change step 2 to read, "Before inserting the
batteries, observe the polarities of the batteries
and the engraved polarity diagram inside the
battery compartment. When inserting the
batteries into the remote control, make sure the
polarities of the batteries match the engraved
polarity diagram inside the battery
compartment." This has a better flow and easier
to follow.
3. After installing the batteries, place the battery
compartment door in place and slide in the
opposite direction of the arrow (the reverse of
step 1).
Connecting the Speakers
When connecting the speakers, match the red
wires to the red jacks and the black wires to the
black jacks. Each speaker has a black and a red
jack, one for positive and one for negative. The
top two jacks are for the left speaker, while the
bottom two jacks are for the right speaker.
5cm
/2”
Release tab to lock wire in
the terminal.
NOTE: Make sure the insulation is completely removed from the
ends of the speaker wires at all connection points.
Speaker Wire Connection
Push terminal tab
down to insert wire.
Unpacking the unit, you’ll have:
1. The main unit
2. One remote control
3. Two speakers
4. One user manual
5. One AM loop antenna
6. Owner registration card
1. FM antenna
2. AM loop antenna
connector
3. AUX IN jack
4. Main speaker jacks
2
3
41
1
10cm
/ 4”
10cm
/ 4”
10 cm/
4”
R
/AUX IN
@
L
FM ANT
AM ANT
R
/AUX IN
@
L
FM ANT
AM ANT
J
A
Z
Z
F
L
A
T
•
C
L
A
S
S
I
C
R
O
C
K
P
O
P
ON
STAND-BY
TUNER
CD
TAPE
•PRESET •
TUNING
VOLUME
BAND•APP
IRSENSOR
UPDN
EQ
X-BASS
MULTIFUNCTION FLUORESCENT DISPLAY
DIGITALMICRO HI-FI SYSTEM
DIGITAL LOGIC DECK
CLOCK/
TIMER
DISPLAY
DEMO
DIGITALPLL SYNTHESIZED TUNER
@
AUX
PROG•SET
CLEAR
DIMMER ST•MO
˚
REC•
PLAYBACK/RECORD
OPEN•
CLOSE
RS2022
CD-R/ RW COMPATIBLE
REC•
RS2022 EN 12/11/02, 11:00 AM6

EN
2
CD Micro System
Front View
STAND-BY –turns on/off the unit. Remember to unplug
the power cord from the power outlet if you are not
going to use the system for some time.
CD / SHUFFLE ( )– selects CD mode; plays tracks
randomly.
TUNER / BAND / APP – selects tuner mode; selects FM/
AM band in tuner mode; begin Auto Preset Programming.
TAPE – selects tape mode.
AUX ( @ ) - selects AUX mode.
CLOCK/TIMER - shows clock time and timer on/off time;
enters clock and timer setting mode; enables or disables
timer mode.
REC II - starts/pauses recording from CD/Tuner/AUX mode.
PRESET DN – In tuner mode, selects preset station.
PRESET UP – In tuner mode, selects preset station
PROG/SET/CLEAR – enters program setting mode;
confirms your setting; clears settings.
EQ – selects among different sound effects(flat/classic/
rock/pop/jazz).
X-BASS – enable X-bass function.
DIMMER/DEMO – In any of power on mode, press and
hold it to set VFD brightness level(dimmer mode); In
power standby mode, begins system demo feature.
DISPLAY – In CD playing mode, shows the remain time;
In Tuner FM mode, displays station information.
ST•MO – In Tuner mode, selects between stereo and mono
in FM tuner.
STOP ( ) -In CD mode, stops CD playback; In Tape mode,
stops tape playback.
PLAY/PAUSE ( ) ––In CD mode, play and pause cd
playback; In Tape mode, play and pause tape playback.
TUNING+/-(SKIP BACKWARD ( ) / SKIP FORWARD
( )) – In CD mode, skip backward or forward to the
next or previous track, hold key to search; In Tuner mode,
search down or up radio frequency; In Tape mode,
rewinds or fast forwards tape.
VOLUME KNOB - rotate to adjust volume.
Top View
OPEN/CLOSE - Press to open/close the CD compartment
door.
PHONES - Jack for connecting headphones.
COMPACT DISC MICRO SYSTEM
OPEN•CLOSE
J
A
Z
Z
F
L
A
T
•
C
L
A
S
S
I
C
R
O
C
K
P
O
P
ON
STAND-BY
TUNER
CD
TAPE
• PRESET •
TUNING
VOLUME
BAND•APP
IR SENSOR
UPDN
EQ
X-BASS
MULTI FUNCTION FLUORESCENT DISPLAY
DIGITAL MICRO HI-FI SYSTEM
DIGITAL LOGIC DECK
CLOCK/
TIMER
DISPLAY
DEMO
DIGITAL PLL SYNTHESIZEDTUNER
@
AUX
PROG•SET
CLEAR
DIMMER ST•MO
˚
REC•
PLAYBACK/ RECORD
OPEN•
CLOSE
RS2022
CD-R / RW COMPATIBLE
REC•
RS2022 EN 12/11/02, 11:00 AM7

EN
Remote Control
3
ON/STANDBY – Turns the unit on/off (standby mode)
CD( )/TUNER/TAPE/AUX(@) –––Selects CD (plays tracks randomly in CD
mode), Tuner, Tape and AUX mode, .
DEMO/DIM - In standby mode, begin system feature demo; In any of power
on mode, press and hold it to set VFD brightness level(dimmer mode).
CLK/TIMER – Shows clock time and timer on/off time; enters clock and timer
setting mode.
TMR ON/OFF – Enables or disable timer.
SLEEP – Selects sleep time of 120min, ... 15 mins and OFF.
INTRO – Selects intro play in CD mode.
DISPLAY – In CD mode, shows playback remain time; In Tuner FM band,
shows RDS information.
PROG/SET/CLEAR – enters program setting mode; confirms your setting;
clears setting.
REPEAT – In CD normal playback mode, sets repeat 1, repeat disc for
playing; In CD program playback mode, sets repeat 1, repeat all of the
programming for playback.
BAND/APP ––selects band in tuner mode; press and hold to active Auto
preset programming.
TUNE- - In CD playback mode, skip backward to the previous tracks; In
Tuner mode, search down radio frequency; In Tape mode, rewinds the tape;
TUNE+ - In CD playback mode, skip forward to the next tracks; In Tuner
mode, search up radio frequency; In Tape mode, fast forward the tape.
PRESET - In tuner mode, selects preset station.
STEREO•MONO -In Tuner mode, selects between stereo and mono in FM
tuner.
PLAY/PAUSE – In CD mode, play and pause CD playback; In Tape mode,
play and pause the tape playback.
STOP – In CD mode, stops CD playback; In Tape mode, stops tape playback.
REC •II -- Start/pause recording from CD/Tuner/AUX mode.
MUTE – Mutes volume.
EQ – Selects–among different sound effects (flat / classic / rock / pop / jazz).
X-BASS - enable X-bass function.
VOLUME UP – Increases the volume level.
VOLUME DOWN – Decreases the volume level.
AUX(@)
X-BASS
DISPLAY
TUNER
TAPE
DEMO DIM
TUNE
CD
PRESET
VOLUME
MONO
STEREO
TIMER
ON OFF
SET CLEAR
PROG
EQ
SLEEP
INTRO
REPEAT
CD
BAND APP
TIMER
CLOCK
ON
STANDBY
RS 20RS 20 22
RS2022 EN 12/11/02, 11:00 AM8

EN
Settings
4
Setting Clock Time
Manual Setting (first time setting)
1. Press CLOCK/TIMER to enter clock setting mode,
XX:XX will show on the display.
2. Press and to set the hour.
3. Press PROG•SET/CLEAR to confirm.
4. Press and to set the minutes.
5. Press PROG•SET/CLEAR to confirm the setting.
6. Press and to select 12/24 hour mode.
7. Press PROG•SET/CLEAR to confirm the setting.
8. You can re-adjust the clock time by pressing
PROG•SET/CLEAR (only in standby mode), and
repeat step 2-6.
Setting the Timer On Time
1. Press CLOCK/TIMER until ON XX:XX is displayed.
2. Press PROG•SET/CLEAR to enter edit mode, the
hour will flash.
3. Press and to confirm and set the hour.
4. Press PROG•SET/CLEAR to move to the minutes
digits.
5. Press and to set the minutes.
6. Press PROG. to confirm the TIMER ON setting. If
Tuner source is selected, the next step when
PROG•SET/CLEAR is pressed is to select preset
station (1-30).
7. Press or to select source ( CD / TUNER/
TAPE/REC TUN) and move to the source selection.
8. Press PROG•SET/CLEAR to move to volume setting.
9. Press or to select desired level.
10. Press PROG•SET/CLEAR to move to timer off time
setting, OFF XX:XX will show on display.
11. Repeat step 2-5 to set timer off hour and minute.
12. Press PROG•SET/CLEAR to confirm setting.
Note: When setting timer on time, the
internal clock of the unit will not stop, you
are advised to set the timer on time at 5
minutes later or more. Or else the Timer
may not operate properly.
Note: When the unit displays “TIME NG”,
this means the timer setting is conflicting,
this message will be displayed until the
timer setting is corrected.
Activating the Timer
Press CLOCK/TIMER on the main unit for 2
seconds to turn the Timer on or off. TIMER will
show on the display when it is on. The unit will
turn on when the timer on time is reached.
Note:If clock time is not set,SET CLOCK will flash
on the display when you try to activate the timer.
If time setting have not been entered,SET TIMER
will flash on the display when you try to activate
the timer.
Setting Sleep Time
Press SLEEP on the remote to toggle among OFF,
120 to 15 minutes in 15 minutes step.
Sound Features
Press flat / classic, rock, pop and jazz to select
their corresponding mode.
X-BASS — press X-BASS to turn on/off x-bass.
Press MUTE to silence sound.
RS2022 EN 12/11/02, 11:01 AM9

EN
5
Tape / Recording
Recording a CD disc
1. Press CD to select CD mode.
2. Select the track that you want to record.
3. Press REC•II, when “CD” is flashing on display,
press again to start recording.
4. Press STOP to stop recording.
Recording from AUX
1. Press AUX ( @ )to select aux mode.
2. Press REC•II, when “REC AUX” is flashing on
display, press again to start recording.
3. Press STOP to stop recording.
Note: Other functions will be disabled during
recording.
Press RECREC
RECREC
REC•llll
llll
ll to pause recording. To resume
recording, press it again.
Reset Tape Counter
In stop mode, press PROG/SET/CLEAR to reset
counter.
Note: When the cassette tray is empty, if you
press REC•II, “NO TAPE” will show on display;
and “PROTECT” will show on display if the
cassette is write-protected.
In TAPE mode:
F. FWD – Fast forwards tape.
PLAY / PAUSE – Plays / pauses the tape.
REC•II – Records/pauses recording from CD,
Tuner or AUX.
REWIND – Rewinds tape.
STOP – Stops the tape and recording.
Playing Cassette Tape
1. Press TAPE to select tape mode.
2. Press on the cassette door to open the deck.
3. Load a cassette tape into the deck. Then, lightly
push the deck door closed.
4. Press PLAY/PAUSE to start tape play.
5. Press STOP to stop.
Recording a Radio Program
1. Press TUNER/BAND/APP to select tuner mode and
desired band.
2. Tune to the station you want to record.
3. Press REC•II, when “REC” is flashing on display,
then press again to start recording.
4. Press STOP to stop recording.
DIGITAL LOGIC DECK
PLAYBACK/ RECORD
OPEN•
CLOSE
RS2022 EN 12/11/02, 11:01 AM10

EN
Tuner
Searching for a Station
1. Press TUNER/BAND/APP on main unit or
TUNER on the remote control to select TUNER
mode.
2. Select a radio band by pressing TUNER/BAND/
APP on main unit or BAND/APP on the
remote: FM / AM
3. Press or to search for a radio station.
To search automatically, press and hold or
for 1 second.
Presetting a Station
1. Press TUNER/BAND/APP to select band.
2. Press or to select station.
3. Press PROG. SET / CLEAR to enter program
mode.
4. Press PRESET DN / UP to select memory
location (up to 30 memory locations).
5. Press PROG. SET / CLEAR to confirm the
setting.
Listening to the Preset
Station
1. Press TUNER/BAND/APP.
2. Press PRESET DN / UP repeatedly to select
your desired memory location.
In FM band, press STEREO/MONO to
select between stereo and mono sound.
6
Auto Preset Programming
1. In tuner mode, press and hold TUNER/BAND/
APP on main unit or BAND/APP on remote for
two seconds, the unit will try to search and
program any valid preset station.
J
A
Z
Z
F
L
A
T
•
C
L
A
S
S
I
C
R
O
C
K
P
O
P
ON
STAND-BY
TUNER
CD
TAPE
• PRESET •
TUNING
VOLUME
BAND•APP
IR SENSOR
UPDN
EQ
X-BASS
MULTI FUNCTION FLUORESCENT DISPLAY
DIGITAL MICRO HI-FI SYSTEM
CLOCK/
TIMER
DISPLAY
DEMO
DIGITAL PLL SYNTHESIZEDTUNER
@
AUX
PROG•SET
CLEAR
DIMMER ST•MO
˚
REC•
RS2022
CD-R / RW COMPATIBLE
REC•
RS2022 EN 12/11/02, 11:01 AM11

EN
7
CD Player
Loading and Playing CDs
1. Push lightly to open the CD door. Load a CD
(with labeled side facing up) into the CD
compartment. Then, close the door by pushing
it down lightly.
2. Press CD to select CD mode and the power will
be turned on automatically.
3. Press PLAY/PAUSE to play and pause cd
playback.
You may:
• skip to other tracks by pressing SKIP
BACKWARD or SKIP FORWARD .
Press and hold SKIP BACKWARD or
SKIP FORWARD to search.
• press REPEAT on the remote control once to
repeat a particular track, REP.ALL is
displayed; press again to play all tracks. REP.
1is shown in the display simultaneously.
Press the third time to de-select the function.
• Press CD in playback mode to listen to the
tracks randomly.
4. Press STOP to stop playback.
Tip:Tip:
Tip:Tip:
Tip: If the CD compartment is not loaded with
a CD or the CD is unreadable, the message
“NO DISCNO DISC
NO DISCNO DISC
NO DISC” will be shown.
Setting Intro Play (Remote
only)
Intro Play lets you enjoy the CD tracks for 10
seconds. When the last track has played for 10
seconds, the Intro Play stops.
1. Follow step 2 and 3 of “Loading and Playing
CDs” above.
2. Press INTRO on remote, the unit will start
playback from the first track.
3. Press SKIP BACKWARD or SKIP
FORWARD to select a particular track.
4. During INTRO playback, press INTRO again to
turn off INTRO function, and “INTRoff “ will
display, the unit will start normal playback
from the current track.
Programming
1. Select CD mode by pressing CD.
2. Once the CD has been loaded into the system
and is in stop mode, press PROG.SET/CLEAR.
The message “O1 PR 01” will show on display.
3. Press SKIP BACKWARD or SKIP
FORWARD to select a track to be stored
into memory location 1.
4. Press PROG.SET/CLEAR to confirm your
selection and store that track into memory.
Repeat step 3 and this step to store addtional
tracks. A maximum of 20 tracks can be stored
into memory.
5. Press PLAY/PAUSE to run the preset
program. When the unit is playing the
program, PROG. icon will be displayed.
6. Press and hold PROG.SET/CLEAR for 2 seconds
or open the CD compartment door to clear the
stored program.
Notes to CD-R/RW
This unit is compatible with CD-RW/ CD-R discs
for playback.
• Do not affix any type of labels to either side
(recordable or labeled side) of a CD-R/RW disc
as this may result in the unit malfunctioning.
• To avoid damages to the CD-R/RW disc, do not
open the disc compartment door while the
disc is being read.
• Do not load an unrecorded CD-R/RW disc into
the unit. This may take a longer time to read
the disc.
• Playback capability for CD-RW discs may
vary due to variations in the quality of
the CD-RW disc and the recorder used to
create the disc.
J
A
Z
Z
F
L
A
T
•
C
L
A
S
S
I
C
R
O
C
K
P
O
P
ON
STAND-BY
TUNER
CD
TAPE
• PRESET •
TUNING
VOLUME
BAND•APP
IR SENSOR
UPDN
EQ
X-BASS
MULTI FUNCTION FLUORESCENT DISPLAY
DIGITAL MICRO HI-FI SYSTEM
CLOCK/
TIMER
DISPLAY
DEMO
DIGITAL PLL SYNTHESIZEDTUNER
@
AUX
PROG•SET
CLEAR
DIMMER ST•MO
˚
REC•
RS2022
CD-R / RW COMPATIBLE
REC•
RS2022 EN 12/11/02, 11:01 AM12

EN
Troubleshooting Tips
Problem
System will
not turn on
No sound
Poor radio
reception
CD does not
play
CD sound
skips
Solution
• Check power cord for a secure
connection.
• Unplug the unit for a moment,
and then plug into power source
again.
• Check the outlet by plugging in
another device.
• Increase the volume setting.
• Check connection to speakers.
• Check that you have selected the
appropriate function: CD, TAPE,
Tuner.
• Make sure mute is off.
• Check antenna connection.
• Move antenna.
• Turn off nearby electrical
appliances, such as hair dryer,
vacuum cleaner, microwave,
fluorescent lights.
• Check that CD is in the tray.
• Check that CD label is facing up.
• Check that PAUSE mode is not
on.
• Check that CD function is
selected.
• Use CD lens cleaner.
• Clean the disc.
• Make sure the CDR/CDRW is
finalized.
• Clean the disc.
• Check disc for warping,
scratches, or other damage.
• Check if something is causing
the system to vibrate. If so, move
the system.
• Make sure the speakers are at
least 3 feet away or on a different
surface from the main unit.
Problem
CD button
will not
respond
Distorted or
noisy tape
recordings
Remote
control does
not work
Solution
• Switch to another function
(TAPE, Tuner) and then back to
CD.
• Inspect the tape head, clean it if
neccessary.
• Check that the batteries are
properly installed.
• Replace weak batteries.
• Check that the system is plugged
into power source.
• Point the remote directly at the
system’s front panel.
• Move closer to the system.
• Remove any obstacles between
the remote and the system.
8
RS2022 EN 12/11/02, 11:01 AM13

EN
9
Maintenance
Disconnect the audio system from the power
source before performing any maintenance.
Cleaning
Clean the exterior of the system using a soft dust
cloth.
CD Player
CAUTION! This system operates with a laser. It
must be opened by only a qualified technician.
Tape Player
To prevent deterioration of sound quality,
periodically open the door of each deck and clean
the magnetic heads, pinch roller, and capstan with
a cotton bud dipped in alcohol. Also,
demagnetize the head by playing a
demagnetizing cassette (available through an
audio equipment store).
To protect recordings on one or both sides of a
tape, remove the corresponding tab. If you later
want to record on the tape, affix a piece of
adhesive tape over the hole.
A
Quit Slacking - A little bit of
slack in your tapes can cause
scratches on the tape, or worse
yet, the tape could break. If
you notice some slack in the
tape, use a pencil to tighten it
up before you insert it.
Handling CDs
• Do not touch the signal surfaces. Hold CDs by
the edges, or by one edge and the hole. Do not
affix labels or adhesive tapes to the label surfaces.
Do not scratch or damage the label. CDs rotate at
high speeds inside the player. Do not use
damaged (cracked or warped) CDs
Cleaning CDs
• Dirty CDs can cause poor sound quality. Always
keep CDs clean by wiping them gently with a soft
cloth from the inner edge toward the outer
perimeter.
• If a CD becomes dirty, wet a soft cloth in water,
wring it out well, wipe the dirt away gently, and
then remove any water drops with a dry cloth.
• Do not use record cleaning sprays or antistatic
agents on CDs. Also, never clean CDs with
benzene, thinner, or other volatile solvents which
may cause damage to disc surface
CD Lens Care
When your CD lens gets dirty it can also cause the
system to output poor sound quality. To clean the
lens you will need to purchase a CD lens cleaner
which can maintain the output sound quality of
your system. For instructions
on cleaning the CD lens, refer to the ones
accompanying the lens cleaner.
RS2022 EN 12/11/02, 11:01 AM14

EN
More Information
Safety Precautions
• Never open the cabinet under any
circumstances. Any repairs or internal
adjustments should be made only by a trained
technician.
• Never operate this product with the cabinet
removed.
•Do not use your System immediately after
transporting it from a cold place to a warm
place, as condensation may cause the system to
malfunction.
• Keep your unit away from humid areas and
abnormally hot places.
• Do not touch the player with wet hands. If any
liquid enters the player cabinet, take the player
to a trained technician for inspection.
• This compact disc player uses a laser to read the
music on the disc. The laser mechanism
corresponds to the cartridge and stylus of a
record player. Although this product incorporates
a laser pick-up lens, it is completely safe when
operated according to directions.
• Discs rotate at high speed inside the
player. Do not use damaged, warped, or cracked
discs.
• Do not touch the pick-up lens which is located
inside the disc compartment. To keep dust from
collecting on the pick-up lens, do not leave the
compartment door open for an extended period
of time. If the lens becomes dirty, clean it with a
soft brush, or use an air blower brush designed
for camera lenses.
• The apparatus shall not be exposed to dripping
and splashing.
Headset Safety
• Do not play your headset at high volume.
Hearing experts warn against extended high-
volume play.
• If you experience ringing in your ears, reduce
volume or discontinue use.
• You should use with extreme caution or
temporarily discontinue use in potentially
hazardous situations.
Even if your headset is an open-air designed to
let you to hear outside sounds, do not turn up
the volume so high that you are unable to hear
what is around you.
Important Battery
Information
• Remove the batteries to avoid leakage if you
do not use your remote control for more than
one month.
• Discard leaky batteries immediately as leaking
batteries may cause skin burns or other personal
injuries. Dispose of batteries in the proper
manner, according to provincial and local
regulations.
• Any battery may leak electrolyte under the
following circumstances:
- if mixed with a different battery type,
- if inserted incorrectly,
- if all batteries are not replaced at the same
time,
- if disposed of in fire, or
- if an attempt is made to charge a battery not
intended to be recharged
Don’t Infringe
This product should only be used for the
purposes for which it is sold, that is,
entertainment, violating no copyright law. Any
attempts to use this product for which it is not
intended is unlawful and therefore not
condoned by Thomson multimedia.
Technical Specification
Power supply : 120V~60Hz
Dimensions W x D x H (inch)
Main unit -5.9 x 9 x 9.5
Speakers - 6.5 x 6.2 x 9.5
Tape deck:Response curve 125Hz~10KHz(-
5dB)
CD player:Response curve 60~20KHz(+/-3dB)
Rating Plate :Look for it at the back of the
set
10
RS2022 EN 12/11/02, 11:01 AM15
Table of contents
Other RCA Stereo System manuals