T
able
of
Cont
ents
Equipment
ApprovalInformation.......2
I
n
t
e
r
f
e
r
e
n
c
e
I
n
f
o
r
m
at
i
o
n
.....................
3
Hearing
AidCompatibility ...................
4
Fcc Rf
Radiation Exposure
S
tat
ement
...4
Introduction
...........................................7
Before
Y
ou
Begin
...................................7
Parts Checklist
.................................................
7
Telephone Jack
R
equirements
...............7
Important Installation Information.7
Base Layout
...........................................8
Installing thePhone
............................9
Desktop
In
st
a
ll
a
t
i
o
n
..
............................9
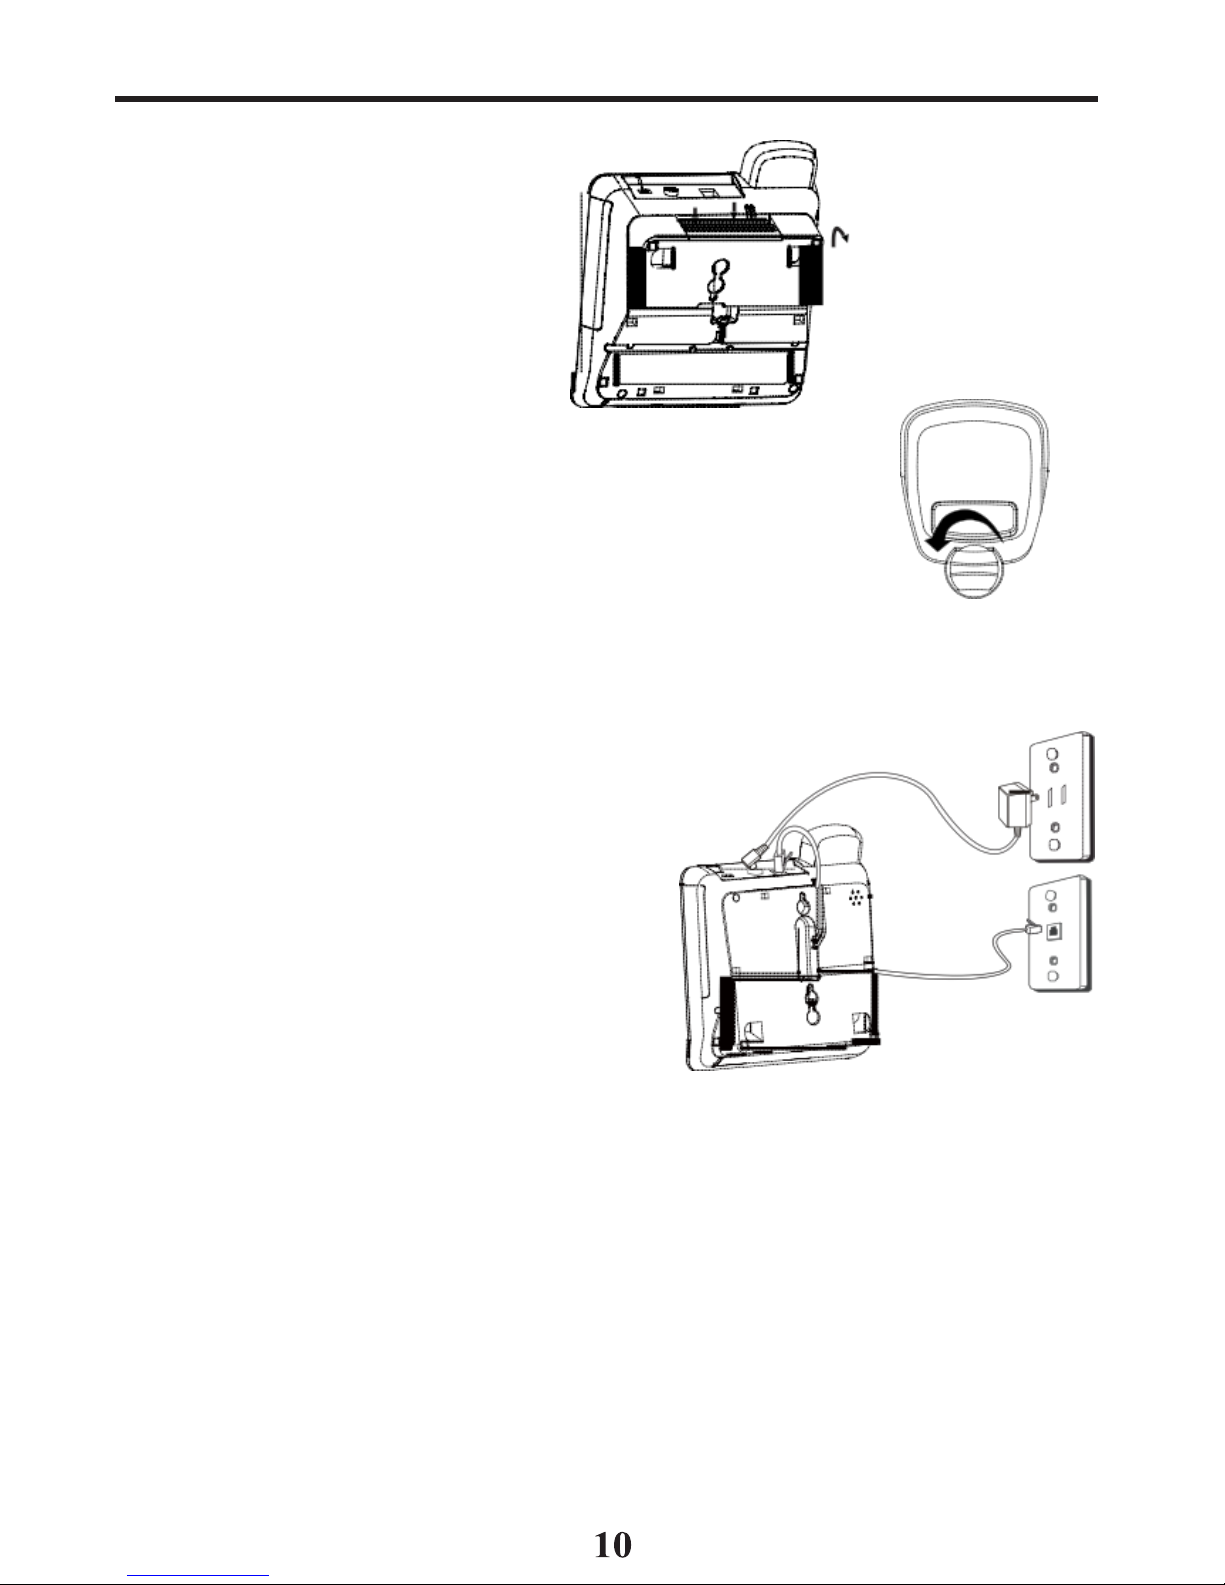
Wall
Mounting the Phone
..................10
Important
Instructions
For
Moving
the
A
nsw
e
r
e
r
.............................1
0
A
n
s
w
e
r
i
n
g
System Setup
...................
11
R
ecording
the
Out
going
Announcement
......................................................1
1
Reviewing theAnnouncement...…..
.....
11
T
elephone
Operation
..........................11
Using
T
h
e
S
p
e
a
k
e
r
ph
o
n
e
....................
11
S
peak
e
r
phone
Location
...........................1
1
Speakerphone Use
......................................
11
Receiving a Phone Call
..............................12
Placing a Phone Call
.................................1
2
S
witching
Between Speaker
And
Handset
............................................................
12
T
e
m
p
o
r
a
r
y
T
o
n
e
D
i
a
li
ng
............................
12
Flash
..................................................................12
Redial
................................................................13
Mute
..................................................................13
T
elephone
Set Up
................................13
Setting the Rings
To
Answer
............14
Setting the Incoming Message or
Memo
Length............................................14
S
ett
i
ng
the
R
e
c
o
r
d
i
ng
Q
u
a
li
t
y
..............
14
S
e
tt
i
ng
the
S
e
c
u
r
i
t
y
Code
......................
15
S
ett
i
ng
the
D
i
s
p
l
a
y
Contrast
..................
15
S
e
tt
i
ng
Your Local Area Code
.........
15
S
ett
i
ng
the
D
i
a
li
ng
Mode
.................
16
S
ett
i
ng
Day
of
Week
..........................
16
S
ett
i
ng
the
T
i
m
e
and
Date
..............
16
S
e
tt
i
ng
theLanguage
.......................1
7
Message Volume
.................................17
Ringer Volume
.......................................
17
Speakerphone
V
olume....................17
Caller
ID
Features
...............................1
8
S
u
mm
a
r
y
Screen
.................................
18
C
a
ll
e
r
ID
with
C
a
ll
Wa
i
t
i
ng
...............
19
R
e
c
e
i
v
i
ng
and
S
t
o
r
i
ng
C
a
ll
s
.............
19
R
e
v
i
e
w
i
ng
C
a
ll
R
e
c
o
r
d
s
.....................
19
Deleting
CID
R
ecor
ds.......................19
Dialing
Back
...........................................
20
If
You
Programmed
Your Local Ar
ea
Code
.........................................................
20
If
Y
ou
Did
Not Program
Y
our
Local
Area Code
...............................................
21
Memory
....................................................21
S
t
o
r
i
ng
aNumber
InMemory
.......
21
S
toring
a Redial
Number
ToMemory
..............................................
22
E
r
a
s
i
ng
a
S
t
o
r
e
d
Number
..................
22
Copying Caller
Id
Memories ToUser
Memory
....................................................2
2
Inserting
A
Pause In The Dialing
S
e
qu
e
n
c
e
.................................................
23
Changing A
S
tor
ed
Number
............23
Dialing A
Number Stored In
Memory
While
On-hook
........................................
23
Dialing A
Number Stored InMemory..23
Reviewing
S
t
o
r
e
d
Numbers
...........23
C
h
a
i
n
D
i
a
li
ng
From Memory
............
24
A
n
s
w
e
r
i
n
g
System Operation
....
24
Ca
ll
A
n
s
w
e
r
i
ng
...................................2
4
A
u
t
o
D
i
s
c
o
nn
e
c
t
...................................
25
Playing Messages
...............................25