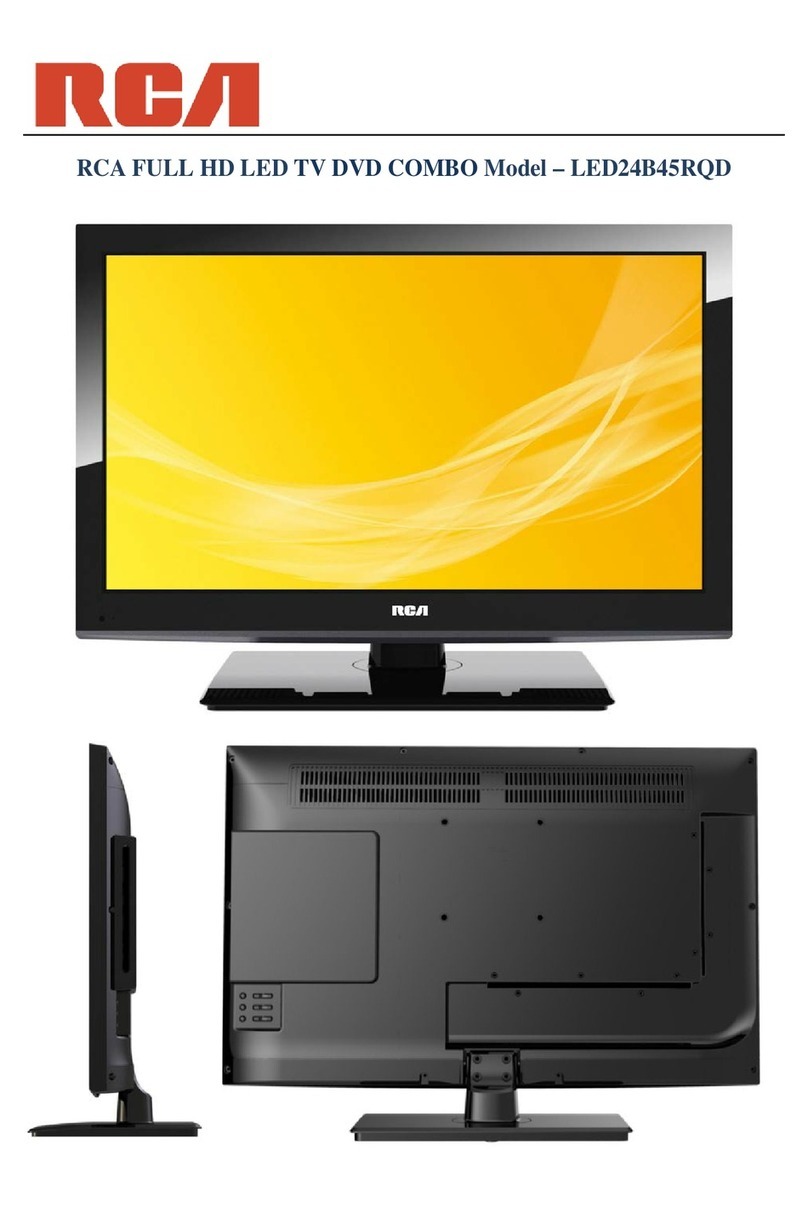
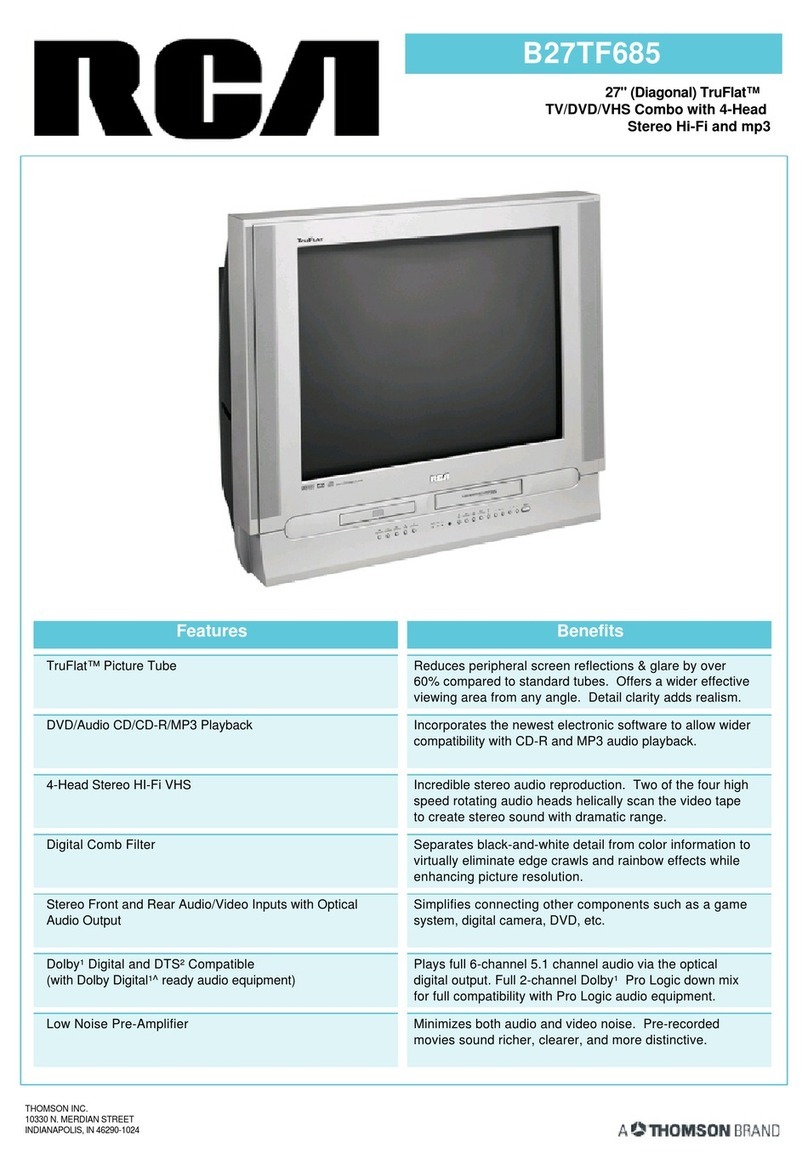
RCA B27TF685 User manual

TV/VCR/DVD
User’s Guide
Changing Entertainment. Again.
16061510- cover 12/13/02 11:40 AM Page 1

WARNING
To reduce the risk of fire or electric
shock, do not expose this product
to rain or moisture.
RISK OF ELECTRIC SHOCK. DO
NOT OPEN.
CAUTION
This symbol indicates “
dangerous voltage” inside
the product that presents
a risk of electric shock or
personal injury.
This symbol indicates
important instructions
accompanying the product.
Caution: To prevent electric shock, match wide blade
of plug to wide slot, fully insert.
Refer to the identification/rating label located on the
back panel of your product for its proper operating
voltage.
FCC Regulations state that unauthorized changes or modifications to
this equipment may void the user’s authority to operate it.
Caution: Using video games or any external accessory with fixed
images for extended periods of time can cause them to be per-
manently imprinted on the picture tube (or projection TV picture
tubes). ALSO, some network/program logos, phone numbers, etc.
may cause similar damage. This damage is not covered by your
warranty.
Cable TV Installer: This reminder is provided to call your attention to
Article 820-40 of the National Electrical Code (Section 54 of the
Canadian Electrical Code, Part 1) which provides guidelines for proper
grounding and, in particular, specifies that the cable ground shall be
connected to the grounding system of the building as close to the point
of cable entry as practical.
Product Registration
Please fill out the product registration card (packed separately) and return it immediately, or register on-line at
www.rca.com. Returning the card allows us to contact you if needed.
Product Information
Keep your sales receipt to obtain warranty parts and service and for proof of purchase. Attach it here and record
the serial model numbers in case you need them. These numbers are located on the product.
Model No. _________________________________ Serial No. ____________________________________________
Purchase Date: ____________________________________________________________________________________
Dealer/Address/Phone: ______________________________________________________________________________
CAUTION
THIS PRODUCT UTILIZES A LASER.
USE OF CONTROLS OR ADJUST-
MENTS OR PERFORMANCE OF
PROCEDURES OTHER THAN SPEC-
IFIED HEREIN MAY RESULT IN
HAZARDOUS RADIATION EXPO-
SURE. DO NOT OPEN COVERS
AND DO NOT REPAIR YOURSELF.
REFER SERVICING TO QUALIFIED
PERSONNEL.
Note:
This DVD player is designed and man-
ufactured to respond to the Region
Management Information. If the
Region number of a disc does not cor-
respond to the Region number of this
DVD player, this DVD player cannot
play the disc. The Region number for
this player is Region No. 1.
Information
This equipment has been tested and found to comply with the limits for a Class B digital device, pursuant to Part 15
of the FCC Rules. These limits are designed to provide reasonable protection against harmful interference in a resi-
dential installation. This equipment generates, uses and can radiate radio frequency energy and, if not installed and
used in accordance with the instructions, may cause harmful interference to radio communications. However, there is
no guarantee that interference will not occur in a particular installation. If this equipment does cause harmful inter-
ference to radio or television reception, which can be determined by turning the equipment off and on, the user is
encouraged to try to correct the interference by one or more of the following measures:
• Reorient or relocate the receiving antenna.
• Increase the separation between the equipment and receiver.
• Connect the equipment into an outlet on a circuit different from that to which the receiver is connected.
• Consult the dealer or experienced radio/TV technician for help.
CLASS 1
LASER
PRODUCT
Caution: To reduce the risk of electric shock, do not remove
cover (or back). No user serviceable parts inside. Refer servicing
to qualified service personnel.
IMPORTANT INFORMATION
16061510- cover 12/13/02 11:40 AM Page 2

CHAPTER ONE: YOUR NEW 3WAY COMBINATION UNIT 1
Chapter 1:
Your New 3Way Combination Unit . . . . . . . . . . . . . . . . . . . 3
Things to Consider Before You Connect . . . . . . . . . . . . . . . . . . . . . . . . . . . . . . . . . . . . . . . . 3
Protect Against Power Surges . . . . . . . . . . . . . . . . . . . . . . . . . . . . . . . . . . . . . . . 3
Protect Components from Overheating . . . . . . . . . . . . . . . . . . . . . . . . . . . . . . . 3
Position Cables Properly to Avoid Audio Interference. . . . . . . . . . . . . . . . . . . . 3
Important Stand and Base Safety Information . . . . . . . . . . . . . . . . . . . . . . . . . . 3
Use Indirect Light . . . . . . . . . . . . . . . . . . . . . . . . . . . . . . . . . . . . . . . . . . . . . . . . . 3
Cables Needed to Connect Components to Your TV/VCR/DVD. . . . . . . . . . . . . 3
Dolby Digital and DTS . . . . . . . . . . . . . . . . . . . . . . . . . . . . . . . . . . . . . . . . . . . . . . . . . . . . . . . 4
TV/VCR/DVD + Receiver . . . . . . . . . . . . . . . . . . . . . . . . . . . . . . . . . . . . . . . . . . . . . . . . . . . . . . 5
Familiarizing Yourself with The 3way Combination Unit . . . . . . . . . . . . . . . . . . . . . . . . . . . 6
Front Panel Buttons. . . . . . . . . . . . . . . . . . . . . . . . . . . . . . . . . . . . . . . . . . . . . . . . 6
Side Panel Jacks . . . . . . . . . . . . . . . . . . . . . . . . . . . . . . . . . . . . . . . . . . . . . . . . . . 7
Rear Panel Jacks . . . . . . . . . . . . . . . . . . . . . . . . . . . . . . . . . . . . . . . . . . . . . . . . . . 7
Remote Control (TV Function Buttons) . . . . . . . . . . . . . . . . . . . . . . . . . . . . . . . . 8
Remote Control (DVD Function Buttons) . . . . . . . . . . . . . . . . . . . . . . . . . . . . . . 9
Remote Control (VCR Function Buttons). . . . . . . . . . . . . . . . . . . . . . . . . . . . . . 10
Installing Batteries in the Remote Control . . . . . . . . . . . . . . . . . . . . . . . . . . . . . . . . . . . . . . 11
Setting the Optical Out Jack. . . . . . . . . . . . . . . . . . . . . . . . . . . . . . . . . . . . . . . . 11
Chapter 2: TV Operation. . . . . . . . . . . . . . . . . . . . . . . . . . . . . . . . . 12
Turning the TV On and Off . . . . . . . . . . . . . . . . . . . . . . . . . . . . . . . . . . . . . . . . . . . . . . . . . . 12
Viewing the Menus and On-Screen Displays. . . . . . . . . . . . . . . . . . . . . . . . . . . . . . . . . . . . 12
Viewing the Menus . . . . . . . . . . . . . . . . . . . . . . . . . . . . . . . . . . . . . . . . . . . . . . . 12
Viewing the Display . . . . . . . . . . . . . . . . . . . . . . . . . . . . . . . . . . . . . . . . . . . . . . 12
Selecting a Menu Language . . . . . . . . . . . . . . . . . . . . . . . . . . . . . . . . . . . . . . . . . . . . . . . . . 13
Memorizing the Channels . . . . . . . . . . . . . . . . . . . . . . . . . . . . . . . . . . . . . . . . . . . . . . . . . . . 13
Selecting the Video Signal-source. . . . . . . . . . . . . . . . . . . . . . . . . . . . . . . . . . . 13
Storing Channels in Memory (Automatic Method) . . . . . . . . . . . . . . . . . . . . . 14
Adding and Erasing Channels (Manual Method) . . . . . . . . . . . . . . . . . . . . . . . 15
Customizing the Picture. . . . . . . . . . . . . . . . . . . . . . . . . . . . . . . . . . . . . . . . . . . . . . . . . . . . . 16
Using Automatic Picture Settings. . . . . . . . . . . . . . . . . . . . . . . . . . . . . . . . . . . . . . . . . . . . . 17
Changing the Color Tone. . . . . . . . . . . . . . . . . . . . . . . . . . . . . . . . . . . . . . . . . . . . . . . . . . . . 18
Changing the Screen Size . . . . . . . . . . . . . . . . . . . . . . . . . . . . . . . . . . . . . . . . . . . . . . . . . . . 18
Fine Tuning Channels . . . . . . . . . . . . . . . . . . . . . . . . . . . . . . . . . . . . . . . . . . . . . . . . . . . . . . 19
Digital Noise Reduction . . . . . . . . . . . . . . . . . . . . . . . . . . . . . . . . . . . . . . . . . . . . . . . . . . . . . 20
Tilt . . . . . . . . . . . . . . . . . . . . . . . . . . . . . . . . . . . . . . . . . . . . . . . . . . . . . . . . . . . . . . . . . . . . . . 20
Customizing the Sound . . . . . . . . . . . . . . . . . . . . . . . . . . . . . . . . . . . . . . . . . . . . . . . . . . . . . 21
Using Automatic Sound Settings . . . . . . . . . . . . . . . . . . . . . . . . . . . . . . . . . . . . . . . . . . . . . 21
Choosing a Multi-Channel Soundtrack (MTS) . . . . . . . . . . . . . . . . . . . . . . . . . . . . . . . . . . . 22
Viewing a VCR or Camcorder Tape. . . . . . . . . . . . . . . . . . . . . . . . . . . . . . . . . . . . . . . . . . . . 23
Setting the Clock . . . . . . . . . . . . . . . . . . . . . . . . . . . . . . . . . . . . . . . . . . . . . . . . . . . . . . . . . . 23
Setting the On/Off Timer . . . . . . . . . . . . . . . . . . . . . . . . . . . . . . . . . . . . . . . . . . . . . . . . . . . . 26
Setting the Sleep Timer . . . . . . . . . . . . . . . . . . . . . . . . . . . . . . . . . . . . . . . . . . . . . . . . . . . . . 28
Viewing Closed Captions. . . . . . . . . . . . . . . . . . . . . . . . . . . . . . . . . . . . . . . . . . . . . . . . . . . . 29
Using the V-Chip . . . . . . . . . . . . . . . . . . . . . . . . . . . . . . . . . . . . . . . . . . . . . . . . . . . . . . . . . . 30
How the V-Chip Works . . . . . . . . . . . . . . . . . . . . . . . . . . . . . . . . . . . . . . . . . . . . 30
Setting Up Your Personal ID Number (PIN) . . . . . . . . . . . . . . . . . . . . . . . . . . . 30
How to Enable/Disable the V-Chip . . . . . . . . . . . . . . . . . . . . . . . . . . . . . . . . . . . 31
How to Set up Restrictions Using the “TV guidelines” . . . . . . . . . . . . . . . . . . 31
How to Set up Restrictions using the MPAA Ratings:
G, PG, PG-13, R, NC-17, X. . . . . . . . . . . . . . . . . . . . . . . . . . . . . . . . . . . . . . . . . . 32
How to Reset the TV after the V-Chip Blocks
a Channel (“Emergency Escape”) . . . . . . . . . . . . . . . . . . . . . . . . . . . . . . . . . . . 33
Chapter 3: DVD Operation . . . . . . . . . . . . . . . . . . . . . . . . . . . . . . . 34
Playing a Disc . . . . . . . . . . . . . . . . . . . . . . . . . . . . . . . . . . . . . . . . . . . . . . . . . . . . . . . . . . . . . 34
Playback . . . . . . . . . . . . . . . . . . . . . . . . . . . . . . . . . . . . . . . . . . . . . . . . . . . . . . . . 34
Pausing Playback. . . . . . . . . . . . . . . . . . . . . . . . . . . . . . . . . . . . . . . . . . . . . . . . . 34
Step Motion Playback (Except CD) . . . . . . . . . . . . . . . . . . . . . . . . . . . . . . . . . . 34
Slow Motion Playback (Except CD) . . . . . . . . . . . . . . . . . . . . . . . . . . . . . . . . . . 35
Using the Search and Skip Functions . . . . . . . . . . . . . . . . . . . . . . . . . . . . . . . . . . . . . . . . . 35
Searching through a Chapter or Track . . . . . . . . . . . . . . . . . . . . . . . . . . . . . . . 35
Skipping Tracks . . . . . . . . . . . . . . . . . . . . . . . . . . . . . . . . . . . . . . . . . . . . . . . . . . 35
Using the Display Function . . . . . . . . . . . . . . . . . . . . . . . . . . . . . . . . . . . . . . . . . . . . . . . . . . 36
Repeat Play . . . . . . . . . . . . . . . . . . . . . . . . . . . . . . . . . . . . . . . . . . . . . . . . . . . . . . . . . . . . . . . 37
Program Play and Random Play . . . . . . . . . . . . . . . . . . . . . . . . . . . . . . . . . . . . . . . . . . . . . . 38
Program Playback . . . . . . . . . . . . . . . . . . . . . . . . . . . . . . . . . . . . . . . . . . . . . . . . 38
Random Playback . . . . . . . . . . . . . . . . . . . . . . . . . . . . . . . . . . . . . . . . . . . . . . . . 38
Using the Disc View Function (VCD). . . . . . . . . . . . . . . . . . . . . . . . . . . . . . . . . . . . . . . . . . . 39
Track View/Index View . . . . . . . . . . . . . . . . . . . . . . . . . . . . . . . . . . . . . . . . . . . . 39
Selecting the Audio Language . . . . . . . . . . . . . . . . . . . . . . . . . . . . . . . . . . . . . . . . . . . . . . . 40
Using the AUDIO Button. . . . . . . . . . . . . . . . . . . . . . . . . . . . . . . . . . . . . . . . . . . 40
Using the DVD Setup Button (When in DVD mode). . . . . . . . . . . . . . . . . . . . . 41
CONTENTS
16061510-CHAPTER 1 12/13/02 11:43 AM Page 1
2CHAPTER ONE: YOUR NEW 3WAY COMBINATION UNIT
Chapter 3: DVD Operation (Cont.)
Selecting the Subtitle Language. . . . . . . . . . . . . . . . . . . . . . . . . . . . . . . . . . . . . . . . . . . . . . 42
Using the SUBTITLE button . . . . . . . . . . . . . . . . . . . . . . . . . . . . . . . . . . . . . . . . 42
Using the DVD Setup Button (When in DVD mode). . . . . . . . . . . . . . . . . . . . . 43
Setting up the Language Features . . . . . . . . . . . . . . . . . . . . . . . . . . . . . . . . . . . . . . . . . . . . 43
Using the Player and Disc Menu . . . . . . . . . . . . . . . . . . . . . . . . . . . . . . . . . . . . 43
Using the Master Volume Control Function. . . . . . . . . . . . . . . . . . . . . . . . . . . . . . . . . . . . . 44
Changing the Camera Angle . . . . . . . . . . . . . . . . . . . . . . . . . . . . . . . . . . . . . . . . . . . . . . . . . 45
Using the Zoom Function (DVD/VCD) . . . . . . . . . . . . . . . . . . . . . . . . . . . . . . . . . . . . . . . . . 45
Using the Bookmark Function. . . . . . . . . . . . . . . . . . . . . . . . . . . . . . . . . . . . . . . . . . . . . . . . 46
Using the Bookmark Function (DVD/VCD) . . . . . . . . . . . . . . . . . . . . . . . . . . . . 46
Recalling a Marked Scene . . . . . . . . . . . . . . . . . . . . . . . . . . . . . . . . . . . . . . . . . 46
Clearing a Bookmark. . . . . . . . . . . . . . . . . . . . . . . . . . . . . . . . . . . . . . . . . . . . . . 47
MP3 Play . . . . . . . . . . . . . . . . . . . . . . . . . . . . . . . . . . . . . . . . . . . . . . . . . . . . . . . . . . . . . . . . . 48
MP3 Play Function. . . . . . . . . . . . . . . . . . . . . . . . . . . . . . . . . . . . . . . . . . . . . . . . 48
Program/Random playback . . . . . . . . . . . . . . . . . . . . . . . . . . . . . . . . . . . . . . . . 48
CD-R MP3 discs . . . . . . . . . . . . . . . . . . . . . . . . . . . . . . . . . . . . . . . . . . . . . . . . . . 49
Setting up the Parental Control . . . . . . . . . . . . . . . . . . . . . . . . . . . . . . . . . . . . . . . . . . . . . . 50
Setting up the Audio Options . . . . . . . . . . . . . . . . . . . . . . . . . . . . . . . . . . . . . . . . . . . . . . . . 52
Setting up the Display Options . . . . . . . . . . . . . . . . . . . . . . . . . . . . . . . . . . . . . . . . . . . . . . . 53
Chapter 4: VCR Operation . . . . . . . . . . . . . . . . . . . . . . . . . . . . . . . 54
Using the Safety Tab . . . . . . . . . . . . . . . . . . . . . . . . . . . . . . . . . . . . . . . . . . . . . . . . . . . . . . . 54
Inserting and Ejecting a Video Cassette Tape . . . . . . . . . . . . . . . . . . . . . . . . . . . . . . . . . . . 54
Using Picture Search. . . . . . . . . . . . . . . . . . . . . . . . . . . . . . . . . . . . . . . . . . . . . . 55
Using the Time Counter . . . . . . . . . . . . . . . . . . . . . . . . . . . . . . . . . . . . . . . . . . . 55
Using Memory Stop . . . . . . . . . . . . . . . . . . . . . . . . . . . . . . . . . . . . . . . . . . . . . . 56
Using P.PLUS . . . . . . . . . . . . . . . . . . . . . . . . . . . . . . . . . . . . . . . . . . . . . . . . . . . . . . . . . . . . . 57
Recording TV Programs As You Watch . . . . . . . . . . . . . . . . . . . . . . . . . . . . . . . . . . . . . . . . 58
Recording. . . . . . . . . . . . . . . . . . . . . . . . . . . . . . . . . . . . . . . . . . . . . . . . . . . . . . . 58
Editing While Recording . . . . . . . . . . . . . . . . . . . . . . . . . . . . . . . . . . . . . . . . . . . 59
Using Advanced Recording Features . . . . . . . . . . . . . . . . . . . . . . . . . . . . . . . . . . . . . . . . . . 59
Using One-Touch Recording . . . . . . . . . . . . . . . . . . . . . . . . . . . . . . . . . . . . . . . 59
Recording at a Later Time. . . . . . . . . . . . . . . . . . . . . . . . . . . . . . . . . . . . . . . . . . 60
Using Program Review. . . . . . . . . . . . . . . . . . . . . . . . . . . . . . . . . . . . . . . . . . . . 63
Using True Repeat . . . . . . . . . . . . . . . . . . . . . . . . . . . . . . . . . . . . . . . . . . . . . . . . . . . . . . . . . 64
Using Block Repeat . . . . . . . . . . . . . . . . . . . . . . . . . . . . . . . . . . . . . . . . . . . . . . . . . . . . . . . . 65
Using the HiFi Stereo. . . . . . . . . . . . . . . . . . . . . . . . . . . . . . . . . . . . . . . . . . . . . . . . . . . . . . . 66
Selecting the HiFi Mode . . . . . . . . . . . . . . . . . . . . . . . . . . . . . . . . . . . . . . . . . . . 66
MTS Recording/Monitor Mode . . . . . . . . . . . . . . . . . . . . . . . . . . . . . . . . . . . . . 66
Video Dubbing . . . . . . . . . . . . . . . . . . . . . . . . . . . . . . . . . . . . . . . . . . . . . . . . . . . . . . . . . . . . 67
Making the Connections . . . . . . . . . . . . . . . . . . . . . . . . . . . . . . . . . . . . . . . . . . . 67
Video Dubbing. . . . . . . . . . . . . . . . . . . . . . . . . . . . . . . . . . . . . . . . . . . . . . . . . . . 67
Tape Speeds . . . . . . . . . . . . . . . . . . . . . . . . . . . . . . . . . . . . . . . . . . . . . . . . . . . . . . . . . . . . . . 68
Chapter 5: Troubleshooting . . . . . . . . . . . . . . . . . . . . . . . . . . . . . . 69
Identifying TV Problems . . . . . . . . . . . . . . . . . . . . . . . . . . . . . . . . . . . . . . . . . . . . . . . . . . . . 69
Identifying DVD Problems . . . . . . . . . . . . . . . . . . . . . . . . . . . . . . . . . . . . . . . . . . . . . . . . . . . 70
Identifying VCR Problems . . . . . . . . . . . . . . . . . . . . . . . . . . . . . . . . . . . . . . . . . . . . . . . . . . . 71
Limited Warranty . . . . . . . . . . . . . . . . . . . . . . . . . . . . . . . . . . . . . . . . . . . . . . . . . . . . . . . . . . 72
CONTENTS
16061510-CHAPTER 1 12/13/02 11:43 AM Page 2
CHAPTER ONE: YOUR NEW 3WAY COMBINATION UNIT 3
Things to Consider Before You Connect
Protect Against Power Surges
• Connect all components before you plug any of their power cords into the wall outlet.
• Turn off the TV/VCR/DVD and/or component before you connect or disconnect any cables.
• Make sure all antennas and cables are properly grounded. Refer to the Important Safeguards sheet
packed with your TV/VCR/DVD.
Protect Components from Overheating
• Don’t block ventilation holes on any of the components. Arrange the components so that air can
circulate freely.
• Don’t stack components.
• When you place components in a stand, make sure you allow adequate ventilation.
• If you connect an audio receiver or amplifier, place it on the top shelf so the heated air from it won’t
flow around other components.
Position Cables Properly to Avoid Audio Interference
• Insert each cable firmly into the designated jack.
• If you place components above the TV/VCR/DVD, route all cables down the side of the back of the
TV/VCR/DVD instead of straight down the middle.
• If your antenna uses 300-ohm twin lead cables, do not coil the cables. Also, keep the twin lead
cables away from audio/video cables.
Important Stand and Base Safety Information
Choose the location for your TV/VCR/DVD carefully. Place the TV/VCR/DVD on a stand or base that is of
adequate size and strength to prevent the TV/VCR/DVD from being accidentally tipped over, pushed
off, or pulled off. This could cause personal injury and/or damage to the TV/VCR/DVD. Refer to the
Important Safeguards sheet packed with your TV/VCR/DVD.
Use Indirect Light
Don’t place the TV/VCR/DVD where sunlight or room lighting will be directed toward the screen. Use
soft or indirect lighting.
Cables Needed to Connect Components to Your TV/VCR/DVD
The pictures below show the cables needed for the connections represented in this book.
Notes: Audio/Video cables (A/V cables for short) are usually sold as a bundled set, but the connection picture in this
book shows each cable separately for better visibility.
This TV/VCR/DVD’s OPTICAL DIGITAL OUT jack fully complies with the international standard governing this type of
jack (IEC958), and is designed for connection to a Dolby Digital (AC-3® or PCM) receiver or Dolby Digital (AC-3 or
PCM) decoder. Older equipment, some of which is not fully compliant with IEC958, may not be compatible with the
Dolby Digital bitstream. Such a connection using anything other than Dolby Digital AC-3 or PCM receiver or decoder
could create a high noise level, causing damage to headphones or speakers.
Chapter One
YOUR NEW 3WAY COMBINATION UNIT
Coaxial cable Audio/Video cable Optical Digital cable
16061510-CHAPTER 1 12/13/02 11:43 AM Page 3
4CHAPTER ONE: YOUR NEW 3WAY COMBINATION UNIT
YOUR NEW 3WAY COMBINATION UNIT
Dolby Digital® and DTS®
Both Dolby Digital and DTS are audio formats used to record 5.1-channel audio signals onto the digital
track of film (while the film is being made). Both of these formats provide up to six separate channels:
left, right, center, left rear, right rear, and common subwoofer.
The disc will play 5.1-channel sound only if you’ve connected a DTS or Dolby Digital receiver or decoder
and if the original movie the disc was recorded from was encoded in the Dolby Digital or DTS format.
Please Read this Before Using the OPTICAL DIGITAL OUT Jack!
This TV/VCR/DVD’s digital output jack is designed for a connection to a Dolby Digital or DTS receiver
or decoder.
Older digital equipment may not be compatible with the Dolby Digital bitstream. Such a connection
can create a high level of noise that may be harmful to your ears, and could damage headphones or
speakers.
Make sure the Optical Out setting in the TV/VCR/DVD’s sound menu is on (go to page 11).
M
ANUFACTURED UNDER THE LICENSE FROM
D
OLBY
L
ABORATORIES
. “D
OLBY
”
AND THE
DOUBLE
-D
SYMBOL ARE TRADEMARKS OF
D
OLBY
L
ABORATORIES
. C
ONFIDENTIAL UNPUBLISHED
WORKS
. ©1992-1997 D
OLBY
L
ABORATORIES
, I
NC
. A
LL RIGHTS RESERVED
.
** DTS
IS A REGISTERED TRADEMARK OF
D
IGITAL
H
OME
T
HEATER
S
YSTEMS
, I
NC
.
S-VIDEO INPUT
VIDEO
75
AUDIO
TV/VCR/DVD Back Panel
MONITOR
OUT
L
R
OPTICAL
DIGITAL OUT
DIGITAL IN
From Antenna/Cable Feed
DOLBY DIGITAL
or DTS RECEIVER
TAP E VCR
IN OUT IN OUT
CD
IN
TV
IN
R
L
A/V RECEIVER
-OR-
TV/VCR/DVD
Receiver
1A
1B
16061510-CHAPTER 1 12/13/02 11:43 AM Page 4

CHAPTER ONE: YOUR NEW 3WAY COMBINATION UNIT 5
YOUR NEW 3WAY COMBINATION UNIT
TV/VCR/DVD + Receiver
1A. Connect the Dolby Digital or DTS receiver to the TV/VCR/DVD
If you have a Dolby Digital or DTS receiver with a Digital Input jack, connect an optical digital
cable (not provided) into the OPTICAL DIGITAL OUT jack on the TV/VCR/DVD player and to the
Digital Input jack on the back of the receiver. You must also set the digital output setting in the
DVD setup menu (Chapter 3 has details).
or
1B. Connect the A/V receiver to the TV/VCR/DVD
Connect the A/V cables to an A/V (audio/video) receiver. Connect audio cables to the
TV/VCR/DVD’s MONITOR OUT AUDIO (L and R) jacks and the other ends to the receiver’s
corresponding Audio Input jacks.
16061510-CHAPTER 1 12/13/02 11:43 AM Page 5

6CHAPTER ONE: YOUR NEW 3WAY COMBINATION UNIT
YOUR NEW 3WAY COMBINATION UNIT
VIDEO
L
R
SKIP/SEARCH PLAY/PAUSE SKIP/SEARCH STOP OPEN/CLOSE
STAND BY TIMER REC
REC PLAY/PAUSESTOP/EJECT REW FF VOL CH POWER
///_
+
AUD IO
SKIP/SEARCH PLAY/PAUSE SKIP/SEARCH STOP OPEN/CLOSE STANDBY TIMER REC REC PLAY/PAUSESTOP/EJECT REW FF VOL CH POWER
///_
+
12
345678910 11 12 13 14 15 16 17
Side Panel Jacks
Familiarizing Yourself with The 3way Combination Unit
Front Panel Buttons
The buttons on the front panel control your 3way Combination Unit’s basic features, including the
on-screen menu. To use the more advanced features, you must use the remote control.
1 Disc tray
Load the disc here.
2 VCR deck
Insert a standard VHS video tape.
3 SKIP/SEARCH (DVD)
Press to skip or search the title, chapter or track.
4 PLAY/PAUSE (DVD)
Press to play or pause the disc
5 STOP (DVD)
Press to stop the disc
6OPEN/CLOSE (DVD)
Press to open and close the disc tray.
7STAND BY indicator
Lit when TV power is Off.
8Timer indicator
Lit when the program times are stored.
9REC indicator
Lit when the VCR is recording.
10
Remote Control Sensor
Aim the remote control towards this spot on the TV.
11 REC (VCR)
Press to begin recording.
12 STOP/EJECT (VCR)
Press to stop a video tape during play, record, rewind, or
fast forward. Press to eject a video tape if the tape is
stopped.
13 REW/FF (VCR)
Press to rewind/fast forward a videotape.
14 PLAY/PAUSE (VCR)
Press to play or pause a video tape.
15 VOL – , +
Press to increase or decrease the volume.
16 CH ▼ and ▲
Press to change channels.
17 POWER
Press to turn the TV on and off.
16061510-CHAPTER 1 12/13/02 11:43 AM Page 6

CHAPTER ONE: YOUR NEW 3WAY COMBINATION UNIT 7
YOUR NEW 3WAY COMBINATION UNIT
Side Panel Jacks
You can use the Side panel jacks to connect an A/V component that is used only occasionally, such as a
camcorder or video game.
VIDEO IN Jack
Used to connect a video signal from a camcorder or video game.
AUDIO IN Jacks
Used to connect the audio signals from a camcorder or video game.
S-VIDEO INPUT
VIDEO
75
AUDIO
TV/VCR/DVD Back Panel
MONITOR
OUT
L
R
OPTICAL
DIGITAL OUT
Rear Panel Jacks
Use the rear panel jacks to connect an A/V component that will be connected continuously, such as a
VCR or a camcorder.
75 Ω(Ant/Cable) Receives a signal from an antenna or cable system when the TV/VCR/DVD is attached with an RF cable.
AUDIO (L and R) and VIDEO INPUT Receives signals from another component, such as another VCR or camcorder, when the
component is connected to these jacks. To see the content coming from the component connected to these jacks, press the INPUT button on
the remote until AV appears on the screen.
AUDIO (L and R) and VIDEO MONITOR OUT Sends signals from the TV/VCR/DVD to another component, like a stereo
amplifier or speakers when the other component is connected to these jacks. These jacks are shared between the DVD player output and VCR
player output. The output is from the DVD player when the TV/VCR/DVD is in the DVD mode. The output is from the VCR player when the
TV/VCR/DVD is in the VCR mode.
OPTICAL DIGITAL OUT Use a digital optical cable (not provided) or a shielded coaxial cable (not provided) to connect your
TV/VCR/DVD player to a compatible Dolby Digital or DTS receiver or decoder. You must set Optical Out to On (instructions on page 11). Digital
output is only available during DVD playback.
S-VIDEO Provides better picture quality than the VIDEO INPUT jacks because the color part of the signal is separated from the black and
white part of the picture. When using S-VIDEO, make sure to connect left and right audio cables to the AUDIO L and R INPUT jacks.
16061510-CHAPTER 1 12/13/02 11:43 AM Page 7

8CHAPTER ONE: YOUR NEW 3WAY COMBINATION UNIT
YOUR NEW 3WAY COMBINATION UNIT
Remote Control (TV Function Buttons)
You can use the remote control up to about 23 feet from the TV.
When using the remote, always point it directly at the TV.
1 POWER
Turns the 3way Combination Unit
on and off.
2
+100
Press to select channels over 100.
For example, to select channel
121, press “+100,” then press “2”
and “1.”
3
VOL +, VOL -
Press to increase or decrease the
volume.
4
MUTE
Press to temporarily cut off
the sound.
5
S.STD
Adjust the TV sound by selecting
one of the preset factory settings
(or select your personal,
customized sound settings).
6
P.STD
Adjust the TV picture by selecting
one of the preset factory settings
(or select your personal,
customized picture settings).
7
MENU
Displays the main on-screen
menu.
8
Arrow buttons (up,
down, left, right)
Press to move through the
on-screen menus.
9
TV/VCR ↔ DVD
selection
Press to switch between TV/VCR,
and DVD mode.
10
PRE-CH
Tunes to the previous channel.
11
SLEEP
Press to select a preset time
interval for automatic shutoff.
12
CH and CH
(Channel Down/Up)
Press to change channels.
13
INPUT
Press to watch the TV picture or a
picture from a connected
component (VCR, camcorder
etc...)
14
MTS (Multichannel
Television Stereo)
Press to choose stereo, mono or
Separate Audio Program (SAP
broadcast).
15
DISPLAY
Press to see the channel, time,
current disc mode, audio/video
settings etc., on-screen.
16
ADD/ERASE
Press to add or erase channels in
the TV’s memory.
16061510-CHAPTER 1 12/13/02 11:43 AM Page 8

CHAPTER ONE: YOUR NEW 3WAY COMBINATION UNIT 9
YOUR NEW 3WAY COMBINATION UNIT
Remote Control (DVD Function Buttons)
1
Search
Press to search forward/back-
ward through a disc.
2
Stop
Press to stop a disc.
3
DISC MENU
Press to display the disc menu.
4
ENTER
Confirms a selection.
5
OPEN/CLOSE
Press to open or close the disc
tray.
6
STEP
Press to advance play one frame
at a time.
7
ZOOM
Press to zoom-in during playback,
slow motion or pause mode on the
selected area of a scene.
8
ANGLE
Press to access various camera
angles on a DVD.
9
PROGRAM
For random and program play.
10
BOOKMARK
Press to memorize scenes for
replay.
11
Play/pause
Press to play or pause disc play.
12
Skip
Press to skip the title, chapter, or
track.
13
TOP MENU
Press to display the top menu on a
DVD or CD/VCD disc.
14
RETURN
Press to return to a previous menu
or exit.
15
SUBTITLE
Press to display the subtitle
language on-screen.
16
AUDIO
Press to access various audio
functions on a disc.
17
CLEAR
Press to clear on-screen displays.
18
REPEAT
Press to repeat a title, chapter,
track, or disc.
19
DVD SETUP
Displays the DVD Setup menu.
16061510-CHAPTER 1 12/13/02 11:43 AM Page 9

10 CHAPTER ONE: YOUR NEW 3WAY COMBINATION UNIT
YOUR NEW 3WAY COMBINATION UNIT
Remote Control (VCR Function Buttons)
1
REW/FF
Press to rewind/fast forward a
video tape.
2
Stop
Press to stop a video tape.
3
TRK+, – (tracking)
Press to adjust tape tracking.
4
OPEN/CLOSE
Press to eject a tape.
5
SP/SLP
Press to select the tape recording
speed.
6
P.PLUS
Press to compensate for a poor
rental tape.
7
Play/pause
Press to play or pause a tape.
8
SLOW+, –
Press to watch a tape in slow
motion.
9
REC
Press to begin recording.
10
F.ADV
(frame advance)
Press to advance a tape frame-
by-frame.
16061510-CHAPTER 1 12/13/02 11:43 AM Page 10

CHAPTER ONE: YOUR NEW 3WAY COMBINATION UNIT 11
Setting the Optical Out jack (Only DVD mode)
1
Press the MENU button.
Press the DOWN arrow
button to select the
Sound icon, then press
the RIGHT arrow button to
access the Sound menu
options.
Mode Custom
Adjust
MTS :Stereo
Optical Out : On
Sound
CH
Move Sel. Exit
2
Press the DOWN arrow
button to select “Optical”,
then press the RIGHT
arrow button to select
“On” or “Off”.
Press the MENU button to
exit.
Mode Custom
Adjust
MTS :Stereo
Optical Out : On
Sound
CH
Move Sel. Exit
Note: The Optical Out function in the menu doesn’t appear while a normal TV channel (RF channel) is being watched.
3
Replace the cover.
Remove the batteries and store them in a cool, dry place if
you won’t be using the remote control for a long time.
The remote control can be used up to about 23 feet from
the TV.
(Assuming typical TV usage, the batteries last for about one
year.)
2
Install two AA size
batteries.
Make sure to match the “+” and “–” ends of the batteries
with the diagram inside the compartment.
Installing Batteries in the Remote Control
1
Slide the cover out
completely.
YOUR NEW 3WAY COMBINATION UNIT
16061510-CHAPTER 1 12/13/02 11:43 AM Page 11

12 CHAPTER TWO: TV OPERATION
Viewing the Menus and On-Screen Displays
Viewing the Menus
1
With the power on, press
the MENU button.
The main menu appears on
the screen:
Picture, Sound, Channel,
Function and VCR setup.
The on-screen menus disappear from the screen after about
thirty seconds.
2
Use the UP/DOWN
buttons to select one of
the 5 items. Then press
the LEFT/RIGHT buttons to
access the item’s
sub-menu.
3
Press the MENU button to
exit.
Chapter Two
TV OPERATION
Turning the TV On and Off
Press the POWER button on the remote control.
You can also use the Power button on the front panel.
Viewing the Display
The display identifies the current channel and the status of certain audio-video settings.
The on-screen displays disappear after about ten seconds.
1
Press the DISPLAY button
on the remote control.
The TV will display the
channel, Time, disc mode,
the status of certain
picture and sound
settings, V-chip and the
type of sound.
Date : 09/01/2002
Clock : 12:15 pm
Disc : DVD
Picture : Custom
Sound : Custom
V-Chip : No
MTS : Stereo
Speed : SP
ANT 4
Stop
Mode : Custom
Adjust
Color Tone : Normal
Size : Normal
Digital NR : Off
Tilt : 0
Picture
CH
Move Sel. Exit
16061510-CHAPTER 2 12/13/02 11:44 AM Page 12

CHAPTER TWO: TV OPERATION 13
Memorizing the Channels
Your TV can memorize and store all of the available channels for both “off-air” (antenna) and cable
channels. After the available channels are memorized, use the CH up and down buttons to scan
through the channels. This eliminates the need to change channels by entering the channel digits.
There are three steps for memorizing channels: selecting a broadcast source, memorizing the channels
(automatic) and adding and deleting channels (manual).
Selecting the Video Signal-source
Before your television can begin memorizing the available channels, you must specify the type of signal
source that is connected to the TV (i.e., an antenna or a cable system).
1
Press the MENU button to
display the menu.
Press the DOWN arrow
button to select the
Channel icon.
Press the RIGHT arrow
button once to access the
Channel menu options.
TV/AV
ANT/CATV
Auto Program
Fine Tune : 0
Add/Erase
Channel
CH
Move Sel.
TV
ANT
Exit
TV OPERATION
Selecting a Menu Language
2
Press the DOWN arrow
button to select
“Language”.
Press the RIGHT arrow
button to select the
appropriate language:
English, Spanish, or French.
3
Press the MENU button to
exit.
Clock
Timer
Caption
V-chip
Language : English
Function
CH
Move Sel. Exit
1
Press the MENU button to
display the menu.
Press the DOWN arrow
button to select the
Function icon. Press the
RIGHT arrow button once
to access the Function
menu options.
Clock
Timer
Caption
V-chip
Language : English
Function
CH
Move Sel. Exit
16061510-CHAPTER 2 12/13/02 11:44 AM Page 13

14 CHAPTER TWO: TV OPERATION
TV OPERATION
2
Press the DOWN arrow
button to select “ANT/CATV”.
Repeatedly press the RIGHT
arrow button to cycle
through these choices:
ANT (antenna), STD, HRC or
IRC (all cable TV).
TV/AV
ANT/CATV
Auto Program
Fine Tune : 0
Add/Erase
Channel
CH
Move Sel.
TV
ANT
Exit
Note: STD, HRC and IRC identify various types of cable TV
systems. Contact your local cable company to identify the
type of cable system that exists in your particular area.
3
Press the RIGHT arrow button. The TV begins memorizing all of
the available channels.
4
After all the available channels are stored, the Auto program
menu disappears. Press the MENU button to exit.
Storing Channels in Memory (Automatic Method)
The TV automatically cycles through all of the available
channels and stores them in memory. This takes about one
to two minutes.
Press the RIGHT button at any time to interrupt the
memorization process and return to the Channel menu.
2
Press the DOWN arrow
button to select “Auto
Program”.
TV/AV
ANT/CATV
Auto Program
Fine Tune : 0
Add/Erase
Channel
CH
Move Sel.
TV
ANT
Exit
1
Make sure the correct
signal source (ANT, STD,
HRC, IRC) has been
selected. See steps 1~2
on previous page.
Press the DOWN arrow
button to select the
Channel icon, then press
the RIGHT arrow button to
access the Channel menu
options.
TV/AV
ANT/CATV
Auto Program
Fine Tune : 0
Add/Erase
Channel
CH
Move Sel.
TV
ANT
Exit
16061510-CHAPTER 2 12/13/02 11:44 AM Page 14

CHAPTER TWO: TV OPERATION 15
TV OPERATION
Adding and Erasing Channels (Manual Method)
You can view any channel
(including an erased channel) by
using the number buttons or
UP/DOWN buttons on the remote
control.
3
Press the LEFT/RIGHT
arrow buttons to select
the channel you want to
add or erase.
4
Press the DOWN arrow
button to select “Sel.”.
Press the RIGHT arrow
button to select “Added”
or “Erased”.
Press the MENU button to
exit.
2
Press the DOWN arrow
button to select
“Add/Erase”, then press
the RIGHT arrow button to
access the Add/Erase
menu.
TV/AV
ANT/CATV
Auto Program
Fine Tune : 0
Add/Erase
Channel
CH
Move Sel.
TV
ANT
Exit
1
Press the MENU button to
display the menu.
Press the DOWN arrow
button to select the
Channel icon.
Press the RIGHT arrow
button once to access the
Channel menu options.
TV/AV
ANT/CATV
Auto Program
Fine Tune : 0
Add/Erase
Channel
CH
Move Sel.
TV
ANT
Exit
Channel : ANT 3
Sel. : Added
Channel
CH
Move Sel. Exit
Add/Erase
16061510-CHAPTER 2 12/13/02 11:44 AM Page 15

16 CHAPTER TWO: TV OPERATION
TV OPERATION
1
Press the MENU button to
display the menu (the
Picture menu is
automatically displayed).
Press the RIGHT arrow
button to select Mode.
Mode : Custom
Adjust
Color Tone : Normal
Size : Normal
Digital NR : Off
Tilt : 0
Picture
CH
Move Sel. Exit
Customizing the Picture
You can use the on-screen menus to change the contrast, brightness, tint, color, and sharpness
according to personal preference. (Alternatively, you can use one of the “automatic” settings. See next
page.)
3
Press the UP/DOWN arrow buttons to select the item you want
to adjust.
Press the LEFT/RIGHT arrow buttons to increase or decrease
the value of a particular item.
4
Press the MENU button to exit.
2
Repeatedly press the
RIGHT arrow button until
“Custom” is selected.
Press the DOWN arrow
button to select “Adjust”,
then press the RIGHT
arrow button to display the
Adjust menu.
Adjust
Contrast 100
Brightness 50
Sharpness 50
Color 50
Tint G 50 R 50
Picture
CH
Move Sel. Exit
After adjusting an item, the gauge will
automatically disappear (after about 3 seconds).
16061510-CHAPTER 2 12/13/02 11:44 AM Page 16

CHAPTER TWO: TV OPERATION 17
1
Press the MENU button to
display the menu. (the
Picture menu is
automatically displayed)
Press the RIGHT arrow
button to select Mode.
Mode : Custom
Adjust
Color Tone : Normal
Size : Normal
Digital NR : English
Tilt : 0
Picture
CH
Move Sel. Exit
2
Press the RIGHT arrow button to select the “Dynamic”
“Standard,” “Movie” or “Custom” picture setting.
Press the MENU button to exit.
TV OPERATION
Using Automatic Picture Settings
Your TV has automatic picture settings (“Dynamic”, “Standard” and “Movie) that are
preset at the factory. You can activate these by pressing P.STD (or by making a
selection from the menu). Or, you can select “Custom” which automatically recalls
your personalized picture settings.
• Choose Dynamic for viewing the TV during the day or when there is bright light in the room.
• Choose Standard for the standard factory settings.
• Choose Movie when viewing a movie.
• Choose Custom if you want to adjust the settings according to personal preference.
Simply press the P.STD
button on the remote
control to select one of
the standard picture
settings.
Alternate method:
16061510-CHAPTER 2 12/13/02 11:44 AM Page 17

18 CHAPTER TWO: TV OPERATION
TV OPERATION
1
Press the MENU button to
display the menu.
Press the RIGHT arrow
button to access the
Picture menu options.
Mode : Custom
Adjust
Color Tone : Normal
Size : Normal
Digital NR : Off
Tilt : 0
Picture
CH
Move Sel. Exit
2
Press the DOWN arrow
button to select Color
Tone.
Press the RIGHT arrow
button to select “Cool2”,
“Cool1”, ”Normal”,
“Warm1” or “Warm2”
according to personal
preference.
3
Press the MENU button to
exit.
Mode : Custom
Adjust
Color Tone : Normal
Size : Normal
Digital NR : Off
Tilt : 0
Picture
CH
Move Sel. Exit
Changing the Color Tone
Changing the Screen Size
• Normal : Sets the picture to 4:3 normal mode.
This is a standard TV screen size.
• Zoom : Sets the picture to Zoom mode.
• 16:9 : Sets the picture to 16:9 mode.
1
Press the MENU button to
display the menu.
Press the RIGHT arrow
button to access the
Picture menu options.
Mode : Custom
Adjust
Color Tone : Normal
Size : Normal
Digital NR : Off
Tilt : 0
Picture
CH
Move Sel. Exit
2
Press the DOWN arrow
button to select “Size”.
Press the RIGHT arrow
button to select “Normal”,
“Zoom” or “16:9”.
3
Press the MENU button to
exit.
Mode : Custom
Adjust
Color Tone : Normal
Size : Normal
Digital NR : Off
Tilt : 0
Picture
CH
Move Sel. Exit
16061510-CHAPTER 2 12/13/02 11:44 AM Page 18
Other manuals for B27TF685
1
Table of contents
Other RCA TV DVD Combo manuals

RCA
RCA Scenium D34W135D User manual

RCA
RCA 20F501TDV User manual

RCA
RCA D52W27D User manual

RCA
RCA 9V401TD User manual

RCA
RCA D52W27D User manual

RCA
RCA 20F502TDV User manual

RCA
RCA 13R400TD User manual

RCA
RCA 13R400TD User manual

RCA
RCA L40HD33D - LCD/DVD Combo HDTV Quick start guide

RCA
RCA L40HD33D - LCD/DVD Combo HDTV User manual

RCA
RCA 19LB30RQD User manual

RCA
RCA TruFlat 24F500TDV User manual

RCA
RCA SCENIUM L37WD14 User manual

RCA
RCA L22HD34D User manual

RCA
RCA l26wd26d - LCD HDTV w/ DVD Player User manual

RCA
RCA RLCDV3282A User manual

RCA
RCA 26LA30RQD User manual

RCA
RCA 26LB30RQD User manual

RCA
RCA 13.3" LED HDTV DVD Combo User manual

RCA
RCA TruFlat BD20TF10 User manual