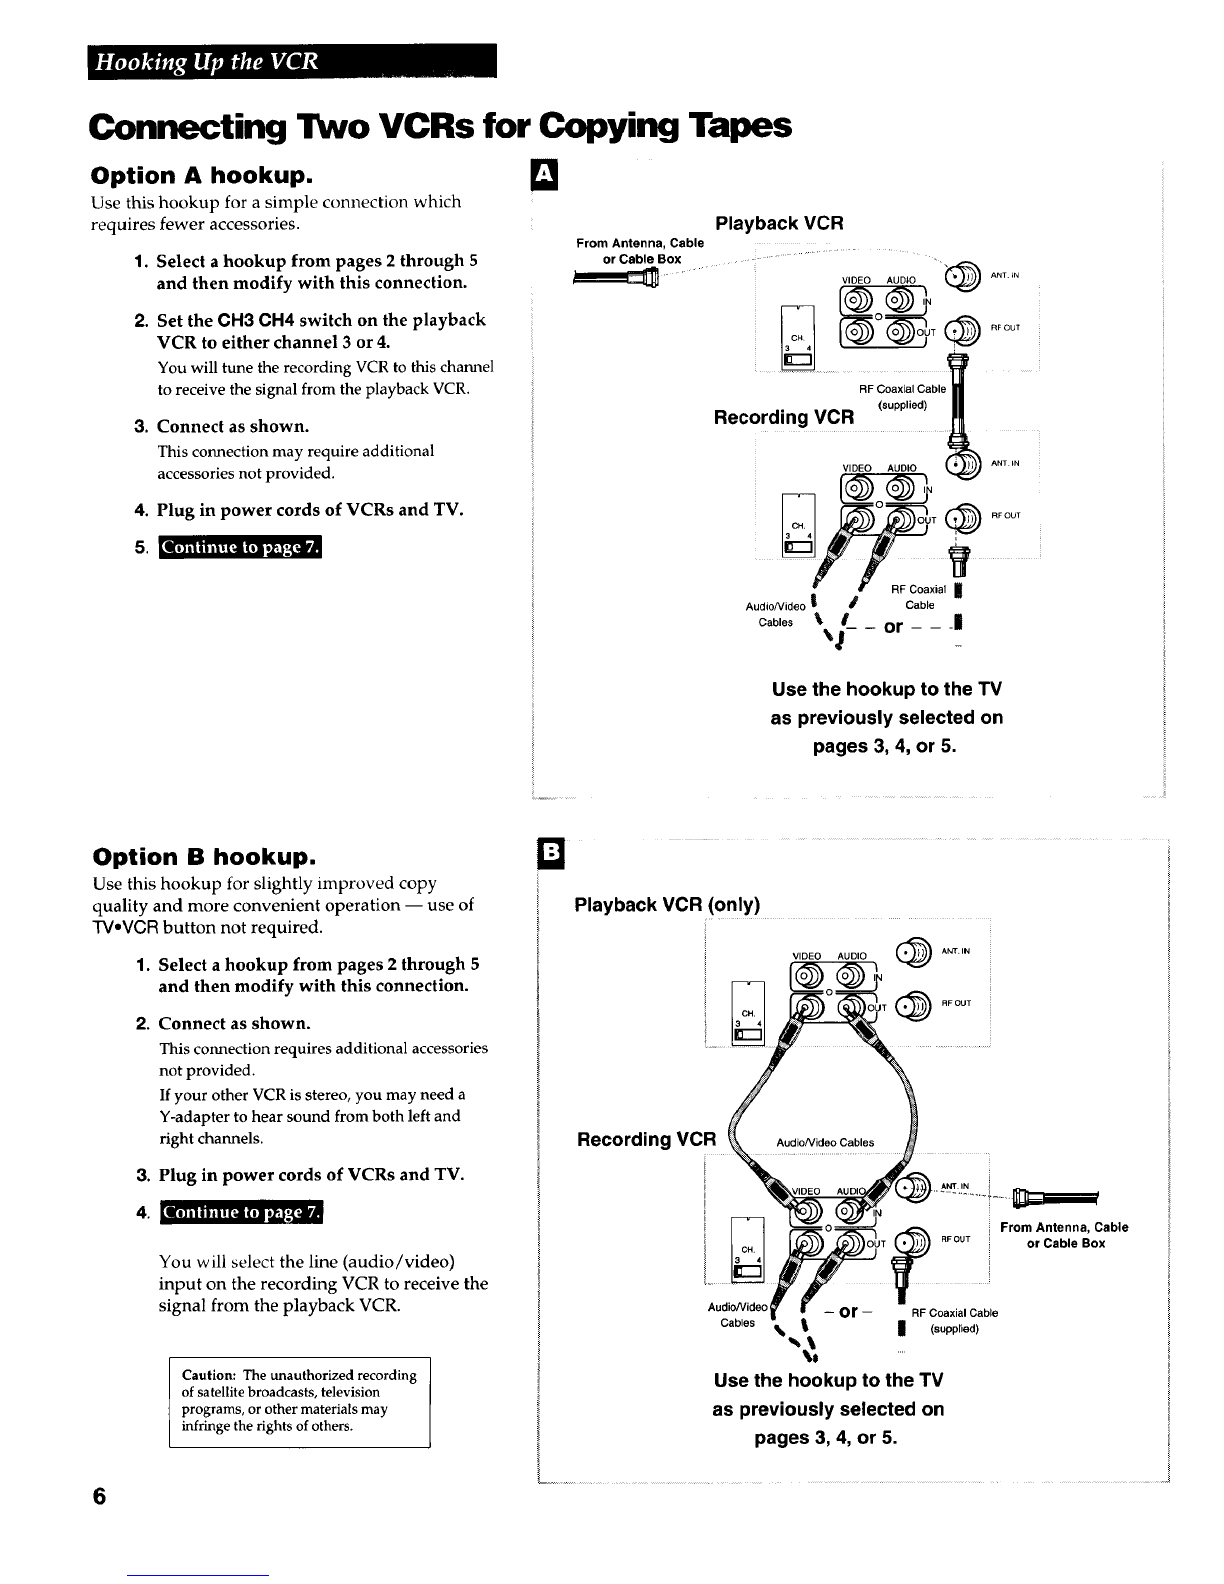
Connecting Two VCRs for Copying Tapes
Option A hookup.
Use this hookup for a simple connection which
requires fewer accessories.
1. Select a hookup from pages 2 through 5
and then modify with this connection.
2. Set the CH3 CH4 switch on the playback
VCR to either channel 3 or 4.
You will tune the recording VCR to this channel
to receive the signal from the playback VCR,
3. Connect as shown.
This connection may require additional
accessories not provided.
4. Plug in power cords of VCRs and TV.
0
Playback VCR
From Antenna, Cable
or Cable Box ...... ..... .......................... ,
...... "Sog®......
Recording VCR (supplied)
......
AudioNideo | J Cable
Cables _'_1_- -or - - 1
II}illii|t[_ll|lli_'._[I
Use the hookup to the TV
as previously selected on
pages 3, 4, or 5.
Option B hookup.
Use this hookup for slightly improved copy
quality and more convenient operation -- use of
TV,VCR button not required.
1. Select a hookup from pages 2 through 5
and then modify with this connection.
2. Connect as shown.
This connection requires additional accessories
not provided.
If your other VCR is stereo, you may need a
Y-adapter to hear sound from both left and
right channels.
3. Plug in power cords of VCRs and TV.
ko] ill iil