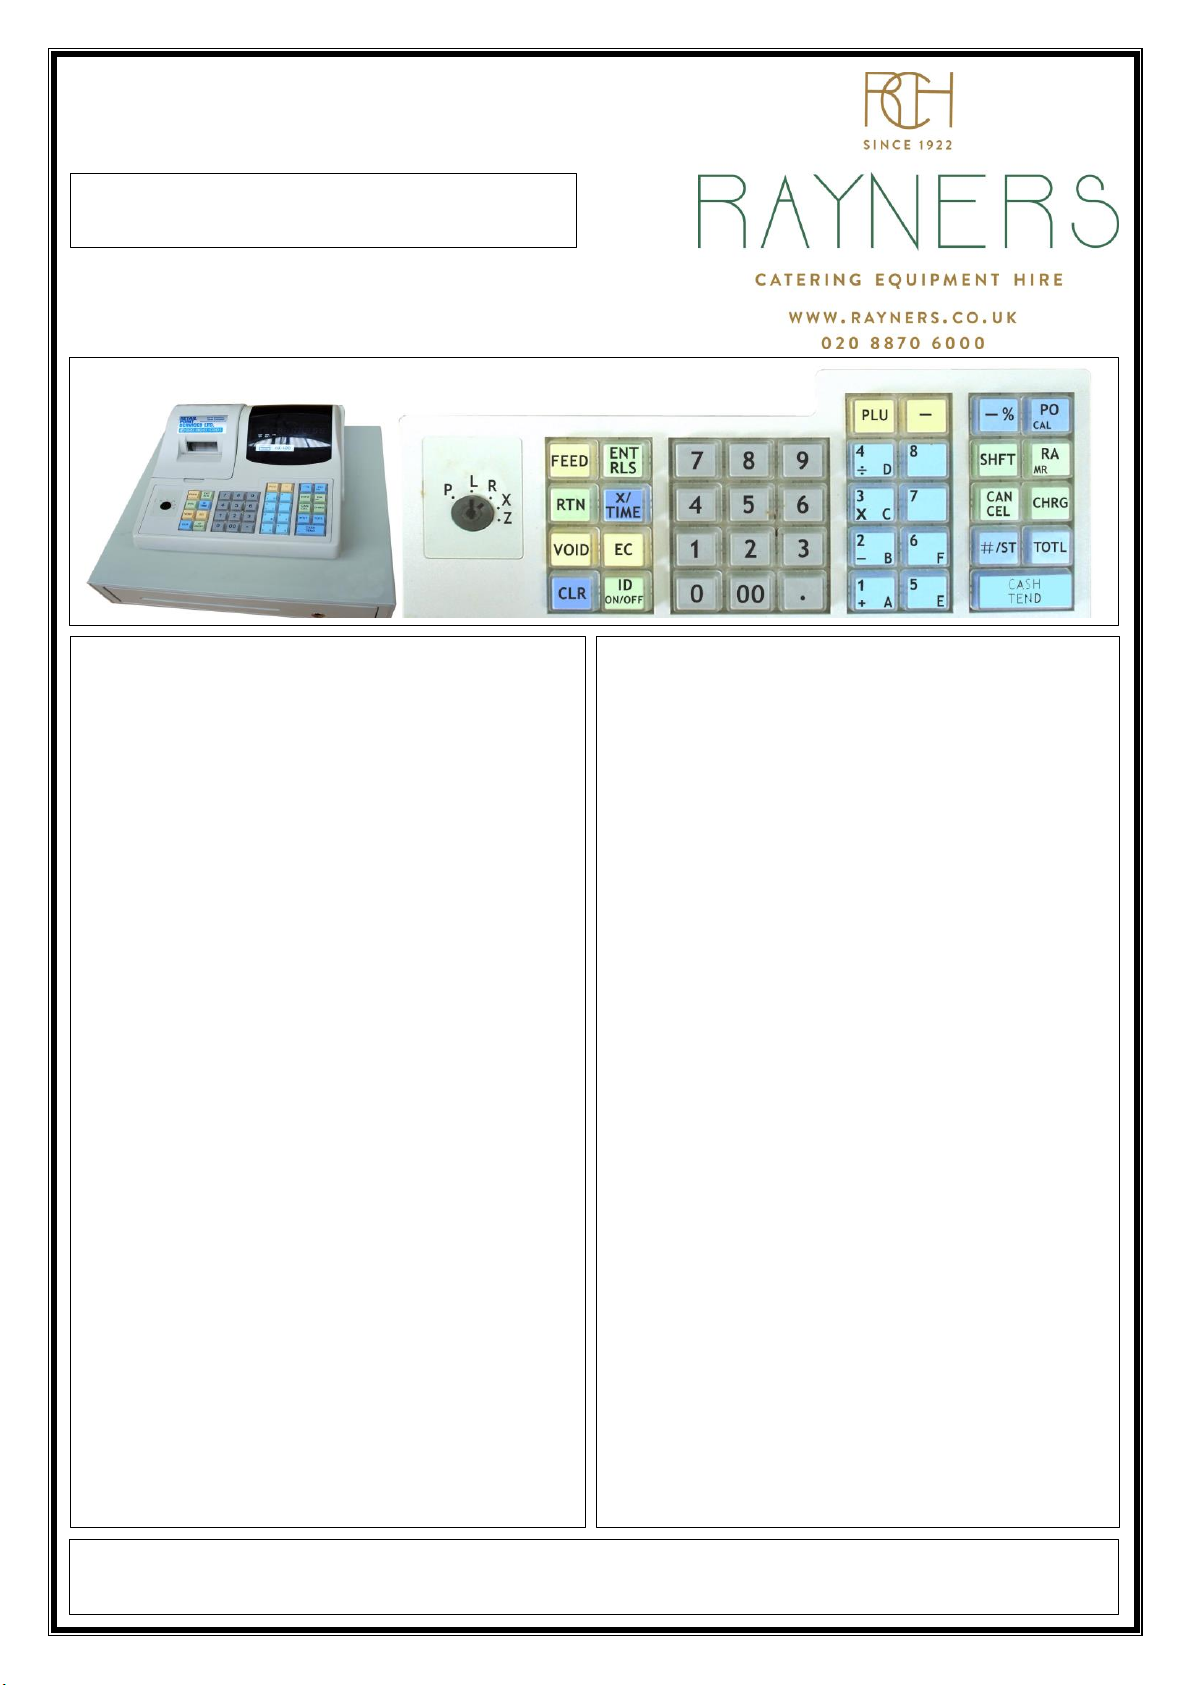
Read instructions carefully before use
INITIALIZING
1. Plug into a 13 amp socket
2. The cash register will come with a till roll
3. Turn key to position (L) and remove plug from the
mains, turn key to position (Z/P) plug back into
the mains and turn on while holding down key
(CL) until------- is displayed, turn the key back to
the (L) position.
4. To set the date turn key to the (ZP) position press
white button (1) followed by (X/TIME). Enter the
date as follows: for example 28 Feb 2012 enter
20120228 (yy-mm-dd). Press button (CA/TEND)
then button (C) to clear.
5. To set time press white button (2) followed by the
(X/TIME) button, enter the time using 24hr
format for example for 3.20pm enter 1520, for
3.20am enter 0320. (Please note that the first 0
will not show on the display). Press (CA/TEND) to
set, then (C) to clear the screen. Turn key to
position (R) press button (X/TIME) once to view
the time, twice to view the date.
VENDING
1. Enter the sale amount on the keypad, press
button marked (1) repeat for different amounts
making sure you press button (1) after each
amount to maintain running total.
To repeat the same amount press button (1)
continuously. To cancel single transaction press
button (C) . When the sale is complete
Press CASH/TEND button the cash total will now be
displayed on the screen and the draw will open
automatically.
VOID LAST ENTRY IN CURRENT TRANSACTION
BEFORE THE CASH TEND BUTTON HAS BEEN
PUSHED.
1. To delete an entry after the (1) button has been
pushed, enter the amount to be deleted then
press the Void button, press the BLUE button
marked (1) continue with the sale or press the
CASH/TEND button, the deleted amount will
automatically be deducted from the end total.
VOID SALE AFTER A TRANSACTION HAS BEEN
FINALIZED
1. Enter the full amount to be deleted, press the
VOID button, press the CASH/TEND button the
LED screen will display the cancelled amount.
OPERATOR READINGS
1. Turn key to position (X) then press CASH/TEND this
will print total of the last session. For daily takings
turn key to (Z) and repeat.
ERROR
1. If an error occurs the letter (E) will appear on the
LED screen, press the (C) button the LED screen
will display (0.00), continue as normal. Any
previous entries will be saved.
In the event of a breakdown or unsatisfactory working of hired equipment Rayners Catering Hirer Ltd should be notified of the fault. No attempt should
be made to repair the item unless permission has been granted by Rayners Catering Hire to do so. No responsibility will be accepted by Rayners Catering
Hire for any accident or damage resulting from the use of equipment hired whatever the cause.