Ready Rack HW-1 Datasheet

ASSEMBLY INSTRUCTIONS
& PARTS LIST
Hose Winder
WASH • DRY • STORE • PROTECT
ITEM#:HW-1

2
PARTS
ALL PARTS SHOWN BELOW:
- HW-1 Body
- HW-1 Handle/Spindle Assembly
- Male HW-1 Blade
- Female HW-1 Blade
HARDWARE NEEDED:
- Philips Head Screw Driver
- Socket Wrench
- 11/16” and 3/4” Socket
- 11/16” and 3/4” Wrench
- Set of Hex Wrenches
Use the below links on the assembly instructions
HW-1 Assembly Video: https://www.youtube.com/
watch?v=JdYI1ffYZw4
How to Operate the HW-1 Video: https://www.youtube.
com/watch?v=hojqUw7VXXM&t=34s
We recommend that the HW-1 be mounted
to our Mobile Hose Carts (see last page)
or optional trailer hitch mount (TM-2).
MOUNTING RECOMENDATIONS:
VIDEO TUTORIALS:
HW-1 Body
Male & Female HW-1 Blades
HW-1 Handle/Spindle Assembly

3
Start by having one person to take the
body of HW-1 and hold it against the
desired product that is compatible with
it. The HW-1 is also compatible with
any 2 1/2 inch square posts.
Have the second person insert the
bolts, washers, locking washers, then
nuts to the side of HW-1 Mounting
Bracket be sure everything is very
tight and secure to the mounting
bracket so it can withstand the weight
of winding hoses.
Adjust the body components into their
respective positions and secure both
knob fasteners.
STEP 1 STEP 2 STEP 3
4
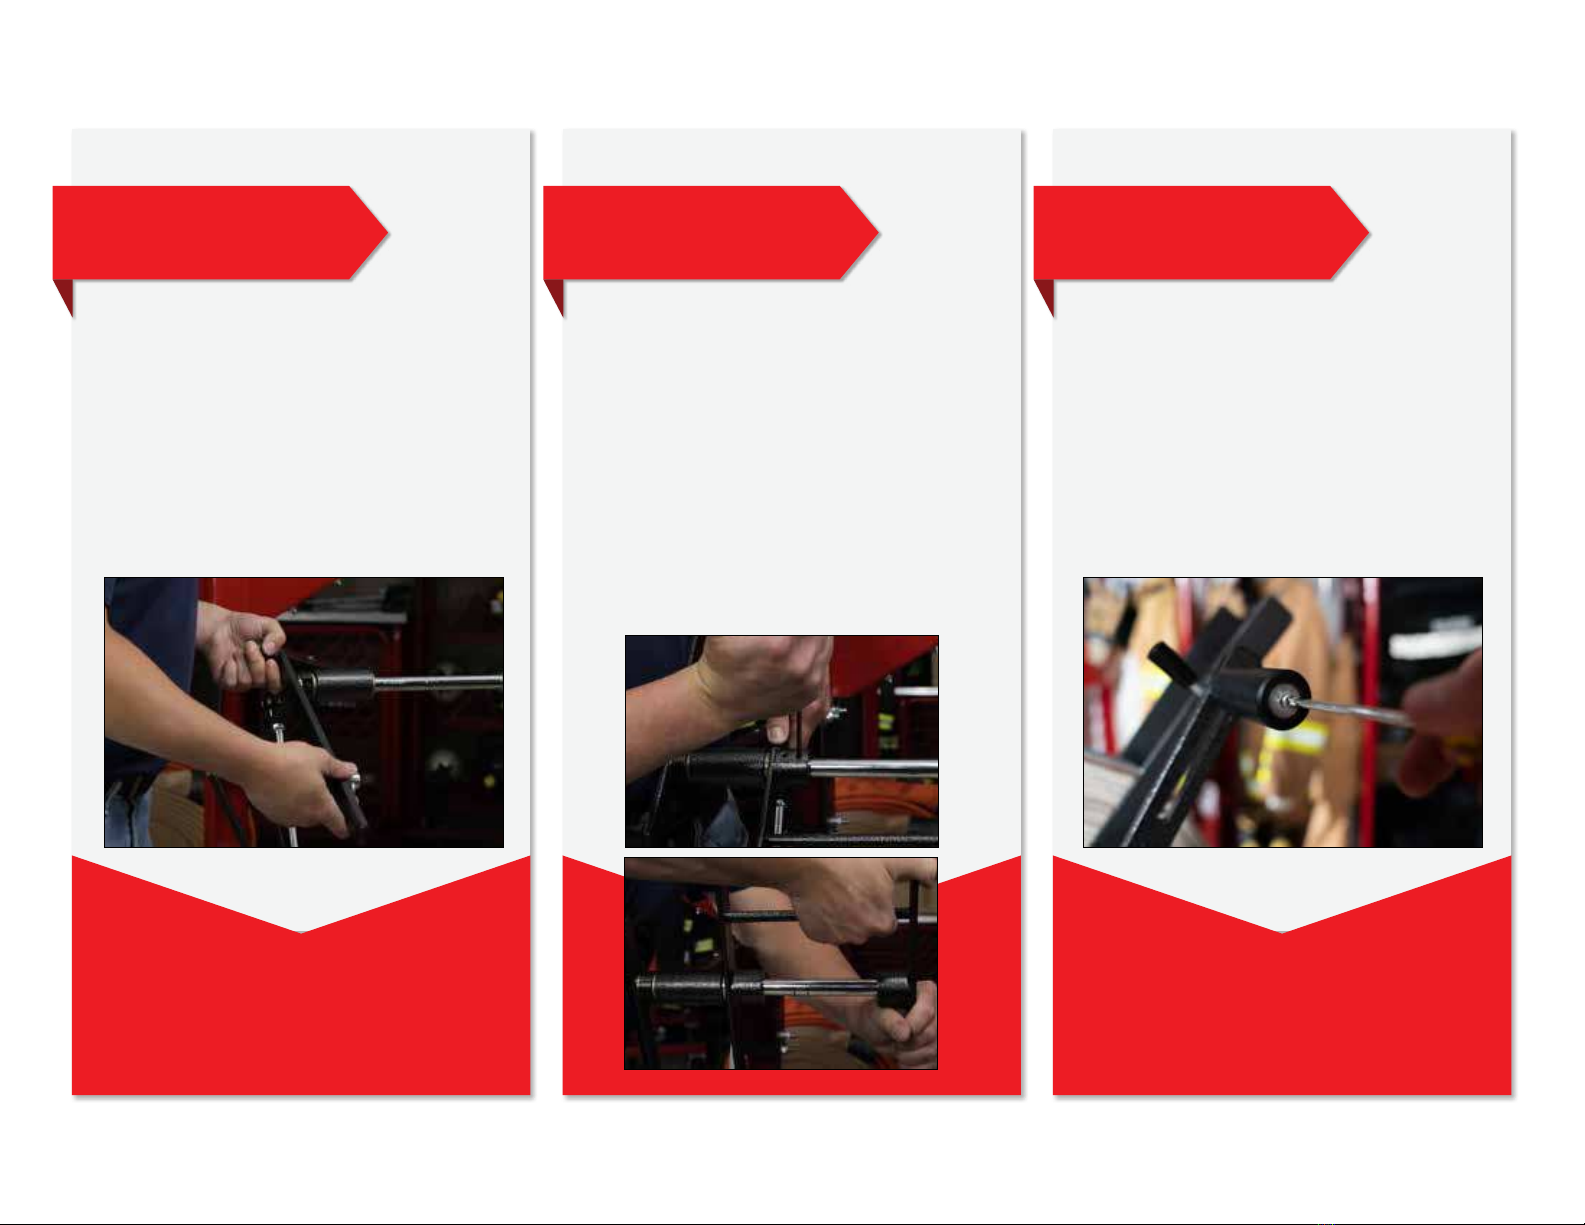
Take the Handle/Spindle Assembly
and slide through the spindle hole
of the upper arm of the HW-1 Body.
Make sure the handle is on the oppo-
site side of the hose threading rollers.
Grab the male guide blade and slide
it on to the other side of the now
attached handle. When sliding it
through the handle’s rail, be sure the
at section lines up with the screws.
Then tighten the screws with your hex
wrench. Next grab the female guide
blade and t it onto the rail with the
elevated hole going towards the body
of the HW-1.
You can now use your Philips head
screwdriver to tighten the screw at
the end of the handle. For further
information on assembly and
operation of the hose winder, please
see video links on the parts page.
STEP 4 STEP 5 STEP 6

Shown: Hose winder attached to the Mobile Hose Cart (sold seperate)
To watch the assembley video, type this link into your browser: https://www.youtube.com/watch?v=JdYI1ffYZw4
Please visit readyrack.com/guides to nd
more information and other assembly
instruction guides.
GROVES INCORPORATED
818 TRAKK LN, WOODSTOCK, IL 60098
WWW.READYRACK.COM
"WE TAKE CARE OF THE GEAR THAT TAKES CARE OF YOU"


