Real IMMERSIVE SYSTEM User manual

1 (17)
REAL
®IMMERSIVE SYSTEM
USER MANUAL

2 (17)
Table of Contents
Warning 3
Device Description 3
Indication for Use 4
Contraindications 4
Warnings 4
Precautions 4
Potential Adverse Eects/Events 4
Operating Prole 5
Operating Procedure 5
• Getting Started & Charging Components 5
• Internet Connectivity 6
• Start-Up System for Patient Use 6
• Therapy Activities 8
• System Removal 9
• Software Description 10
Technical Specications 15
Symbol Glossary 15
Technical Information 15

3 (17)
WARNING! CAREFULLY READ ALL INSTRUCTIONS PRIOR TO USE. OBSERVE ALL
WARNINGS AND PRECAUTIONS NOTED THROUGHOUT THESE INSTRUCTIONS.
FAILURE TO DO SO MAY RESULT IN COMPLICATIONS.
DEVICE DESCRIPTON
The REAL
®
Immersive System is a digital hardware and software medical device plat-
form using a combination of virtual environments and full presence tracked avatars for
visual feedback. The use of the REAL Immersive System is intended to be in a clinical
environment, supervised by a medical professional trained in rehabilitation therapy.
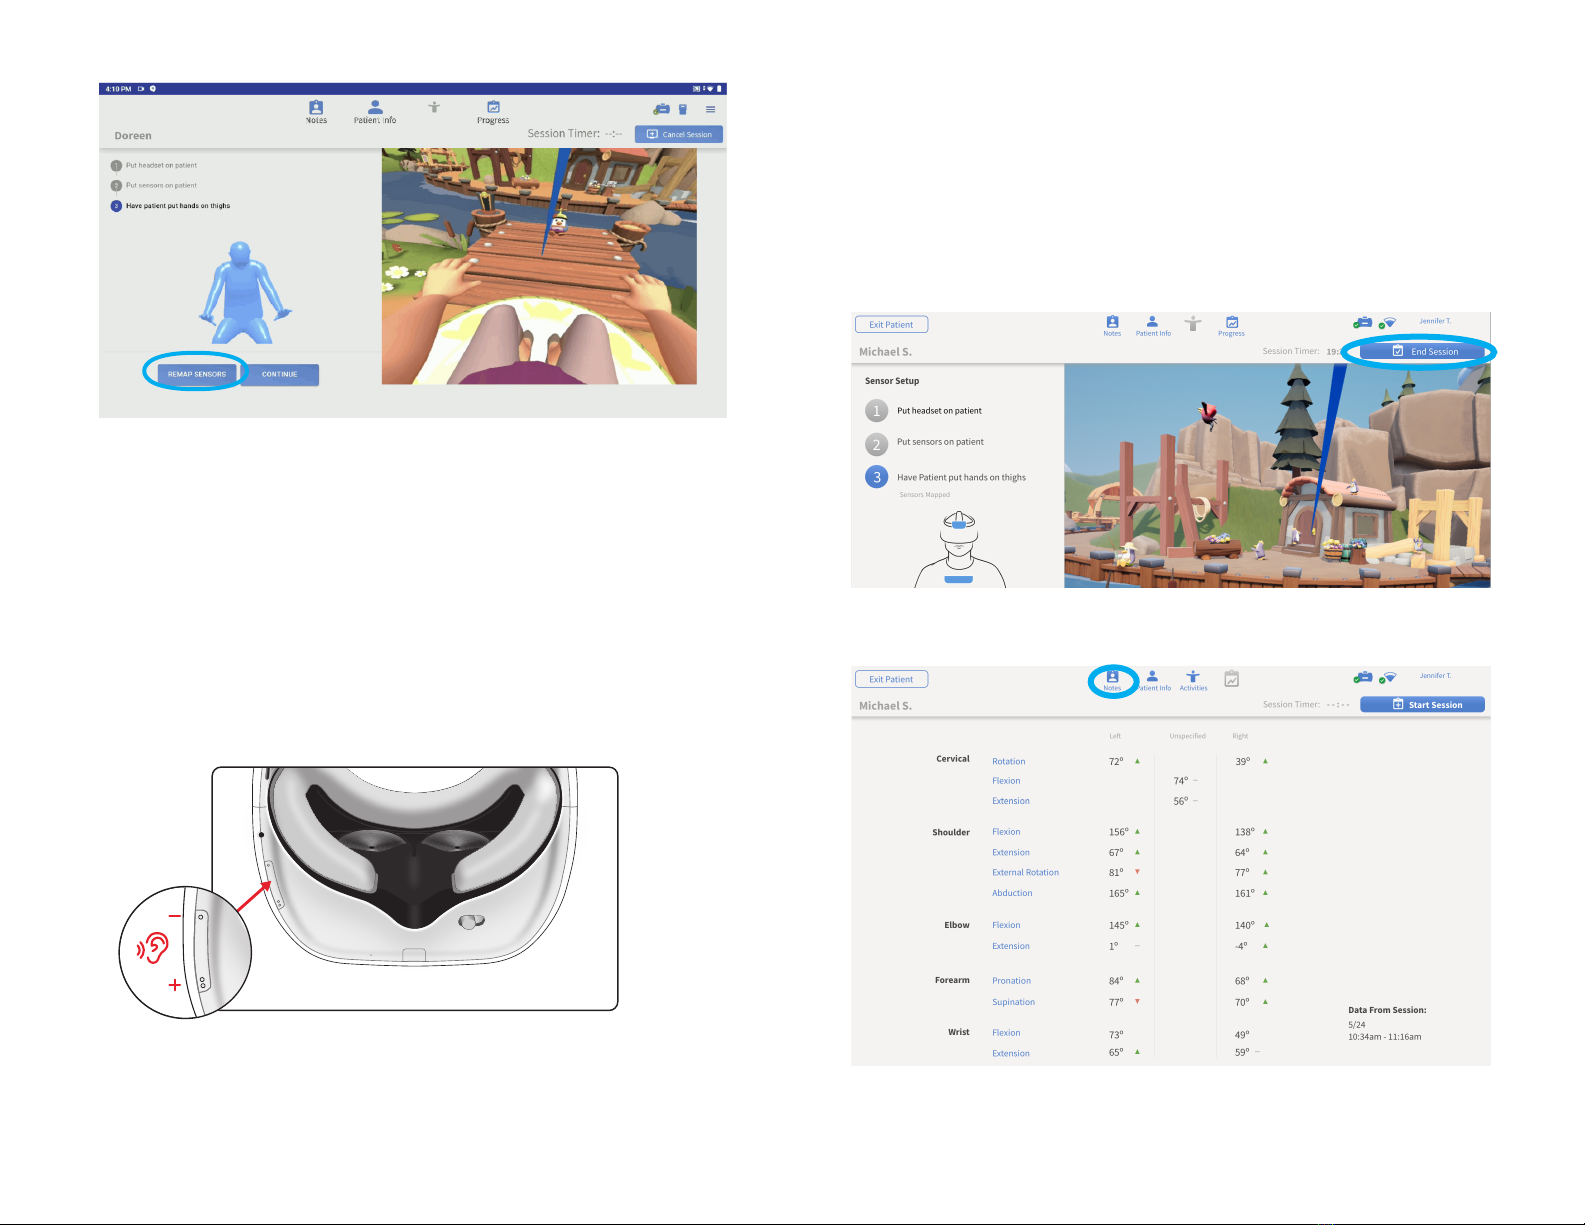
The REAL Immersive System consists of a clinician tablet, headset (HMD), small sensors,
large sensor, sensor charger, router, router battery, headset controller, power cords,
and
USB cables. Note: Bands sold separately.
Tablet is tted with a touch screen, a power/lock key that turns the component on or
o, and a charger/accessory port.
The headset contains a power button that turns the component on or o and a charger/
accessory port. The headset also provides visual feedback of virtual reality applications
in concert with the REAL Immersive System tablet and small and large sensors.
Large and small sensors (WTM and WSMs) are equipped with mechanical and
electrical components that measure motion and direction in physical space and then
translate that information into a virtual environment.
The sensor charger powers the sensors.
Headset controller (Only to be used in certain troubleshooting and administrative
tasks. Not used during patient therapy.)
At full charge, the entire system can last at a minimum of 60 minutes and it is recom-
mended that a therapy session does not exceed 60 minutes. Please suciently charge
all components between use for a minimum of 60 minutes.
In the event of electromagnetic disturbances, the performance of the REAL Immersive
System may be aected.
The REAL Immersive System is a Type B Applied Part.
Frequently used features and functions:
Headset
• Plug headset power cord into wall outlet and headset to charge device.
• Press power button to power on headset or restart headset. The power
button is on top of the headset.
Headset Controller
• Buttons on the controller are used to control power, connect to headset,
access settings, or control volume.
Large Sensor and Small Sensors
• Components are removed or placed back into the sensor charger
(charging station) to activate or charge device.
• Components are placed into the sensor bands.
Tablet
• Plug tablet power cord into wall outlet and tablet to charge device.
• Press power button to power on tablet or restart tablet. The power button is
on the edge of the device.
• User Interface:
- Selecting the application
- Logging in
- Adding or selecting patient
- Initializing and syncing to sensors
- Selecting, starting, modifying, or ending therapy session
- Viewing data
- Logging out
Sensor Charger
• Plug sensor charger power cord into wall outlet and sensor charger to power
on device to charge sensors.
Router/Router Battery
• Power router with router battery.
•
Plug router battery power cord into wall outlet and router battery to charge device.
Sensor Bands
• Place or remove sensor bands on or from patient.
There is no preventive inspection, calibration, and maintenance necessary for the
REAL Immersive System besides the initial set up procedure. During the one-year
product lifespan of the REAL Immersive System, the system will continue to perform
safely without any routine maintenance. No parts within the REAL Immersive System
will require inspection nor maintenance by a service personnel to ensure basic safety
during the one-year product lifespan. Circuit diagrams and calibration instructions
are not provided because service or parts repair is not necessary.
At the end of the one-year product lifespan, the user should contact the local REAL
representative or Penumbra if the following event occurs:
• The system no longer stays powered on and connected through the entire
recommended duration of a therapy session.
Supply mains are electrically isolated in medical equipment to maintain basic safety.
The full expected latency of the device, including movement detection, processing,
and visual representation is 35 milliseconds or less. This value is considered minimal
and suciently low enough so that movement can be quickly detected.

4 (17)
INDICATION FOR USE
The REAL
®
Immersive System is an immersive virtual reality and display system that
interactively displays and tracks upper-extremity rehabilitation exercises for adult
patients using a combination of virtual environments and full presence tracked
avatars for visual feedback. These rehabilitation exercises are intended to be
conducted in a seated position in a clinical environment and prescribed and
supervised by a medical professional trained in rehabilitation therapy.
CONTRAINDICATIONS
There are no known contraindications.
WARNINGS
If a patient complains of motion sickness, dizziness, headache, eye strain, or fatigue
when using the device, stop use of device immediately.
Use caution when using this device if a patient has a history of vestibular issues or
motion sickness.
PRECAUTIONS
Ensure a safe environment for the patient while performing activities with the device
(e.g. remove any surrounding obstacles and ensure that the patient is unlikely to trip
or fall). As this device is to be used for upper body rehabilitation, we recommend that
the patient remain seated to avoid a fall.
Be aware of the patient’s limitations in range of motion and avoid device or program
use that could lead to excessive gestures that could injure a patient.
Extended use of the headset can cause discomfort or eye strain.
Incorrect placement of the sensors on the patient may result in the avatar appearing
incorrectly or distorted on the headset and tablet.
Damage (mechanical and electrical) may result if the tablet, headset, sensors, router,
router battery, and/or sensor charger are dropped or struck against another object.
Device is not intended for continued use if dropped from higher than 1 meter.
Do not touch the router and patient at the same time. Patients are not allowed to
touch the router at any time.
During use, the surface of the equipment will not exceed 41 °C.
Sensors will transmit inaccurate position data if used near metal including, but not
limited to, wheelchairs, walkers, utility carts, smart watches, and mobile devices.
Headset tracking can be lost or compromised if large objects obscure the headset.
To avoid risk of electric shock, this equipment must only be connected to a supply
mains with protective earth.
At no time should liquid products be allowed near any device component.
No modication of this equipment is allowed.
Use of accessories, transducers, and cables other than those specied or provided
by the manufacturer of this equipment could result in increased electromagnetic
emissions or decreased electromagnetic immunity of this equipment and result in
improper operation.
Portable RF communications equipment (including peripherals such as antenna ca-
bles and external antennas, smart watches, and mobile devices) should be used no
closer than 30 cm (12 inches) to any part of the REAL Immersive System, including
cables specied by the manufacturer. Otherwise, degradation of the performance of
this equipment could result.
Use of this equipment adjacent to or stacked with other equipment should be avoided
because it could result in improper operation. If such use is necessary, this equipment
and the other equipment should be observed to verify that they are operating normally
.
Accessories such as power adapters and cords should not be replaced by the end
user and should only be replaced by Penumbra. Any changes or replacements of
accessories will likely impact compliance of REAL Immersive System.
Use of this device should be in a secure information technology environment. Out-
bound https communication channels must be open.
POTENTIAL ADVERSE EFFECTS/EVENTS
Visual stimulation through head-mounted displays have a small possibility of provok-
ing an epileptic seizure. Should this occur, stop using the device immediately. Other
possible complications include, but are not limited to, the following:
• claustrophobia
• discomfort or pain in the head
or eyes
• disorientation/vertigo/dizziness
• drowsiness
• eye strain
• falls or fractures
• headache/migraine
• insomnia
• light-headedness
• motion sickness
• nausea
• pain
• seizure
• repetitive strain injury
• vision problems
Should any of the above occur, stop using the device immediately.

5 (17)
OPERATOR PROFILE
Operators of the REAL
®
Immersive System should be trained in rehabilitation therapy.
Follow hospital guidelines for use and access to account login credentials. The same account
login credentials shall not be used by more than one REAL System at any given time.
Note: These rehabilitation exercises are intended to be conducted in a clinical environment
and prescribed and supervised by a medical professional trained in rehabilitation therapy.
Rehabilitation therapy treatment and technique decisions will vary based on the clinical
judgement of the treating medical professional. A medical professional must be present at
all times to provide direct supervision throughout course of therapy.
OPERATING PROCEDURE
Note: Prior to rst time use, router must be congured and connected to the local internet.
Note:
Over-the-air software updates may occur throughout the lifespan of the REAL System.
User may be prompted/required to complete software updates to continue using the product.
Note:
These rehabilitation exercises are intended to be conducted in a seated position.
The patient must be seated at all times when the system is in use.
SECTION 1: GETTING STARTED AND CHARGING COMPONENTS
1. Remove REAL Immersive System case from the shipping container.
2. Connect the REAL Immersive System
case to its power cord (AC adapter
power cord). Plug
the power cord into
a grounded electrical outlet, making
sure that it is the same voltage as
indicated on the unit nameplate.
Ensure the power receptacle is
connected to a supply mains with
protective earth.
3. Ensure sensors with white sides facing forward are in their corresponding size
slots on the sensor charger. LED lights on sensors will show the following:
4. Ensure the headset is connected to its power cord (USB-C cord). LED lights
on top of headset will only show blinking green or solid green to indicate
charging status.
5. Ensure the tablet is connected to its power cord (USB-C cord).
Solid Green: Full battery
LED Off: Battery dead or sensor asleep
Solid Blue: Connected
Blinking Red: Low battery, charging
Blinking Green: Charging
Blinking Blue: Connecting

6 (17)
SECTION 2: INTERNET CONNECTIVITY
1. Turn on tablet by pressing power button for approximately 5 seconds.
(May take up to 30 seconds if tablet was fully drained of battery).
2. Launch TherapyView™ if it is not already open.
3. On the log in page, click on the “Network Setup” button.
4. Enter the username and password below to login into the router:
a. Username: realadmin
b. Password: realsystem
5. Connect using the desired wireless network name and password.
a. To connect using a network name and password:
i. Select “Wireless 5 GHz” from the menu. If the desired
network is a not a 5 GHz network, select “Wireless 2.4 GHz”.
Wireless 5 GHz is preferred to Wireless 2.4 GHz.
ii. Select “Scan” to search for local networks.
iii. Select “Connect” next to the desired network.
iv. Enter the password into the corresponding eld.
v. Select “Save”.
vi. The REAL Immersive System should now be connected.
6. Click the button at the top left of the screen to return to the TherapyView
home screen.
Continue to Section 3 when the components are suciently charged, and the system
has secure internet connectivity.
SECTION 3: START-UP SYSTEM FOR PATIENT USE
1. Unplug power cords from tablet and headset when ready to use.
2. If tablet is not turned on, turn on.
3. Turn on headset by pressing and holding power button for
approximately 5 seconds.
4. Ensure the patient is in a seated position away from metal components and
remains seated at all times for the duration of the therapy session.
5. Place headset on patient’s head in the sequence numbered below. Patient
can immediately begin visually interacting with the environment.
Note: Size of headset strap and interpupillary distance can be adjusted for t. Top of
head pad may be removed temporarily for better t on larger heads.
Note: Patient can keep eyeglasses on.
6. Remove sensor bands from reusable packaging (sold separately). Each
patient should have their own sensor bands and bands should not be shared
between patients.
7. Remove all sensors from sensor charger.
Hold 5 seconds
1
2
3
4

7 (17)
8. Place small sensors onto bands by sliding them into elasticized loops. For
the hand sensor bands, tighten elasticized loop using the buckle. Place large
sensor into pocket of shoulder band.
9.
Once sensors are placed in the bands, put each band onto its corresponding
body part (see image below). Connect hook and loop fasteners of shoulder
band if desired. Make sure the elbow sensor is sitting behind the patient’s
elbow. Adjust bands for comfortable t, if necessary
.
10. Log in to TherapyView on the tablet. Add new patient or select patient from
directory; edit patient information as needed.
Front View Back View
11. Once a patient is selected or created, the healthcare provider (HCP) may
initiate the session by pressing “Start Session.”
12. Have the patient sit in a neutral position, facing forward with hands on knees
or thighs. Press the “Map Sensors” button on the tablet screen to calibrate
the sensors.
13.
Patient’s avatar appears immediately after mapping sensors. Edit the default
avatar settings to match the patient. If the avatar looks correct, press “Continue”.
If not, recalibrate the sensors by selecting the “Remap Sensors” button.

8 (17)
14. The HCP may navigate to additional therapy activities by selecting the corre-
sponding icon from the display. Once the activity is loaded, the HCP can
press the “Start Session” button to begin the activity.
See Section 6 for more information.
Section 4: THERAPY ACTIVITIES
1. Conrm patient’s avatar in VR space corresponds to actual patient’s
physical movement.
2.
Conrm application audio can be heard but doesn’t block out HCP’s
communication; adjust volume on headset as needed
.
3. Conduct rehabilitation session as planned. (See Section 6 which includes a
software description for details of therapeutic activities).
4. Always remain with the patient throughout therapy session to provide
direct supervision.
5. Monitor patient view on tablet; select and begin new activities as desired.
Note: If sensors lose synchronization or headset loses tracking, turn o entire
system then back on to reset. Headset is turned o and on using the power button.
TherapyView should be relaunched on the tablet. Sensors are turned o and on by
placing them in the powered charging station (while the REAL® Immersive System is
plugged in) and removing them again.
6. When planned therapy activities are complete, press “End Session” on tablet.
Patient will be returned to the Hide and Seek activity.
7. View patient results on tablet. You may also switch to the Notes tab for a
summary of session and activity times.

9 (17)
Section 5: SYSTEM REMOVAL
1. Remove sensors and bands.
2. Remove headset from patient’s head.
3. Power o headset by pressing and holding onto the power button for
approximately 5 seconds.
4. Log out of TherapyView.
5. Clean headset and sensors with institutional approved sanitizing wipes*.
6. Ensure REAL Immersive System Case is plugged in.
7. Connect tablet and headset to their respective power cords.
8. Return all sensors to sensor charger. Red or green LEDs should be noted on
sensors when placed correctly in the charging station.
9. Store and label bands for future individual patient use.
10. Suciently charge all components after each use and prior to next use
for 60 minutes.
Note: Standard operation is to power cycle and relaunch application between therapy
sessions to reestablish system connections.
*Handle the lenses on the headset carefully to avoid smears or scratches. Wipe
lenses with a soft cloth for cleaning as needed. Clean outer and inner plastic
components of headset with institutional approved sanitizing wipe. Do not use
petroleum-based compounds, acids, caustics, or chlorinated solvents to clean
or lubricate any parts. Use only water-based solvents for cleaning.
REAL®Immersive System Case Instructions:
The REAL Immersive System is housed in a travel case that may be locked with the
attached combination lock that secures the zipper. The combination lock should
be turned to the red dot position at all times. If the combination lock is turned away
from the red dot, turn it to the red dot position.
How to reset the combination lock:
1. Set all combination dials to the following: (0-0-0 default)
2. Find the hole located to the right of the dials. Use a paper clip or similar
tool to press down on the reset button until an audible “click” is heard.
3. Set personal combination by turning the dials to display the desired set of
numbers, e.g. 2-8-7.
4. Push the slide button located on the left of the dials towards the direction
of the arrow and the reset button will push back up. An audible “click” will
be heard.
5. Remember the personal combination and repeat the steps above to
reset the personal combination, if necessary.
How to use the combination lock:
1. To unlock: Turn the dials to the correct combination. Push the slide
button on the left of the dial towards the direction of the arrow to unlock.
2. To lock: Put the loop portion of the zipper into the slots of the lock,
then turn the dials randomly to conceal the personal combination to lock.

1 0 (17)
Section 6: SOFTWARE DESCRIPTION
The REAL
®
Immersive System contains a variety of activities that incorporate clinically
recognized, existing therapeutic and functional exercises to facilitate motor and
cognitive rehabilitation as well as activities to support general wellness. Settings for
each activity will involve parameters such as turning on and o avatar features and
environmental factors. While using the REAL Immersive System, the HCP remains
responsible for the patient’s safety and the appropriateness of individual exercises
including range of motion (ROM) attempted and any other limb or joint limitations
unique to that patient.
Hide and Seek
Hide and Seek can be used with or without a displayed avatar tracking the patient’s
upper body as it primarily relies on cervical proprioception and range of motion (ROM).
Hide and Seek puts the patient in a pastoral setting with a number of animated
animals that react to the patient’s acknowledgement of them. Visually scanning the
environment, patients are tasked with nding a small penguin by hovering a blue
gaze pointer on the penguin by turning and rotating their head to exercise their
cervical range of motion. The penguin will then disappear and reappear in a dierent
location. The pointer is positioned to represent the patient’s upper body vertical
midline and is itself a useful tool as some patients in neurorehabilitation have lost
their sense of body position resulting in “midline shift.” The blue pointer provides a
visual, external cue to their true body midline helping them relearn centering themselves.
The Hide and Seek exercise encourages visual scanning of their environment, an
important functional ability, and cognitive recognition of nameable animals, objects,
and environmental locations in their immediate surrounding. This is both the rst
and
last experience for the patient. At the end of the patient’s session, the patient can
visualize overall progress they made during the session in the form of virtual “rewards.”
HCPs may adjust various activity parameters through the tablet.
Catch & Glow
Catch & Glow is designed to help the patient exercise cervical proprioception and
ROM. This activity takes place in a low-stimulation, nighttime environment, where the
patient is tasked to focus on and control a small penguin with their head movement
to catch reies that appear in a specic pattern. This activity provides a range of
challenges to help focus on the patient’s gaze stability, oculomotor and visual control,
and postural and cervical control. The HCP can control the complexity of the activity
by adjusting various activity parameters through the tablet.
Hot Air Balloon
Hot Air Balloon is a family of activities designed to help the patient work on core

1 1 (17)
control, strength, centering, and postural proprioception. By leaning their torso from
a sitting position in a certain direction, and holding it there against gravity, they y a
hot air balloon in that same direction. To y the balloon away and towards themself,
the patient uses thoracolumbar exion and extension, while ying from left to right
involves thoracolumbar exion to the left or right. This set of activities helps provide
a range of challenges focusing on enhancement of trunk control, postural stabili-
ty, and dynamic balance, all of which are foundational to upper extremity function.
HCPs may adjust various activity parameters through the tablet.
Balloon Pilot Activity
Balloon Pilot takes place near the ground. The patient-controlled balloon is tethered
to the ground to limit balloon travel and encourage simple torso centering, trunk
mobility, and dynamic weight shifting. The patient can pilot the balloon on-tether to
nearby interactive objects, such as the trees and the bell.
Bumper Band Activity
Bumper Band takes place halfway up the mountainside. The patient uses trunk
extension, exion, and lateral exion to steer an untethered balloon to bump other
balloons with band members in them, back to the performance stage
.
Summit Rescue Activity
Summit Rescue takes place at the peak of the mountain where the patient has to
steer the balloon to rescue hikers and bring them back to the safety of the chalet.
The patient has to counteract dierent obstacles using cognitive planning, problem
solving, and trunk control movements.
Sunrise
The Sunrise family of activities focuses on simple shoulder exion. The patient
holds their arms out in front of them and raises their arms up and over their head in
a motion that ideally, is pure shoulder exion with a maximum, healthy ROM of 180
degrees. This exercise may be done passively with HCP assistance or actively by
the patient themselves. This exercise encourages postural alignment and symmetrical
seated shoulder exion.
When this motion is initiated, a Sun rises up from beyond the horizon in proportion
to the patient’s shoulder exion ROM. The sun also rotates in the sky and translates
side to side, depending on the patient’s postural symmetry. When the patient’s arms
are horizontally and vertically symmetric, and their torso is in vertical alignment with
their pelvis and head, the sun will be smiling broadly and high in the sky straight
ahead of the patient.
If the patient’s posture exhibits asymmetry or other compensating characteristics,
the sun’s position and the expression on its face will alter from the “ideal” state,
thereby providing the patient an external visual cue as to their posture, and allowing
them to learn via alternative references, what is proper, non-compensating posture.
Maximum shoulder exion ROM achieved during this activity will be stored as a
session output for the HCP’s record. HCPs may adjust various activity parameters
through the tablet
Sunrise Activity
As the patient fully lowers and fully raises their arms to the best of their ability, the
lighting in the virtual world will exhibit night-time or daytime according to the sun’s
position, thus greatly accentuating the activity and feedback of a simple coordinated
arm raise. There is a rep counter on the tree to count the number of reps the patient
completes. Optional mirror therapy setting available in TherapyView.
Harvest Activity
Harvest involves growing a variety of vegetables by raising and lowering one’s arms
a number of times in order to trigger the appearance of day- night cycles. This
activity creates an incentive for the patient to do multiple repetitions of this exercise if
called for by the patient’s rehabilitation plan. Optional mirror therapy setting available
in TherapyView.
Ice Cave Activity
Ice Cave involves freeing a variety of Cave Penguins from ice blocks by raising and
lowering one’s arms a number of times in order to trigger the appearance of day-night
cycles. This activity creates an incentive for the patient to do multiple repetitions of
this exercise if called for by the patient’s rehabilitation plan. Optional mirror therapy
setting available in TherapyView
.

1 2 (17)
Penguin Sports Park
In the Sports Park family of activities, the patient must move their upper extremities
to intercept a Chuckleball™ coming at them, in a time dependent manner. These
activities require quick cognitive processing and visual-motor integration to succeed,
and thus are more advanced activities for a neurorehabilitation patient. Other primary
skills being challenged are reective movements, dynamic postural control, visual
recognition, and motor control. HCPs may adjust various activity parameters through
the tablet.
Chuckleball™Activity
The patient fends o approaching Chuckleballs by deecting them with their hands
or head. This activity is designed to challenge reexive movements, dynamic control,
visual recognition, and motor control.
Chuckleball Arena Activity
Designed to exercise trunk control and functional reach, the patient must defend their
goal using their hands or head as a penguin tries to score with a Chuckleball. Using
cognitive skills, the patient must predict trajectory and reach for a certain location to
block and hit the Chuckleball into the opposing goal or into other characters within the
environment to collect points. The HCP can control how fast the ball travels towards
the patient, the direction and distance the patient must reach to block the ball, and the
number of balls to be kicked at the patients.
Flying Fish Activity
Designed to facilitate trunk stability and functional reach, patients will test their reactive
movement by blocking blue sh with their hands or head or dodging red spiky sh. Fish
may turn from blue sh, which should be deected, to red spiky sh, which need to be
avoided. This requires extra cognitive processing to decide, under time pressure, which
sh should be contacted, and which should be avoided, in addition to predicting where
the sh are coming and integrating proper movement to accomplish the task.
Bird Forest
The Bird Forest family of activities incorporates standard functional exercises including
dynamic reaching and pronation/supination requiring the patient to reach out with one
or both hands to pick up birds and place them into nests. Patients have opportuni-
ties to reach from low to high, high to low, from left to right and vice versa to practice
functional reach. These exercises mimic standard functional exercises that would
be practiced during rehabilitation to help the patient regain skills necessary to live at
home with a degree of functional independence, and perform activities of daily living
(ADL’s) such as unpacking groceries, cooking, unloading a dishwasher, self-care, etc.
HCPs may adjust various activity parameters through the tablet.
Free Birds Activity
In Free Birds, the patient uses functional movements to pick up and place birds into
nests. Optional setting to include pronation and supination therapy by instructing
patients to pick up and place the bird into nests.
Nest Hop Activity
In Nest Hop, the patient uses functional movements to pick up a single bird into
a series of nests, under an optional time limit. When a target nest has been lled,
a new target nest will appear, and the patient will have to move the bird from the
previous nest to the new target. Optional setting to include pronation and supination
therapy by instructing patients to pick up and place the bird into nests.
Bird Match Activity
In Bird Match, the patient uses functional movement to pick up a bird and place it
into a nest with its matching-colored ribbon. Optional setting to include pronation and
supination therapy by instructing patients to pick up and place the birds into nests
.

1 3 (17)
Free Paint Activity
Free Paint allows the patient to express their own artistic creativity, without restrictions.
This activity has two modes: Blank Canvas and Coloring Book. There are no rules,
goals or tasks that need to be completed; the patient can paint whatever they’d like
on a canvas. Using the paintbrush, the patient chooses a color from the color palette
or paint swatches to paint the canvas. The patient also has the ability to access a
hand palette in the non-painting hand, to help promote two handed interaction within
the activity.
Creative Canvas
The Creative Canvas family of activities is table-top based, designed to support
functional reach, ne motor control, and cognitive abilities. These activities incorporate
simple cognitive and creative elements through selecting colors, painting pictures, and
stamping images, while providing a therapeutic upper body experience. For patients
who cannot benet from more advanced functional reach activities, the activities in
Creative Canvas allow patients to focus on rehabilitation of their cervical range of
motion. The activities also include a canvas angle setting that allows the HCP to adjust
for more able patients to experience more advanced arm reach and ne motor control.
HCPs may adjust therapy settings and diculty through various activity parameters on
the tablet.
Paint by Numbers Activity
In Paint By Numbers, the patient will ll in empty cells of an image with the required
matching color and number by selecting the color and lling in the image with a
single brush touch. Besides using the left or right hand to select colors and paint
on the canvas, the patient can utilize Gaze Painting Mode. This mode allows the
patient to select paint colors from a palette and paint on the canvas using only the
gaze pointer, providing a cervical motion exercise variation. The patient also has the
ability
to access a hand palette in the non-painting hand, to help promote two handed
interaction within the activity. The HCP can control the level of complexity by choosing
the number of color selections available.

1 4 (17)
Mad Tavern
Mad Tavern is a pain distraction activity using distraction techniques where the patient
is surrounded by animated characters in a cozy tavern setting. Visually scanning the
environment, the patient interacts with each character by using the blue gaze pointer by
turning and rotating their head to exercise their cervical range of motion. The patient’s
pointer is positioned to represent the patient’s upper body vertical midline and triggers
a series of short stories within the tavern. This activity is designed for practicing visual
processing skills and cognitive aspects for focus and attention
.
Free Stamp Activity
Free Stamp allows the patient to express their creativity by selecting and stamping down
images onto a provided canvas background to create their own artistic compositions.
There are no rules, goals or tasks that need to be completed. This activity helps provide
a free form cognitive exercise encouraging the patient to combine stamps together
creatively to construct their own scene and story. Three sets of stamp collections are
available to the patient: Happy Farm, Happy Trails, and Happy Geometry. The patient
also has the ability to access a hand palette in the non-stamping hand, to help promote
bimanual coordination within the activity.

1 5 (17)
Sensor Accuracy* ± 2 cm at a max distance of 75 cm
Sensor Precision* 2 cm or less
Latency ≤35 milliseconds
Operating Temperature 15°C to 30°C
Operating Pressure 102 kPa or less
Operating Relative Humidity 30% to 90%
Operating Elevation 2,500 meters or less
Radio Module Output power (EIRP*): 1 mW (0 dBm) typical
Frequency Band: ISM (Industrial, Scientic, and Medical)
Typical Center frequency: 2.44 GHz
Channel: 79 channels
Bandwidth: 2 MHz per channel
Modulation: GFSK (Gaussian frequency-shift keying)
Data ow: Bi-directional
*EIRP = Equivalent isotropically radiated power
REAL® Immersive System is intended for use in the electromagnetic environment specied below. The customer or the user
of REAL Immersive System should assure that it is used in such an environment.
Emissions Test Compliance
RF emissions
CISPR 11 Group 1
REAL Immersive System uses RF energy only for
its internal function. Therefore, its RF emissions are
very low and are not likely to cause any interfer-
ence in nearby electronic equipment.
RF emissions
CISPR 11 Class A REAL Immersive System is suitable for use
in all
establishments other than domestic
and those
directly connected to the public low-voltage power
supply network that supplies buildings used for
domestic purposes.
Harmonic emissions
IEC 61000-3-2 Class A
Voltage Fluctuations/
Flicker emissions Complies
TECHNICAL SPECIFICATIONS
*REAL Immersive System is calibrated appropriately to detect movement in virtual reality space in relation to real space accu-
rately and precisely. Sensors will compute and display position at an accuracy of a 2 cm radius with respect to real space at a
max distance of 75 cm relative to the headset. Sensors will also reproducibly compute position at a maximum deviation of a 2
cm radius for repeated movements at a max distance of 75 cm relative to the headset. Please note that accuracy and precision
specications contain limitations and are dependent on certain factors such as the amount of metal near the system. For exam-
ple, if the patient is in a metal wheelchair and cannot move to a non-metal chair, reduction in accuracy and precision may occur.
SYMBOL GLOSSARY
TECHNICAL INFORMATION
REAL Immersive System is intended for use in the electromagnetic environment specied below. The customer or the user
of REAL Immersive System should assure that it is used in such an environment.
Immunity test IEC 60601
test level
Compliance level Electromagnetic
environment – guidance
Electrostatic
discharge (ESD)
IEC 61000-4-2
±8 kV contact
±15 kV air
±8 kV contact
±15 kV air
Floors should be wood, concrete
or ceramic tile. If oors are covered
with synthetic material, the relative
humidity should be at least 30%.
Electrical fast
transient/burst
IEC 61000-4-4
±2 kV for
power supply lines
±1 kV for
input/output lines
±2 kV for
power supply lines
±1 kV for
input/output lines
Mains power quality should be that
of a typical commercial or hospital
environment.
Surge
IEC 61000-4-5
±1 kV dierential mode
±2 kV common mode
±1 kV dierential mode
±2 kV common mode
Mains power quality should be that
of a typical commercial or hospital
environment.
Voltage dips, short
interruptions and
voltage variations
on power supply
input lines
IEC 61000-4-11
Voltage Dips 30% reduction,
25/30 periods
At 0°
Voltage Dips 30% reduction,
25/30 periods
At 0°
Mains power quality should be that
of a typical commercial or hospital
environment. If the user of the
EQUIPMENT requires continued
operation during power mains
interruptions, it is recommended that
REAL Immersive System be powered
from an uninterruptible power supply
or a battery.
Voltage Dips > 95% reduc-
tion, 0.5 period
At 0°, 45°, 90°, 135°,
180°,
225°, 270° and 315°
Voltage Dips > 95% reduc-
tion, 0.5 period
At 0°, 45°, 90°, 135°,
180°,
225°, 270° and 315°
Voltage Dips > 95% reduc-
tion, 1 period At 0°
Voltage Dips > 95% reduc-
tion, 1 period At 0°
Voltage Interruptions > 95%
reduction, 250/300 periods
Voltage Interruptions > 95%
reduction, 250/300 periods
(50/60 Hz)
magnetic eld
IEC 61000-4-8
30 A/m 30 A/m Power frequency magnetic elds
should be at levels characteristic of a
typical location in a typical commer-
cial or hospital environment.
Refer to User Guide (Instruction Manual)
Prescription only – US Federal Law restricts this device to
use by or on the order of a physician
Type B Applied Part
WEEE
Manufacturer
Catalog Number
Lot Number
Date of Manufacture
Both Direct and Alternating Current
Class II Equipment
Serial Number
US and Canada Certication
Medical Device

1 6 (17)
This device complies with part 15 of the FCC Rules. Operation is subject to the following two conditions: (1) This device may
not cause harmful interference, and (2) this device must accept any interference received, including interference that may cause
undesired operation.
This device contains license-exempt transmitter(s)/receiver(s) that comply with Innovation, Science and Economic Development
Canada’s license-exempt RSS(s). Operation is subject to the following two conditions:
1. This device may not cause interference.
2. This device must accept any interference, including interference that may cause undesired operation of the device.
L’émetteur/récepteur exempt de licence contenu dans le présent appareil est conforme aux CNR d’Innovation, Sciences et
Développement économique Canada applicables aux appareils radio exempts de licence. L’exploitation est autorisée aux deux
conditions suivantes :
1. L’appareil ne doit pas produire de brouillage;
2. L’appareil doit accepter tout brouillage radioélectrique subi, même si le brouillage est susceptible d’en compromettre
le fonctionnement.
Changes or modications not expressly approved by the party responsible for compliance could void the user’s authority to
operate the equipment.
Les changements ou les modications qui n’ont pas été expressément approuvés par la partie responsable de la conformité
peuvent faire perdre à l’utilisateur son droit d’utiliser l’appareil.
REAL® Immersive System is intended for use in the electromagnetic environment specied below. The customer or the user
of REAL Immersive System should assure that it is used in such an environment.
Immunity test IEC 60601
test level
Compliance level Electromagnetic
environment – guidance
Conducted RF
IEC 61000-4-6
Radiated RF
IEC 61000-4-3
3 Vrms
150 kHz to 80 MHz
(6 Vrms in ISM radio Bands
within 150kHz – 80MHz)
3 V/m
80 MHz to 2.7 GHz
3 Vrms
3 V/m
Portable and mobile RF communications
equipment should be used no closer to any
part of REAL Immersive System, including
cables, than the recommended separation
distance calculated from the equation appli-
cable to the frequency of the transmitter.
Recommended separation distance
d = 1.2√P
d = 1.2√P 80 MHz to 800 MHz
d = 2.3√P 800 MHz to 2.7 GHz
where P is the maximum output power rating
of the transmitter in watts (W) according
to the transmitter manufacturer and d is
the recommended separation distance in
meters (m).
Field strengths from xed RF transmitters, as
determined by an electromagnetic site
survey a, should be less than the compliance
level in each frequency range b.
NOTE 1 At 80 MHz and 800 MHz, the higher frequency range applies.
NOTE 2 These guidelines may not apply in all situations. Electromagnetic propagation is aected by absorption and reec-
tion from structures, objects and people.
a Field strengths from xed transmitters, such as base stations for radio (cellular/cordless) telephones and land mobile radi-
os, amateur radio, AM and FM radio broadcast and TV broadcast cannot be predicted theoretically with accuracy. To assess
the electromagnetic environment due to xed RF transmitters, an electromagnetic site survey should be considered. If the
measured eld strength in the location in which REAL Immersive System is used exceeds the applicable RF compliance
level above, REAL Immersive System should be observed to verify normal operation. If abnormal performance is observed,
additional measures may be necessary, such as reorienting or relocating REAL Immersive System.
bOver the frequency range 150 kHz to 80 MHz, eld strengths should be less than 3 V/m.
Recommended separation distances between
portable and mobile RF communications equipment and REAL Immersive System
REAL Immersive System is intended for use in an electromagnetic environment in which radiated RF disturbances are con-
trolled. The customer or the user of REAL Immersive System can help prevent electromagnetic interference by maintaining a
minimum distance between portable and mobile RF communications equipment (transmitters) and REAL Immersive System
as recommended below, according to the maximum output power of the communications equipment.
Rated maximum
output power
of transmitter
W
Separation distance according to frequency of transmitter
m
150 kHz to 80 MHz
d = 1.2√P
80 MHz to 800 MHz
d = 1.2√P
800 MHz to 2.7 GHz
d = 2.3√P
0.01 0.12 0.12 0.23
0.1 0.38 0.38 0.73
11.2 1.2 2.3
10 3.8 3.8 7.3
100 12 12 23
For transmitters rated at a maximum output power not listed above, the recommended separation distance d in meters (m) can
be estimated using the equation applicable to the frequency of the transmitter, where P is the maximum output power rating of
the transmitter in watts (W) according to the transmitter manufacturer.
NOTE 1 At 80 MHz and 800 MHz, the separation distance for the higher frequency range applies.
NOTE 2 These guidelines may not apply in all situations. Electromagnetic propagation is aected by absorption and reec-
tion from structures, objects and people.
Immunity to RF Wireless Communications Equipment
Test
Frequency
(MHz)
Band a)
(MHz)
Service a) Modulation b) Maximum
Power
(W)
Distance
(m)
IMMUNITY
TEST LEVEL
(V/m)
385 380-390 TETRA 400 Pulse
modulation
b)
18 Hz
1.8 0.3 27
450 430-470 GMRS 460,
FRS 460
FM c)
±5 kHz deviation
1 kHz sine
20.3 28
710 704 – 787 LTE Band 13, 17 Pulse
modulation b)
217 Hz
0.2 0.3 9
745
780
810 800-960 GSM 800/900,
TETRA 800,
iDEN 820,
CDMA 850,
LTE Band 5
Pulse
modulation b)
18 Hz
20.3 28
870
930
1720 1700-1990 GSM 1800;
CDMA 1900;
GSM 1900;
DECT;
LTE Band 1, 3,
4, 25; UMTS
Pulse
modulation b)
217 Hz
20.3 28
1845
1970
2450 2400-2570 Bluetooth,
WLAN,
802.11 b/g/n,
RFID 2450,
LTE Band 7
Pulse
modulation b)
217 Hz
20.3 28
5240 5100-5800 WLAN 802.11
a/n
Pulse
modulation b)
217 Hz
0.2 0.3 9
5500
5785
a) For some services, only the uplink frequencies are included.
b) The carrier shall be modulated using a 50 % duty cycle square wave signal.
c) As an alternative to FM modulation, 50 % pulse modulation at 18 Hz may be used because while it does not represent
actual modulation, it would be worst case.

1 7 (17)
This equipment has been tested and found to comply with the limits for a Class A digital device, pursuant to part 15 of the FCC
Rules. These limits are designed to provide reasonable protection against harmful interference when the equipment is operated
in a commercial environment. This equipment generates, uses, and can radiate radio frequency energy and, if not installed
and used in accordance with the instruction manual, may cause harmful interference to radio communications. Operation of
this equipment in a residential area is likely to cause harmful interference in which case the user will be required to correct the
interference at their own expense.
Mode of Operation:
Charging mode and battery mode
Highest Clock Frequency:
HMD: 32 MHz
WSM: 24.576 MHz
WTM: 24.576 MHz
Frequency Range:
2402 MHz – 2480 MHz
Transmitting Frequency and Modulation:
Frequency-shift Keying (FSK) modulation. 2 Mbps modulation for all transmitter frequencies.
Antenna Make, Model, and Gain:
Power Output and Data Rate:
Product availability varies by country. Please see www.realsystem.com for more information. Copyright ©2021 Penumbra,
Inc. All rights reserved. The REAL Hero logo, REAL, Chuckleball, and TherapyView are registered trademarks or trademarks of
Penumbra, Inc. in the USA and other countries. All other trademarks are the property of their respective owners.
Device Antenna Make Antenna Model Antenna Gain
WSM Johanson P/N 2450AT43B100E Peak Gain 1.3 dBi
Average Gain -0.5 dBi
WTM
HMD Penumbra, Inc. P/N 14536 Peak Gain -1 dBi
Average Gain 2.4 dBi
Device Power Output Data Rate
WSM Transmitter with programmable output power of +4 dBm to -20 dBm,
in 4 dB steps. Programmed by the rmware to +0dBm.
GFSK modulation, 2
Mbps data rate.
WTM
HMD
Tel: 1.855.REAL-SYS
1.855.732.5759
Manufacturer:
Penumbra Inc.
One Penumbra Place
Alameda, CA 94502 USA
13661.C
2021-02
Table of contents
Other Real Medical Equipment manuals