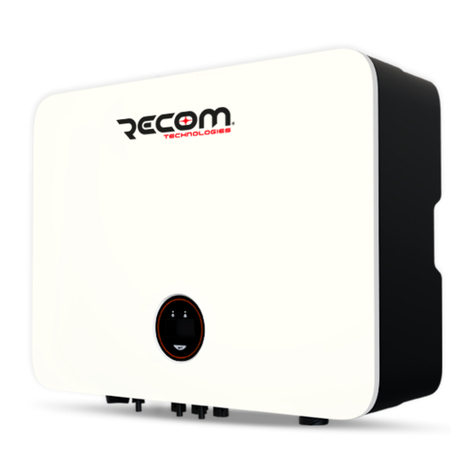
Recom RCM SP-D Series User manual

1
Grid-connected PV Inverter
Single Phase Dual MPPT
RCM-3.0-SP-D/RCM-3.6-SP-D/RCM-4.0-SP-D/
RCM-4.5-SP-D/RCM-5.0-SP-D/RCM-6.0-SP-D
User Manual
RECOM TECHNOLOGIES

2

3
CONTENTS
1. Preface .......................................................................................................................5
1.1 Overview ........................................................................................................5
1.2 Target Groups ................................................................................................5
2. Safety Instructions .............................................................................................5
2.1 Safety Notes ..................................................................................................5
2.2 Statement ......................................................................................................5
2.3 Important Safety Matters .............................................................................6
2.4 Symbols Explanation ....................................................................................7
3. Product Introduction ........................................................................................9
3.1 Basic Features ...............................................................................................9
3.2 Appearance Introduction ...........................................................................10
3.3 Display Interface .........................................................................................12
3.4 Packing List ..................................................................................................13
4. Product Installation ........................................................................................13
4.1 Selection of Installation Location ..............................................................13
4.2 Mounting the Inverter .................................................................................15
4.3 Electrical Connection .................................................................................17
4.4 Monitoring Device Installation ...................................................................22
4.5 CT/RS485/DRED Connection ......................................................................23
4.6 System Layout of Units without Integrated DC Switch ............................26
5. Start and Stop .....................................................................................................27
5.1 Start the Inverter .........................................................................................27
5.2 Stop the Inverter .........................................................................................27
6. General Operation ............................................................................................28
6.1 Display Operation .......................................................................................28
6.2 Auto-Test ......................................................................................................29
7. Troubleshooting ................................................................................................30
7.1 Fault Messages ............................................................................................30
7.2 Maintenance ................................................................................................31
8. Technical Parameters .....................................................................................32

4
Attention
The products, services or features you purchase are subject to the commercial
contracts and terms of RECOM TECHNOLOGIES All or part of the products, services or
features described in this document may not be within your purchasing or using scope.
Unless otherwise agreed in the contract, the Company shall not make any express or
implied declaration or guarantee of the contents of this document.
Due to product version upgrades or other reasons, the contents of this document will
be updated periodically. Unless otherwise agreed, this document serves only as a
guide to use, and all statements, information and recommendations in this document
do not constitute any express or implied guarantee.
RECOM SILLIA SAS
Address: 4 Avenue Pierre Marzin, Lannion, 22300, France
Website: www.recom-solar.com
Service Mail: info@recom-solar.com
Hotline: +33 255030861

5
1. Preface
1.1 Overview
This manual is an integral part of RECOM RCM 3.0~6.0-SP-D series single-phase inverters
(hereinafter referred to as the inverters). It mainly introduces the assembly, installation,
electrical connection, debugging, maintenance and troubleshooting of the products. Before
installing and using inverters, please read this manual carefully, understand the safety
information and be familiar with the functions and characteristics of inverters.
1.2 Target Groups
This manual is applicable to the electrical installers with professional qualifications and
the people who bought this inverter. If there are any problems in the installation process,
please call RECOM TECHNOLOGIES service telephone at +33 255030861 or email RECOM
TECHNOLOGIES at technical@recom-solar.com for consultation.
2. Safety Instructions
2.1 Safety Notes
2.1.1 Before installation, you should read this manual carefully and follow the instructions in
this manual strictly.
2.1.2 Installation operators need to undergo professional training or obtain electrical related
professional qualication certicates.
2.1.3 When installing, do not touch any part of the inner part of the inverter except the
terminals.
2.1.4 All electrical installations must conform to local electrical safety standards.
2.1.5 If the inverter needs maintenance, please contact the local designated personnel for
system installation and maintenance.
2.1.6 To use this grid-connected inverter for power generation needs the permission of the
local power supply authority.
2.1.7 During the operation of the inverter, the surface temperature may be higher and there is
a risk of burns. Do not touch.
2.1.8 When installing photovoltaic panels in the daytime, the photovoltaic panels should be
covered with opaque materials to avoid the risks and danger of high voltage at the panel end
in sunlight.
2.2 Statement
RECOM TECHNOLOGIES has the right not to undertake quality assurance in any of the
following circumstances:
2.2.1 Damages caused by irregular transportation.

6
2.2.2 Damages caused by incorrect storage, installation or use.
2.2.3 Damages caused by installation and use of equipment by non-professionals or untrained
personnel.
2.2.4 Damages caused by failure to comply with the instructions and safety warnings in the
products and documents.
2.2.5 Damages of running in an environment that does not meet the requirements stated in
the document.
2.2.6 Damages caused by operation beyond the parameters specied in applicable technical
specications.
2.2.7 Damages caused by unauthorized disassembly, alteration of products or modication of
software codes.
2.2.8 Damages caused by abnormal natural environment (force majeure, such as lightning,
earthquake, re, storm, etc.).
2.2.9 Any damages caused by the process of installation and operation which don’t follow the
local standards and regulations.
2.2.10 Products beyond the warranty period.
2.3 Important Safety Matters
The following symbols may appear in this manual, which represent the following meanings:
Danger
Warning
Caution
Used to warn of urgent dangerous situations, if not avoided, it
could result in death or serious personal injury.
DescriptionSymbol
Used to warn of potentially dangerous situations, if not avoided, it
may result in death or serious personal injury.
Used to warn of potentially dangerous situations, if not avoided, it
may result in moderate or minor personal injury.
Attention
Used to transmit the safety warning information about equipment
or environment, if not avoided, it may cause equipment damage,
data loss, equipment performance degradation or other
unpredictable results. "Attention" does not involve personal
injury.
Note Used to highlight important information, best practices and
tips, etc. it's not warning, doesn't involve personal injury and
equipment damage information.

7
2.4 Symbols Explanation
This chapter mainly elaborates the symbols displayed on the inverter, nameplate and packing
box.
2.4.1 Symbols on the Inverter
2.4.2 Symbol on the Inverter nameplate
The inverter cannot be disposed of with household waste.
DescriptionSymbol
Please read the instructions carefully before installation.
Do not touch any internal parts of the inverter until 5 min after
being disconnected from the mains and PV input.
CE mark, the inverter complies with the requirements of the
applicable CE guidelines.
Danger. Risk of electric shock!
TUV certication.
SAA certication.
The surface is hot during operation and no touch is allowed.
Electric shock hazard, it is strictly forbidden to use the person to
disassemble the inverter casing.
Inverter status indicator.
DescriptionSymbol
Inverter running indicator.
Grounding symbol, the inverter casing needs to be properly
grounded.

8
2.4.3 Symbol on the Packing box
Handle with care.
DescriptionSymbol
This side up.
Keep dry.
Stacked layers.

9
Figure 3-1 Applicable grid type
RCM Single Phase RCM Single Phase
3. Product Introduction
3.1 Basic Features
3.1.1 Function
The RECOM RCM 3.0~6.0-SP-D series is a single-phase grid-connected PV inverter which used
to eciently convert the DC power generated by the PV string into AC power and feed it into
the grid.
3.1.2 The RCM 3.0~6.0-SP-D series inverter contains 6 models which are list below:
RCM-3.0-SP-D/3.6-SP-D/4.2-SP-D/4.6-SP-D/5.0-SP-D/6.0-SP-D
3.1.3 Applicable grid type
The applicable grid types for the RCM 3.0~6.0-SP-D series are TN-S, TN-C, TN-C-S and TT. When
applied to the TT grid, the voltage of N to PE should be less than 30V. See Figure 3-1 for details:
3.1.4 Storage conditions
1) Inverter must be stored in its original packaging.
2) The storage temperature should be in the range of -30 ° C and + 60 ° C , and the relative
humidity stored is less than 90%.
3) If a batch of inverters needs to be stored, the height of each pile should be no more
than 6 levels.

10
Figure 3-2 Front view
Figure 3-3 Side view
3.2 Appearance Introduction
3.2.1 Inverter front view, as shown in Figure 3-2:
3.2.2 Inverter side view, as shown in Figure 3-3:
360mm
410mm
Logo
Display
Name
Plate
360mm
120mm

11
Figure 3-4 Bottom view
Figure 3-5 Inverter back view
3.2.3 Inverter bottom view, as shown in Figure 3-4:
3.2.4 Inverter back view, as shown in Figure 3-5:
Back Rail
Vent Valve
120mm
DC Switch (Optional)
DC Input Terminal
Back Rail
Com1 Port Com2 Port (Optional)
AC Output Terminal

12
3.3 Display Interface
Figure 3-6 Display interface
Item Indicator Status Description
1Power
Indicator
O No input voltage detected or input voltage is too low.
Slow ashing Inverter powered on, waiting for the grid connection.
Quick ashing Inverter detected grid power and entered self-test status.
Always on Normal, grid-connected and power generated.
2Alarm
Indicator
Always on An alarm or fault is detected, and the display can view the specic
fault information.
O The inverter is running normally.
Slow ashing The monitoring device is not connected to the router or is not
connected to the base station.
Quick ashing The monitoring device is connected to the router or connected to
the base station but not connected to the server.
3OLED
Display
On Display the inverter operating information.
O If the button pressed without any response, the screen is faulty or
not well connected.
4 Button Physical
button
Switch OLED display information and set parameters by short
press and long press.

13
Anti-reverse version 2pcs / RS485 and DRED version 1pcs (This connector already
pre-installed inside the inverter).
② DRED version only (This connector already pre-installed inside the inverter).
4. Product Installation
4.1 Selection of Installation Location
The RECOM RCM 3.0~6.0-SP-D series is designed with IP65 protection for indoor and outdoor
installations. When selecting an inverter installation location, the following factors should be
considered:
1) The wall on which the inverter is mounted must be strong and can withstand the weight of
the inverter for a long time.
2) The inverter needs to be installed in a well-ventilated environment.
3) Do not expose the inverter directly to strong sunlight to prevent the power derating due to
excessive temperature.
4) The inverter should be installed in a place with shelter to prevent direct exposure to sunlight
and rain.
5) Install the inverter at the eye level for easy inspection of screen data and further
maintenance.
6) The ambient temperature of the inverter installation location should be between -30 ° C and
60 ° C.
7) The surface temperature of the inverter may reach up to 75 ° C. To avoid risk of burns, do
not touch the inverter while it’s operating and inverter must be installed out of reaching of
children.
4.1.1 Recommended installation location of the inverter, as shown in Figure 4-1:
Inverter × 1 Wall Bracket × 1 Expansion Bolt × 4 PV Terminal × 2
Figure 3-7 Packing list
3.4 Packing List
The package of the inverter includes the following accessories. Please check whether the
accessories in the packing box are complete at the rst time when receiving the goods. See
Figure 3-7 for the packing list:
Monitoring
Device × 1(Optional)
AC Terminal × 1 Ground Terminal × 1
3Pin Terminal × 1①
②
6Pin Terminal × 1
Inspection
Report
User
Manual
Quick
Guide
User Manual × 1
Quick Guide × 1
Inspection Report × 1
Note ①

14
Figure 4-1 Recommended installation location
4.1.2 The requirements for inverter installation spacing are shown in Figure 4-2:
4.1.3 The installation angle of the inverter is recommended as shown in Figure 4-3:
Figure 4-2 Recommended installation space
Figure 4-3 Recommended installation angle
Do not put ammable and explosive articles around the inverter.
Warning
300mm
300mm
500mm 500mm
500mm 500mm
300mm

15
4.2 Mounting the Inverter
4.2.1 Wall bracket installation
Dimensions of wall bracket, see Figure 4-4:
1) Use the wall bracket as the template to mark the position of 4 holes on the wall. See Figure
4-5 for details:
Figure 4-4 Dimensions of wall bracket
Figure 4-5 Mark the hole position
10mm
16mm
150mm
220mm
110mm 110mm
104mm

16
Figure 4-6 Fix the wall bracket
Figure 4-7 Mounting the inverter
2) Use an electrical driller with 10mm diameter bit to drill 4 holes on the wall and make sure
hole depth is 80mm.
3) Insert the expansion tubes into the holes and tighten them, then x the bracket onto the
wall with expansion screws by using a cross screwdriver, as shown in Figure 4-6:
4.2.2 Mounting the inverter
Lift up the inverter with both hands, hang the back rail on the xed wall bracket carefully, see
Figure 4-7 for details:
Before drilling, make sure to avoid the buried water tube and electric wires
in the wall to avoid danger.
Warning

17
4.3 Electrical Connection
Danger hint
4.3.1 Inverter PV string connection
4.3.1.1 The following principles must be considered when making electrical connections to the
inverter:
1) Disconnect the AC breaker on the grid side.
2) The DC switch of the inverter must be turned to the "OFF" position.
3) The number and type of the PV panels connected in each PV string best to be same.
4) Make sure the maximum output voltage of each PV string does not exceed 600V.
4.3.1.2 DC connector assembly procedure
1) Select the appropriate photovoltaic cable:
2) Peel o the DC cable insulation sleeve for 7 mm, as shown in Figure 4-8:
Figure 4-8
Wire cross-setional area 2.5-4mm27mm
A high voltage in the conductive part of the inverter may cause an electric
shock. When performing any installation on the inverter, make sure that the AC
and DC sides of the inverter are completely de-energized.
Do not ground the positive or negative pole of the PV string, otherwise it will
cause serious damage to the inverter.
Static may cause damage to the electronic components of the inverter. Anti-
static measures should be taken during the repairing or installation.
Do not use other brands or other types of terminals other than the terminals
in the accessory package. RECOM TECHNOLOGIES has the right to refuse all
damages caused by the mixed-use of terminals.
Moisture and dust can damage the inverter, ensure the cable gland is securely
tightened during installation. The warranty claim will be invalided if the inverter
damaged by the cable connector not well installed.
Danger
Warning
Attention
Attention
Warning
Cable type Conductor cross-setional area (mm²)
General photovoltaic cable
Scope (mm²) Recommended value
(mm²)
2.5-4.0 4.0

18
Figure 4-9
+
-
Crimping Plier
Open-end Wrench
Figure 4-10
Figure 4-11
3) Disassemble the connector in the accessory bag, as shown in Figure 4-9:
4) Insert the DC cable through the DC connector nut into the metal terminal and press the
terminal with a professional crimping plier (pull back the cable with some power to check it’s
tight enough or not), as shown in Figure 4-10:
5) Insert the positive and negative cables into the corresponding positive and negative
connectors, pull back the DC cable to ensure that the terminal is tightly attached in the
connector.
6) Use an open-end wrench to screw the nut to the end to ensure that the terminal is well
sealed, as shown in Figure 4-11:
1.Before assembling the DC connector, make sure that the cable polarity is
correct.
2.Use a multimeter to measure the voltage of the DC input string, verify the
polarity of the DC input cable, and ensure that each string voltage is within
600V.
Warning
RCM-3SP-D

19
Figure 4-12
Figure 4-13
7) Insert the positive and negative connectors into the inverter DC input terminals respectively,
and when you hear the "click" sound represents the assembly in place, as shown in Figure 4-12:
4.3.2 Connection of AC output
The RECOM RCM 3.0~6.0-SP-D series single phase inverter applies to the single-phase power
grid with a voltage of 220/230V and a frequency of 50/60Hz.
The recommended cable and AC breaker for the RECOM RCM 3.0~6.0-SP-D series single phase
inverter are shown in the following table:
4.3.2.1 AC connector connection steps
1) Take the AC connector out of the accessory bag and disassemble it, as shown in Figure 4-13:
Cable Gland Threaded Sleeve AC Terminal Head
Model RCM-3.0-SP-D RCM-3.6-SP-D RCM-4.2-SP-D RCM-4.6-SP-D RCM-5.0-SP-D RCM-6.0-SP-D
Cable 4mm24mm24mm24mm26mm26mm2
Breaker 20A 25A 32A 32A 40A 40A
An AC breaker must be connected on the AC side of the inverter.
Any loads cannot be directly connected to the inverter.
Warning
RCM-3SP-D

20
Figure 4-14
Figure 4-15
Allen Key
Figure 4-16
2) According to the table above, select an appropriate cable, peel the insulation sleeve of AC
cable o for 50mm, and peel o the end of L /PE / N wires for 8mm, as shown in Figure 4-14:
3) Insert the stripped end of each three wire into the appropriate hole of the terminal head
(yellow green wire to PE port, red or brown wire to L port, and blue or black wire to the N port).
Please try to pull out the cable to make sure it’s well connected. As shown in Figure 4-15:
4) According to the arrow direction push the threaded sleeve to make it connected with the AC
terminal head and then rotate the cable gland clockwise to lock it. As shown in gure 4-16:
Wire Diameter:10-14mm
50mm
Strip Length:8mm
This manual suits for next models
6
Table of contents
Other Recom Inverter manuals
Popular Inverter manuals by other brands

Phase Green
Phase Green PhG-P5 K0HT-M Series user manual

Generac Power Systems
Generac Power Systems 8 KVA owner's manual

Sumitomo
Sumitomo HF-520 Series manual

Fuji Electric
Fuji Electric FVR-E11S-7EN instruction manual

Immergas
Immergas CP4 XL/M quick start guide

Omnik New Energy Co., Ltd.
Omnik New Energy Co., Ltd. Omniksol-10k-TL3 user manual

Ring Powering
Ring Powering E:Can user manual

SEW-Eurodrive
SEW-Eurodrive MOVITRAC LTP-B operating instructions

FRONIUS
FRONIUS Symo Hybrid 3.0-3-S operating instructions

Streamline
Streamline IECS series installation manual

Huawei
Huawei SUN2000-43KTL-IN-C1 user manual

Lenze
Lenze E931E Series Hardware manual