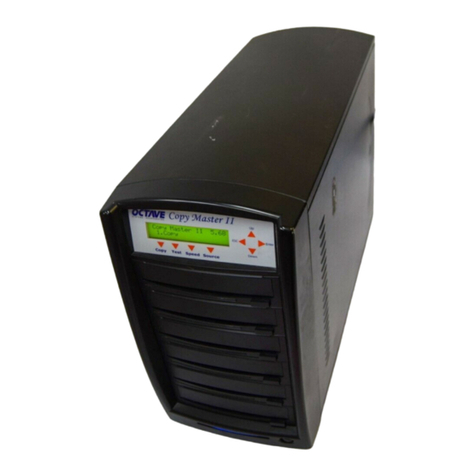
Recordex TechDisc Pro User manual

TechDisc ProTM
User’s Guide
ENGLISH
Commercial Grade CD Duplicator

2
©2007 Recordex USA, Inc. All rights reserved.
Version: 1.2
User’s Guide Recordex TechDisc Pro CD
®
TM
Copyright
Copyright ©2007 Recordex USA, Inc. All rights reserved. No part of this user’s guide may be reproduced in any
form without the express written permission of Recordex USA, Inc. Note: User’s are permitted to print copies of
this guide for personal use.
Trademarks
Recordex and all Recordex product name are the registered trademarks of Recordex USA, Inc. All other trademarks
acknowledged. Apple™ is a registered trademark of Apple Computer, Inc.
Disclaimer
The information in this document is subject to change without notice.
RECORDEX USA, INC. MAKES NO WARRANTY OF ANY KIND WITH REGARD TO THIS MATERIAL., EITHER EXPRESS OR
LIMITED, EXCEPT AS PROVIDED HEREIN, INCLUDING WITHOUT LIMITATION, THEREOF, WARRANTIES AS TO MARKET-
ABILITY, MERCHANTABILITY, FITNESS FOR A PARTICULAR PURPOSE OF USE OR AGAINST INFRINGEMENT OF ANY PAT-
ENT. RECORDEX USA, INC. SHALL NOT BE LIABLE FOR ANY DIRECT, INCIDENTAL, OR CONSEQUENTIAL DAMAGES OF
ANY NATURE, OR LOSSES EXPENSES RESULTING FROM THE USE OF THIS MATERIAL.
Legal Limitation on the Usage of Your Product
This optical duplication device is to be used exclusively for the purpose of copying non-copyright material only. This de-
vice is sold and intended strictly for the purposes of making legal copies of data onto CD and DVD discs any other use
may be a violation of International Copyright Laws and may result in criminal and/or civil liability. If you are uncertain
about the legality of using this device to produce copies of any particular data you should consult with your legal advi-
sor for guidance.
Information & Support
Before calling for support please read the user’s guide and refer to Chapter 7: Troubleshooting for advice on resolving
common problems. Should service be necessary please contact the Recordex Reseller where you purchased your duplica-
tor, or contact us using the contact information below.
Recordex USA, Inc.
PO Box 848
105 North Anderson Drive
Swainsboro, GA 30401
1-478-237-5501
Supplies
Your duplicator will perform at peak operation when you use high-quality media. Please contact the authorized Record-
ex retailer/dealer where you purchased your duplicator and ask them to recommend their highest quality media. Using
high quality media will ensure quick and error-free duplication.

3
©2007 Recordex USA, Inc. All rights reserved.
Version: 1.2
User’s Guide Recordex TechDisc Pro CD
®
TM
Warranty
Limited 2-year Warranty on TechDisc Pro™ Commercial CD/DVD Duplicator
What is my warranty? Recordex warrants to the original purchaser only that the CD/DVD duplicator will be free from de-
fects in material and workmanship under normal use for a period of two (2) years from the date of original purchase. The
following components are covered for two full years: controller, case, and power supply. The following components are
covered for only one year: CD-ROM, DVD-ROM, CD-RW, DVD-RW and Hard Drive. All other components not specifically
listed are considered covered for the two year warranty term. Recordex does not warrant against copy failures related to
poor quality media. Recordex's warranty shall not apply: (i) to any duplicator subjected to accident, misuse, neglect, altera-
tion, acts of God, improper handling, improper transport, improper storage, improper use or application, improper installa-
tion, improper testing or unauthorized repair; or (ii) to cosmetic problems or defects that result from normal wear and tear
under ordinary use, and do not affect the performance or use of the product. If the duplicator develops a covered defect
within the first year, Recordex will, at its option, either repair or replace the duplicator at no charge, provided that the
duplicator is returned during the warranty period. If the duplicator develops a covered defect in year two, Recordex will,
at its option, repair or replace any defective component at no charge for the parts used. Labor charges will apply in year
two and will be estimated before warranty work is performed, and Recordex will not perform warranty work without get-
ting approval from the customer for the labor charges estimated. How long does this warranty last? Two (2) years from
the date of the original purchase.
How long does this warranty last? Two (2) years from the date of the original purchase.
What must I do to obtain warranty service? To obtain warranty service please contact Recordex's Customer Service Cen-
ter at 1-478-237-5501 or contact your authorized Recordex Dealer for assistance in filing a warranty claim. You will re-
ceive instructions on how to properly return your product for authorized warranty repair. In order to receive warranty
service you must be able to provide an original receipt for the purchase of your duplicator.
THE ABOVE STATED WARRANTY IS EXCLUSIVE AND REPLACES ALL OTHER WARRANTIES EXPRESSED OR IMPLIED INCLUD-
ING THOSE OF MERCHANTABILITY AND FITNESS FOR A PARTICULAR PURPOSE. RECORDEX WILL NOT BE HELD LIABLE
FOR ANY OTHER DAMAGES OR LOSS INCLUDING INCIDENTAL OR CONSEQUENTIAL DAMAGES AND LOSS OF PROFITS
OR REVENUES FROM WHATEVER CAUSE, INCLUDING BREACH OF WARRANTY OR NEGLIGENCE.
4
©2007 Recordex USA, Inc. All rights reserved.
Version: 1.2
User’s Guide Recordex TechDisc Pro CD
®
TM
The following type conventions, terms, symbols, and abbreviations are used to make it easier for you to navigate the infor-
mation contained in this Users’s Guide.
Symbols
CAUTION: Indicates a caution warning regarding operation of the system that may lead to personal injury or dam-
age to the duplicator. Be sure to take careful note of any instruction flagged with a caution symbol.
IMPORTANT: Indicates a note regarding the proper use of the duplicator. For best results you should pay careful
attention to instructions flagged with the important information symbol.
NOTE: Indicates a note that may provide useful information regarding operation of your duplicator. Reading
these notes will help you to better understand how your duplicator operates.
UP ARROW: This represents the up arrow control button on the duplicator’s control panel. This symbol is used to
indicate when the up arrow button should be pressed while operating the duplicator.
DOWN ARROW: This represents the down arrow control button on the duplicator’s control panel. This symbol is
used to indicate when the down arrow button should be pressed while operating the duplicator.
ENTER: This represents the enter control button on the duplicator’s control panel. This symbol is used to indicate
when the enter button should be pressed while operating the duplicator.
ESCAPE: This represents the escape control button on the duplicator’s control panel. This symbol is used to indicate
when the escape button should be pressed while operating the duplicator.
Terms
SYSTEM, MACHINE, or UNIT: These terms all refer to your duplicator.
CONTROL PANEL, CONTROLLER: These terms refer to the user interface of your duplicator (see Chapter 1, Control Panel).
LCD DISPLAY, MENU: These terms refer to the blue user display located on the control panel.
MASTER DRIVE or SOURCE DRIVE: These terms refer to where the source data is stored.
TARGET DRIVE or COPY DRIVE: These terms refer to where the source data will be copied.
MASTER DISC or SOURCE DISC: These terms refer to the CD or DVD Disc that contains the data to be copied.
TARGET DISC or COPY DISC: These terms refer to the blank CD or DVD Discs.
COPY, BURN, WRITE: These terms refer to the process of permanently writing data to a copy disc.
IMAGE: This term refers to a disc’s contents when it is stored on a hard drive instead of a CD or DVD disc.
Type Conventions
These distinctive typefaces are used in the user guide to depict a control panel buttons and information that is displayed on
the control panel menu:
• Menu buttons that you press will appear in upper case bold typeface, I.e. UP, DOWN, ENT, ESC.
• Information that is displayed on the LCD will appear in this typeface: 1. Copy.
!
i
2
ENT
ESC

5
©2007 Recordex USA, Inc. All rights reserved.
Version: 1.2
User’s Guide Recordex TechDisc Pro CD
®
TM
General Information...........................................................................................................................................................................................................................2
Type Conventions, Terms, and Symbols..................................................................................................................................................................................4
Chapter 1: Introduction.....................................................................................................................................................................................................................6
Chapter 2: Setting Up Your Duplicator...................................................................................................................................................................................10
Chapter 3: Source & Target Discs.............................................................................................................................................................................................11
Chapter 4: Quick Reference.........................................................................................................................................................................................................12
Chapter 5: Advanced Features....................................................................................................................................................................................................14
Chapter 6: Advanced Setup.........................................................................................................................................................................................................28
Chapter 7: Trouble Shooting........................................................................................................................................................................................................31
Appendix A: Alerts & Error Messages.....................................................................................................................................................................................34
Appendix B: Technical Support.................................................................................................................................................................................................38

6
©2007 Recordex USA, Inc. All rights reserved.
Version: 1.2
User’s Guide Recordex TechDisc Pro CD
®
TM
Customer Support
Your duplicator was subjected to rigorous quality control testing and inspection, however, if your system is not working prop-
erly please contact our support department so we can ensure that your duplicator is running properly. We strive to build
the best product possible and we desire that every customer feel confident recommending Recordex products to their
friends. If you are not fully satisfied please call our Customer Service Center today and we will do our best to make things
right.
Customer Service Center
Recordex USA, Inc.
PO BOX 848
105 North Anderson Drive
Swainsboro, GA 30401
P. 1-478-237-5501
F. 1-478-237-5504
Safety Precautions
Please read through these important safety precautions and recommendations before setting up your duplicator to
ensure safe and trouble free operation.
Duplicators are high-precision electronic devices. Do not use them in any manner other than as specified in this
user’s guide.
To prevent fire, shock, or other health risks do not expose the unit to moisture or rain.
To prevent electronic shock do not attempt to disassemble or modify the duplicator or any of its internal compo-
nents. Refer all servicing to authorized service centers.
The internal drives utilize a laser beam that can be harmful to eyes. Do not disassemble the unit. Do not attempt
to look through the front panel of the drives while the unit is powered on.
Do not attempt to look into the unit while the unit is powered on as eye-damage could occur if dust or other parti-
cles are forced out of the fan vents and into your eyes.
The duplicator warranty will become void if the unit is modified or serviced by unauthorized personnel.
Operating Environment
Before unpacking your duplicator select an appropriate operating environment for your system. You should look for an
area that meets these criteria:
·A level and stable work surface,
·In an area with good ventilation, low dust and no smoke,
·With moderate temperature and humidity,
·And access to an outlet with stable power
Consider using an uninterruptible power supply with surge protection (UPS) to protect your duplicator.
You’re duplicator is able to operate in both 115 and 230V environments. The factory default is 115V but if you
live an a region of the world that operates at 230V you can simply switch the voltage setting to 230V using a
small screwdriver (see figure 1.1).
!
!
!
!
!
!
!
i
2

7
©2007 Recordex USA, Inc. All rights reserved.
Version: 1.2
User’s Guide Recordex TechDisc Pro CD
®
TM
Figure 1.1: Voltage Switch
WARNING: Operating the duplicator at
the wrong voltage setting will damage the
duplicator. Make sure that voltage setting
matches the power requirements for the
region of the world where the duplicator is
operated.
Use small flat head screwdriver to change
voltage switch from 115V to 230V.
Your Duplicator
Study the image below to familiarize yourself with your duplicator.
Controller
Side Air Vent
Stabilizing Feet
Master Drive*
{
Target Drives
!
i
Cooling Fans
Side Air Vent
Power Switche
Power Plug
Figure 1.2
Figure 1.3

8
©2007 Recordex USA, Inc. All rights reserved.
Version: 1.2
User’s Guide Recordex TechDisc Pro CD
®
TM
Control Panel
The control panel provide you with an easy interface to utilize the many simple and advance features built-in to your duplci-
ator. Once you understand how the control panel buttons work you will find it easy to find the controller features you are
looking for.
Use the arrow buttons to move up or down the menu and use the ENT and ESC buttons to enter and leave sections of the
controller menu. For example if you arrow down through the controller menu you will notice that the display changes to
reveal the following menu options:
1.Copy P: A
2.Test P: A
3.Test&Copy P: A
4.Verify P: A
5.Compare P: A
6.Prescan P: A
7.Disc Info P: A
8.Select Source
9.Image
10.Edit Track
11.Setup
Each of these menu options is called a function. Some of the functions have sub-menus which hold a number of additional
sub-functions. For example function #9, Image, has eight sub-functions. To access these sub-functions you simply press ENT
when the LCD Panel is at function 9. To return to the main menu just press ESC. For example:
ENT
ESC
Figure 1.4
LCD Display Down Arrow Button
Up Arrow Button
Enter Button
Escape Button
1. Copy
9.Image
ENT
9-01.Image P:A
Load
9-05.Image P:A
Select Image
9-02.Image P:A
Delete Image
9-06.Image P:A
Image Src Drive
9-03.Image P:A
Image Info
9-07.Image P:A
ImageFormat Info
9-04.Image P:A
Compare Image
9-08.Image P:A
Edit
ESC
2
NOTE: Do not worry at this point about understanding what all of the functions mean. They are explained in detail
in Chapter 4: Loading An Image.

9
©2007 Recordex USA, Inc. All rights reserved.
Version: 1.2
User’s Guide Recordex TechDisc Pro CD
®
TM
DVD/CD Drive
Drive Tray
Eject Button

10
©2007 Recordex USA, Inc. All rights reserved.
Version: 1.2
User’s Guide Recordex TechDisc Pro CD
®
TM
Taking a minute to make sure that your TechDisc Pro2100™ duplicator is setup properly will make operation smoother and
more enjoyable.
Contents
First, un pack all three boxes and verify the contents of your system against the list below.
Location
Next, pick a well suited location to setup your duplicator. You should choose a level and stable work surface in an area
with good ventilation, moderate temperature and humidity, and access to a grounded power outlet.
Consider using an uninterruptible power supply with surge protection (UPS) to protect your duplicator.
ü
Manual ü
Quick Start Guide
ü
Duplicator
ü
Power cable
Making Connections
1. Connect the power cable to the back of the unit and to the power
source (I.e. Surge protector, UPS, or grounded wall outlet).
2. Turn the unit on using the power switch located on the back of the
unit.
Powering On
The control panels should look like this after you’ve powered on the unit:
1. Copy P:A
2
NOTE: When you power on the duplicator it will run a short self-diagnostic test during which time the LCD panel
look very different from the image above. This is normal and after about 20 seconds the test will be complete and
the LCD panel will look like the reference image above.
i

11
©2007 Recordex USA, Inc. All rights reserved.
Version: 1.2
User’s Guide Recordex TechDisc Pro CD
®
TM
Your TechDisc Pro™ is designed to make thousands of copies at high speed. For the best results we recommend that you
use the highest grade media available. Higher grade media may cost a little more but the you will have fewer failures
when copying at high-speed. Recordex recommends that you contact the dealer or retailer where you bought your duplica-
tor and ask them to recommend a high-quality disc for duplication.
There are a few steps you can take to make sure that your source discs, also called master discs, are optimized for high-
speed duplication.
Disc Capacity
Make sure the disc is not too full. Due to differences in discs and disc drives it is important to not fill the disc too full or you
may experience something called a target over flow error. This happens when the system determines that the source disc
contains more data than will fit on the target discs. A good rule of thumb is to keep discs below these size guidelines:
• DVDs should be 4.38GB or smaller
• CDs should be 685MB or smaller
Disc Surface
Both the master and target discs need to be clean and free of any blemishes. Even fingerprints can cause issues when copy-
ing at high speeds. For best results use new media that has not been previously handled and always pick up discs by their
edges and avoid touching the data surface of the disc.
Disc Quality
As mentioned above disc quality is important when copying at high speeds. Using the cheapest media may result in a high-
er rate of copy failures.
A failed disc is often called a coaster because it is good for little else than keeping your coffee table free from
drink rings!
2

12
©2007 Recordex USA, Inc. All rights reserved.
Version: 1.2
User’s Guide Recordex TechDisc Pro CD
®
TM
This section will provide you with the basics of what you need to know in order to get started making copies. First, you’ll
learn how to load a master image to the duplicator’s hard drive, and then you’ll learn how to make high-speed copies of
your master image.
Loading Images - ONLY For units with an internal hard drive
First, what is an image? An image is a copy of a CD or DVD that is stored on the duplicator’s internal hard drive. Images
can be stored for ever or deleted after you are finished with them. It is up to you. Images are stored on the hard drive in
folders called partitions. Each partition is labeled with a letter, I.e. A, B, C, ..., AA, AB, AC, and so on depending on the
size of the hard drive.
To load your first image to partition A follow these steps:
1. Insert the disc into the top drive of the Host tower and close
the drive tray.
2. Scroll down the controller menu using the down arrow
button until you see option 9. Image and press the button.
This will open the Image option menu where you will be able to
easily load the data from your master CD or DVD to the hard
drive in your duplicator. The controller display should now
match Figure 4.1
3. Press to load the data on your CD or DVD to the hard drive.
The controller will quickly check the source disc and then start copying
the data to the hard drive. (See figure 4.2 and 4.3).
4. After the image is loaded the screen will update to Image Load OK.
At this time you should press the Escape button twice to return to the
main menu. The controller will then read 9. Image. See Figure 4.4.
You are now ready to start making copies.
ENT
9-01.Image P:A
Load
Figure 4.1
Source Disc
Analyzing
Figure 4.2
Load- A-18X 0%
1/1 Trk 7:10
Figure 4.3
ENT
ESC
Image Load OK
Figure 4.4
9-01.Image P:A
Load
9. Image
ESC ESC

13
©2007 Recordex USA, Inc. All rights reserved.
Version: 1.2
User’s Guide Recordex TechDisc Pro CD
®
TM
Making Copies - With Hard Drive Set as Source
Now that you have loaded an image on to the hard drive you are ready to start making copies. The first thing you’ll want
to do is make sure the duplicator is set to copy mode. To do this simply scroll through the controller menu until you find the
copy function. The LCD panel should look like this:
After you have set the controller to copy mode you are ready to load blank media into the target drives. Start loading
your blank discs. Press ENT to start the copy process. The LCD panel will display the status of the copy process and indi-
cate the estimated time left for the copy process.
After the copy process is complete the successfully copied discs will be ejected. This makes it easier to identify which discs
passed and which discs failed the copy process. This is a user selectable feature and can be changed through the Setup
menu by changing the setting under the Eject Disc sub-menu.
Making Copies - Without An Internal Hard Drive
To make a copy without using the hard drive simply place a master disc in the top drive and then place blank discs into the
remaining drives (note that you do not have to use all the drives) and press ENT. This will start the copy process and the
controller will look like figure 4.6 except that the Copy display will look like figure 4.7:
1. Copy P:A
4380MB
Copy Function
The source is set to
Partition A.
The image on partition A is 4380MB.
Figure 4.5
Preparing......
Check Target
Please Wait
Copy -A-18X 5%
1/1 Trk 6:50
1. Copy
OK: 07
% Complete
Estimated time remaining
Source
Successful Copies
Figure 4.6
Check Target
Please Wait
Copying-18X 5%
1/1 Trk 6:50
1. Copy
OK: 07
% Complete
Estimated time remaining
Successful Copies
Figure 4.7

14
©2007 Recordex USA, Inc. All rights reserved.
Version: 1.2
User’s Guide Recordex TechDisc Pro CD
®
TM
In chapter 4 we discussed the Copy function (1.Copy) and the Image function (9.Image). In this chapter you will be intro-
duced to the rest of the functions built into your duplicator’s control panel.
Test
The test function, 2. Test, provides you with a way to simulate a disc copy. This is sometimes useful if you are not sure if
your master disc may be too big for the target disc (I.e. Target over flow). In any case the test function works just like the
copy function except no data is actually written to the target drives.
Note, although data isn’t written to the target drives it is still necessary to use good quality blank discs for the test.
First, set the duplicator to test mode. To do this simply scroll through the controller menu until you find the test function. The
LCD panel should look like this:
After you have set the controller to test mode you are ready to load blank media into the target drives. Once you have
loaded all of the blank media press ENT to start the test process. The LCD panel will display the status of the test and indi-
cate the estimated time left for the test. The controller will display the following:
After the test process is complete the successfully tested discs will be ejected. This makes it easier to identify which discs
passed and which discs failed the test. This is a user selectable feature and can be changed through the Setup menu by
changing the setting under the Eject Disc sub-menu.
2
2. Test P:A
4380MB
Test Function
The source is set to
Partition A.
The image on partition A is 4380MB.
Figure 5.1
Preparing......
Check Target
Please Wait
Test-A-18X 5%
1/1 Trk 6:50
12. Test
OK: 07
% Complete
Estimated time remaining
Source
Successful Test Copies
Figure 5.2

15
©2007 Recordex USA, Inc. All rights reserved.
Version: 1.2
User’s Guide Recordex TechDisc Pro CD
®
TM
Test & Copy
The Test & Copy function, 3. Test & Copy, provides you with a way to simulate a disc copy before creating an actual
copy. Essentially, this function first runs a test cycle and if the test cycle is good then a copy is made, if the test cycle fails
the duplicator does not attempt to make a copy of the source image.
First, set the duplicator to Test & Copy mode. To do this simply scroll through the controller menu until you find the Test &
Copy function. The LCD panel should look like this:
After you have set the controller to Test & Copy mode you are ready to load blank media into the target drives. Once you
have loaded all of the blank media press ENT to start the test process. The LCD panel will display the status of the test
and indicate the estimated time left for the test. The controller will display the following:
After the test process is complete the successfully tested discs will be ejected. This makes it easier to identify which discs
passed and which discs failed. This is a user selectable feature and can be changed through the Setup menu by changing
the setting under the Eject Disc sub-menu.
3. Test&Copy P:A
4380MB
Test & Copy Function
The source is set to
Partition A.
The image on partition A is 4380MB.
Figure 5.3
Preparing......
Check Target
Please Wait
Test-A-18X 5%
1/1 Trk 6:50
3. Test & Copy
OK: 07
% Complete
Estimated time remaining
Source
Successful Test Copies
Figure 5.4
Copy-A-18X 5%
1/1 Trk 6:50

16
©2007 Recordex USA, Inc. All rights reserved.
Version: 1.2
User’s Guide Recordex TechDisc Pro CD
®
TM
Verify
The Verify function, 4. Verify, provides a way to verify that a copied disc will read properly in a standard CD or DVD
player.
To verify a disc or set of discs set the duplicator to Verify mode. To do this simply scroll through the controller menu until
you find the Verify function. The LCD panel should look like this:
After you have set the controller to Verify mode you should load copied discs into the target drives. Once you have load-
ed all of the copied discs press ENT to start the Verify process. The LCD panel will display the status of the verify test and
indicate the estimated time left for the test. The controller will display the following:
After the test process is complete the successfully verified discs will be ejected. This makes it easier to identify which discs
passed and which discs failed. This is a user selectable feature and can be changed through the Setup menu by changing
the setting under the Eject Disc sub-menu.
Note: The system can only verify multiple discs at one time if all of the discs were copied from the same image.
4. Verify P:A
4380MB
Verify Function
The source is set to
Partition A.
The image on partition A is 4380MB.
Figure 5.5
Preparing......
4. Verify
OK: 07
% Complete
Estimated time remaining
Successfully Verified Discs
Figure 5.6
Verify- 18X 5%
1/1 Trk 6:50
i

17
©2007 Recordex USA, Inc. All rights reserved.
Version: 1.2
User’s Guide Recordex TechDisc Pro CD
®
TM
Compare
The Compare function, 5. Compare, provides a way to compare a copy disc to the source image. The duplicator will make
the comparison and then report whether the discs are identical or not.
To compare a disc or set of discs set the duplicator to Compare mode. To do this simply scroll through the controller menu
until you find the Compare function. The LCD panel should look like this:
After you have set the controller to Compare mode you should load copied discs into the target drives. Once you have
loaded all of the copied discs press ENT to start the Compare process. The LCD panel will display the status of the Com-
pare test and indicate the estimated time left for the test. The controller will display the following:
After the test process is complete the successfully compared will be ejected. This makes it easier to identify which discs
passed and which discs failed. This is a user selectable feature and can be changed through the Setup menu by changing
the setting under the Eject Disc sub-menu.
5. Compare P:A
4380MB
Verify Function
The source is set to
Partition A.
The image on partition A is 4380MB.
Figure 5.7
Preparing......
Compare OK: 5
FAIL: 1 DIFF: 1
% Complete
Estimated time remaining
Successfully Verified Discs
Figure 5.8
Comp-A- 18X 5%
1/1 Trk 6:50
Source Partition
(what the copies are being
compared with)
Discs with differences
Discs that failed
Src:05 HDD P: B
Total: 4380MB
Press ENT to display detailed
results for each disc.
ENT
Info about source image/disc
Tgt:00 SUPER MUL
Identical
ENT
Info about target disc (passed) Info about target disc (failed)
Tgt:01 SUPER MUL
TOC not match
ENT

18
©2007 Recordex USA, Inc. All rights reserved.
Version: 1.2
User’s Guide Recordex TechDisc Pro CD
®
TM
Prescan
The Prescan function, 6. Prescan, provides a way to test the readability of a source disc. The duplicator will read the
source disc and report the status of the read process. To prescan a source disc set the host duplicator to Prescan mode. To
do this simply scroll through the controller menu until you find the Prescan function. The LCD panel should look like this:
The Prescan function checks the source disc so you will want to first make sure that you have selected the source you wish to
pre-scan. For information on selecting a source see section Select Source later in this chapter. Once you have loaded and
selected a source disc press ENT to start the Prescan process. The LCD panel will display the status of the Prescan test and
indicate the estimated time left for the test. The controller will display the following:
6. Prescan
4380MB
Prescan Function
Blank indicates the source
is set to a disc drive, if a hard
drive is selected then a partition
will be reported, I.e. P:A
* See Select Source for more info.
The source image is 4380MB.
Figure 5.9
Preparing......
Prescan OK!
% Complete
Estimated time remaining
Figure 5.10
Scanning-18X 5%
1/1 Trk 6:50

19
©2007 Recordex USA, Inc. All rights reserved.
Version: 1.2
User’s Guide Recordex TechDisc Pro CD
®
TM
Disc Info
The Disc Info function,7. Disc Info, provides a way to easily view basic information about source or target discs. The
duplicator will read the disc info track and report the basic information such as disc manufacturer, disc size, number of
tracks, disc format, etc. To retrieve the disc info for a source or target disc set the duplicator to Disc Info mode. To do this
simply scroll through the controller menu until you find the Disc Info function. The LCD panel should look like this:
Pressing ENT will start the Disc Info function and you will be prompted to select either the source or the target drives for
viewing disc information. See Figure 5.13.
Depending on the type of disc and the disc contents there may be more or less information displayed. Continue to press
ENT to cycle through all of the disc information. Press the DOWN arrow button to cycle through the other target discs.
7. Disc Info P:A
Disc Info Function
Blank indicates the source
is set to a disc drive, if a hard
drive is selected then a partition
will be reported, I.e. P:A
* See Select Source for more info.
The source image is 4380MB.
Figure 5.11
7-01. Disc Info
Source
Disc Type:DVD-ROM
Capacity:4384MB
Figure 5.12
Source Disc
Analyzing
7-01. Disc Info
Target
Preparing......
01 Prodisc
DVD-R 16 0
ENT
ENT
ENT
ENT

20
©2007 Recordex USA, Inc. All rights reserved.
Version: 1.2
User’s Guide Recordex TechDisc Pro CD
®
TM
Select Source
The Select Source function, 8. Select Source, allow you to select which device will be used as the source drive. It is rec-
ommended to always make copies from the hard drive (if one is installed), especially when working with large DVD master
images. The duplicator supports copying from the hard drive (if one is installed) or from one of the DVD/CD drives. The
duplicator ships from the factor with the hard drives set as the source drive (on models including a hard drive). To change
the source simply select the Select Source function from the controller.
Pressing ENT will start enter the Select Source sub-menu. Scroll through the submenu using the arrow buttons to select the
device you wish to use as the source drive.See Figure 5.14.
8. Select Source
Figure 5.13
Src: HDD
05 IDE5 Master
Src: SUPER MULTI
01 IDE1 Master
Figure 5.14
Src: SUPER MULTI
00 IDE0 Slave
The currently selected source
device will appear first in the
list of available sources.
Scroll down to view available sources
ETC.
Table of contents
Other Recordex Disc Duplicator manuals
Popular Disc Duplicator manuals by other brands

Aleratec
Aleratec 330106 user guide

Addonics Technologies
Addonics Technologies DGC3 user guide

Rimage
Rimage Perfect Image Replacement guide

MicroBoards Technology
MicroBoards Technology Copywriter Flash Duplicator user manual

Rimage
Rimage 2000i 6.5-7.1 Service Pack 1 instructions

Vinpower
Vinpower ROBOTIC AUTOLOADER V3.5 user manual