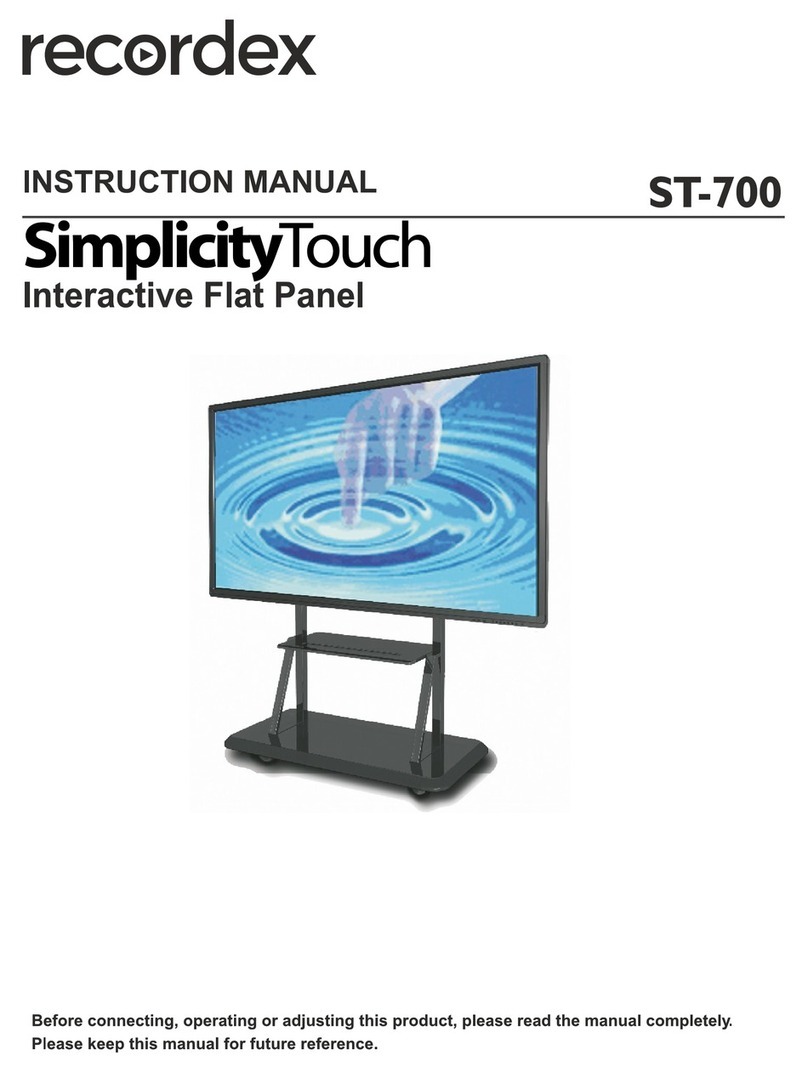
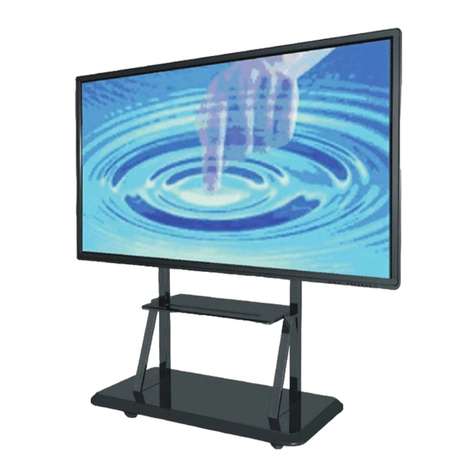
Recordex SimplicityTouch ST-650U Gen3 User manual

Owner’s Manual
ST-650U (Gen3), ST-700 (Gen3), ST-750U (Gen3), ST-840U (Gen3)

Table of Contents
Child Safety 4
The Issue 4
Tune Into Safety 4
Wall Mounting 4
Important Safety Precautions 5
Warning 6
Electric Shock Hazard 6
Lightning 6
Power Lines 6
Handling the LCD Panel 6
Replacement Parts 6
Safety Check 6
Power Source 7
Servicing 7
Caution 7
Damage Requiring Service 7
Mobile Phone Warning 7
End of Life Directives 7
Non-Active Pixels 8
Legal Notices 8
FCC Statement 8
Warranty 9
Important Notices 10
About Location & Environment 10
Do not use in hot and cold rooms (locations) 10
Environmental conditions: 10
About After-Image 10
About Cleaning & Maintenance 11
To clean this unit, wipe with a soft, dry cloth. 11
Carrying or Moving the IFP 11
Selecting a Location 11
Remote Control Use, Maintenance & Batteries 11
Version: 17.1.6.0 Page 1

Powering On the Panel 13
Make Power Connection 13
Turn the Panel On 13
Identifying the Controls 14
Front Controls 14
Remote Control 15
Identifying Inputs and Outputs 16
Side Connections (inputs and outputs) 17
Bottom Connections (inputs and outputs) 18
Connecting Your Computer 19
Connecting with HDMI Cable 19
Connecting with VGA Cable 20
Tips Regarding Resolution Settings and Fitting Picture on Screen 21
Freeze and Snap Function 21
Tips Regarding the IR Touch USB Connection 21
Touch on Microsoft Windows & Google Chrome OS 21
Touch on Apple OS X 21
Loss of Touch 22
Advanced Touch Controls 22
Adjusting the Sound 22
Switching Display Inputs 23
On-Screen Quick Annotation 24
Floating Menu Expanded 25
Drawing Menu Expanded 25
Bundled Applications 26
Home Screen 26
Browser 27
Clock 28
XPress Annotation & Whiteboarding Application 29
XPress User Interface 29
Annotation & Presenter Toolbars 29
Selecting & Modifying Placed Objects 31
Browsing to Select Images & Video from USB Thumb Drive 32
Connect to Google Drive (G Suite) or Microsoft OneDrive (Office365) 33
Change Page Background & Properties 36
Version: 17.1.6.0 Page 2

Save Page as an Image 36
XPress Application Settings 37
Exiting XPress 38
MobiSystems OfficeSuite 7 39
USB Media Player 40
Changing the Homescreen Wallpaper 41
Add and Remove App Shortcuts to Homescreen 42
Administrator Setup 44
SimplicityTouch Settings Passwords 44
Settings Password (PIN Code) 44
Router Password & Router Setup 46
Dual Touch Configuration 46
Typical Dual-touch Configurations 47
Router Configuration 49
RS232 Control 49
Additional Links & Support Resources 50
Version: 17.1.6.0 Page 3

Child Safety
It makes a dierence how and where you use your at panel display!
As you use enjoy your new product keep these safety tips in mind.
The Issue
Interactive Flat Panels (IFP) are popular purchases. However, IFPs are not always supported
on the proper stands or installed according to the manufacturer’s recommendations. We
and the consumer electronics industry are committed to making classroom technology and
home entertainment enjoyable and safe. IFPs that are inappropriately placed on dressers,
bookcases, shelves, desks, speakers, chests, or carts may fall over and cause injury.
Tune Into Safety
●One size of IFP stand does not fit all. Use only a IFP stand
rated for the weight of your IFP.
●Carefully read and understand all enclosed instructions for
proper use of this product.
●Don’t let children climb on or play with entertainment system
furniture and IFPs.
●Don’t place IFPs on furniture that can easily be used as steps,
such as a crate or chest of drawers.
●Remember that children can become excited while watching
a program, especially on a "larger-than-life” IFP.
●Make sure that you place or install the IFP where it cannot be
pushed, pulled over, or knocked down.
●Make sure that you route all cords and cables so that they
cannot be pulled or grabbed by curious children.
Wall Mounting
●If you decide to wall mount your IFP, always remember:
●One size of wall mount does not fit all. Use only a wall mount rated for the weight of
your IFP and that has been recommended by this IFP manufacturer, listed in this
manual, or otherwise listed by an independent laboratory as suitable for your IFP.
●Follow all instructions supplied by the IFP and wall mount manufacturers.
●If you have any doubts about your ability to safely wall mount your IFP, get help
from a professional installer.
●Make sure that the wall where you are mounting the IFP is appropriate. Some wall
mounts are not designed to be mounted to walls backed with steel studs or cinder
blocks. If you are unsure, ask a professional installer.
●IFPs can be heavy. At least two people are required for safe wall mount installation.
Version: 17.1.6.0 Page 4

Important Safety Precautions
1. Read these instructions.
2. Keep these instructions.
3. Heed all warnings.
4. Follow all instructions.
5. Do not use this apparatus near water.
6. Clean only with dry cloth.
7. Do not block any ventilation openings. Install in accordance with the manufacturer's
instructions.
8. Do not install near any heat sources such as radiators, heat registers, stoves, or
other apparatus (including amplifiers) that produce heat.
9. Do not defeat the safety purpose of the polarized or grounding-type plug. A
polarized plug has two blades with one wider than the other. A grounding type plug
has two blades and a third grounding prong. The wide blade or the third prong are
provided for your safety. If the provided plug does not fit into your outlet, consult an
electrician for replacement of the obsolete outlet.
10. Protect the power cord from being walked on or pinched particularly at plugs,
convenience receptacles, and the point where they exit from the apparatus.
11. Only use attachments/accessories specified by the manufacturer.
12. Use only with the cart, stand, or bracket rated to meet the weight of the
product. When a cart is used, use caution when moving the cart/apparatus
combination to avoid injury from tip-over.
13. Unplug this apparatus during lightning storms or when unused for long
periods of time.
14. Refer all servicing to qualified service personnel. Servicing is required when the
apparatus has been damaged in any way, such as power-supply cord or plug is
damaged, liquid has been spilled or objects have fallen into the apparatus, the
apparatus has been exposed to rain or moisture, does not operate normally, or has
been dropped.
15. The wall plug is the disconnecting device. The plug must remain readily operable.
16. Remote control batteries should not be exposed to excessive heat such as sunshine,
fire, or the like.
17. The apparatus should not be exposed to dripping or splashing, and no objects filled
with liquids, such as vases, should be placed on the apparatus.
Version: 17.1.6.0 Page 5

Warning
Electric Shock Hazard
To reduce the risk of fire or electric shock, do not remove any cover or expose the device to
rain or moisture. No user-serviceable parts are inside. Refer servicing to qualified service
technicians. Do not use immediately after moving from a low temperature to high
temperature environment, as this causes condensation, which may result in fire, electric
shock, or other hazards.
Lightning
For added protection for your device receiver during a lightning storm, or when it is left
unattended and unused for long periods of time, unplug it from the power outlet and
disconnect any antenna or cable system. This helps prevent property damage and personal
injury from lightning and power line surges.
Power Lines
An outside antenna system should not be located in the vicinity of overhead power lines or
other electric light or power circuits, or where it can fall into such power lines or circuits.
When installing an outside antenna system, extreme care should be taken to keep from
touching such power lines or circuits as contact with them might be fatal.
Handling the LCD Panel
●Your IFP’s screen is made of glass. Do not drop your IFP or hit, jolt, or press hard
against the LCD panel. If the screen breaks, be careful of broken glass.
●If the LCD panel is broken, make absolutely sure that you do not touch the liquid in
the panel. This may cause skin inflammation.
●If the liquid gets in your mouth, immediately gargle, rinse, and consult with your
doctor. Also, if the liquid gets in your eyes or touches your skin, consult with your
doctor after rinsing for at least 15 minutes or longer in clean water.
Replacement Parts
When replacement parts are required, make sure that the service technician uses
replacement parts specified by the manufacturer that have the same characteristics as the
original part. Unauthorized substitutions may result in fire, electric shock, personal injury,
or other hazards.
Safety Check
After completing any service or repair to this device, ask the service technician to perform
routine safety checks to determine that your IFP is in correct operating condition.
Version: 17.1.6.0 Page 6

Power Source
Operate your IFP only from the type of power source indicated on the marking label. If you
are not sure of the type of power supplied to your home, consult an electrician or your
local power company. Operate your IFP only from the type of power source indicated on
the marking label. If you are not sure of the type of power supplied to your home, consult
an electrician or your local power company.
Servicing
These servicing instructions are for use by qualified service personnel only. To reduce the
risk of electric shock, do not perform any servicing other than that contained in the
operating instructions unless you are qualified to do so.
Caution
Damage Requiring Service
Unplug this IFP from the power outlet and refer servicing to qualified service personnel
under the following conditions:
●When the power supply cord or plug is damaged or frayed.
●If liquid has been spilled or objects have fallen into your IFP.
●If your IFP has been exposed to rain or water.
●If your IFP does not operate normally by following the operating instructions. Adjust
only those controls that are covered by the operating instructions because incorrect
adjustment of other controls may result in damage and will often require extensive
work by a qualified technician to restore your IFP to its normal operation.
●If your IFP has been dropped or damaged in any way.
●When your IFP exhibits a distinct change in performance.
Mobile Phone Warning
To avoid interference with your IFP picture and sound, operating problems, or even
damage, keep your cordless and cellular telephones away from the IFP.
End of Life Directives
Your IFP may contain materials that are regulated for environmental reasons. Your IFP also
contains materials that can be recycled and reused. To help protect the environment,
contact your local authorities for information about disposal or recycling and about finding
a recycler in your area before you dispose of your IFP.
Version: 17.1.6.0 Page 7

Non-Active Pixels
The LCD panel contains almost millions of thin film transistors, which provide exceptionally
sharp video quality. Occasionally, a few non-active pixels may appear on the screen as a
fixed blue, green, or red point. These non-active pixels do not adversely affect the
performance of your IFP, and are not considered defects
Legal Notices
FCC Statement
1. This device complies with Part 15 of the FCC Rules. Operation is subject to the
following two conditions:
(1) This device may not cause harmful interference.
(2) This device must accept any interference received, including interference that
may cause undesired operation.
2. Changes or modifications not expressly approved by the party responsible for
compliance could void the user’s authority to operate the equipment.
NOTE : This equipment has been tested and found to comply with the limits for a Class B
digital device, pursuant to Part 15 of the FCC Rules. These limits are designed to provide
reasonable protection against harmful interference in a residential installation.
This equipment generates uses and can radiate radio frequency energy and, if not installed
and used in accordance with the instructions, may cause harmful interference to radio
communications. However, there is no guarantee that interference will not occur in a
particular installation. If this equipment does cause harmful interference to radio or
television reception, which can be determined by turning the equipment off and on, the
user is encouraged to try to correct the interference by one or more of the following
measures:
●Reorient or relocate the receiving antenna.
●Increase the separation between the equipment and receiver.
●Connect the equipment into an outlet on a circuit different from that to which the
receiver is connected.
●Consult the dealer or an experienced radio/TV technician for help.
Version: 17.1.6.0 Page 8

Warranty
LIMITED 5-YEAR WARRANTY RECORDEX USA SimplicityTouch IFP (“Product”)
What is my warranty? Recordex warrants to the original purchaser (“You”/”Your”) only that the Product will be
free from defects in material and workmanship under normal use for a period of five (5) years from the date of
original purchase* (see note below).
How long does this warranty last? Five (5) years from the date of the original purchase*.
What is the typical warranty process? A service technician will attempt to resolve the problem by phone and
or email. If the problem appears to require a replacement component or a replacement panel then the
following will occur:
●Within 48-72 hours (2-3 business days) a technician will be dispatched on site with necessary parts to
repair the panel.
●If the panel is unable to be repaired on site then a replacement panel will be installed and the defective
panel removed from the school/site.
Who is responsible for Shipping? Recordex is responsible for picking up defective product from your school or
business. Shipping expenses are only covered under warranty to the 48 contiguous United states. You are
responsible for shipping, if necessary, to Alaska, Hawaii and any address outside of the United States. If the
Product is repaired out of warranty then you are responsible for shipping both ways.
What must I do to obtain warranty service? To obtain warranty service please contact Recordex's Customer
Service Center at 888-712-0278 and [email protected] or contact your authorized Recordex
Integrator/Installer for assistance in filing a warranty claim. You will receive instructions on how to properly
return your product for authorized warranty repair. In order to receive warranty service you must be able to
provide an original receipt or invoice for the purchase of your Product.
What are the limitations? Recordex's warranty shall not apply: (i) to any Product subjected to accident,
misuse, neglect, alteration, acts of God, improper handling, improper transport, improper storage, improper
use or application, improper installation, industrial or commercial use, improper testing or unauthorized repair;
or (ii) to cosmetic problems or defects that result from normal wear and tear under ordinary use, and do not
affect the performance or use of the product. If the Product develops a covered defect within the warranty
period, Recordex will, at its option, either repair or replace the Product at no charge, provided that the Product
is returned during the warranty period and this is your exclusive remedy and the entire liability of Recordex
under this warranty. No warranty is made or implied as to the effectiveness or suitability of this product for
your purposes.
THE ABOVE STATED WARRANTY IS EXCLUSIVE AND REPLACES ALL OTHER WARRANTIES EXPRESSED OR IMPLIED
INCLUDING THOSE OF MERCHANTABILITY AND FITNESS FOR A PARTICULAR PURPOSE. RECORDEX WILL NOT BE
HELD LIABLE FOR ANY OTHER DAMAGES OR LOSS INCLUDING INCIDENTAL OR CONSEQUENTIAL DAMAGES
AND LOSS OF PROFITS OR REVENUES FROM WHATEVER CAUSE, INCLUDING BREACH OF WARRANTY OR
NEGLIGENCE.
*If the product is installed by an authorized Recordex integrator/installer the warranty period starts on the date
the installation of the SimplicityTouch is approved by authorized party. (I.e. Authorized Recordex Integrator or
Installer installs SimplicityTouch and authorized School District personnel signs-off on installation.)
Version: 17.1.6.0 Page 9
Important Notices
About Location & Environment
Do not use in hot and cold rooms (locations)
When the unit is used in rooms (locations) with low temperature, the picture may leave
trails or appear slightly delayed. This is not a malfunction, and the unit will recover when
the temperature returns to normal.
Do not leave the unit in a hot or cold location. Also, do not leave the unit in a location
exposed to direct sunlight or near a heater, or in high humidity, as this may cause the
cabinet to deform and the screen to malfunction, and affect the IFP’s performance .
Environmental conditions:
Operating temperature: 5°C – 35°C (41°F – 95°F)
Operating humidity: 20 – 80 % ( no moisture condensation )
Storage temperature: -15°C – 45°C (5°F – 113°F)
Storage humidity: 10 – 80 %
Atmospheric pressure: 86 kPa ~106 kPa
About After-Image
The extended use of fixed image program material can cause a permanent after-image on
the screen.
This background image is viewable on normal programs in the form of a stationary fixed
image. This type of irreversible screen deterioration can be limited by observing the
following steps:
A. Reduce the brightness/contrast setting to a minimum viewing level.
B. Do not display the fixed image for extended periods of time.
C. Turn the power off when not in actual use.
Important Information Regarding Use of Video Games, Computers, Captions or Other
Fixed Image Displays.
Do not allow a still picture to be displayed for an extended period, as this can cause a
permanent after-image to remain on the screen. Examples of still pictures include logos,
video games, computer images, teletext and images displayed in 4:3 mode.
CAUTION :The permanent after-image on the screen resulting from fixed image use is not
an operating defect and as such is not covered by the warranty. This product is not
designed to display fixed images for extended periods of time.
Version: 17.1.6.0 Page 10

About Cleaning & Maintenance
(ALWAYS UNPLUG UNIT BEFORE CLEANING!)
To clean this unit, wipe with a soft, dry cloth.
Clean the cabinet with a soft, lint-free cloth, If the cabinet is especially dirty, moisten a soft,
lint-free cloth in a weak detergent solution, squeeze the excess moisture from the cloth,
then wipe the cabinet with the cloth. (ALWAYS UNPLUG UNIT BEFORE CLEANING!)
●Use a clean cloth to dry the cabinet.
●Use eyeglass cleaner to remove stubborn dirt from the screen.
●Never use alcohol, paint thinner or benzine to clean this unit.
Carrying or Moving the IFP
●When you move the IFP , hold the frame of the IFP .
●Be aware of the danger or harm which may caused by carrying or moving the IFP, as
the bezel is very thin.
●When transporting, do not subject the unit to shocks or vibration, or excessive force.
Selecting a Location
You should select a location for the IFP that meets the following conditions:
●Direct light does not reflect on the screen;
●There is close access to a grounded power outlet;
NOTE: Watching an IFP in a room with total darkness or with a reflection on the screen may
cause eyestrain.
Remote Control Use, Maintenance & Batteries
Remove remote battery cover, install two AAA batteries making sure to match the + and -
symbols on batteries to symbols in the battery compartment and then replace the cover.
Improper use of batteries can result in a leakage of chemicals and/or explosion. Be
sure to follow the instructions below:
●Place batteries with their terminals corresponding to the (+) and (–) indications.
●Different types of batteries have different characteristics. Do not mix batteries of
different types.
●Do not mix old and new batteries. Mixing old and new batteries can shorten the life
of new batteries and/or cause old batteries to leak chemicals.
●Remove batteries as soon as they are non-operable. Chemicals that leak from
batteries can cause a rash. If chemical leakage is found, wipe with a cloth.
●Dispose of batteries in a proper manner.
Version: 17.1.6.0 Page 11

●If the remote control is not used for an extended period of time, remove the
batteries.
●The batteries shall not be exposed to excessive heat such as sunshine, fire or the
like.
Use the remote control by pointing it towards the remote sensor on the front of your IFP.
Objects between the remote control and the remote sensor may prevent proper operation.
Cautions regarding use of remote control:
●Do not expose the remote control to shock. In addition, do not expose the remote
control to liquids, and do not place in an area with high humidity.
●Do not install or place the remote control under direct sunlight. The heat may cause
deformation of the unit.
●The remote control may not work properly if the remote sensor window of the main
unit is under direct sunlight or strong lighting. In such a case, change the angle of
the lighting or the IFP set, or operate the remote control closer to the remote sensor
window.
Version: 17.1.6.0 Page 12

Powering On the Panel
Make Power Connection
The panel has a main power switch
located at the rear underside of the
cabinet.
●Connect the panel to a grounded
110-120V electrical outlet using the
supplied power cord.
NOTE: It is recommended to use a surge
protector power strip rated for use with
electronics devices.
Turn the Panel On
The panel has two power switches:
●Hard power switch. The first is the main power switch located next to the AC IN
(power plug). This is located in the back of the panel (see image above). This switch
must be in on position to operate the panel. When this is in the on position the
Power Indicator light will dimly glow red.
●Soft power switch. The second power switch is located on the front edge of the
cabinet. This is the power button used for day to day operation. This will power the
panel out of standby mode and into operating mode. When the panel is in
operating mode the Power Indicator light will glow blue.
NOTE: If the panel will not power then make sure that the panel is plugged in and that the
hard power switch is in the on position, then press the soft power switch on front of panel.
Version: 17.1.6.0 Page 13

Identifying the Controls
Front Controls
The controls on the front of panel are also included on the remote control. Below is a brief
description of each control.
No.
Description
1
Power Indicator LED (red=standby mode; blue=operating mode).
2
Remote Control IR Sensor.
3
Power Button. This toggles the panel between standby and operating mode.
4
Input Button. This brings up the on-screen menu for selecting the display input.
5
Back Button. Use this to exit on-screen menus and navigate the home screen.
6
Home Screen Button. This switches the panel to the internal operating system.
7
Settings Button. This opens TV settings when pressed from an input screen. It
opens wallpaper and widget options when pressed from the home screen.
8/9
Volume Up and Volume Down Button.
10
Home Screen USB 2.0 ports. Use these to connect USB devices to the Home Screen
environment.
11
USB 2.0 Port. This port is not used in your model.
Version: 17.1.6.0 Page 14

Remote Control
The remote control communicates with the panel via IR which requires a line of sight to
work properly. It is important to point the remote in the direction of the IR receiver located
next to the Power Indicator LED on front of the panel.
Version: 17.1.6.0 Page 15

Identifying Inputs and Outputs
The SimplicityTouch comes with many input and output options for making connections to
a wide array of devices. This image shows all the of jacks and connections and their
location on the panel. The following pages contains a brief explanation of each
input/output connection.
Version: 17.1.6.0 Page 16

Side Connections (inputs and outputs)
These inputs are located on the left edge of the cabinet.
No.
Description of connection
1
Wi antenna connection. Attached supplied wifi antennas
here if connecting panel to a wireless network.
2
PC IN 1 & PC IN 2. Each PC IN port consists of a VGA
connection and a PC audio (3.5mm) connection. Use this
connection if connecting a computer using VGA cable.
Note: preferred connection is by HDMI.
3
USB 3.0. These ports are used for connecting USB 3.0
devices to the panel. (i.e. USB flash drive, optional keyboard)
4
HDMI 1 & HDMI 2. The HDMI ports are the recommended
connection to use when connecting your computer or other
A/V devices. The HDMI port transmits both audio and video
signal.
5
DP 1. This is a Display Port. This is another good option for
connecting a computer or other device that supports Display
Port connector for audio and video.
6
USB 2.0. This USB port is for connecting USB 2.0 devices to
the home screen environment (i.e. USB flash drive)
7
IR Touch 1 . This is the primary touch output. Connect the
panel to your computer using this port and the supplied USB
cable to enable touch screen control of your computer from
the SimplicityTouch screen.
Note: The panel is equipped with two touch output connections.
Refer to page 42 for instructions on how to congure panel for
dual touch.
Version: 17.1.6.0 Page 17

Bottom Connections (inputs and outputs)
There are additional inputs and outputs located on the bottom edge of the panel.
No.
Description of connection.
2
PC IN 3. The third PC input consists of a VGA port and a PC audio (3.5mm) input.
NOTE: The PC Audio jack for PC IN 3 can also be used optionally as a mic-input. For
instructions on how to connect a mic to the panel contact Recordex technical support.
8
AC IN. The main power jack for the panel. Connect to a grounded 110-120V power
outlet.
NOTE: It is recommended to use a properly rated surge protector strip with the panel to
protect from power surges.
9
Main Power Switch. This is the main power switch. This switch must be on in order
to operate the panel. After this switch is on the soft power button on the front
control panel can be used to switch panel from standby mode to operating mode.
10
IR Touch 2. This is the second USB connector for IR touch control. By using this
port two devices can be connected to panel at all times and the touch control will
be switched between devices according to how the panel is set up. See page 42 for
more information regarding conguration of dual touch.
11
Headphone Out. Connect headphones here. Be careful that volume is not too
high before connecting headphones.
12
SPDIF Digital Out. This port provides digital audio out via SPDIF connection.
13
AV Input. Use the included adapter to connect an AV device (i.e. DVD Player) using
Yellow/Red/White RCA connectors to the panel’s 3.5 mm AV input jack.
14
LAN Out. This jack is not typically used. It can be configured to pass through
network connectivity to another device.
15
WAN In. Connect the panel to your local network using the WAN in port. See page
45 for instructions on conguring the panel for wired connection.
16
RS232 Port. Control the panel via RS232 control commands. See page 45 for more
information.
Version: 17.1.6.0 Page 18

Connecting Your Computer
The SimplicityTouch provides multiple options for connecting your PC to the panel: HDMI,
VGA and Display Port. HDMI is the most common, and preferred connection.
Connecting with HDMI Cable
HDMI is the preferred method for connecting your PC to the SimplicityTouch. Use the
supplied cable to make the connection from your PC to the Panel. Next, you’ll want to
connect your PC to the IR TOUCH 1 port on the panel using the included active USB cable.
Note, using other cables or using wall plates with the USB connection may cause
intermittent or total loss of touch function.
Version: 17.1.6.0 Page 19
This manual suits for next models
3
Table of contents
Other Recordex Interactive Whiteboard manuals
Popular Interactive Whiteboard manuals by other brands

SMART
SMART SC12A Setup manual

SMART Board
SMART Board Board 800 series user guide

anyractive
anyractive GoTouch user manual

Comm Box
Comm Box Interactive Pulse user manual

Smart Technologies
Smart Technologies SMART Board 3000i Specification sheet

Smart Technologies
Smart Technologies Smart Board installation guide