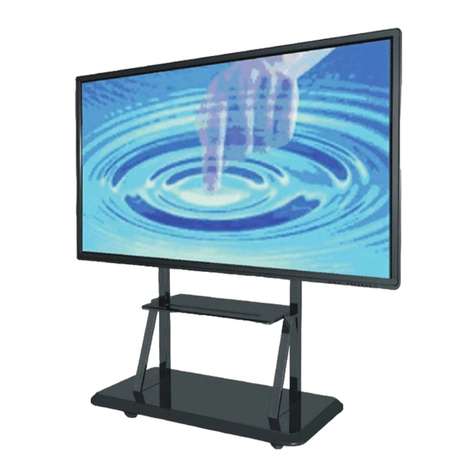
Recordex ST4-650U User manual

Interactive Flat Panel
Owners Manual
Before connecting, operating, or adjusting this product, please read the manual thoroughly.
Please keep this manual for future reference.

CONTENTS
Important Information 1
Important Safety Precautions 2
Identification of Controls 4
Remote Control 6
Connections 7
Basic Operations 9
Operating the Navigation Menu 10
User Menu List 11
File Explorer 15
Annotation 16
USB Multimedia Player 17
Troubleshooting 20
Specifications 21

1
The Issue
As you enjoy your new interactive flat
panel, keep these safety tips in mind.
Interactive flat panels are not always supported on the proper stands or installed
according to Recordex’s recommendations. We are committed to our products as
enjoyable and as safe as possible.
Safety Information
●
One size of the IFP stand does not fit all. Use only an IFP stand or mount rated for the weight of
your IFP.
●
Carefully read and understand all enclosed instructions for the proper use of this product.
●
Don’t let children climb on or play with the IFP stand or mount and IFPs.
●
Don’t place IFPs on furniture, such as a desk, dresser, cabinet, etc.
●
Make sure that you place or install the IFP where it cannot be pushed, pulled over, or
knocked down by children.
●
Make sure that you route all cords and cables so that they cannot be pulled or grabbed by
children.
Wall Mounting
If you decide to wall mount your IFP, always remember:
●
Only use a wall mount rated for the weight of your IFP. Use mounts recommended by
Recordex, listed in this manual, or otherwise listed by an authorized reseller.
●
Follow all instructions supplied by the wall mount manufacturer.
●
If you have any doubts about your ability to safely wall mount your IFP, get help from a
professional.
●
Make sure that the wall where you are mounting the IFP is
appropriate. Some wall mounts are not designed to be mounted
to walls backed with steel studs or cinder blocks. If you are
unsure, ask a professional installer.
●
IFPs can be heavy. At least two people are required to wall mount an IFP safely.
CHILD SAFETY
It makes a difference how and where you use
your flat panel display

IMPORTANT SAFETY PRECAUTIONS
2
This symbol indicates that dangerous voltage
instituting a risk of electric shock is present
within this unit.
This symbol indicates that there are essential
operation and maintenance instructions in the
literature accompanying the appliance.
Electricity may cause personal injuries and property
damage if mishandled. This IFP has been
engineered and manufactured with the highest priority on
safety. But IMPROPER USE CAN RESULT IN POTENTIAL
ELECTRIC SHOCK OR FIRE HAZARD. To prevent
potential danger, please observe the following instructions
when installing, operating, and cleaning the product. To
ensure your safety and prolong the service life of your IFP,
please read the following precautions carefully before using
the product.
1. Read these instructions---All operating instructions
must be read and understood before the product is
used.
2. Keep these instructions---These safety and operating
instructions must be kept in a safe place for future
reference.
3. Note all warnings---All warnings on the product and in
the instruction manual must be observed closely.
4. Follow all instructions---All operating instructions must
be followed.
5. Attachments---Only use attachments/accessories
specified by Recordex. Do not use attachments that
are not recommended by Recordex. The use of
improper attachments can result in accidents.
6. Power source---This product is intended to be supplied
with a listed power supply indicated on the marking
label. If you are not sure of the type of power supply at
your location, consult your product dealer or local power
company. For added protection for this product during a
lightning storm, or when it is left unattended and unused
for a long period, unplug it from the wall outlet and
disconnect the cable system.
7. Power cord protection---Protect the power cord from
being walked on or pinched particularly at plugs, wall
outlet, and the point where they exit from the device.
8. Overloading---Do not overload wall outlets, extension
cords, or convenience receptacles on other equipment
as this can result in a risk of fire or electric shock.
9. Entering of objects and liquids---Never insert an
object into the product through vents or openings.
High voltages are present in the product and inserting
an object can cause electric shock and/or short circuit
internal parts. For the same reason, do not spill water or
liquid on the product.
10. Servicing---Refer all servicing to qualified service
personnel. Servicing is required when the device has
been damaged in any way, such as the power-supply
cord or plug is damaged, liquid has been spilled,
objects have fallen into the device, the device has been
exposed to rain or moisture, it does not operate
normally or has been dropped.
11. Damage requiring service---If any of the following
conditions occurs, unplug the power cord from the
AC outlet and request a qualified service technician to
perform repairs.
a. When the power cord or plug is damaged.
b. When a liquid is spilled on the product or when
objects have fallen into the product.
c. When the product has been exposed to rain or water.
d. When the product does not operate properly as
described in the operating instructions.
Do not touch the controls other than those described in
the operating instructions. Improper adjustment of
controls not defined in the instructions can cause
damage, which often requires extensive adjustment
work by a qualified technician.
e. If the product has been dropped or the cabinet has
been damaged in any way.
f. When the product displays an abnormal condition
or exhibits a distinct change in performance, any
noticeable abnormality in the IFP indicates that it needs
servicing.
12. Replacement parts---In case the product needs
replacement parts, make sure that the service person
uses replacement parts specified by Recordex. The
use of unauthorized parts can result in fire, electric
shock, and/or other danger.
13. Safety checks---Upon completion of service or repair
work, request the service technician to perform safety
checks to ensure that the product is in proper operating
condition.
14. Wall or ceiling mounting---When mounting the
device on a wall or ceiling, be sure to install the
product according to the method recommended by
Recordex. This is a safety issue.
15. Stand---Use only with the trolley, stand or wall mount
specified through CE/UL/GS safety certificate, or sold
with the device. Do not place the product on an unstable
trolley, stand, or mount. Placing the product on an
unstable base can cause the product to fall, resulting
in possible serious injuries as well as damage to the
device.
16. Carefully move---When a trolley is used, be cautious
when moving the trolley/device combination to avoid
injury from the device tipping over. Sudden stops,
excessive force, and uneven floor surfaces can cause
the product to fall from the trolley.
Never lean the panel so that all of the pressure is on the
display.
Never attempt to move the IFP unless the AC power
cord is disconnected.
17. Do not use this device near water---for example,
near a sink, emergency shower, hand washing stations,
water lines, etc.
CAUTION
RISK OF ELECTRIC SHOCK
DO NOT OPEN!
IMPORTANT SAFETY PRECAUTIONS
3
The IFP should not be exposed to dripping or splashing
liquids. No objects filled with liquids should be placed
on the panel.
Do not use immediately after moving from a low
temperature to a high-temperature environment, as this
causes condensation, which may result in fire, electric
shock, or other hazards.
18. Clean only with dry cloth---Unplug the device from
the power before cleaning. Do not use liquid cleaners or
aerosol cleaners. Use a soft cloth for cleaning.
Wipe the screen from one side to the other
carefully until it looks completely clean. Do not flail
in all directions.
19. Ventilation---Do not block any ventilation openings.
Install the IFP following the manufacturer instructions.
Do not cover or block these vents and openings
since insufficient ventilation can cause overheating
and/or shorten the life of the product. This product is not
designed for built-in installation; therefore, do not place
the product in an enclosed space such as a bookcase
or rack unless proper ventilation is provided.
The IFP should have sufficient space around it. The
wider space it has, the better the heat dissipation. We
suggest up>10cm, around>10cm and back >2.5cm.
20. Heat sources---Do not install near any heat sources
such as radiators, heat registers, stoves, or other
devices that produce heat.
21. Panel protection---The display panel used in this
product is made of glass. Therefore, it can break when
the product is dropped or impacted by other objects.
Do not use a hard or sharp object to take the
place of a special pen/stylus when writing on the
panel.
22. Pixel defect---The display panel is a very high
technology product, giving you finely detailed pictures.
Occasionally, a few non-active pixels may appear on the
screen as a fixed point of blue, green, or red. Please
note that this does not affect the performance of your
product. However, this type of issue should be reported
to Recordex support.
WARNING: For continued safety, a device with class I
construction shall be connected to a mains socket outlet
with a protective earthing connection.
Environmental Protection
Electrical waste products should not be disposed of
with household waste. Please recycle where facilities
exist. Check with your Local Authority or retailer for
recycling advice.
About Location/Environment
Do not use in hot and cold rooms (locations)
● When the unit is used in areas or places with low temperatures,
the picture may leave trails or appear slightly delayed. This is
not a malfunction. The unit will recover when the temperature
returns to normal.
● Do not leave the unit in a hot or cold location. Also, do not leave
the unit in a place exposed to direct sunlight, near a heater, or
in a high humidity room, as this may cause the cabinet to
deform and the IFP to malfunction and affect the IFP’s
performance.
● Environment condition:
Operating temperature: 41°F - 95°F (5°C - 35°C)
Operating humidity: 20% - 80% (no moisture condensation)
Storage temperature: 5°F - 113°F (-15°C - 45°C)
Storage humidity: 10% - 80%
Atmospheric pressure: 86 kPa ~106 kPa
Lightning
For added protection for your device receiver during a lightning
storm, or when it is left unattended and unused for long periods,
unplug it from the power outlet and disconnect any antenna or
cable system. This helps prevent property damage and
personal injury from lightning and power line surges.
Handling the LCD panel
● Your IFP’s screen is made of glass. Do not drop your IFP or hit,
jolt, or press hard against the LCD panel. If the screen breaks,
be careful of broken glass.
● If the LCD panel breaks, make sure that you do not touch
the liquid in the panel. This may cause skin inflammation.
● If the liquid gets in your mouth, immediately gargle, rinse, and
consult with your doctor. If the liquid gets into your eyes or
touches your skin, consult with your doctor after rinsing for at
least 15 minutes with clean water.
Replacement parts
When replacement parts are required, make sure that the
service technician uses replacement parts specified by
Recordex that have the same characteristics as the original part.
Unauthorized substitutions may result in fire, electric shock,
personal injury, damage to the product, or other hazards.
Safety check
After completing any service or repair to this device, ask the
service technician to perform routine safety checks to determine
that the IFP is in proper operating condition.
Power source
Operate the IFP only from the type of power source indicated on
the marking label.
Servicing
These servicing instructions are for use by qualified service
personnel only. To reduce the risk of electric shock, do not
perform any servicing other than that contained in the operating
instructions unless you are qualified to do so.

IDENTIFICATION OF CONTROLS
4
14
1
2
3
4 5 6 7 8 9 10 11 12 13
1
USB(3.0)(for webcam) Connect USB devices to this port.
Notes: Please open the dust cover before being used.
2 Fuse 10A 250V
3 AC IN Plug the AC cord into this jack and a power outlet. (AC
100-240V 50/60Hz)
4
Press this button to switch the IFP on or off.
5
Press this button to display the input source menu or exit the menu
screen.
6
Press this button to return to the previous menu.
7
Press this button to display the desktop (Home page) on the screen.
8
Press this button to open the setting menu.
9
Press this button to turn down the volume.
10
Press this button to turn up the volume.
11
USB 2.0 Connect USB devices to this port.
12
TOUCH OUT 3
Connect an external device to support touch control of the external device
from the IFP.
Note: Touch Out 3 corresponds to the HDMI 4 input.
13
HDMI IN 4 Connect an HDMI or DVI cable to this jack.
14
Power Rocker Switch Push ( I ) to connect the power, push (O) to cut off the power.
Note: Don’t cover the power switch.
15
Extension module Slot Insert an extension module (Optional).
16
OPS module slot Insert an OPS module (Optional).
15
16
Power
Indicator
Remote Sensor

IDENTIFICATION OF CONTROLS
5
1
2
3
4
8 9 10 11 12 13 14
1 DP (DisplayPort) INPUT Connect an external device to the IFP using the DP IN jack.
2
HDMI IN 1/2/3 Connect an external device to the IFP using an HDMI or DVI cable to this jack.
HDMI IN 3 (ARC): Connect an ARC-enabled home theater receiver or
soundbar to this specific input.
3 USB 2.0 Connect USB devices to this port for Android, which is also used for upgrading
software.
4
TOUCH OUT 1/2
Connect an external device to support touch control of the external device from
the IFP.
Note: Touch Out 1 corresponds to the HDMI 1, Touch out 2 corresponds to the
HDMI 2, HDMI3, DP, or VGA.
5 WiFi module slot Insert a WiFi module.
6 USB C Full-featured Type C USB port.
7 USB 3.0 Connect USB devices to this port.
8 PC IN Connect the video via VGA and audio via 3.5mm (AUX) cable from a computer
to these ports.
9 S/PDIF Digital Audio
Output
Connect a digital sound system to this jack. Also known as Digital Optical
output.
10
Connect headphones to this 3.5mm (AUX) jack.
11
RS-232C For remote control, service, and other uses.
12
HDMI OUT Connect a monitor to this port, the output of the current screen.
13
LAN IN 1/2 Connects the IFP to the external network or the router.
14
MIC The microphone jack.
The terms HDMI stands for High-Definition Multimedia Interface, and the HDMI Logo are
trademarks or registered trademarks of HDMI Licensing LLC in the United States and other
countries.
5
6
7
HDMI OUT
S/PDI F
MI C

REMOTE CONTROL
6
Switch the IFP power on or off Display or exit the input source menu
Navigate to the home page
Display or exit the setting menu
To confirm or enter a sub-menu or toggle
between options during menu operation.
Use Arrow buttons to navigate in the on-
screen menu
Freeze the current picture
Take a screenshot. It stores the data onto a
connected USB storage device. If there is no
USB storage, the screenshot is stored in the
built-in storage.
Volume up/down
Return to the previous menu or exit the on-screen
menu
NOTES:
● This operation manual provides a description based on operating functions with the remote control.
● In a different mode, some buttons may have a different function.

CONNECTIONS
7
Cautions Before Connecting
● When connecting an external device to the IFP, make sure that the IFP and the external device are turned off.
● Check the plugs at the ends of the cables to make sure that they are the correct type before plugging them into the
jacks on the IFP.
● Make sure that all plugs are securely inserted into the jacks. Loose connections can result in image or color problems.
● The illustration of the external device may be different depending on your model.
● Refer to the operating manual of the external device as well.
Note: Before using headphones, adjust the device volume to avoid excessive volume, as hearing damage may result.
Connect TOUCH OUT with USB cable to the PC USB port.
Connect PC with VGA cable, HDMI cable, or DP cable. Please choose the proper method of connection based on your device. (Only
for PC, HDMI, DP signal)
Touch Out 1 corresponds to HDMI 1, Touch Out 2 corresponds to HDMI 2, HDMI3, DP, or VGA.
Note: After the installation of the touch driver, the IFP can control the external computer by native touch control.
USB
Type
C
devices
Type
C cable
DP cable
DP
devices
HDMI cable
HDMI
devices
HDMI cable
HDMI cable
USB
cable
USB cable
USB cable
AC 100-240V 50/60Hz
USB devices
HDMI OUT
HDMI cable
MI C
S/PDI F
USB cable
PC, etc.
DP cable
USB cable
HDMI cable
Digital sound
system
Microphone
PC, etc.
USB cable
Audio input
devices
Audio cable
VGA cable
PC, etc.
VGA
cable
PC, etc.
VGA
devices
Monitor
HDMI cable
Audio cable
Network
cable
Network
connection
S/PDIF cable
Headphone cable
Serial port cable

CONNECTIONS
8
Connect TOUCH OUT with USB cable to the PC USB port.
Connect PC with VGA cable, HDMI cable, or DP cable. Please choose the
proper method of connection based on your device. (Only for PC, HDMI, DP
signal) Touch Out 3 corresponds to HDMI 4
.
Note: After the installation of the touch driver, the IFP can control the external
computer by native touch control.
WiFi module instructions
Screw
Screw
Installation instructions
● Tighten the WiFi antenna in a clockwise direction.
● Unscrew the screws and take out the baffle-plate on the
your device.
● Insert the WiFi module to the slot along the track on both
sides. Fasten the WiFi module with two screws.
HDMI cable
HDMI
devices
USB devices
USB cable
USB cable
PC, etc.
WiFi
module
slot
USB cable
USB cable

BASIC OPERATIONS
9
Turning the IFP On
1. Plug the power cord into an AC power outlet.
2. Flip the power rocker switch on (labeled as I) to turn on the IFP. (This rocker switch is located on the back
of the panel. Close to
where the power cable connects to the IFP.)
Note: Be sure to wait for a few seconds before pressing the button. If you press the power button quickly after flipping
the rocker switch, then the IFP may not respond correctly.
Turning the IFP Off
1. Press the button again to put the IFP in standby mode.
2. Switch the power rocker switch off (labeled as O) to cut off the power completely.
FIRST TIME INSTALLATION
When turning on the IFP for the first time, you must select a language and a time zone.
Below are the pages that will appear on the screen on the first boot.
Select the desired language. Press
Next to go to the next page.
Select your Time Zone and press
Finish, this will finish the installation.

OPERATING THE NAVIGATION MENU
10
Wireless
(WiFi) S
etting
s
Source
/Input
M
enu
Annotation
T
ool
Settings
M
enu
ScreenShot Wireless Casting StopWatch
Alone (Blank screen)
Calendar
Opening SpotLight
M
ode
OPS Power
On/Off
Opening
Curtain
mode
Calculator
Add a
C
ustom
A
pp
Brightness Bar
Volume Bar
Return/Back Home (Android Interface) Application History
Gesture operation:
Side menu
Swipe up from the bottom left or the bottom right
of the screen and pause.
Go back
Swipe up from the bottom left or the bottom right
of the screen.
Go to Home screen
Swipe up from the bottom center of the screen.
Add a custom app
Click to expanding side menu

USER MENU LIST
11
1. NETWORK & CONNECTED DEVICES
Ethernet: Plug an ethernet cable into the LAN IN-port on the bottom
of the IFP, the IFP will get an IP address automatically and connect to
the internet.
WiFi: Turn the WiFi on.
Select the network from the WLAN
network list to connect it
.
Note:
Once the device is connected to the WLAN network
successfully, then whenever the network is available, the
device will reconnect to the network automatically without
entering the password.
Portable hotspot: Enables a portable WiFi hotspot.
Bluetooth: Automatic search for Bluetooth devices.
2. DEVICE
2.1 Picture: Adjusting picture.
Picture
Picture mode
Select picture mode.
If you select “User,”
you can set the
level of the
Contrast, Brightness,
Saturation, Sharpness as you desire.
Energy mode Select the energy-saving mode.
Color temperature Select the color temperature.
Anti-blue light Turn
on to decrease blue light to protect
eyesight.
Blue light level When the Anti-blue light is on, the Blue
light level can be adjusted.
Backlight Set the overall brilliance of the IFP.
Advanced
Contrast Adjust the contrast.
Brightness Adjust the brightness.
Saturation Adjust the color saturation.
Sharpness Adjust the sharpness.
Display mode Select the aspect ratio (display
proportions).
MEMC Frame rate upconversion. (Only for 4K
model)
Overscan
Adjust the reproduction ratio. You may
activate this function to obtain a clearer
picture. Note: Overscan is only
adjustable when PC mode is off & the
signal is not in a 4K resolution.

USER MENU LIST
12
Sound
Sound mode
Select sound mode.
If you select “User”, you can set the level
of the frequency response as you desire.
SPDIF mode
Select the digital audio output mode for
SPDIF .
Select “RAW” to output audio signal as its
original format.
Select “PCM” to output audio signal by
PCM format.
AVC Select “On” to equalize overall volume lev-
els across all channels.
Volume Adjust volume.
Mic volume Adjust the microphone volume.
Balance Adjust volume level of right and left speak-
ers.
2.2 Sound: Adjusting sound.
3. SYSTEM
3.1 Security
Change password: Password settings.
App lock: Lock specific applications with a password.
App install/uninstall lock: Lock the installation/uninstallation of apps.
Touch lock: Disable the touch functions of the panel.
Keypad lock: Lock the physical IFP buttons.
IR lock: Disable the function of the remote.
Network lock: Disable the function of the network.
3.2 Manage apps
Installed apps: Displays the list of the installed apps.
All apps: Display all apps.

USER MENU LIST
13
Power on settings
Power on Source
In Memory mode, when the
panel is turned on, it will au-
tomatically switch to the source
where it powered off last time.
Otherwise, you can set it to any
default input to boot to.
Power on Volume
In Memory mode, the power on
volume will remain the same
once turned off.
In User mode, the default power
on volume can be set using the
volume settings slider.
Volume Settings
Boot OPS when Power on
Turn on or off.
3.3 Power
Timing power on/off – Adjust the automatic power on and
power off times for the panel.
Timing off: Automatically switch the IFP to standby mode on a
specified day and at a specified time.
Timing on: Automatically turn on the IFP on a specified day and
at a specified time.
Power on settings:
Sleep time:
Set the duration of time until the IFP automatically goes into Standby mode.
Auto sleep:
Auto Sleep will bring the IFP to standby automatically when there is no signal input for a certain amount of time.
4. OTHERS
4.1 More
Auto source switch: When you connect a
device to the panel, it
will automatically switch to that input.
Available options are “Off,” “Prompt,” and “Direct.”
Temperature protection: Turn on or off the temperature
protection function. Temperature protection will automatically
turn the panel off if the internal temperature reaches dangerous
levels.
Current temperature: Showing the present temperature
value of the panel.
Alarm temperature: Set alarm temperature.
Note: When the temperature protection is turned on, if the
current temperature exceeds the alarm temperature, the
IFP will start a countdown to turn off. If you want to cancel
the shutdown, it can be canceled within 30 seconds.
HDMI
HDMI EDID version: Select HDMI EDID Ver.

USER MENU LIST
14
Date & time: To manually set the date and time, you must
toggle “Automatic date & time” to OFF.
Languages: Select menu language.
Keyboard & inputs:
Setting input method
.
Individuation:
Fullscreen gesture: Turn on/off the fullscreen gesture function.
Set wallpaper: Set the home page’s wallpaper.
Set no input wallpaper: Set the wallpaper for the no input screen.
Set source label: Allows you to rename each input on the panel.
4.2 Device:
Device name
Device model
System information
Includes: S/N, CPU, RAM, ROM, Resolution,
Android version, and kernel version.
System updates:
Local update: Use a USB drive to update the panel’s firmware.
Online update: Update the panel’s firmware using the internet.
Reset: Reset all settings to factory defaults.

File Explorer
15
Copy Click to copy file.
Cut Click to cut file.
Delete Click to delete file.
Rename Click to rename file.
Paste Click to paste file.
More Click to show more functions.
Exit Click to exit file manager.
Theme Click to change the theme.
Setting Click to enter setting menu page.
New Click to add file or folder.
Search Click to search file or folder.
Refresh Click to refresh file status.
Cleaner Click to clean not necessary file.
More Click to show more functions.
Notes:
● Never remove the USB storage device or turn off the IFP while using the USB storage device.
● It is recommended that you back-up your USB device data.
● Use a USB storage device that is formatted with a FAT32 file system.
● Certain types of USB devices may not be compatible with this IFP.
Function
Category selection
Press and hold management tool
Selection
Select All button
Click to open folder or file
Horizontally scroll the
screen to switch pages
Click to select storage

ANNOTATION
16
Press and drag to any place of the screen.
Pen: Click to choose the color of the pen.
Eraser: Click to choose the size of the eraser.
Screenshot: Click to capture the current screen.
Eraser all: Click to eraser all the annotations on the screen.
Exit: Click to exit the annotation.
Annotation

USB Multi Media Player
17
Notes:
● Never remove the USB storage device or turn off the IFP while using the USB storage device.
● It is recommended that you back-up your USB device data.
● If you want to remove the USB device, please exit USB mode first. For instructions on using your USB device, refer to
the user’s manual of your USB device.
● Use a USB storage device that is formatted with a FAT32 file system.
● Certain types of USB devices may not be compatible with this IFP.
Exit USB multimedia
Select view type
To select and play files from different sources
(You can select from a local disk device (USB device),
network SAMBA device)
Video: Select to play compatible movie
Song: Select to play compatible music
Picture: Select to view compatible photos
All: Select to show all files so that you can easily select any file to play

USB Multi Media Player
18
Playing Photo
With the photo viewer, you can view compatible photos.
previous photo
play/pause
next photo
zoom in
show information
rotate clockwise
rotate anti-clockwise
zoom out
Playing Music
With the USB music player, you can play compatible music.
Repeat a single music file, repeat all music
files in the selected folder when it plays to the end,
no-repeat when it plays to the end.
previous song
pause/play
next song
show
information
show playlist
repeat mode select
This manual suits for next models
2
Table of contents
Other Recordex Interactive Whiteboard manuals
Popular Interactive Whiteboard manuals by other brands

SMART Board
SMART Board SBID8055i-G5-SMP manual

AVer
AVer CP series user manual

StarBoard
StarBoard F8 Series user manual

Touchboards
Touchboards Walk-and-Talk Installation and operation guide

promethean
promethean ActivBoard Touch Getting started guide

SMART Board
SMART Board SB660 64" Quick installation guide