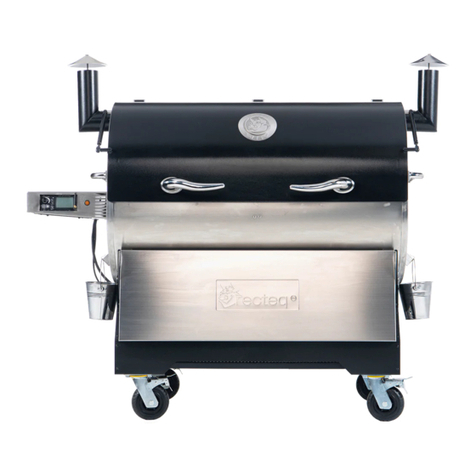
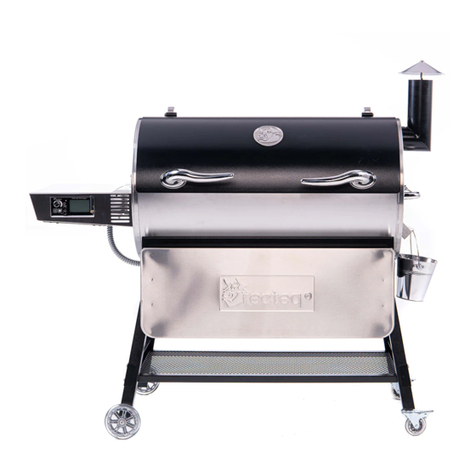
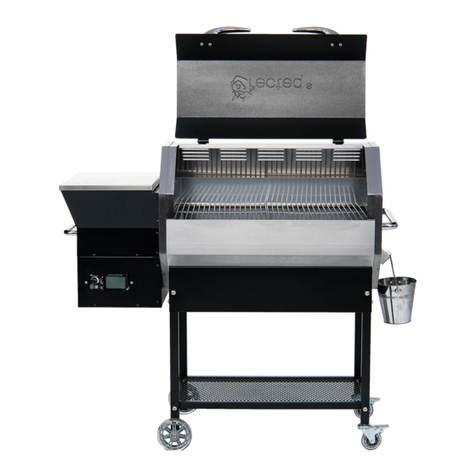
recteq RT-1070 User manual

Assembly Manual
RT-1070
Built-In/Cabinet

WARNING
ONLY
EXTREME CAUTION AND CARE SHOULD BE TAKEN
TO PREVENT GREASE FIRES. SEE MAINTENANCE
AND CLEANING SECTION FOR MORE INFORMATION.
DO NOT STORE OR USE COMBUSTIBLE MATERIALS IN
OR NEAR THIS APPLIANCE.
TO PREVENT INJURY, NEVER ATTEMPT TO MOVE
GRILL WHILE HOT OR WITHOUT ASSISTANCE.
NEVER STORE ANY GRILL IN A SMALL SPACE OR
PLACE IN A VEHICLE UNLESS COMPLETELY COOL
AND FIRE IS VERIFIED AS EXTINGUISHED.
LEAVE A MINIMUM OF 60” CIRCUMFERENCE
BETWEEN GRILL, DECKS, HOUSES OR ANY
COMBUSTIBLE MATERIALS.
USE ON LEVEL GROUND AWAY FROM OVERHANGING
ROOFS OR LEAVES.
FOR OUTDOOR USE
2

IMPORTANT SAFETY INFORMATION
WARNING: READ ALL SAFETY INFORMATION PRIOR TO USE
LOCATION AND PLACEMENT OF GRILL/GRILL INSTALLATION MUST
BE COMPLIANT WITH ALL LOCAL CODES AND REQUIREMENTS.
EXTREME CAUTION AND CARE SHOULD BE TAKEN TO ENSURE
SAFE USAGE OF THIS GRILL. WHEN DESIGNING YOUR LAYOUT /
PLACEMENT, KEEP IN MIND THAT THIS GRILL GETS EXTREMELY
HOT AND THE POSSIBILITY OF A GREASE FIRE DOES EXIST. SEE
MAINTENANCE AND CLEANING SECTION FOR MORE INFORMATION.
Burning materials particularly gas, wood, or charcoal produce natural gases like carbon
monoxide, which is toxic when concentrated. Do not use in enclosed areas such as
garages, indoors, etc.
Keep grill 60” or more from any combustible surface.
Do not put anything ammable in the bottom cabinet, or under the grill.
Never put your grill in a vehicle without rst ensuring that it is completely cool and
that no hot embers, pellets, or ashes remain in the repot or auger.
Occasionally, your RT-1070 should be checked for re pot obstructions to ensure
proper airow is maintained. See cleaning instructions in this manual for proper
procedures.
Your RT-1070 gets very hot; keep young children and animals away while in use. Use
extreme caution when cooking at high temperatures.
Use heat-resistant barbecue mitts or gloves when operating this unit. Long handled,
non-plastic utensils are also recommended.
Do not touch cooking chamber or attempt to move your RT-1070 while operating
or while the grill is hot. Make sure the re is completely out and that the grill is
completely cool before transporting. Before covering your grill, make sure that the
grill has cooled completely.
Never put your hand in the pellet hopper or attempt to service any part of your RT-
1070 while your grill is plugged in.
3

RT-1070
Table of Contents
Warnings
Welcome
Hardware
Assembly
Cabinet Assembly
Interior Grill Installation
Built-In Warnings
1070 Dimensions
Built-In Styles
Cut Sheet
Initial Setup
Operating Your Grill
Test Mode
Shutting Off Grill
Tips,Tricks, and Temps
Maintenance and Cleaning
Trouble Shooting
Controller Schematic
Warranty
2-3
5
6
7-8
9-11
12
13
14
15
16
17
18
19
20
21
22
23-26
27
28
4

Congratulations on the purchase of your new
RT-1070 Wood Pellet Grill. With proper care and maintenance, your
grill will provide you years of trouble-free operation. Please review
the following information carefully for useful tips and information
that will help you utilize your grill’s extensive features and benets.
To see our favorite recipes and cooking tips, visit recteq.com. As
you become familiar with your recteq, you will nd that indoor
cooking becomes the exception and not the rule in your house.
With the ability to easily cook foods to standards that meet or
exceed restaurant quality, you will nd yourself not wanting to go
to restaurants and pay for food that does not live up to the recteq
standard of avor. Also, don’t be alarmed when your neighbors call
and ask if you will ‘recteq’ some meat for them...This is a common
occurrence among recteq owners.
We want you to join the vibrant and growing community of recteq
owners. Whether you want to contribute your own tips and recipes,
learn from others, or a bit of both, please jump right in. You now
have an incredible tool for cooking. Let’s see how you use it!
Thank you for choosing recteq.
Ray Carnes & Ron Cundy
RT-1070
Assembly Manual and Users Guide
5

6
RT-1070 Contents
2
1
11
12
13
14
18
15
16
10
3
4
6
78
5
* 9. Hardware Pack Contents
* 17. Hardware Pack Contents
1. Grill Body
2. Grill Lid
3. Pull Bar
4. Top Grate
5. Bottom Grate
6. Drip Pan
7. Grease Trap
8. Heat Deector
9. Hardware Pack
10. Cabinet Sides (2x)
11. Left Cabinet Door
12. Right Cabinet Door
13. Cabinet Bottom
14. Magnetic Strip
15. Cabinet Back
16. Caster Wheels (4x)
17. Hardware Pack
18. Internal Rack Brackets
17-a. Thin Bolts (24x)
17-b. Lock Washers (24x)
17-c. Flat Washers (24x)
9-a. Lid Stops (2x)
9-b. Bolts (4x)
9-c. Lock Washers (4x)
9-d. Flat Washers (4x)
9-d. Grate Tool
9-e. Leveling Feet
9-f. Meat Probes (not pictured)
9-g. Stainless Plug
17-d. Thick Bolts (16x)
17-e. Lock Washers (16x)
17-f. Flat Washers (16x)
RT-1070 Cart Contents (Optional)
*Stainless steel can have sharp edges and corners so use caution when assembling

RT-1070 Assembly
Step 1
Unbox the grill and remove all internal components.
Prepare for Assembly
Attach left lid stop (9a) to grill body (1).
You will need a Phillips-Head screwdriver and 8mm socket wrench (5/16” or pliers will
work)
DO NOT FULLY TIGHTEN.
Carefully slide lid (2) onto left lid stop (9a).
Attach unfastened right lid stop (9a) to lid (2).
Align holes in right lid stop (9a) with holes in grill body (1).
Open lid (2) and from inside the grill body (1) install remaining hardware.
DO NOT FULLY TIGHTEN.
Verify that lid (2) closes correctly, and make necessary adjustments before nal
tightening.
Step 2 Install Lid
7
*Stainless steel can have sharp edges and corners so use caution when assembling

IF BUILDING IN, OR NOT USING A CART, PROCEED TO PAGE 12
Step 3
Open lid and attach pull bar (3) using the two bolts that are screwed into the handle.
The beauty ring stays attached to the pull bar.
Hand tighten until all screws are in place.
Pull Bar
Grill Body
Attach Pull Bar
PRO TIPS:
Use packaging cardboard, furniture sliders, or high temp felt to make sliding grill in easier
and keep scratching at a minimum.
holes if not using bar.
Use optional stainless plug to cover and tighten
with nut from the inside if not using the pull bar.
Nuts go on inside of grill
8

RT-1070 Cabinet Assembly
Step 1: Attach back panel (15) to bottom panel (13) of the cabinet using 3 thin bolts, washers, and lock
washers.
Step 2: Attach left panel (10) to bottom and back panel (15) using 5 thin bolts, washers, and lock washers.
Step 3: Attach right panel (10) to bottom and back panel (15) using 5 thin bolts, washers, and lock washers.
Step 4: Attach magnetic strip (14 ), facing forward, to front of cart using 2 thin bolts, washers, and lock washers.
MAGNETS MUST FACE
FORWARD BEFORE
PROCEEDING.
1 2
3 4
4
9
*Stainless steel can have sharp edges and corners so use caution when assembling

RT-1070 Cabinet Assembly cont.
Step 5: Flip cabinet over and attach caster wheels (16) using 16 thick bolts, washers, and lock washers.
Step 6: With assistance,
lay grill and cabinet on its
back.
Step 7: With the cabinet
on its back, move cabinet
to bottom of grill.
Step 8: Align screw
housings from the
magnetic strip to the
horizontal slot.
Step 9: Screw cabinet
onto grill body using 9
thin
bolts, washers, and
lock washers.
55
8
76
9
10

RT-1070 Cabinet Assembly cont.
Step 10: (NOT PICTURED) Lock caster wheels and with assistance, lift grill and cabinet
upright. Use caution and make sure area is free from obstructions.
Step 11: Attach internal rack bracket.
Step 12: Attach cabinet doors, starting with the bottom pin and pulling the trigger down for the
top pin.
11
12
11

Lift the lid, align the notches in the heat deflector (8) with the small brackets in the front and back
of the barrel, and place the heat deflector over the fire pot. Install the drip pan (6) with the pan
sloping down to the right of the grill making sure to leave equal gaps between the pan and
the front and back of the chamber walls. Install the cooking grates (4/5) by sliding them into their
appropriate rails. Ensure grease trap (7) is lined and slid into place. 1lb mini loaf pan liners fit
into grease tray. CHECK GREASE TRAY BEFORE EACH COOK TO AVOID OVERFLOW AND
ALWAYS LINE GREASE TRAY WITH A LINER OR FOIL.
Heat Deflector, Drip Pan, and Cooking Grates
Heat Deflector Drip Pan
Cooking Grates
Drip Pan (view2)
12

1070 Built-In Warnings
Make sure there is enough clearance to slide grill into space. Surrounding materials
need to be non-ammable and meet local building codes.
Do not seal grill into place, cover front vents, or close off rear vents when sliding
grill into place, doing so will keep the grill from operating correctly.
Leave approximately a 1” to 2” gap between the rear vents and building material.
Make sure electrical outlet/box is not behind the grill but rather separated in a
different compartment.
Pro tip: A 1.5” hole can be used to thread electrical cord.
13

*All measurements are approximations
RT-1070 Dimensions
30’’
25’’
29.5’’
31.5’’
11.5’’
14’’ 11’’
7’’
22.5’’ (vents to back of grill skirt)
26.25’’ (vents to back of grill)
25’’
14’’
6’’
14

Built-In Styles
Built-In #1
This style uses the back of
the grill to the front vents
as guidelines.
Built-In #2
This style uses the back
of the grill skirt to front of
grill controls as guidelines.
26.25’’ (vents to back of grill)
*All measurements are approximations
25’’
Electrical cord
RT-1070 Dimensions for Electrical
Electrical Cord is 2”
from the back right
of the grill, and 1.5”
from the bottom.
TOTAL CORD LENGTH: 4’8”
15

16
Cut Sheet (Overhead View)
** Due to hopper and pull bar hardware, we do not recommended a height taller than 13”
BUILT IN MEASUREMENTS
Width:
Height:
Depth:
Electrical:
30”
13”**
26”
1.5” dia
30”
26”
13”
30”
26”
1.5” dia (electrical)
1.5” dia
(electrical)

Initial Setup Procedure
Operating Your Grill
Before cooking for the rst time, we recommend that you remove the cooking grate and wash it with
mild soap and water. Fill your hopper at least halfway up and place a small handful of pellets into the
re pot (about a 1/4 cup of pellets). Do not over fill the fire pot. Reinstall the grate, set grill to 400°F
and once the grill reaches 400°F, let run with the lid down for 1 hour. This will provide a nal cure
and remove any residue that may have accumulated during manufacturing and shipping. After this
initial burn, your auger and re pot are primed, and your grill is ready for cooking.
Power Button:
Press power button to turn grill on and adjust temperature knob to desired temperature.
• Turning the grill ON activates the automatic startup mode and illuminates the digital readout.
• If your grill fails to light itself within 30 minutes of startup, the Smart Grill Technology™ processor
will turn the grill off and display ER-2 on the screen.
• Pressing the power button again activates the shut down mode of your grill. If grill’s actual
temperature is below 160°F, pressing the power button will simply turn the grill off.
• When the power button is used to shut down your grill, the Smart Grill Technology™ processor
will stop adding pellets to the re pot and the fan will continue running to completely burn the
pellets remaining in the re pot. During this cooling process, the display screen will display FAN.
Shortly thereafter, the display screen will change to display AUG - this will push out any embers
left in the auger tube.
WIFI: Download the recteq app from Apple App Store for Apple devices or Google Play for Android
devices, and follow the directions on app.
WIFI Troubleshooting: Use the specic link based on phone.
iOS Wi-Fi Setup
Android Wi-Fi Setup
Temperature Control Knob: Turn knob to select computer maintained temperature in 5° increments.
(Range: 200°F - 500°F)
Additional Temperature settings: LO and FUL
LO: LO will display as set temperature when knob is turned counterclockwise beyond 200°F and
Xtreme Smoke will be activated. The grill will feed pellets to the re at the minimum feed rate
(lowest rate possible to maintain a reliable re). This will produce the most smoke and achieve the
lowest temperature possible, given environmental conditions/type of pellets used.
FUL: FUL will display as set temperature when knob is turned clockwise beyond 500°F. Grill will feed
pellets to the re at 100% of auger capacity. This will produce the highest temperature possible,
given environmental conditions/type of pellets used.
17

Operating Your Grill
Adjustable Parameter 1: Min Feed Rate - Min Feed Rate is the
minimum rate that the auger is allowed to feed fuel to the re
pot, regardless of Set Point. Decreasing the value will allow
the grill to achieve lower temperatures but will increase the
risk of ame-outs. Increasing the value will prevent losing re
but will limit your ability to maintain low temperatures on hot,
sunny days. Note: Changing this does not change the auger speed. The
auger speed is constant.
Turning the Temperature Control Knob clockwise will increase,
and turning counterclockwise decrease, the value within the
range of 5 - 250. (Factory preset: 10)
Adjustable Parameter 2: Temperature Offset - Your grill has been
precisely calibrated at our facility, but the Temperature Offset
allows you to customize how your controller will operate.
Should you choose to rely on a secondary temperature probe,
you can use the following process to recalibrate your Smart
Grill Technology Controller. Adjustable Parameter 2 will display
OFS.
Offset Calibration Video Link
Additionally, the current temperature offset percentage value
will be displayed. Turning the Temperature Control Knob
clockwise will increase, and turning counterclockwise decrease,
the value within the range of -25.0 to 25.0. (Factory preset: 0)
Probe A/B Calibration - video link
Due to varying qualities of pellet brands, we give you the ability to adjust your
minimum feed rate downward in the event that your grill is running hot at lower
temperatures. However, if you experience a sudden loss, followed by an
immediate increase in grill temperature, then your grill has experienced a flame
out and will automatically relight. This signifies that your minimum feed rate was
adjusted too low and needs to be increased.
Adjustable Parameter 1
Adjustable Parameter 2
Probe A Calibration
Probe B Calibration
AUG
OFS
PrA
PrB
Settings Button: Press and hold the settings button to access the adjustable parameters menu. Short
presses of the settings button will scroll through the adjustable parameters. Pressing and holding the
settings button will exit the adjustable parameters menu.
Test Mode: With grill OFF, press and hold the Settings Button to enter the Adjustable Parameters
Menu. Enter Test Mode from either of the four screens AUG, OFS, PrA, or PrB by pressing the
Power Button. Each additional press of the Power Button will advance you through the 8 Test Mode
screens. The last screen is the BYE screen. While on the BYE screen, press the Settings Button to
return to the adjustable parameters screen, then press and hold the Settings Button and your grill’s
controller will return to the OFF state.
18

To enter test mode: Press and hold Settings for 3 seconds -
Press Power - until you see AUG
VEr XXX displays current software version.
Screen 5-1 is test mode for your auger motor. You should
be able to look in your grill’s re pot and see the end of
the auger turning very slowly.
Screen 5-2 is test mode for your grill’s ignition system.
You should be able to look into grill’s re pot and see
your igniter begin to glow within a few minutes. DO NOT
TOUCH THE IGNITER.
Screen 5-3 is test mode for your grill’s blower fan. You
should be able to hear the fan blowing.
Screen 5-4 is test mode for your grill’s control knob. You
can turn the knob to see the 000 value increase and
decrease as you turn the knob.
Screen 5-5 is test mode for your grill’s temperature sensor
and Probe A and Probe B. You can see the temperature
values for each displayed on the screen (a value of - - -
means the probe is not plugged in or the grill’s sensor is
not connected).
Screen 5-6 is an internal quality control screen that has no
function for the user.
Screen BYE is the nal screen of the test mode. Pressing
the power button again will return you to Screen 5-1.
Pressing the settings button will return you to the
Settings Menu, at which time you can hold the Settings
Button to exit Settings Menu and get you back to a blank
screen.
19
Test Mode
VEr XXX
Screen 5-1
Screen 5-2
Screen 5-3
VEr
5-1
5-2
0
5-3
0
Screen 5-4
Screen 5-5
Screen 5-6 Screen BYE
5-4
000
5-5
Probe A Probe B
Actual
5-6

Operating Temperatures
Smoking
Roasting/Braising
Baking
Grilling
Searing
180°F to 275°F
275°F to 325°F
325°F to 375°F
375°F to 450°F
450°F+
Shutting Off Grill
When you are done cooking, simply press the power button. The blower fan will start to cool
your grill down and will shut off on its own. The auger will feed pellets during the process;
this is completely normal. Keep lid closed during this process. Do not move until fully cooled.
Tips, Tricks, and Temps
Preheating
It is important to allow your grill to preheat to achieve your desired cooking temperature
before cooking. This allows the entire grill to heat up and quickly return to your desired
temperature once your food is introduced. If you do not allow the grill to preheat, you will
nd that it takes a longer period of time to bring both the grill and the food to your desired
cooking temperature. It is important to leave the lid closed during preheating.
Pellet Information
Ultimate Blend premium hardwood pellets contain approximately 8,200 BTUs of heat per
pound and leave less than 1% ash residue. Pellets should be stored in a dry area, as wet
pellets will swell and turn back into sawdust. For the best results, always use premium
hardwood pellets in your grill. The use of grades other than premium hardwood pellets may
result in temperature variations, uneven cooking, and poor results. Remember, pellets do not
contain preservatives and will deteriorate over time.
Caution: Some wood pellets produced for heating fuel have a high content of softwood which can
include pitch and should not be used for cooking. Always check with the pellet manufacturer to ensure
that you are cooking with a premium, 100% hardwood pellet.
20
Table of contents
Other recteq Grill manuals

recteq
recteq The Flagship RT-1100 User manual

recteq
recteq RoadWarrior 340 User manual

recteq
recteq Matador RT-G450 User manual

recteq
recteq RT-590 User manual

recteq
recteq RT-700 User manual

recteq
recteq RT-2500 User manual
recteq
recteq Bullseye Deluxe RT-B380X User manual

recteq
recteq Patio Legend RT-410 User manual

recteq
recteq Backyard Beast RT-1000 User manual
recteq
recteq RT-1250 User manual