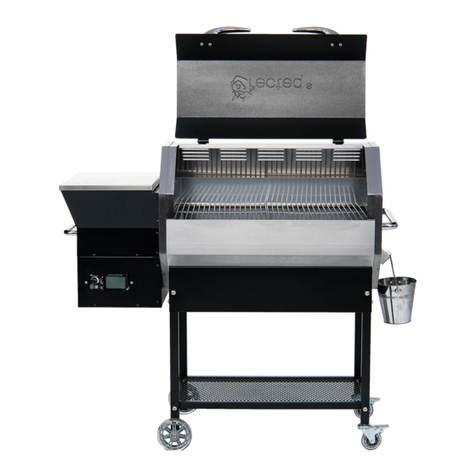
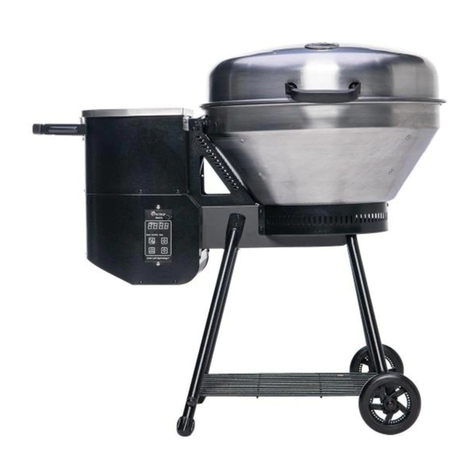
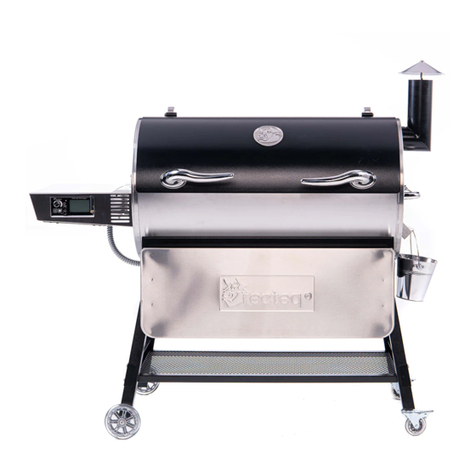
recteq WyldSide RT-A850 User manual

Assembly Manual
RT-A850
WyldSide

2
WARNING
ONLY
DO NOT STORE OR USE COMBUSTIBLE MATERIALS
IN OR NEAR THIS APPLIANCE.
TO PREVENT INJURY, NEVER ATTEMPT TO MOVE
GRILL WHILE HOT OR WITHOUT ASSISTANCE.
NEVER STORE ANY GRILL IN A SMALL SPACE OR
PLACE IN A VEHICLE UNLESS COMPLETELY COOL
AND FIRE IS VERIFIED AS EXTINGUISHED.
LEAVE A MINIMUM OF 60” CIRCUMFERENCE
BETWEEN GRILL, DECKS, HOUSES OR ANY
COMBUSTIBLE MATERIALS.
USE ON LEVEL GROUND AWAY FROM
OVERHANGING ROOFS OR LEAVES.
FOR OUTDOOR USE

3
IMPORTANT SAFETY INFORMATION
Warning: Read all safety information before operating grill.
For outdoor use only. Do not use in any enclosed area. Use on level surface, away
from overhanging easements.
We strongly advise against using lighter fluid during the operation of your
grill.
Do not use kerosene or alcohol for lighting charcoal. Use of these or similar
products could cause an explosion possibly leading to severe bodily injury
and/or equipment damage.
Never leave coals and/or smoldering ashes in grill unattended. Before
leaving grill unattended, remaining coals and/or smoldering ashes must be
removed from grill. Carefully place remaining coals and/or smoldering ashes
in a non-combustible metal container and completely saturate with water.
Allow coals and water to remain in metal container at least 24 hours before
disposal.
Extinguished coals and/or ashes should be placed a safe distance from all
structures and combustible materials.
With a garden hose, completely wet the surface beneath and around grill to
extinguish any ashes, coals, and/or embers, which may have fallen during
the cooking or cleaning process. Do not use water on lit grease. Doing so can
cause a grease fire.
Use caution to protect yourself and property.
Use common sense practices at all times when operating or moving your grill.

4
Congratulations on the purchase of your new
WyldSide Argentina Style Grill. With proper care and maintenance,
your grill will provide you years of trouble-free operation. Please review the
following information carefully for useful tips and information that will help
you utilize your grill’s extensive features and benefits.
Your WyldSide is by far and away the most bang for your buck and
comes fully loaded with high quality construction that makes your cooking
experience enjoyable and stress free. With direct flame cooking, we’re taking
the art of grilling back to the simplest of methods. Grilling your favorite foods
over an open flame adds flavor profiles that can only come from real fire. To
see our favorite recipes and cooking tips, visit recteq.com.
We want you to join our vibrant and growing community of grill owners.
Whether you want to contribute your own tips and recipes, learn from others,
or a bit of both, please jump right in. You now have an incredible tool for
cooking. Let’s see how you use it!
Thank you for choosing recteq.
Ray Carnes & Ron Cundy
Co-Founders, recteq, LLC
RT-A850 WyldSide
Assembly Manual and Users Guide

5
RT-A850 Contents
1. Grill Body
2. Side Shelf
3. Lift Frame
4. Vermiculite Bricks
5. Caster Wheels
6. Lid
7. Lid Handles
8. Pull Bar Handle
9. Grate Frame
10. Cooking Grates
11. Left Lift Bracket
12. Right Lift Bracket
13. Rotisserie Motor
14. Rotisserie Motor Bracket
15. Counter Weights
16. Spit Rod and Parts
17. Hanging Hooks
18. Crank Wheel Brake
19. Crank Wheel
20. Pull Pin
21. Hardware Package (not pictured)
1
2
3
4
5
6
7
8
9
10
11 12
13 14
15
17
18 19
16 20

6
RT-A850 Assembly
Step 1 Unpack and Prepare for Assembly
With assistance, remove all items from inside grill body. Tip: Flatten the cardboard box out and lay
everything on it. This serves as a good working area and it helps prevent the grill from getting scratched
or damaged during installation.
Step 2 Lay Grill on its Back
Lay grill on its back with logo facing up.

7
Step 3 Attach Caster Wheels
Install caster wheels (5) using bolt assembly order.
Step 4 Stand Grill Upright and Install Bricks
Lock caster wheels (5) and stand grill upright.
Install vermiculite bricks (4) in bottom of fire box.

8
Step 5 Install Lift Frame
Slide grate frame (3) into grill body and attach using bolt assembly order.
Step 6 Install Lift Brackets
Unwrap and attach lift brackets
(11 /12) into grate frame.
Feed the cable and clamps
attached to bracket through the
wider opening at the top of the
slot.

9
Step 7 Install Grate Frame to Lift Brackets
Install grate frame (9) to lift brackets using bolt assembly order.
Install Side Shelf
Attach side shelf (2) to grill body
following bolt assembly order.
Step 8

10
Install Pull Bar Handle
Attach pull bar handle (8) to grill body
following bolt assembly order.
Step 9
Install Crank Wheel Brake
Install crank wheel brake (18) using long bolt.
Step 10

11
Step 11 Install Crank Wheel
Attach crank wheel (19) using large metal pin.
Install Cooking Grates
Install cooking grates (10) in grate frame (9).
Step 12

12
Install Lid Handles to Lid
Attach lid handles (7) to lid (6) using pre-installed hardware.
Step 13
Install Hanging Hooks
Install hanging hooks (17) with small steel pins.
Step 14

13
Installing Rotisserie Attachment
Slide motor mount (14 ) into left lift bracket and insert pull pin (20).
Install Hanging Hooks
Step 1
Slide rotisserie motor (13) onto the motor bracket (14 ).
Attach Rotisserie Motor
Step 2

14
Assemble spit rod (16) starting with sliding on the rotisserie forks. Next, slide on the rod bushings so
that they rest on the lift brackets, one on each end of the rod. Grab desired weight and assemble in
order based on picture (A). Finally, screw on handle to finish spit rod.
Assemble Spit Rod
Step 3
A

15
With assembled spit rod, insert tapered end into rotisserie motor.
Mount Spit Rod
Step 4
Reverse spit rod assembly order to add meat for cooking.
Note: Be sure the bushings rest on the lift brackets to ensure the spit rod rotates smoothly.
The WyldSide includes 4 spit forks and 3 counter
balance weights: Large (11.2 oz), Medium (7. 7 o z ),
Small (4.1 oz). You can remove the spit rod bushing
and chrome locking washers to add these accessories
onto your spit rod.
Rotisserie Spit Rod Attachments

16
We recommend placing your preferred fuel in the cooking chamber and allowing a fire to fully burn
before your first cook. This will act as a burn in for your grill. Below are a list of fuel burning and
lighting methods for your WyldSide.
Chimney Starter Method
Use hardwood chunks and light them in the chimney starter, just as you would charcoal.
Teepee Method
Build a small teepee of kindling over a ball or twist of loosely crumpled newspaper and/or fire
starter, leaving enough space in the front to insert a match. Build a larger teepee of sticks over the
first teepee, again leaving a space in the front. Finally, build a third teepee of lump hardwood over
the first two. Using a long match, light the newspaper.
Log Cabin Method
Build a small box of kindling, as you would a log cabin, over a ball of loosely crumpled newspaper
and/or fire starter. Build larger boxes of kindling, sticks, and split logs around it. Light the newspaper
with a long match.
Charcoal Method
Start with a mound of lit charcoals. Arrange your wood kindling first, then lump hardwood - on top.
Lighting Procedure
Tips, Tricks, and Temps
Operating Blower Fan
When starting up your WyldSide, you’ll want to turn the dial up on your blower fan to get a fire
started quickly and efficiently. For a lower, more controlled flame, turn the dial down. This variable
speed blower fan will allow you to adjust airflow on the fly for whatever size flame your meal may
call for.
Fuel Information
With the introduction of the WyldSide, we have entered the realm of cooking over a direct flame.
This Argentina style grill can be used with charcoal, hardwood, and wood chunks, among many
other different fuel sources. We recommend using lump hardwood for a more consistent burn.
Tips and Tricks
• Clean your grill regularly to maintain beauty and proper function. It is advised to clean before
any long cook.
• Always use grill on a level surface.
• Not all fuel is created equal; always use high quality fuel when cooking.
• Always store fuel in a dry area.
• Get to know your grill, keep good cooking notes. This will help with consistency.

17
Tips, Tricks, and Temps
• Practice makes perfect.
• Always allow your meat to rest before serving.
• Always keep your cooking area clean.
• Wind can cool your grill temperature.
• Always preheat grill to desired temperature before use.
• Wipe off stainless steel surfaces before preheating; dirt and food stains can cook into surface.
• Leave at least one inch of clearance between food for even cooks (crowded foods will take
longer to cook).
• Foods cooked on pans or in containers will require more time than foods cooked directly on
grates.
• Use an instant read thermometer to determine meat-doneness; never rely on time.
• Know your food’s internal temperature!
• Use long handled tongs and spatulas for turning meats; do not use plastic utensils.
• Injecting, mopping, and spritzing are great ways to keep meat from drying out.
• When going low and slow, plan for the possibility of your meat to stall; larger pieces of meat
tend to take longer from 160°F-180°F. Be patient.
• Never unplug your grill to turn it off.
Temperatures
Remember, you can’t tell whether meat is safely cooked by looking at it. Any cooked, uncured red
meats - including pork - can be pink, even when the meat has reached a safe internal temperature.
After you remove the meat from your grill, allow it to rest for a specified amount of time. During the
rest time, its temperature remains constant or continues to rise, which destroys harmful bacteria.
• Hot foods should be held warmer than 140°F.
• Cold foods should be held below 40°F.
• Perishable food should not be left out for more than 2 hours at room temperature - 1 hour when
the temperature is above 90°F.
• Always follow food safety guidelines provided by the USDA.
Maintenance & Cleaning
• Clean your cooking chamber after every cook to ensure proper airflow.
• Use a grill brush to clean your cooking grates after every cook to provide years of trouble free
use from them.
• Use a mild soap and water to clean the exterior of your grill.
• If left in exposed area, keep your grill unplugged when not in use.
• Never let your fuel get wet.
• For a superior cleaning and shine, clean your grill’s outside surfaces when completely cooled.
Transportation and Storage
Ensure that the unit is cool. Remove the grates and make sure no unburnt fuel remains in the cooking
chamber.
Store in a dry, safe place.
Never store the grill in a small space or place in a vehicle unless completely cool and fire is verified
as extinguished. Never move the grill while it is still hot. Never move the grill without assistance.

18
Warranty
This limited warranty covers the RT-A850 Wood Pellet Grill manufactured by “recteq, LLC.” The RT-A850 carries
a 6-year limited warranty from the date of purchase by the original owner against defects in material and
workmanship when subjected to normal residential use. Limited warranty does not apply to paint, grill cover, or
damage caused from corrosion.
Conditions of Limited Warranty
1. During the term of the limited warranty, recteq, LLC’s obligation shall be limited to replacement of covered, failed
components. Recteq will repair or replace parts returned to recteq, freight prepaid, if the part(s) are found by
recteq to be defective upon examination. Recteq shall not be liable for transportation charges, labor costs, or
export duties.
2. Recteq takes every precaution to utilize materials that retard rust including the use of high temperature paint
and stainless steel where advisable. Even with these safeguards, the protective coatings can be compromised
by various substances and conditions beyond recteq’s control. High temperatures, excessive humidity, chlorine,
industrial fumes, fertilizers, lawn pesticides and salt are some of the substances that can affect paint and metal
coatings. For these reasons, the limited warranties DOES NOT COVER RUST OR OXIDATION FOR ANY
REASON.
3. The warranty is based on residential use. Warranty coverage does not apply to products used in commercial
applications.
Exceptions to the Limited Warranty
There is no written or implied performance warranty on recteq, as the manufacturer has no control over the
installation, operations, cleaning, maintenance or the type of fuel burned. This limited warranty will not apply nor
will recteq assume responsibility if your product has not been installed, operated, cleaned and maintained in strict
accordance with the manufacturer’s instructions. The warranty does not cover damage or breakage due to misuse,
improper handling or modifications. NEITHER THE MANUFACTURER, NOR THE SUPPLIERS TO THE PURCHASER
ACCEPTS RESPONSIBILITY, LEGAL OR OTHERWISE, FOR THE INCIDENTAL OR CONSEQUENTIAL DAMAGE
TO THE PROPERTY OR PERSONS RESULTING FROM THE USE OF THIS PRODUCT. ANY WARRANTY IMPLIED
BY LAW, INCLUDING BUT NOT LIMITED TO IMPLIED WARRANTIES OF MERCHANTABILITY OR FITNESS,
SHALL BE LIMITED TO TWO (2) YEARS FROM THE DATE OF ORIGINAL PURCHASE. WHETHER A CLAIM IS
MADE AGAINST THE MANUFACTURER BASED ON THE BREACH OF THIS WARRANTY OR ANY OTHER TYPE
OF WARRANTY EXPRESSED OR IMPLIED BY LAW, MANUFACTURER SHALL IN NO EVENT BE LIABLE FOR ANY
SPECIAL, INDIRECT, CONSEQUENTIAL OR OTHER DAMAGES OF ANY NATURE WHATSOEVER IN EXCESS
OF THE ORIGINAL PURCHASE PRICE OF THIS PRODUCT. ALL WARRANTIES BY MANUFACTURER ARE SET
FORTH HEREIN AND NO CLAIM SHALL BE MADE AGAINST MANUFACTURER ON ANY ORAL WARRANTY OR
REPRESENTATION. Some states do not allow the exclusion or limitation of incidental or consequential damages, or
limitations of implied warranties, so the limitations or exclusions set forth in this limited warranty may not apply to you.
This limited warranty gives you specific legal rights and you may have other rights, which vary from state to state.
The limited warranty for SIX (6) years is in lieu of all other warranties expressed or implied, at law or otherwise, and
recteq does not authorize any person or representative to assume for recteq any obligation or liability in connection
with the sale of this product. This means that no warranties, either expressed or implied, are extended to persons who
purchase the product from anyone other than recteq or an authorized recteq Distributor.
Procedure for Warranty Service
Call recteq at 706-922-0890 for repair or replacement of your covered parts.
Be prepared to furnish the following information:
• Purchaser’s name, model and serial number of grill and date of purchase.
• An accurate description of the problem.
Table of contents
Other recteq Grill manuals

recteq
recteq RT-590 User manual

recteq
recteq Patio Legend 410 User manual

recteq
recteq RT-1250 User manual

recteq
recteq Patio Legend RT-410 User manual

recteq
recteq RT-B380 Bullseye Guide

recteq
recteq RT-2500 User manual

recteq
recteq Bullseye Deluxe RT-B380X User manual

recteq
recteq Backyard Beast RT-1000 User manual

recteq
recteq RoadWarrior 340 User manual

recteq
recteq RT-340 User manual
Popular Grill manuals by other brands

Pit Boss
Pit Boss PRO Series Assembly and operation

Blue Seal
Blue Seal Evolution G594 Installation, operation & service manual

TAINO
TAINO HERO 93537 Assembly instructions

Blaupunkt
Blaupunkt GRS901 owner's manual

Smoke hollow
Smoke hollow LS2016-2B owner's manual

Camp Chef
Camp Chef BB60X-3 Warning & instruction booklet