HOW TOMAINTAIN YOUR ACTIVE 320S SHOWER
5. Re-Fit the front cover (see Diagram 5),
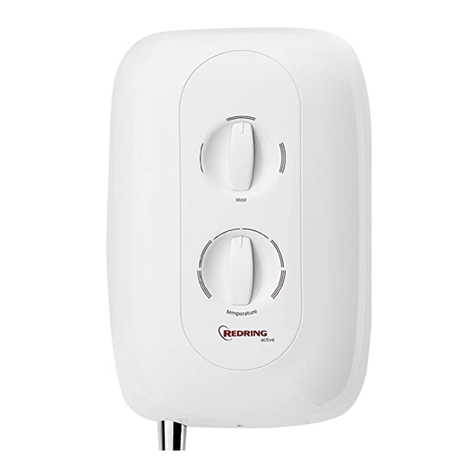
a. Ensure outer knob “A” is aligned fully anti-clockwise to the “ (stop)“ position.
b. Ensure innerknob “B” is aligned tothe “ (high)” position.
c. Inthemainbody of the shower, turnthe “Drive Spider” fully anti-clockwise until it stops.
d. Inthemainbody of the shower, turnthe “Drive Gite” anti-clockwise until it is at “12 o’clock”.
e. Fit the front cover ofthe shower tothe main bodyensuring that the 3 x“Drive Spider Legs”
engage withthe slots inouterknob “A”.
f. Check that outer knob“A”has beencorrectlyaligned by ensuring that all 3 power settings can
be selected, and returns tothe “ (stop)“ position.
g. Check that inner knob “B”has beencorrectlyaligned by turningclockwise and ensuring that
knob turns approximately 3/4 of a turn (270°) and whenturned back fully anti-clockwise,
returns tothe “ (high)”position.
h. Replace the top and bottomfasteningscrews.
6. Fit the shower hose, and operate the shower first without the handset toflushoutparticles,
fit thehandset and thenoperate the shower as onpage 7 or12 and check:
a. That the water gets toa satisfactory temperature.
b. Water flowcanbe adjusted byinner controlknob “B”.
c. Power selectionoperates inall 3 positions, giving a change inwater temperature and that the
neonlightfunctions correctly.
d. Check again for leaks and that theholes inthe shower handset are not blocked
7. DEMONSTRATE OPERATION TOUSERS
It is recommended that the shower unit and hose etc. be cleaned using a soft clothandthat the use
of abrasive or solvent based cleaningfluid be avoided, especially onany plated finishes.
We recommend that before anycleaning, the isolating switchbe turned off, thus avoiding
accidentally switchingonthe shower.
WARNING:
YOU MUST REGULARLY INSPECTTHESHOWERHOSE FORWEAR AND DAMAGE.
REPLACE IF NECESSARY, OR EVERY TWO YEARS, WITH A REDRING APPROVEDPART.
WARNING: INORDERTOMAINTAINTHEPERFORMANCE OF YOUR SHOWER,
YOU MUST CLEAN THE SHOWER HANDSETREGULARLY.
All water contains particles of lime, whichbuild up inthe shower handset and unit reducing the
performance. It is therefore important tocleanthe shower handset by simply rubbing the rubber
nozzles, or soaking ina proprietarylime-scale remover andrinsingthoroughly before use.
NOTE: After use it is normal for some water to drip fromthe shower handset for a fewmoments.
This inhibits scale build-upover prolonged use. 7
IF WATER IS TOOCOLD
Turn inner knob “B” clockwise inthe
directionof the “red arrows” to“1 o’clock”
and continue turningclockwise until youget
the water temperature of your liking.
Wait20 seconds after eachadjustment
for the water temperature tostablise.
IF WATER IS TOO HOT
Turn inner knob “B” anti-clockwise inthe
directionofthe “blue arrows”to “11 o’clock”
and continue turning anti-clockwise untilyou
get thewater temperature ofyour liking.
Wait 20 seconds after each adjustmentfor
the water temperature tostabilise.
If after turningfully anti-clockwise, water is
stilltoohot, adjust outer knob “A”to
“ (medium)” setting andre-adjust as above.
Water flowwillbe reduced onthis setting.
1. Ensure the electricity andwater are turned ontothe unit.
2. Your shower has 3 power settings selected byturning outer
knob “A” (see Diagram6).
Themost popular is “ (high)”.
There are also optionsfor a “ (medium)”
or“ (cold)” shower (see notes 8 and 9).
For this example turnouter knob “A” to “ (high) ”
and setinner knob “B” to “12 o’clock”.
3. Thewater will flowand theneon light will glow brightly.
4. Allow about20 seconds for the temperature of the water
to stabilise. It is recommended that youdonot whollyenter the
water spray during this period, especially if theshower has just beenused.
5. Once a temperature setting to your liking
has beenachieved, inner knob “B” willrarely
need adjusting. Youmust however take into
account required adjustments for variations
of incoming mains watertemperature betweensummer andwinter (see “Effect of Seasonal
Incoming Water Temperature Changes” page 10).
6. Whenyouhave finished showering, turnouter knob “A” anti-clockwise to the “ (stop)”
position. Water will continue to flow for up to 3 seconds before switching off.
This reduces thetemperature of the water in the tankfor thenext user.
Switchoff the electricity at the ceiling switchor local isolator.
7. The“ (medium)” setting ofouter knob“A”reduces the power used by the shower giving a
cooler shower or the optionof reduced water flow. This optionis mainlyforsummer usage and
if this isused theninner knob “B” must be re-adjusted.
8. The“ (cold)” setting of outer knob “A” willsupply water without any heating, and the neon
lightwill goout.
9. Your shower is designedto stabilise temperature changes caused bywater pressure
fluctuations (see “Effect of Other WaterDevices on Incoming Water Supply” page 10).
10. Note that innerknob “B” IS NOT A TAP and does not turn the wateroff.
WARNING: DONOTSWITCH THE SHOWER ON IF YOU SUSPECTIT OF BEING FROZEN.
WAIT UNTIL YOU ARE SUREIT HASTHAWED OUT.
WARNING: DONOTOPERATETHE SHOWER IF WATER IS DISCHARGED FROM THE PRESSURE
RELIEF VALVE. MAINTENANCE ISREQUIREDBEFORETHE SHOWER CAN BE USED.
WARNING: CONSIDERATION SHOULD BE GIVEN TO SUPERVISING THEYOUNG,ELDERLY AND
THE INFIRM WHILST THEY USETHIS SHOWER.
HOW TOUSE YOUR ACTIVE 320S SHOWER (DETAILED)
