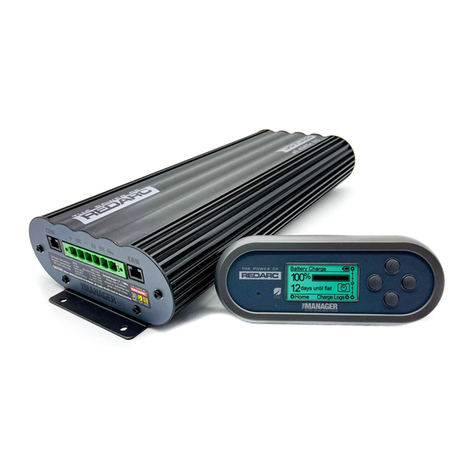
Redarc BMS1215S2 User manual

Battery Management
System
BMS1215S2

THE BMS1215S2
The Redarc BMS1215S2 Battery Management System is a complete charging solution
for you Auxiliary or House battery. The system incorporates 240V AC, 12/24V DC and 12V
Solar inputs to provide a 12V charging output at a maximum 15A rating.
The system also includes a Remote Monitor which provides information such as current,
voltage and temperature as well as a simplified battery percentage and charge rate.
WARNING & SAFETY INSTRUCTIONS
This manual contains important information relating to the safe installation and operation
of the BMS. Please read and understand these instructions before attempting to install
or use the BMS.
WARNING
Throughout this manual, warnings like this will appear to identify conditions or
practices that could result in harm to the user and/or damage to the BMS or other
equipment.
IMPORTANT
Throughout this manual, important information that the user should know will be
denoted like this.
For indoor use.
Keep electrical appliances out of reach from Children or infirm persons. Do not let them
use the appliances without supervision.
Do NOT disassemble the BMS - the internal circuitry contains hazardous voltages.
Attempting to service the unit yourself may result in electric shock or fire and will void
the unit warranty.
Do NOT use the BMS to charge non-rechargeable batteries. Doing so may result in harm
to the user and/or damage to the BMS. Only use the BMS for charging Standard Lead
Acid, Calcium content, Gel & AGM type 12V batteries.
Batteries on charge in ‘Storage’ mode should be checked at regular intervals.
1
i
2009/19/EC adapting to Council Directive 72/245/EEC relating to radio interference
(electromagnetic Compatibility) of vehicles, clauses 6.5, 6.6, 6.8 & 6.9 only.
2004/104/EC: 14th October 2004 adapting to technical progress of Council Directive
72/245/EEC relating to radio interference (electromagnetic compatibility) of vehicles.
IEC 60335-2-29:2002 (Fourth edition) + A1:2004 in conjunction with
IEC 60335-1:2001 (Fourth edition) +A1:2004 +A2:2006
EN 60335-2-29:2004 in conjunction with
EN 60335-1:2002+A1+A2+A11+A12+A13
RoHS
Compliant
SAL.FOR.Instruction Manual.BMS1215S2 – DOC386 – Version 6

CONTENTS
Table of Contents Page
Warnings and Safety Instructions 01
Contents 02
Features and Benefits 03
1 Introduction 04
1. General Description 04
2. The Remote Monitor 04
3. The Kit Includes 04
4. Specifications 05
5. Multi-stage Charging Process 07
2 INSTALLATION Guide 10
1. System Layout 10
2. Mounting Instructions 10
1. Mounting the Main Unit 11
2. Mounting the Remote Monitor 12
3. Installing the Current Shunt & Battery Sensor 15
3. DC Cable Size Requirements 16
4. Connections to Main Unit 18
5. Batteries 21
6. MPPT Solar Regulator 22
3 USER Guide 24
1. Remote Monitor 24
2. Understanding the Display 24
3. Navigating the Menu 25
4. Troubleshooting 31
5. FAQs 33
4 Two Year Warranty 34
2

3
FEATURES AND BENEFITS
1. The BMS incorporates five products in one, negating the need for separate AC 240V
charger, solar regulator, DC-DC charge system, battery monitor and vehicle battery
isolator. The BMS will automatically select between charging sources, requiring no
input from the operator during its operation.
2. The BMS has no fan, which makes it SUPER quiet and very reliable.
3. The BMS is designed and manufactured in Australia, for Australian conditions, using
the latest electronic and design technologies. It is manufactured with high-quality
components to ISO9001 quality and ISO14001 environmental standards and backed
with Redarc’s quality service and two-year warranty.
4. The BMS’s DC-DC charging enables optimal charging of house batteries, even if they
have different chemical characteristics from the vehicle battery. The input voltage
can be above, equal to or below the output voltage.
5. State of Charge (SOC) indication means you will always know how charged the
battery is and how much longer it will need to achieve full charge. An easy to operate,
high-quality, user friendly liquid crystal display (LCD) module lets you know what’s
going on at all times.
6. The BMS is very reliable and includes in-built non-sparking battery connection,
reverse polarity protection (without depending on fuses) and short circuit protection.
The unit has undergone stringent safety & electrical compliance testing.
7. The unit’s easily selectable charging profiles make it suitable for charging all battery
types commonly used in modern caravans and motorhomes.
8. The unit disconnects automatically from the vehicle battery, so there is always power
to start the car.
9. Sophisticated fault detection monitors the house battery condition during all stages
of charge, keeping you and your caravan/ camper/ RV safe.
10. The BMS has a separate battery temperature sensor for automatic temperature
compensation and cut-out.

1 INTRODUCTION
1.1 General Description
The BMS is designed to offer a complete solution to battery charging and
maintenance needs for recreational automotive applications.
The BMS incorporates AC, DC and Solar inputs to achieve the best charge to a
house battery.
1.2 The Remote Monitor
The BMS comes with a Remote Monitor designed to give you house battery
information and charge status along with critical system information while
charging is in progress.
With the Remote Monitor, you can customise how your house battery is charged
and monitor where the charge is coming from, keeping you in control at all times.
The Remote Monitor can be surface mounted on a wall, or recessed (into the
dashboard of an RV for example).
1.3 The Kit Includes
4
Main Unit
Current Shunt
Remote Monitor
Temperature Sensor
Shunt Wire
Remote Monitor Cable
Power Cable
1
2
3
4
5
6
7

5
1 INTRODUCTION
1.4 Specifications
Electrical Specifications
Inputs
AC Input
Input Voltage Range 220 - 240V AC, 50 - 60Hz
Power Rating 280W
Efficiency 92%
Connection Mains Plug
DC Input
Input Voltage Range 9 - 32V
Turn ON/OFF Threshold 12V (24V) 13.2V/12.7V (26.4V/25.4V)
Power Rating 260W
Efficiency 94%
Connection Terminal Block (See figure 2.4.3)
Solar Input
Input Voltage Range 9 - 30V
Turn ON 14V
Turn OFF above 19V
Turn OFF below 9V
Power Rating 260W
Efficiency 93%
Connection Terminal Block (See figure 2.4.3)
Max Charging Volts @ Battery Terminals
Storage Mode Touring Mode
Gel Setting 14.4V 14.4V
AGM Setting 14.4V 14.4V
Calcium Setting 16.0V 15.2V
Standard Lead Acid Setting 15.5V 14.8V
Float Voltage 13.5V
Output Voltage Ripple <15mV
Output Current (Nominal) 15A
Temperature Compensation -5mV / Battery Cell / °C
Limit Temperatures 0°C - 75°C (5°C Hysteresis)
Over Temperature Shutdown Yes
Recommended Total Battery Capacity 40 - 400Ah
Required Number Of Cells in Series 6 (12V Battery)
Non-sparking Connection Yes
Memory Save on Battery Disconnect Yes
Output Protection
Short Circuit Protection Yes
Surge Protection Yes
Reverse Polarity Protection Yes
Overload Protection Yes
Compliance
CE 2009/19/EC
2009/104/EC
Safety IEC60335
Environmental RoHS Compliant
General Specifications
Main Unit Dimensions 350x185x79mm
Remote Dimensions 196x74x29mm
Kit Weight 2.43kg
Warranty 2 years

6
1 INTRODUCTION
BATTERY MANAGEMENT
SYSTEM
27
74
186
21 29
350
82185
309
334
79
6
Figure 1.4.1 - Main Unit Dimensions
Figure 1.4.2 - Remote Monitor Dimensions

7
1 INTRODUCTION
1.5 Multi-stage Charging Process
The BMS incorporates two different multi-stage charging profiles – Touring
(3-stage) and Storage (5-stage) – which can be selected in the Battery Mode
menu on the Remote Monitor.
Touring Mode
Touring mode is designed for use when ‘on the road’. Touring mode offers a
3-stage charging profile consisting of Boost, Absorption and Float stages (see
Figure1.4.1). In Touring mode, the house battery is monitored to detect only a
limited number of faults such as short circuit, over current and over voltage.
This allows the BMS to operate correctly even when loads are connected to the
house battery. This mode will always produce an output (unless a fault condition
is detected) and will cycle through the three stages as required to maintain the
house battery as outlined in Figure 1.4.1.
IMPORTANT
Touring mode will achieve its best charge level if a Storage mode charge has
been recently performed.
i
BOOST
ABSORPTION
FLOAT
FloatAbsorptionBoost
Voltage
Current
3 - Stage Charging Process
Figure 1.4.1 - 3-Stage Charging Process

8
1 INTRODUCTION
Storage Mode
Storage mode is designed to charge the house battery to its optimal level and
maintain that level while your caravan is in storage. This mode requires all loads
to be switched off or disconnected from the house battery before charging. It
uses a 5-stage charging profile consisting of Boost, Absorption, Equalise, Float
and Maintenance stages (see Figure1.4.2). Storage mode is designed to detect
a wide range of battery fault conditions, for more information on these fault
conditions, please refer to the Troubleshooting section of this manual. Unlike
Touring mode, Storage mode does not cycle. This means that when the charging
process is completed, the BMS will always remain in either Float or Maintenance
stages. Float stage will provide the house battery with a ‘trickle’ charge whenever
the house battery voltage drops below a predetermined threshold to ensure the
battery stays charged. Maintenance stage turns the BMS output off, but continues
to monitor the house battery and will revert to Float stage when necessary.
NOTE: If the BMS is set to Storage mode and the vehicle is started the BMS will
automatically switch to Touring mode once it senses an increase in input voltage
from the alternator.
WARNING
Remove all loads from the house battery before starting a Storage mode
charge. Failure to do so could result in an insufficient charge on the house battery
or damage to sensitive loads connected to the house battery.
BOOST
ABSORPTION
FLOAT
MAINTENANCE
EQUALISE
FLOAT
MAINTENANCE
Maintenance MaintenanceFloatFloatEqualiseAbsorptionBoost
Voltage
Current
5 - Stage Charging Process
Figure 1.4.2 - 5-Stage Charging Process

9
1 INTRODUCTION
IMPORTANT
When the BMS is set to ‘Storage’ mode and no valid charging sources are
connected, it will enter a ‘Sleep’ mode after 2-3 seconds. The sleep mode is
designed to limit the amount of current drawn from the output battery by the
system whilst in Storage mode and does this by switching the screen and all
non-essential functions off. The BMS will ‘wake-up’ from its Sleep mode if any
valid input source is sensed, though this may take 30-60 seconds to occur after
the source in connected. This delay can be avoided by disconnecting the output
before connecting an input source however the State of Charge of the output
battery will not be retained (i.e. SOC screen will return to ‘Analysing’ until a
charge cycle in completed).

10
2 INSTALLATION GUIDE
2.1 System Layout
2.2 Mounting Instructions
This section describes how to mount the four major components of the BMS: the
Main Unit, the Remote Monitor, the Current Shunt and the Battery Sensor.
Vehicle
Battery
(Not Supplied)
House Battery
(Not Supplied)
BMS1215S2
Main Unit
Solar Panels
(Not Supplied)
Remote
Monitor
To Loads
(Not Supplied)
Battery
Monitor
240VAC
Mains Power
DC - DC
Power Source
Figure 2.1.1 - System Layout
Figure 2.2.1 - The BMS System

11
2 INSTALLATION GUIDE
2.2.1 Mounting the Main Unit
Do NOT expose the Main Unit to rain, snow, spray or bilge water. For optimum
operation, the BMS should be mounted where the temperature is nominally below
35°C and does not exceed a maximum of 60°C.
The Main Unit must not be installed in a location with any less than 10cm clearance
at the top of the Main Unit, to allow for airflow across the heatsink fins. Care must
be taken not to obstruct the ventilation holes at the end of the Main Unit.
The Main Unit should be installed as close as possible to the house battery. The
cable length should be less than 2m.
The Main Unit must be mounted to a solid support, preferably the vehicle chassis,
using M6 sized screws or bolts, using all four mounting holes.
WARNING
The Main Unit must be fixed using suitable screw mounts. Do NOT use adhesive
to mount the unit because this is unreliable.
Redarc recommends that the Main Unit be mounted to optimise airflow past the
heatsink. Mounting the unit horizontally (see Figure 2.2.1.1) is acceptable. Do
NOT mount the unit as shown in Figure 2.2.1.2 or Figure 2.2.1.3.
8
8
88
99
9
Figure 2.2.1.1 - Horizontal mounting is
acceptable
Figure 2.2.1.2 - Vertical mounting is
not recommended
Figure 2.2.1.3 - Do NOT mount the unit upside down

2 INSTALLATION GUIDE
2.2.2 Mounting the Remote Monitor
The Remote Monitor should be mounted inside the caravan or RV using
the template provided inside the box. It is acceptable however to mount the
Remote Monitor in any convenient location, as long as it is protected from harsh
environments.
Figures 2.2.2.1 and 2.2.2.2 illustrate how to recess and wall mount the Remote
Monitor unit, figure 2.2.2.3 illustrates removal of the Remote Monitor.
Recess
12
Use the template provided to mark
the position and drill and cut the
mounting holes into the wall.
Feed the Remote Monitor cable
through the hole and connect it to
the Remote Monitor.
Mount the Inner Assembly to the
wall using 4 suitably sized screws.
Clip the Front Face to the Inner
Assembly.
Figure 2.2.2.1 - How to recess the
Remote Monitor into the wall.
12
3 4
5

2 INSTALLATION GUIDE
Wall Mount
Use the template provided to mark
the position and drill and cut the
mounting holes into the wall.
Attach the Back Plate to the wall
unig 4 suitably sized countersunk
screws.
Clip the Inner Assembly into the
Back Plate.
Clip the Front Face to the Inner
Assembly.
Feed the Remote Monitor cable
through the hole and connect it to
the Remote Monitor.
Figure 2.2.2.2 - How to wall mount the
Remote Monitor.
12
3 4
5 6
13

2 INSTALLATION GUIDE
Removing the Remote Monitor
14
Figure 2.2.2.3 - How to wall mount the
Remote Monitor.
The locking tabs on the back of the
Inner Assembly need to be unclipped
from the Back Plate.
The locking tabs can be accessed
through holes on the top of the
backing plate when installed.
Slide fingers between the Front Face
and the Inner Assembly in positions
marked above and carefully pull
back towards the front of the
Remote Monitor.
Remove the Remote Monitor cable
and the Inner Assembly is removed.
Insert a flat-head screwdriver at a
slight angle towards the front of the
Remote Monitor and push back to
depress the locking tabs.
1 2
3 4
5 6
When the screwdriver is in a vertical
position, gently push upwards on the
bottom of the Remote Assembly to
unlock tab. Repeat 3 & 4 for 2nd tab.

2 INSTALLATION GUIDE
2.2.3 Installing the Current Shunt & Battery Sensor
Wire the Current Shunt between the negative terminal of the house battery and
the common ground connection using the outside connections as shown in figure
2.2.3.1. Connect the sense terminals on the Battery Management System to the
Current Shunt inner terminals with a twisted pair of wires. The shunt positive wire
is connected to the screw terminal on the end of the Current Shunt closest to the
house battery. The shunt negative terminal on the BMS must be fixed under the
screw terminal on the Current Shunt nearest the common ground connection.
Bolt the large lug of the Battery Sensor to the negative terminal of the house
battery, with the ring terminal of the red wire bolted to the positive terminal of the
house battery as shown in Figure 2.2.3.1.
Shunt
Negative
Shunt
Positive
Common
Ground
Point
Shunt & Battery
Monitor Wiring
House
Battery
Chassis
Earth
Figure 2.2.3.1 - Shunt and Battery
Monitor wiring diagram.
15

2 INSTALLATION GUIDE
2.3 DC Cable Size Requirements
WARNING
Cable and fuse sizes are specified by various codes and standards which depend
on the type of vehicle the unit is installed into. Selecting the wrong cable or fuse
size could result in harm to the installer or user and/or damage to the BMS or
other equipment installed in the system. The installer is responsible for ensuring
that the correct cable and fuse sizes are used when installing this device.
Input Wire Diameter Selection
The BMS is capable of drawing up to 30A from the vehicle battery, which may
be several metres from its installation location. The installer needs to ensure the
appropriate cable is used to connect the positive and negative connections of the
BMS to the vehicle battery. While the BMS will operate with less efficient cabling,
for best performance, high-quality cable connections should be used to minimise
voltage drop and efficiency losses.
Redarc recommends the installer use cabling and connections between 6mm
and 6B&S automotive. The recommended maximum cable length between input
vehicle battery and the BMS should not be longer than 10m for 6mm auto or 20m
for 6B&S.
Redarc recommends that the input wire be of the size outlined in Table 2.3.1.
Distance (metres)
from source battery to
BMS1215S2
Recommended Cross
Sectional Area
(mm²)
Recommended
Diameter
Equivalent
1 4 6mm auto
2 6 8 B&S
3 8 6 B&S
4 12 6 B&S
5+ 16 6 B&S
Figure 2.3.1 - Recommended cable sizes
for safe cable heating and efficiency
losses
16

2 INSTALLATION GUIDE
Output Wire Diameter Selection
To ensure the house battery is charged as quickly as possible, use the appropriate
cable to connect the BMS to the house battery. The BMS should be mounted as
close as possible to the house battery. Table 2.3.2 lists the recommended cable
sizes based on a cable voltage drop of 0.3V @ 15A.
Minimum cable size is 2.9 mm² or 5mm auto (less than 1m length). Maximum
cable size is 8mm² or 6B&S (no need to use values higher than this). For longer
runs using 8mm² is recommended, however this will lower efficiency by up to 3%
(the recommended maximum length is 5m).
NOTE: Redarc has determined these recommended cable sizes based on 50°C
maximum ambient temperature, a single cable loom and does not include any
connection losses. The installer is responsible for ensuring that these cables
are indeed suitable for the vehicle installation.
Distance (metres) from
BMS1215S2 to House
battery
Recommended Cross
Sectional Area
(mm²)
Recommended
Diameter
Equivalent
0.5 2.9 5mm auto
0.75 3.2 6mm auto
1 4 6mm auto
1.25 5 8 B&S
1.5 6 8 B&S
1.75 7 8 B&S
2 8 6 B&S
Figure 2.3.2 - Recommended cable sizes
based on a cable voltage drop of 0.3V @ 15A
17

2 INSTALLATION GUIDE
2.4 Connections to Main Unit
WARNING
Redarc recommends that this unit be installed by a suitably qualified person.
WARNING
The AC power connection must be connected to an earthed socket outlet. Do not
use the BMS AC input if the cord is damaged. (If the supply cord is damaged, it
must be replaced by a special cord or assembly available from the manufacturer
or service agent).
WARNING
During connection of the unit, the positive battery terminal must be connected
first, followed by the chassis terminal. The chassis connection should be made
away from the battery and fuel lines. Supply mains should be connected last. The
connection to the supply mains is to be in accordance with the national wiring
rules.
When disconnecting, the supply mains should be disconnected first, followed by
the chassis connection, then the battery connection.
Refer to Figure 2.4.1 for required connections and to Figure 2.4.2 or 2.4.3 for a
typical setup.
NOTE: If a longer Remote Monitor cable is required, a replacement 6 Pin/ 6 Core
RJ12 cable may be used, up to a length of 10m.
Remote Monitor
Battery Sensor
Input Battery Positive
Solar Positive
Output Battery Positive
AC Mains Input
Shunt Positive
Shunt Negative
Common Ground
1
2
3
4
6
9
7
8
5
Figure 2.4.1 - Required connections.
18

2 INSTALLATION GUIDE
Solar
Panel
Load
Fuse
30A
Fuse 20A
Fuse
Start
Battery
House
Battery
Twisted Wires
Current shunt
Common
ground
point Loads
Battery
Sensor
240V AC
from mains
power
Remote
Monitor
Chassis
Earth
Not
supplied
Not
supplied
Not
supplied
BMS1215S2
Typical 12V Setup
*
* The size of this fuse relates to the total current draw of all the loads connected
to the House Battery, and should be rated slightly higher than this.
13
245
678
9
Chassis
Earth
+
-
+
+
-
-
+
-
Figure 2.4.2 - Typical 12V setup.
19
Table of contents
Other Redarc Camera Accessories manuals
Popular Camera Accessories manuals by other brands

Cambo
Cambo Wide DS Digital Series Main operating instructions

Hamamatsu Photonics
Hamamatsu Photonics C2400-60 instruction manual

Convergent Design
Convergent Design Odyssey7Q ProRes 422 (HQ) Setup guide

Glide Gear
Glide Gear Dev Dolly Pro user manual

GRASS VALLEY
GRASS VALLEY VF 7-100X user guide

Opus
Opus OPL-M40 user manual