Ref.: RX182/009
Version 01/2017 - English
This document must not be reproduced nor information therein disclosed without our authorization
Page 1/ 30
Summary: English version
1INTRODUCTION 2
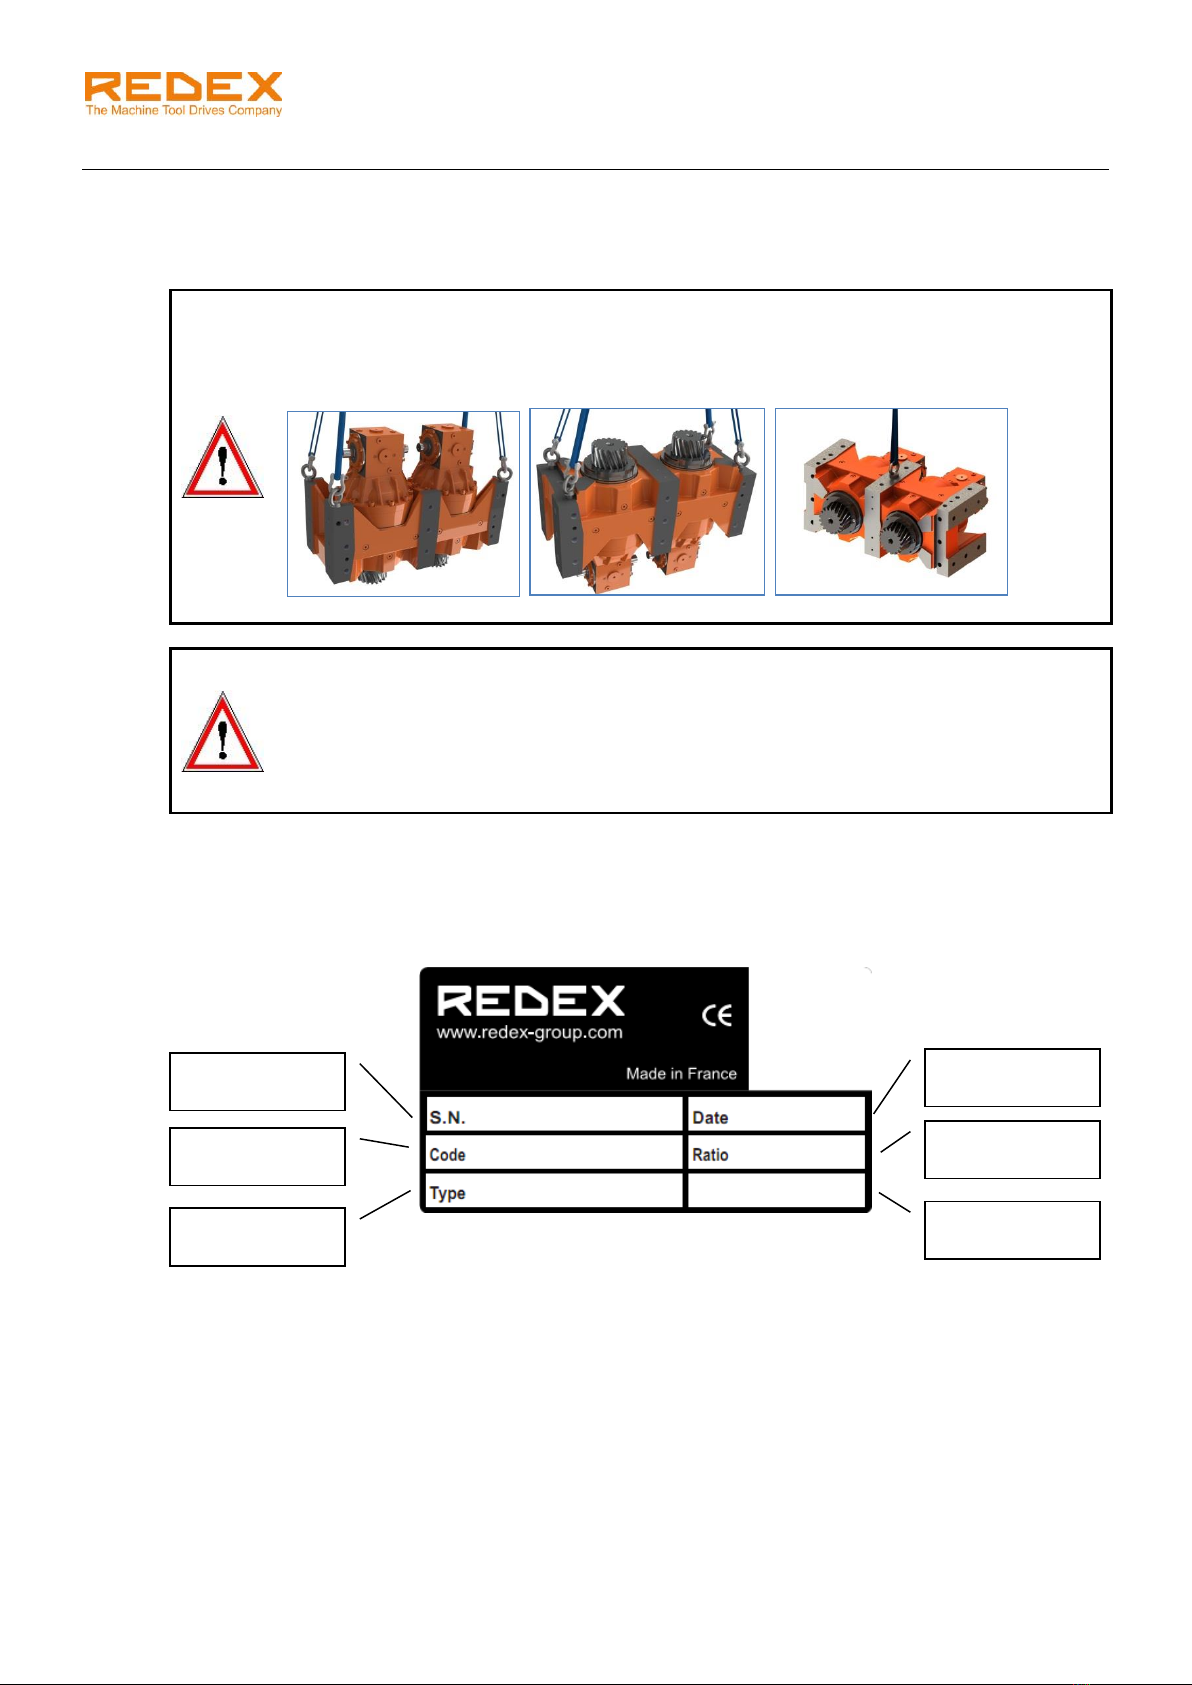
1.1 WARNINGS 2
1.2 GEARBOX IDENTIFICATION 2
1.3 LONG TERM STORAGE 2
2TECHNICAL DATA 3
2.1 GEARBOX 3
2.2 OUTPUT PINION 3
3LUBRICATION 4
3.1 RECOMMENDED LUBRICANTS 4
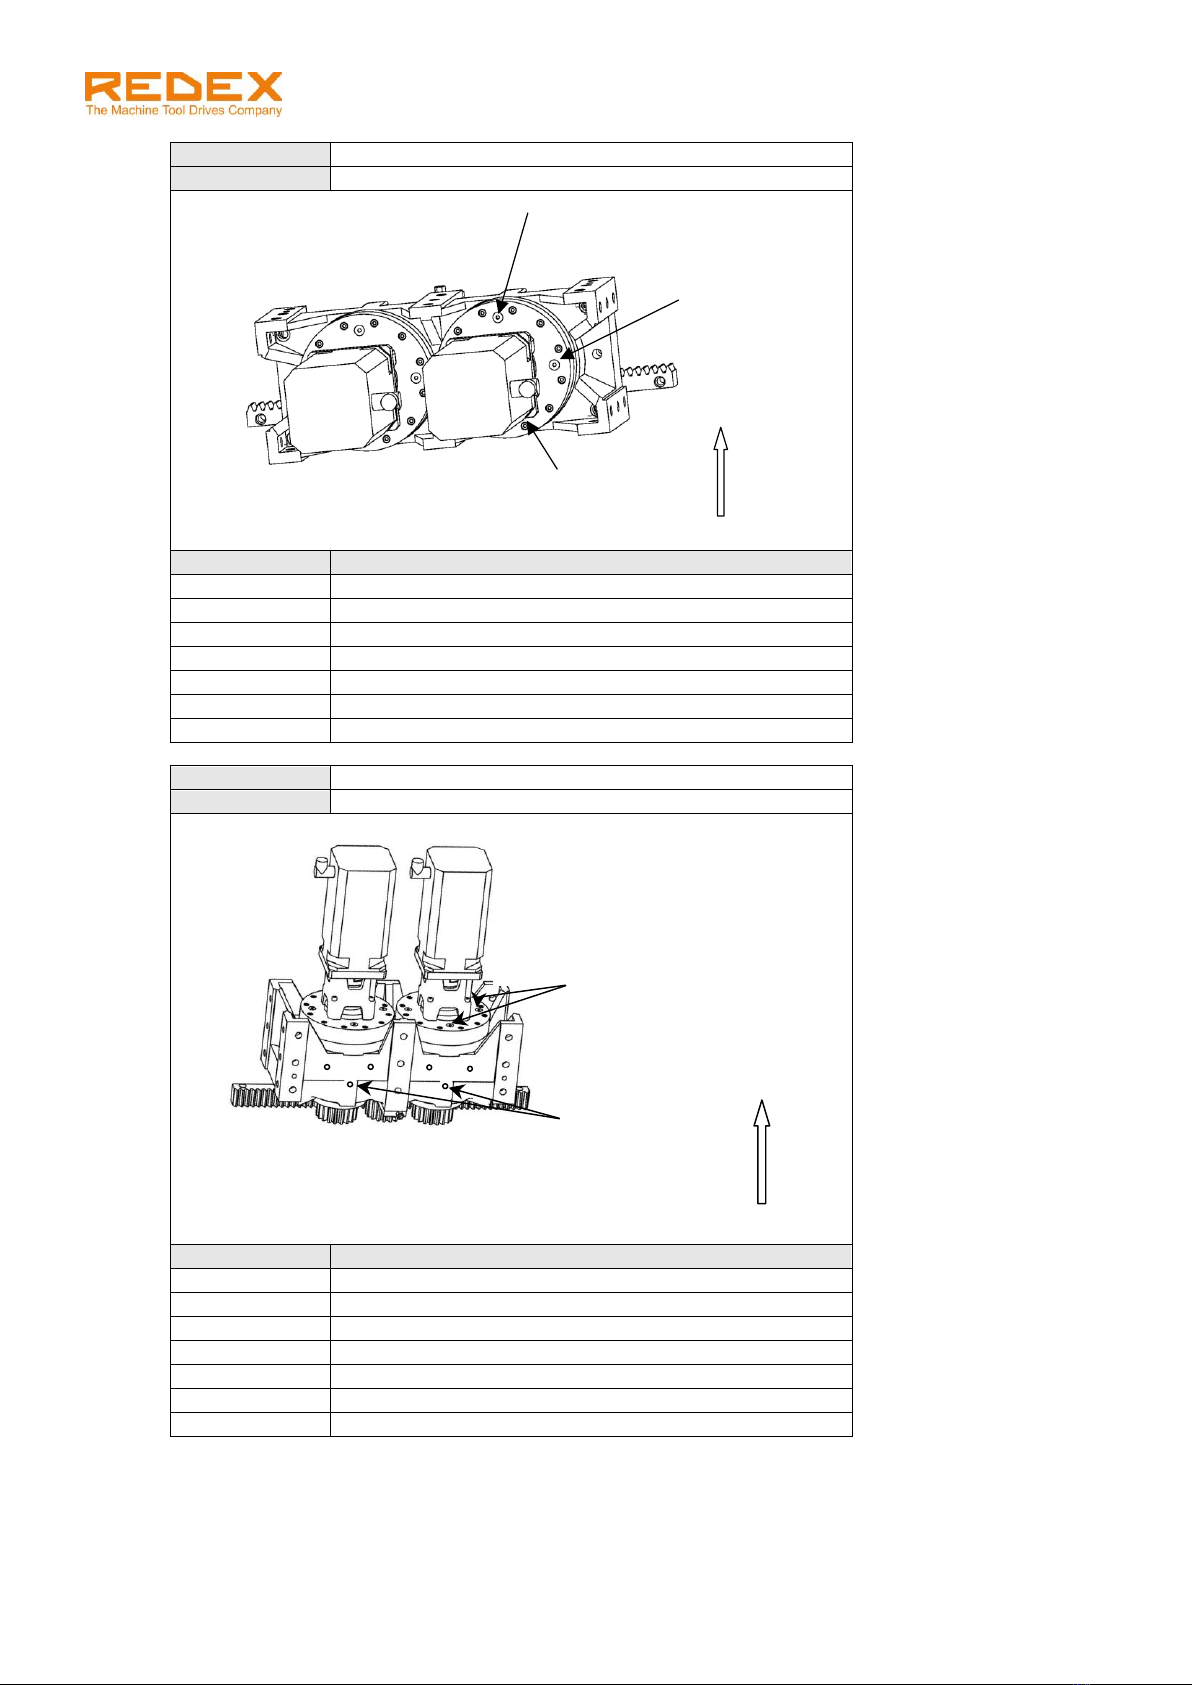
3.2 OIL FILLING:RIGHT-ANGLE CONFIGURATION (DRP+R &DRP+P) 4
3.3 OIL FILLING:MOTOR IN-LINE CONFIGURATION (DRP+M) 7
3.4 OIL DRAINING 10
4INSTALLATION ON THE MACHINE 14
4.1 RACK MOUNTING TOLERANCE 14
4.2 DRP+ PARALLELISM TOLERANCES 15
4.3 DRP+ HEIGHT SETTING 15
4.4 DRP+ PERPENDICULARITY TOLERANCES 17
4.5 PROPER TOOTH MESHING VALIDATION 18
4.6 TOOTH CONTACT PATTERN CHECK 19
4.7 DRP+ FINAL FIXING 19
5MOTOR INSTALLATION 20
5.1 MF-TYPE MOTOR FLANGE MOUNTING (FOR RIGHT ANGLE CONFIGURATIONS DRP+R AND CYLINDRICAL SHAFTS) 20
5.2 MF-TYPE MOTOR FLANGE MOUNTING (FOR RIGHT ANGLE CONFIGURATIONS DRP+R, DRP+P AND TAPER SHAFTS) 21
5.3 IF-TYPE MOTOR FLANGE MOUNTING (FOR IN-LINE CONFIGURATIONS DRP+M) 22
6MECHANICAL PRELOAD 25
6.1 DESCRIPTION 25
6.1.1 LOCKING TOOL 25
6.1.2 SPACER 25
6.1.3 COUPLING AND SHAFT ADAPTERS 25
6.2 GANTRY MACHINE CONFIGURATION 26
6.3 PRELOAD SETTING –LINEAR DRIVE 27
6.4 PRELOAD SETTING –ROTARY DRIVE 29
6.4.1 INSTALLATION ON THE MACHINE 29
6.4.2 DRP+ PARALLELISM TOLERANCES,HEIGHT SETTING,TOOTH MESHING VALIDATION 29
6.4.3 PRELOAD SETTING 29
7RACK & PINION LUBRICATION: OPTIONAL LUBE PINION (PGRP) AND LUBE PINION SUPPORT (SFRP)
30
7.1 DESCRIPTION OF THE PGRP &SFRP OPTION 30
7.2 RECOMMENDED LUBRICANTS 30
7.3 OIL FLOW RATES 30