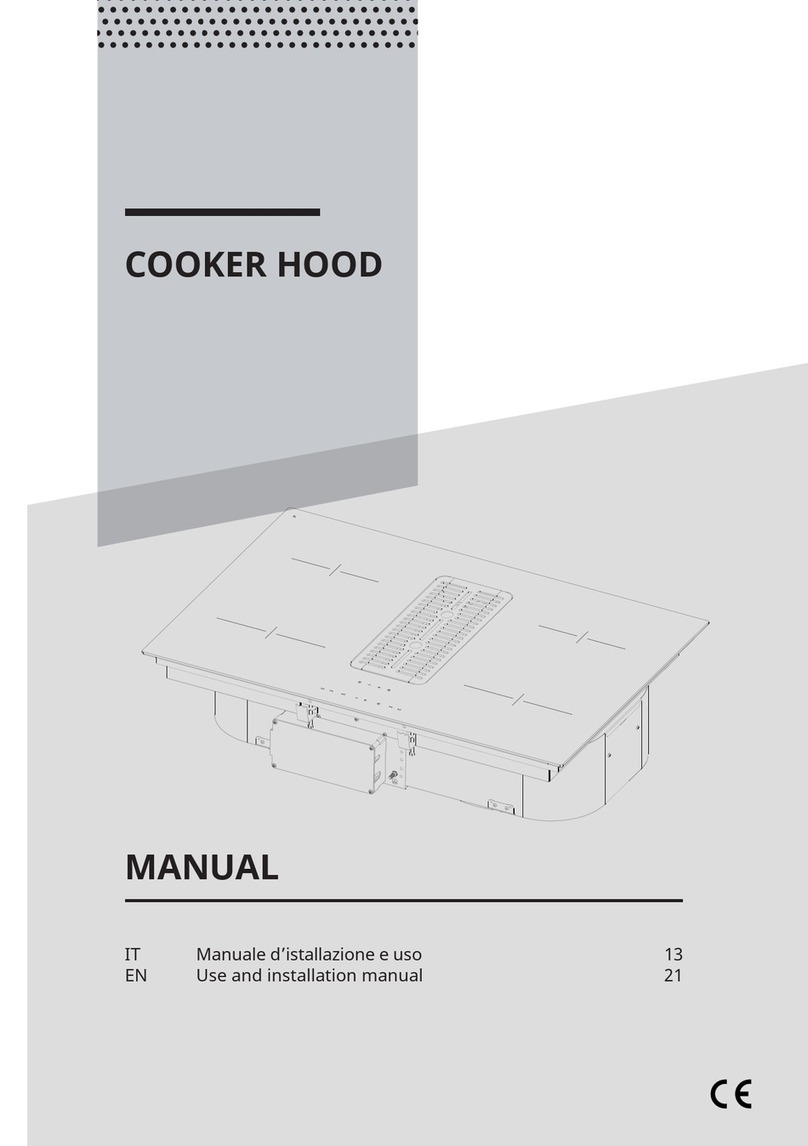
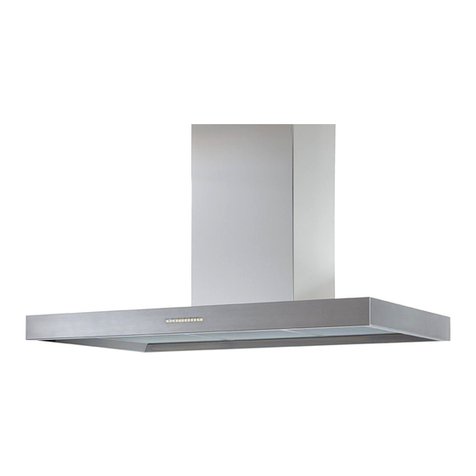
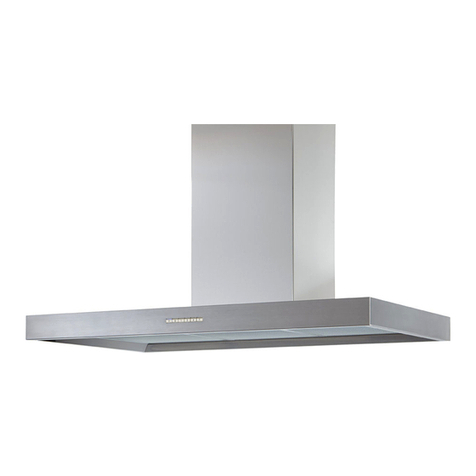
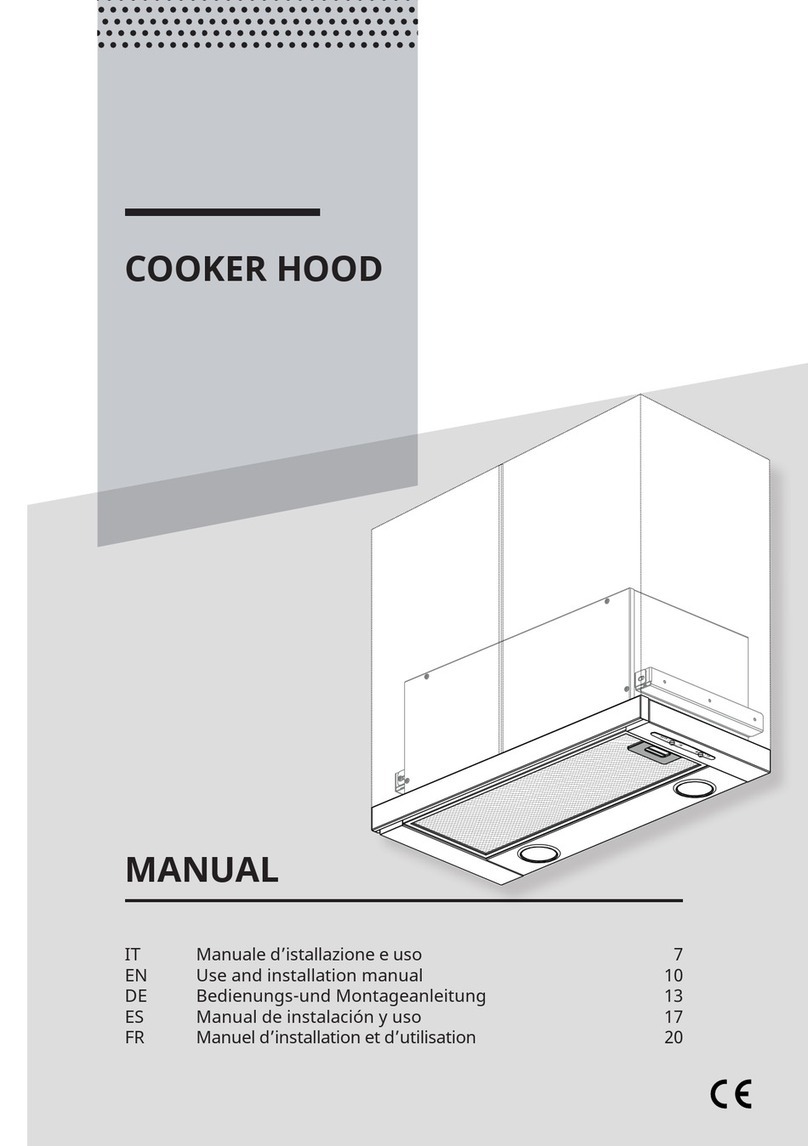
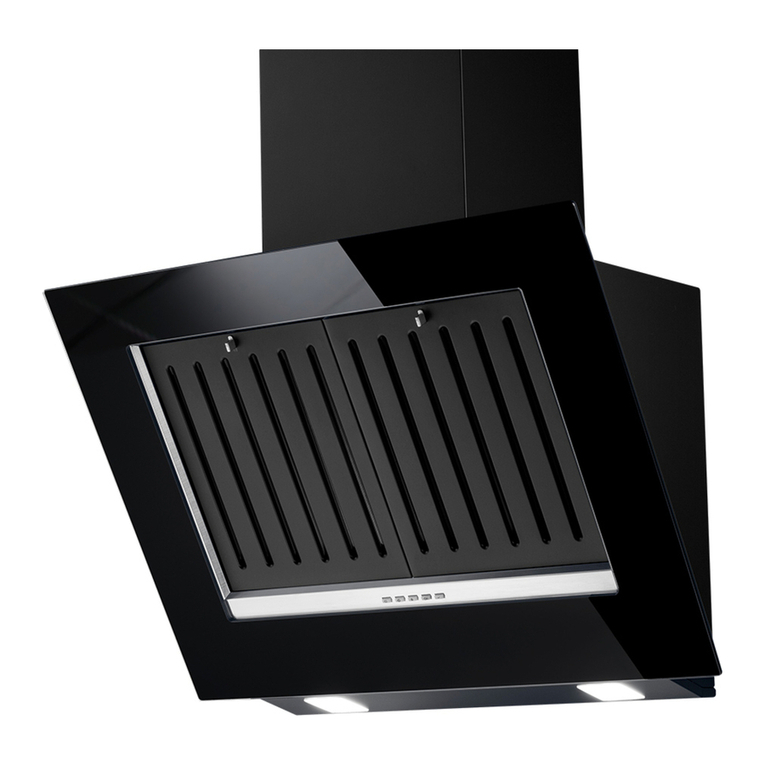
Refsta Cucu User manual

CAPPA ASPIRANTE - Istruzioni per l’uso
DUNSTABZUGSHAUBE - Gebrauchsanweisung
COOKER HOOD - User instructions
I
D
GB


- 3 -
Fig.1
Fig.2

- 4 -
Fig.2
Fig.3 Fig.4

- 5 -
Fig.5 Fig.6

- 6 -
ITALIANO I
GENERALITÀ
Leggere attentamente il contenuto del presente libretto in
quanto fornisce importanti indicazioni riguardanti la sicurezza
di installazione, d’uso e di manutenzione. Conservare il libretto
per ogni ulteriore consultazione. L’apparecchio è stato proget-
tato per uso in versione filtrante (riciclo aria all’interno - Fig.1)
AVVERTENZE PER LA SICUREZZA
1. Fare attenzione se funzionano contemporaneamente una
cappa aspirante e un bruciatore o un focolare dipendenti dall’a-
ria dell’ambiente ed alimentati da un’energia diversa da quella
elettrica, in quanto la cappa aspirando toglie all’ambiente l’aria
di cui il bruciatore o il focolare necessita per la combustione. La
pressione negativa nel locale non deve superare i 4 Pa (4x10-
5 bar). Per un funzionamento sicuro, provvedere quindi ad
un’opportuna ventilazione del locale. Per l’evacuazione esterna
attenersi alle disposizioni vigenti nel vostro paese.
Prima di allacciare il modello alla rete elettrica:
-Controllare la targa dati (posta all’interno dell’ apparecchio)
per accertassi che la tensione e potenza siano corrispondenti a
quella della rete e la presa di collegamento sia idonea. In caso
di dubbio interpellare un elettricista qualificato.
-Se il cavo di alimentazione è danneggiato, esso deve essere
sostituito da un cavo o un assieme speciali disponibile presso
il costruttore o il suo servizio assistenza tecnica.
-Collegare il dispositivo all’alimentazione attraverso una spina
con fusibile 3A o ai due fili della bifase protetti da un fusibile
3A.
2. Attenzione!
In determinate circostanze gli
elettrodomestici possono es-
sere pericolosi.
A) Non cercare di controllare i
filtri con la cappa in funzione.
B) Non toccare le lampade e
le zone adiacenti, durante e
subito dopo l’uso prolungato
dell’impianto di illuminazione.
C) E’ vietato cuocere cibi alla
fiamma sotto la cappa.
D) Evitare la fiamma libera,
perché dannosa per i filtri e
pericolosa per gli incendi.
E) Controllare costantemente i
cibi fritti per evitare che l’olio
surriscaldato prenda fuoco.
F) Prima di effettuare qualsiasi
manutenzione, disinserire la
cappa dalla rete elettrica.
G) Questo apparecchio non è
destinato all’utilizzo da parte di
bambini o persone che necessi-
tano di supervisione.
H) Controllare che i bambini
nongiochinoconl’apparecchio.
I) Quando la cappa viene utiliz-
zata contemporaneamente ad
apparecchi che bruciano gas
o altri combustibili, il locale
deve essere adeguatamente
ventilato.
L) Se le operazioni di pulizia
non vengono eseguite nel ri-
spetto delle istruzioni, esiste
il rischio che si sviluppi un in-
cendio.
Questo apparecchio è contrassegnato in conformità alla
Direttiva Europea 2002/96/EC,Waste Electrical and Electronic
Equipment (WEEE). Assicurandosi che questo prodotto sia
smaltito in modo corretto, l’utente contribuisce a prevenire
le potenziali conseguenze negative per l’ambiente e la salute.
Il simbolo sul prodotto o sulla documentazione di ac-
compagnamento indica che questo prodotto non deve
essere trattato come rifiuto domestico ma deve essere
consegnato presso l’idoneo punto di raccolta per il riciclaggio
di apparecchiature elettriche ed elettroniche. Disfarsene se-
guendo le normative locali per lo smaltimento dei rifiuti. Per
ulteriori informazioni sul trattamento, recupero e riciclaggio
di questo prodotto, contattare l’idoneo ufficio locale, il servizio
di raccolta dei rifiuti domestici o il negozio presso il quale il
prodotto è stato acquistato.
ISTRUZIONI PER L’INSTALLAZIONE
•Leoperazionidi montaggioe collegamentoelettrico
devono essere effettuate da personale specializzato.
•Utilizzaredeiguantiprotettiviprimadiprocedereconle
operazioni di montaggio.

- 7 -
•Collegamentoelettrico:
Classe di isolamento II
-L’apparecchio è costruito in classe II, perciò nessun cavo
deve essere collegato alla presa di terra. La spina deve essere
facilmente accessibile dopo l’installazione dell’apparecchio.
Nel caso in cui l’apparecchio sia provvisto di cavo senza spina,
per collegarlo alla rete elettrica è necessario interporre tra
l’apparecchio e la rete un interruttore onnipolare con apertura
minima tra i contatti 3 mm, dimensionato al carico e rispon-
dente alle norme vigenti.
-L’allaccio alla rete elettrica deve essere eseguito come segue:
MARRONE = Llinea
BLU = Nneutro.
• La distanza minima fra la superficie di supporto dei recipienti
di cottura sul dispositivo di cottura e la parte più bassa della
cappa da cucina deve essere di almeno 65 cm. Se dovesse
essere usato un tubo di connessione composto di due o più
parti, la parte superiore deve essere all’esterno di quella infe-
riore. Non collegare lo scarico della cappa ad un condotto in cui
circoli aria calda o utilizzato per evacuare fumi degli apparecchi
alimentati da un’energia diversa da quella elettrica.
-Nel caso di montaggio dell’apparecchio in versione aspirante
predisporre il foro di evacuazione aria.
• Si consiglia l’utilizzo di un tubo evacuazione aria con lo stesso
diametro della flangia uscita aria. L’utilizzo di una riduzione
potrebbe diminuire le prestazioni del prodotto ed aumentare
la rumorosità.
•Fissaggioaparete
Prima di effettuare l'installazione della cappa al muro control-
late le misure indicate in Fig.1, tenendo conto della distanza
minima dal piano di cottura.
- Segnare ed eseguire i 4 fori di ssaggio (Fig.1).
- Fissare i 4 tasselli Aad espansione e le 2 viti B1 senza avvitarle
completamente Fig.1.
- Togliere le 4 viti Edel coperchio D gura 2 -fase 1-2.
- Prendere l’apparecchio e appenderlo sulla 2 viti B1 figura
2 - fase 3.
- Serrare le 2 viti B1 figura 2 - fase 4. e fissare definitivamente
la cappa al muro con le due viti di sicurezzaB2 figura 2 - fase 5.
- Riposizionare il coperchio De fissarlo con le 4 viti Eprece-
dentemente tolte figura 2 - fase 6-7.
- Per i vari montaggi utilizzare viti e tasselli ad espansione
idonei al tipo di muro (es. cemento armato, cartongesso, ecc).
- Nel caso in cui le viti e i tasselli siano forniti in dotazione con
il prodotto accertarsi che siano idonei per il tipo di parete in
cui deve essere ssata la cappa.
•Versionefiltrante:
Prima di procedere alle operazioni di manutenzione del filtro
al carbone attivo rigenerabili (lavabili), disinserire i filtro/i
antigrasso (Fig.3).
-Togliere prima la staffa e poi sfilare il pannello come indicato
in (Fig.4).
USO E MANUTENZIONE
• Si raccomanda di mettere in funzione l’apparecchio prima di
procedere alla cottura di un qualsiasi alimento.
Si raccomanda di lasciar funzionare l’apparecchio per 15 minuti
dopo aver terminato la cottura dei cibi, per un’evacuazione
completa dell’aria viziata.
Il buon funzionamento della cappa è condizionato da una
corretta e costante manutenzione; una particolare attenzione
deve essere data al filtro antigrasso e al filtro al carbone attivo.
•Ilfiltroantigrasso ha il compito di trattenere le particelle
grasse in sospensione nell’aria, pertanto è soggetto ad intasarsi
in tempi variabili relativamente all’uso dell’apparecchio.
- Per prevenire il pericolo di eventuali incendi, al massimo ogni
2 mesi, è necessario lavare i filtri antigrasso a mano, utilizzando
detersivi liquidi neutri non abrasivi, oppure in lavastoviglie a
basse temperature e con cicli brevi.
- Dopo alcuni lavaggi, si possono verificare delle alterazioni
del colore.
Questo fatto non dà diritto a reclamo per l’eventuale loro
sostituzione.
•Ifiltrialcarboneattivo servono per depurare l’aria che viene
rimessa nell’ambiente ed ha la funzione di attenuare gli odori
sgradevoli generati dalla cottura.
- I filtri al carbone attivo non rigenerabili devono essere sosti-
tuiti ogni 4 mesi al massimo. La saturazione del carbone attivo
dipende dall’uso più o meno prolungato dell’apparecchio,
dal tipo di cucina e dalla regolarità con cui viene effettuata la
pulizia del filtro antigrasso.
- I filtri al carbone attivo rigenerabili devono essere lavati a
mano, con detergenti neutri non abrasivi, o in lavastoviglie
con una temperatura massima di 65°C (il ciclo di lavaggio deve
essere completo senza stoviglie).
Togliere l’acqua in eccesso senza rovinare il filtro, rimuovere
le parti in plastica, e far asciugare il materassino in forno per
almeno 15 minuti circa ad una temperatura di 100°C massimo.
Per mantenere efficiente la funzione del filtro al carbone rige-
nerabile questa operazione deve essere ripetuta ogni 2 mesi.
Questi devono essere sostituiti al massimo ogni 3 anni oppure
quando il materassino risulta danneggiato.
•Primadirimontareifiltriantigrassoeifiltrialcarbone
attivo rigenerabili è importante che questi siano asciugati
bene.
•Pulirefrequentementela cappa,sia internamenteche
esternamente, usando un panno inumidito con alcool
denaturato o detersivi liquidi neutri non abrasivi.
• L’impianto di illuminazione è progettato per l’uso durante la
cottura e non per l’uso prolungato di illuminazione generale
dell’ambiente.
L’uso prolungato dell’illuminazione diminuisce notevolmente
la durata media delle lampade.
• Se l’apparecchio è dotato della luce ambiente questa può
essere utilizzata per l’uso prolungato di illuminazionegenerale
dell’ambiente.
•Attenzione: l’inosservanza delle avvertenze di pulizia della
cappa e della sostituzione e pulizia dei filtri comporta rischi
di incendi. Si raccomanda quindi di attenersi alle istruzioni
suggerite.
•Sostituzionedellelampadealogene(Fig.5):
Per sostituire le lampade alogene B togliere il vetrino Cfacendo
leva sulle apposite fessure. Sostituire con lampade dello stesso
tipo. Attenzione: non toccare la lampadina a mani nude.
•Comandimeccanici(Fig.6) la simbologia èdi seguito ripor-
tata:
A = Tasto ILLUMINAZIONE
B = Tasto OFF
C = Tasto PRIMA VELOCITÀ
D= Tasto SECONDA VELOCITÀ
E = Tasto TERZA VELOCITÀ
G= Spia MOTORE IN FUNZIONE.
SI DECLINA OGNI RESPONSABILITA’PER EVENTUALI DANNI
PROVOCATI DALLA INOSSERVANZA DELLE SUDDETTE
AVVERTENZE.

- 8 -
DEUTSCH D
ALLGEMEINES
Diese Anleitung bitte aufmerksam durchlesen, da sie wichtige
Sicherheitshinweise zur Installation, zum Gebrauch und zur
Wartung enthält.
Die Anleitung für eventuelle zukünftige Konsultationen aufbe-
wahren. Das Gerät wurde zum Gebrauch in Fitrationsversion
(innerer Luftumlauf - Abb.1) .
SICHERHEITSHINWEISE
1. Vorsicht ist geboten, wenn gleichzeitig eine Abzugshaube
und ein raumluftabhängiger Boiler oder ein offenes Feuer in
Betrieb sind, die von einer anderen Energiequelle als Strom
versorgt werden, da die Küchenhaube die Raumluft absaugt,
die auch der Boiler oder das Feuer zurVerbrennung benötigen.
Der Unterdruck im Raum darf den Wert von 4 Pa (4x10⁻⁵ bar)
nicht übersteigen. Um einen sicheren Betrieb der Abzugshau-
be zu gewährleisten, ist daher immer auf eine ausreichende
Belüftung des Raumes zu achten. Bei der Ableitung der Luft
nach aussen müssen die nationalen Vorschriften eingehalten
werden.
Vor Anschluss des Modells an das Stromnetz:
-Kontrollieren Sie das Typenschild an der Geräteinnenseite
um sich zu vergewissern, ob Spannung und Stromstärke der
des Stromnetzes entsprechen und die Steckdose geeignet ist.
Im Zweifelsfall wenden Sie sich bitte an einen qualifizierten
Elektriker.
-Sollte das Speisekabel beschädigt sein, ist es durch ein ande-
res - beim Hersteller oder dessen Kundendienst erhältliches
- Kabel oder mit einem speziellen Bausatz - zu ersetzen.
-Das Gerät muss mittels eines Steckers mit 3A-Sicherung oder
über die beiden Drähte des Zweiphasenanschlusses, die durch
eine 3A-Sicherung geschützt sind, an die Stromversorgung
angeschlossen werden.
2. Achtung!
Elektrogeräte können unter
gewissen Umständen gefähr-
lich sein!
A) Niemals die Filter kontrollie-
ren,wenndie Dunstabzugshau-
be in Betrieb ist.
B)Die Lampen und die umlie-
genden Bereiche nichtwährend
oder nach längerer Benutzung
des Lichts berühren.
C)Es ist verboten, Speisen un-
ter der Dunstabzugshaube zu
flambieren.
D) Offene Flammen sind unbe-
dingt zu vermeiden, da diese
die Filter beschädigen und
einen Brand verursachen kön-
nen.
E) Beim Frittieren sind die Spei-
sen ständig zu kontrollieren,
um eine Entzündung von über-
hitztem Öl zu verhindern.
F)Vor jeglichenWartungsarbei-
ten unbedingt den Netzstecker
aus der Steckdose entfernen.
G) Das Gerät sollte nicht von
kleinen Kindern oder Personen
benutzt werden, welche Beauf-
sichtigung benötigen.
H) Kleine Kinder sollten beauf-
sichtigt werden, um sicherzu-
gehen, dass sie nicht mit dem
Gerät spielen.
I) Der Raum muss über eine
hinreichende Belüftung ver-
fügen, wenn die Dunstabzugs-
haube mit anderen gas- oder
brennstoffbetriebenen Ge-
räten gleichzeitig verwendet
wird.
L) Es besteht Brandgefahr,
wenn die Reinigung nicht ent-
sprechend den Anleitungen
durchgeführt wird.
Dieses Gerät ist gemäß der EU-Richtlinie 2002/96/EC, Waste
Electrical Electronic Equipment (WEEE) gekennzeichnet. Sor-
gen Sie bitte dafür, dass das Gerät korrekt entsorgt wird, der
Benutzer trägt dazu bei, den potentiellen negativen Folgen

- 9 -
für Umwelt und Gesundheit vorzubeugen.
Das auf dem Produkt oder auf den Begleitpapieren
befindliche Symbol sagt aus, dass dieses Produkt nicht
wie normaler Hausmüll behandelt werden darf, sondern
dass es einer geeigneten Sammelstelle für das Recycling der
elektrischen und elektronischen Geräteteile zugeführt werden
muss. Entsorgen Sie bitte das Altgerät gemäß der lokalen
Richtlinien. Für weitere Informationen hinsichtlich der Behand-
lung, der Wiederverwertung und des Recycling des Produkts
wenden Sie sich bitte an die zuständige lokale Stelle, an die
Sammelstelle für Hausmüll, oder an den Händler, bei dem Sie
das Gerät erworben haben.
INSTALLATIONSANLEITUNG
•MontageundAnschlussmüssenvoneinemFachmann
durchgeführt werden.
•VorderAusführungderMontagearbeitenSchutzhand-
schuhe anlegen.
•Elektroanschluss:
Isolierklasse II
-Die Küchenhaube gehört zur Geräteklasse II, daher muss
keine der Leitungen geerdet werden. Der Stecker muss nach
der Montage des Geräts leicht zugänglich sein. Sollte das
Gerät mit einem Kabel ohne Stecker ausgestattet sein, ist für
den Anschluss an das Stromnetz ein allpoliger, der Last und
den einschlägigen Vorschriften entsprechender Schalter mit
einer Kontaktmindestöffnung von 3 mm zwischen Gerät und
Stromnetz vorzusehen.
-Der Anschluss an das Stromnetz ist folgendermassen durch-
zuführen:
BRAUN = LLeitung
BLAU = NNulleiter.
• Der Mindestabstand zwischen der Stellfläche für die Koch-
behälter auf der Kochvorrichtung und dem unteren Teil der
Abzugshaube muss mindestens 65 cm betragen. Falls ein
Verbindungsrohr verwendet wird, das aus zwei oder mehr
Teilen zusammengesetzt ist, muss der obere Teil über den
unteren gestülpt werden. Auf keinen Fall darf das Abluftrohr
der Küchenhaube an ein Rohr angeschlossen werden, in dem
Warmluft zirkuliert oder das zur Entlüftung von Geräten ver-
wendet wird, die an eine andere Energiequelle als an Strom
angeschlossen sind.
-Sollte das Gerät mit Abzugsvorrichtung montiert werden,
bereiten Sie eine Luftabzugsöffnung vor.
• Es empfiehlt sich der Einsatz eines Luftableitungsrohres,
das denselben Durchmesser aufweist, wie der der Luftab-
zugsöffnung. Die Verwendung eines Reduzierstücks könnte
die Leistungen des Erzeugnisses beeinträchtigen und das
Betriebsgeräusch erhöhen.
•Befestigunganderwand:
Vor der Installation der Dunstabzugshaube an der Wand
müssen die in Abb. 1 angeführten Maße kontrolliert werden,
dabei ist auch der Mindestabstand von der Kochfläche zu
berücksichtigen.
- Die 4 Bohrungen für die Befestigung anzeichnen und aus-
führen (Abb.1).
- Die 4 Spreizdübel Aund die 2 Schrauben B1 befestigen, ohne
sie vollkommen anzuschrauben Abb. 1.
- Die 4 Schrauben Edes Deckels Dentfernen, Abbildung
2 - Schritt 1-2.
- Die Abzugshaube ergreifen und an den 2 Schrauben B1
aufhängen, Abbildung 2 - Schritt 3.
- Die 2 Schrauben B1 festziehen, Abbildung 2 - Schritt 4,
und die Abzugshaube endgültig durch Anziehen der beiden
Sicherheitsschrauben B2 an der Wand befestigen, Abbildung
2 - Schritt 5.
- Den Deckel Dwieder anbringen und ihn mit den 4 zuvor
entfernten Schrauben Ebefestigen, Abbildung 2 - Schritt 6-7.
- Verwenden Sie zur Geräteinstallation Schrauben und Dübel,
die für die jeweilige Wandart geeignet sind (zum Beispiel:
Betonwände, Wände aus Gipspappe usw.).
Sollten die Schrauben und Dübel als Geräteausstattung mit-
geliefert werden, stellen Sie bitte sicher, dass diese für die Art
derWand, an die das Gerät montiert werden soll, geeignet sind.
•Umluft-version:
Vor Durchführung der Wartungstätigkeiten des regenerier-
baren Aktivkohlefilters (waschbar), den/die Antifett-Filter
deaktivieren.
- Zuerst den Bügel entfernen und dann das Paneel herauszie-
hen, wie in (Abb.4) dargestellt.
BENUTZUNG UND WARTUNG
• Es wird empfohlen, die Dunstabzugshaube schon vor Koch-
beginn der Speisen einzuschalten. Es wird weiterhin empfoh-
len, das Gerät nach Beendigung des Kochvorgangs noch 15
Minuten weiterlaufen zu lassen, um den vollständigen Abzug
der Kochdünste zu gewährleisten. Die Leistungsfähigkeit der
Dunstabzugshaube hängt entscheidend von der Sorgfalt
und Regelmäßigkeit der Wartung ab, insbesondere die des
Fettfilters und die des Aktivkohlefilters.
•Der Antifett-Filter hat die Aufgabe, die in der Luft schweben-
den Fettpartikel zu fangen, daher kann er in unterschiedlichen
Zeitspannen verstopfen, je nach Gebrauch des Geräts.
- Um der Brandgefahr vorzubeugen, müssen mindestens alle
2 Jahre die Antifett-Filter per Hand gereinigt werden; dazu
verwendet man neutrale, nicht scheuernde Reinigungsmittel
oder man gibt ihn in die Spülmaschine bei niedriger Tempe-
ratur und kurzem Zyklus.
- Nach der Reinigung kann die Farbe etwas verändert sein.
Diese Tatsache ist kein Grund für eine Beschwerde, damit er
ausgewechselt wird.
•DieAktivkohlefilterdienen dazu, die Luft, die in die Umge-
bung zurückgeleitet wird zu reinigen; sie haben die Aufgabe,
die unangenehmen Gerüche, die während des Garvorgangs
entstehen, zu beseitigen.
- Die nicht regenerierbaren Aktivkohlefilter müssen minde-
stens alle 4 Jahre ausgewechselt werden. Die Sättigung der
Aktivkohle hängt davon ab, wie oft das Gerät benutzt wird,
vom Gartyp und von der Häufigkeit, mit der die Reinigung
des Antifett-Filters durchgeführt wird.
- Die regenerierbaren Aktivkohlefilter müssen per Hand mit
neutralen, nicht scheuernden Reinigungsmitteln gewaschen
werden oder man gibt ihn in die Spülmaschine bei einerTem-
peratur, die 65°C nicht überschreiten darf (der Waschzyklus
muss ohne Geschirr vollendet werden). Das überschüssige
Wasser entfernen ohne den Filter dabei zu beschädigen, die
Bauteile aus Kunststoff entfernen und das Vlies im Ofen min-
destens 15 Minuten lang circa bei einer Temperatur von max.
100°C trockenen. Um den regenerierbaren Aktivkohlefilter
wirkungsvoll zu erhalten, muss diese Operation alle 2 Jahre
wiederholt werden. Max. alle drei Jahre muss ein Auswech-
seln vorgenommen werden bzw. jedes Mal, wenn das Vlies
beschädigt ist.
•VorderMontagedesAntifett-Filtersunddesregenerier-
baren Aktivkohlefilters ist es unbedingt nötig sicherzustel-
len, dass diese gut getrocknet sind.
•DieHaubemusshäufigsowohlInnenalsauchAußen
gereinigt werden; dazu verwendet man ein mit denatu-
- 10 -
riertem Alkohol befeuchtetesTuch oder ein neutrales nicht
scheuerndes Reinigungsmittel.
• Die Beleuchtungsanlage ist für den Gebrauch während des
Kochvorgangs realisiert worden und nicht für eine längere
Beleuchtung der Umgebung im Allgemeinen. Wird die Be-
leuchtung lange Zeit angelassen, wird die durchschnittliche
Lebensdauer der Glühbirne erheblich verringert.
• Wenn das Gerät mit einer serviceleuchte ausgestattet ist,
kann diese für die allgemeine anhaltende Beleuchtung der
Umgebung benutzt werden.
•Achtung: das Nichteinhalten dieser Hinweise für die Reini-
gung der Haube und deren Auswechseln und die Reinigung
der Filter, führen zu Brandgefahr. Es wird daher empfohlen,
die hier gegebenen Ratschläge zu befolgen.
•AustauschderHalogenlampen(Abb.5):
Nehmen Sie zum Austausch der Halogenlampe B die Glasab-
deckung C(an den kleinen Schlitzen anheben) ab. Tauschen
Sie die Lampe durch eine desselbenTyps aus. Achtung: fassen
Sie die Halogenlampe nicht mit bloßen Händen an.
•BedienungDerbeleuchtung(Abb.6.) die SimboLbezeich-
nungen sind folgend wiedergegeben:
A = Taste BELEUCHTUNG
B = Taste OFF
C = Taste ERSTE GESCHWINDIGKEIT
D= Taste ZWEITE GESCHWINDIGKEIT
E = Taste DRITTE GESCHWINDIGKEIT
G= MOTORKONTROLLEUCHTE.
FÜR SCHÄDEN, DIE AUF DIE NICHTBEACHTUNG DER OBEN
GENANNTEN ANWEISUNGEN ZURUCKZUFÜHREN SIND,
WIRD KEINERLEI VERANTWORTUNG ÜBERNOMMEN.
ENGLISH GB
GENERAL
Carefully read the following important information regarding
installation safety and maintenance. Keep this information
booklet accessible for further consultations.The appliance has
been designed for use in the filtering version (air circulation
on the inside - Fig.1).
SAFETY PRECAUTION
1. Take care when the cooker hood is operating simultaneously
with an open fireplace or burner that depend on the air in the
environment and are supplied by other than electrical energy,
as the cooker hood removes the air from the environment
which a burner or fireplace need for combustion.The negative
pressure in the environment must not exceed 4Pa (4x10⁻⁵ bar).
Provide adequate ventilation in the environment for a safe
operation of the cooker hood. Follow the local laws applicable
for external air evacuation.
Before connecting the model to the electricity network:
-Control the data plate (positioned inside the appliance)
to ascertain that the voltage and power correspond to the
network and the socket is suitable. If in doubt ask a qualified
electrician.
-If the power supply cable is damaged, it must be replaced with
another cable or a special assembly, which may be obtained
direct from the manufacturer or from theTechnical Assistance
Centre.
- This device must be connected to the supply network through
either a plug fused 3A or hardwired to a 2 fase spur protected
by 3A fuse.
2. Warning!
In certain circumstances electri-
cal appliances may be a danger
hazard.
A) Do not check the status of
the filters while the cooker
hood is operating.
B) Do not touch bulbs or adja
cent areas, during or straight
after prolonged use of the
lighting installation.
C) Flambècooking is prohibited
underneath the cooker hood.
D) Avoid free flame, as it is
damaging for the filters and a
fire hazard.
E) Constantly check food frying
to avoid that the overheated oil
may become a fire hazard.
F) Disconnect the electrical
plug prior to any maintenance.
G) This appliance is not intend-
ed for use by children or infirm
persons without supervision.
H) Children should be super-
vised to ensure they do not play
with the appliance.
I) There shall be adequate ven-
tilation of the room when the
rangehood is used at the same
time as appliances burning gas
or other fuels.
L) There is a risk of fire if clean-

- 11 -
ing is not carried out in accord-
ance with the instructions.
This appliance conforms to the European Directive EC/2002/96,
Waste Electrical and Electronic Equipment (WEEE). By making
sure that this appliance is disposed of in a suitable manner,
the user is helping to prevent potential damage to the
environment or to public health.
The symbol on the product or on the accompanying
paperwork indicates that the appliance should not be
treated as domestic waste, but should be delivered to
a suitable electric and electronic appliance recycling collection
point. Follow local guidelines when disposing of waste. For
more information on the treatment, re-use and recycling of
this product, please contact your local authority, domestic
waste collection service or the shop where the appliance was
purchased.
INSTALLATION INSTRUCTIONS
•Assemblyandelectricalconnectionsmustbecarriedout
by specialised personnel.
•Wearprotectiveglovesbeforeproceedingwiththe
installation.
•ElectricConnection:
Insulation class II
-The appliance has been manufactured as a class II, therefore
no earth cable is necessary. The plug must be easily accessible
after the installation of the appliance. If the appliance
is equipped with power cord without plug, a suitably
dimensioned omnipolar switch with 3 mm minimum opening
between contacts must be fitted between the appliance and
the electricity supply in compliance with the load and current
regulations.
-The connection to the mains is carried out as follows:
BROWN = Lline
BLUE = Nneutral.
• If the hob is electric, gas, or induction, the minimum distance
between the same and the lower part of the hood must be
at least 65 cm. If a connection tube composed of two parts is
used, the upper part must be placed outside the lower part. Do
not connect the cooker hood exhaust to the same conductor
used to circulate hot air or for evacuating fumes from other
appliances generated by other than an electrical source.
- In the case of assembly of the appliance in the suction
version prepare the hole for evacuation of the air.
• We recommend the use of an air exhaust tube which has the
same diameter as the air exhaust outlet hole. If a pipe with
a smaller diameter is used, the efficiency of the product may
be reduced and its operation may become noisier.
•Fixingtothewall:
Before installing the hood on the wall, check the measure-
ments indicated in Fig.1, taking into account the minimum
distance from the cooking hob.
- - Mark and drill the 4 fastening holes (Fig.1).
- Fit the 4 rawlplugs Aand the 2 screws B1 without tightening
them completely Fig.1.
- Remove the 4 screws Efrom the cover Dgure 2 - step 1-2.
- Take the appliance and hang it on the 2 screws B1 gure
2 - step 3.
- Tighten the 2 screws B1 gure 2 - step 4 and mount the
hood on the wall permanently using the two safety screws
B2 gure 2 - step 5.
- Put the cover back in place Dand fasten it using the 4 screws
Eremoved previously gure 2 - step 6-7.
- When carrying out the xing operations, use only screws
and screw anchors suited to the type of wall (e.g. reinforced
concrete, plasterboard etc.).
If the screws and screw anchors are supplied with the appli-
ance, make sure that they are suited to the type of wall to
which the hood must be xed.
•Filterhood:
Before performing maintenance on the washable active
carbon filter, remove the grease filter/s (Fig.3).
- First remove the bracket and then pull out the panel, as
shown in (Fig.4).
USE AND MAINTENANCE
• We recommend that the cooker hood is switched on before
any food is cooked. We also recommend that the appliance is
left running for 15 minutes after the food is cooked, in order
to thoroughly eliminate all contaminated air. The effective
performance of the cooker hood depends on constant main-
tenance; the anti-grease filter and the active carbon filter both
require special attention.
•Theanti-greasefilter is responsible retaining the grease
particles suspended in the air, therefore it is subject to clog-
ging with variable frequency according to the use of the
appliance.
- To prevent the danger of possible fires, at least every 2
months one must wash the anti-grease filters by hand using
non-abrasive neutral liquid detergents or in the dishwasher
at low temperatures and on short cycles.
- After a few washes, colour alterations may occur. This does
not give the right to claim their replacement.
•Theactivecarbonfilters are used to purify the air that is
sent back into the room and its function is to mitigate the
unpleasant odours produced by cooking.
- The non-regenerable active carbon filters must be replaced
at least every 4 months. The saturation of the active charcoal
depends on the more or less prolonged use of the appliance,
on the type of kitchen and on the frequency with which anti-
grease filter is cleaned.
- Regenerable active charcoal filters must be washed by hand,
with non abrasive neutral detergents, or in the dishwasher at
a maximum temperature of 65°C (the washing cycle must be
complete without dishware). Remove excess water without
damaging the filter, remove the plastic parts, and let the mat
dry in the oven for at least 15 minutes approximately at a
maximum temperature of 100°C. To keep the regenerable
charcoal filter functioning efficient this operation must be
repeated every 2 months. These must be replaced at least
every 3 years or when the mat is damaged.
•Beforeremountingtheanti-greasefiltersandtheregen-
erable active charcoal filters it is important that they are
completely dry.
•Cleanthehoodfrequently,both internallyandexter-
nally, using a cloth dampened with denatured alcohol or
neutral liquid detergents that are non abrasive.
• The lighting .system is designed for use during cooking
and not for the prolonged general lighting of the room. The
prolonged use of the lighting system significantly decreases
the average duration of the bulbs.
• If the appliance is equipped with courtesy lights it is possible
to use them for general room lighting for a prolonged amount
of time.

- 12 -
•Attention: the non compliance with the hood cleaning
warnings and with the replacement and cleaning of the filters
entails risk of fires. One therefore recommends keeping to the
suggested instructions.
•Replacinghalogenlightbulbs(Fig.5):
To replace the halogen light bulbs B, remove the glass pane
Cusing a lever action on the relevant cracks. Replace the bulbs
with new ones of the same type. Caution: do not touch the
light bulb with bare hands.
•Commandsmechanical(Fig.6)the key symbols are ex-
plained below:
A = LIGHT
B = OFF
C = SPEED I
D= SPEED II
E = SPEED III
G= MOTOR WORKING indicator.
THE MANUFACTURER DECLINES ALL RESPONSIBILITY
FOR EVENTUAL DAMAGES CAUSED BY BREACHING THE
ABOVE WARNINGS.

- 13 -

- 14 -


3LIK1518
Table of contents
Languages:
Other Refsta Ventilation Hood manuals

Refsta
Refsta Flachluefter III User manual

Refsta
Refsta PURO User manual

Refsta
Refsta PURO 4256P Technical specifications

Refsta
Refsta Solitaer II User manual

Refsta
Refsta OPERA Assembly instructions

Refsta
Refsta 4656P User manual

Refsta
Refsta ANDRO I 4156 User manual

Refsta
Refsta NEPTUN User manual

Refsta
Refsta Piano User manual

Refsta
Refsta JORAN I Operation instructions