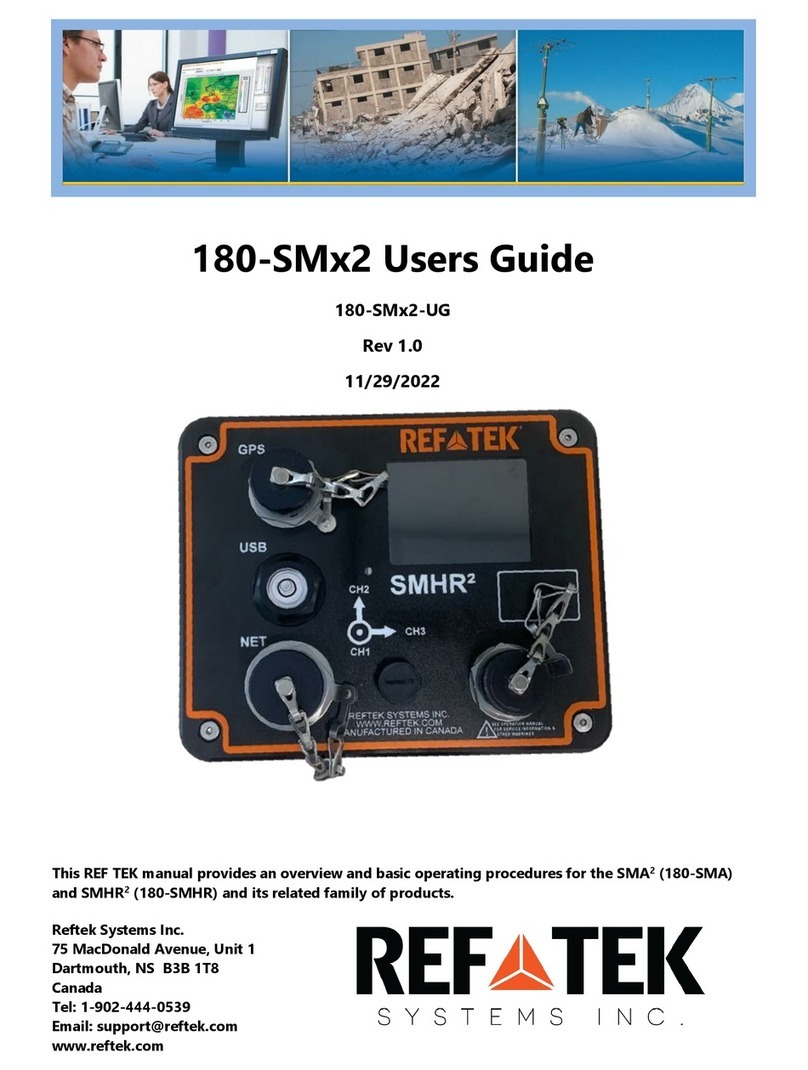
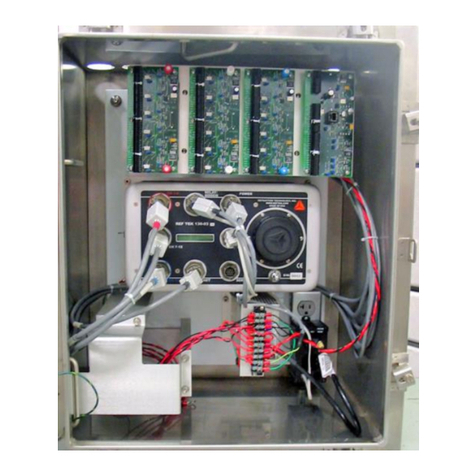
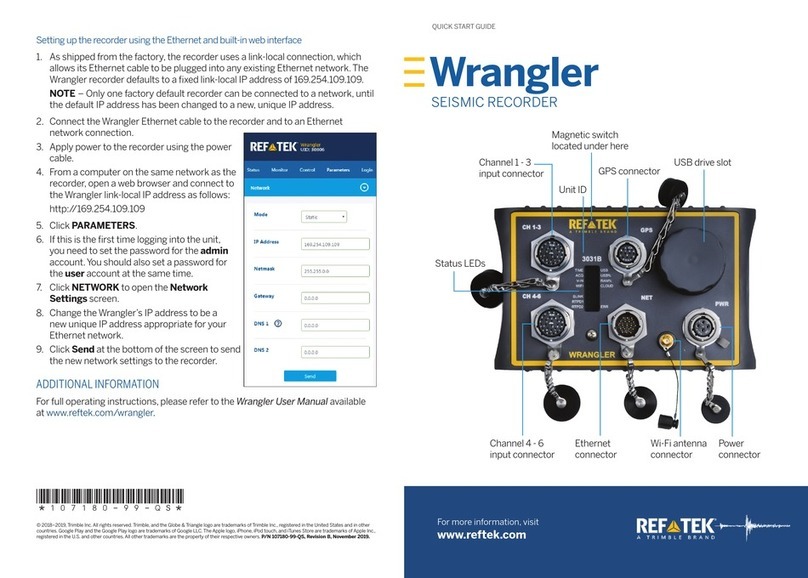
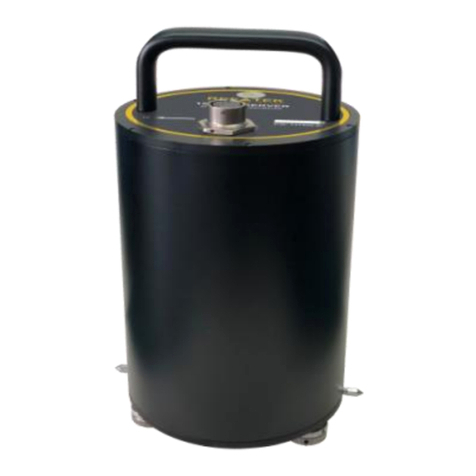
Reftek 130-SMHR/9 User manual

Rev A REF TEK 130-SMHR/9 Users Guide 5/6/2021
98060-00-UG
Reftek Systems Inc. i
REF TEK 130-SMHR/9 Users Guide
98060-00-UG
Rev A
5/6/2021
Reftek Systems Inc.
75 MacDonald Avenue, Unit 1
Dartmouth, Nova Scotia
B3B 1T8
Support Phone: 1-902-444-0539
Email: support@reftek.com
www.reftek.com
This REF TEK manual provides startup and basic operating procedures for the 130-SMHR/9
Accelerograph (98060-00) using Command Line Firmware.

Rev A REF TEK 130-SMHR/9 Users Guide 5/6/2021
98060-00-UG
ii Reftek Systems Inc.
Revision History:
Revision
Date
Reason for change
Pages
A
2014.10.07
Initial release
All
Copyright© 2021 Reftek Systems Inc.
All rights reserved. No part of this manual may be reproduced, copied or transmitted in any form
outside the approved recipient’s organization without written permission from Reftek Systems Inc.
Printed in CANADA

Rev A REF TEK 130-SMHR/9 Users Guide 5/6/2021
98060-00-UG
Reftek Systems Inc. iii
CF Card Replacement:
CAUTION: Due to the large variability of CF cards available on the world market and the
resulting problems with compatibility due to memory layout, signal structuring and power
requirements, REF TEK cannot guarantee a CF card will work in a REF TEK data recorder
unless it is sold through REF TEK itself. REF TEK ensures compatibility through
communications with CF manufacturers and rigorous in-house testing. Some CF
manufacturers refuse to provide adequate information or factory controls to ensure that the
product being sold today is the same as the product sold earlier under the same part
number. CF cards not purchased from REF TEK may work at one temperature but not at
another, or may fail all together.
CAUTION: For optimal performance in a REF TEK 130-SMHR recorder Compact Flash disks
should ALWAYS be formatted BY THE 130-SMHR.
Software Version:
Current software and documentation is available on our web site. Some early units may require
hardware modifications to use the latest software. Contact REF TEK if you have any queries on
the compatibility of your unit(s) and the current software release.
Firmware Update:
To update firmware from the FTP site
1. Login to our FTP site at: ftp.reftek.com/pub as:
User name: Anonymous
Password: Your E-mail address
2. Find the 130 firmware at ftp.reftek.com/pub/130/cpu/prom.
3. Download the zip file of the most recently released firmware version.
Update firmware:
Updating firmware in a 130 DAS requires the presence of a firmware file on an installed Compact
Flash device.
1. On power-up, the 130 checks the Compact Flash for the presence of ‘main.s3’ in the root directory.
2. If the ‘main.s3’ file is present on the Compact Flash, the 130:
a. Reads the file.
b. DELETES the file.
c. Re-programs the internal flash memory.
Note: DO NOT DISTURB THE UNIT DURING THIS PROCESS.
CAUTION: DAS power must be above 10.0V to update the firmware.

Rev A REF TEK 130-SMHR/9 Users Guide 5/6/2021
98060-00-UG
iv Reftek Systems Inc.
Follow these steps to update the firmware of a 130 DAS:
1. Unzip the ‘main.s3’ file from the downloaded zip file of the most recently released firmware.
2. Copy the desired firmware image to the root of the Compact Flash as ‘main.s3’ using a PC with a
Compact Flash reader or ftp into the 130 DAS, with a Compact Flash installed, in binary mode.
3. With the Compact Flash with the main.s3 image installed in the 130 DAS, issue a reset command.
(a) If you are at the 130 DAS:
1. Physically disconnect and reconnect power to the unit.
2. Observe the LCD for the following messages:
READING DISK DO NOT DISTURB
WRITING FLASH DO NOT DISTURB
3. The 130 DAS resets and returns to normal messaging.
(b) If you are remotely connected to a 130 DAS via telemetry mode:
1. If you are connecting remotely by a TCP connection:
a. First connect
b. Discover the unit
c. Acquire status
2. Issue a reset command from the Status screen.
3. Delete the unit from the Station List screen.
4. Wait at least 5 minutes.
5. At the Connections screen (reconnect id using a TCP connection) issue a Station Discovery again to
discover the 130 DAS station.
Note: DO NOT DISTURB THE UNIT until the start-up LCD message reappears.

Rev A REF TEK 130-SMHR/9 Users Guide 5/6/2021
98060-00-UG
Reftek Systems Inc. v
Notation Conventions
The following notation conventions are used throughout REF TEK documentation:
Notation
Description
ASCII
Indicates the entry conforms to the American Standard Code for Information Interchange definition of
character (text) information.
Binary
Indicates the entry is a raw, numeric value.
Hex
Indicates hexadecimal notation. This is used with both ASCII characters (0 –9, A –F) and numeric values.
BCD
Indicates the entry is a numeric value where each four bits represents a decimal digit.
FPn
Indicates the entry is the ASCII representation of a floating-point number with n places following the
decimal point.
<n>
Indicates a single 8-bit byte. When the contents are numeric, it indicates a hexadecimal numeric value;
i.e. <84> represents hexadecimal 84 (132 decimal). When the contents are capital letters, it represents a
named ASCII control character; i.e. <SP> represents a space character, <CR> represents a carriage return
character and <LF> represents a line feed character.
MSB
Most Significant Byte of a multi-byte value.
MSbit
Most Significant Bit of a binary number.
LSB
Least Significant Byte of a multi-byte value.
LSbit
Least Significant Bit (bit 0) of a binary number.
YYYY
Year as a 4-digit number
DDD
Day of year
HH
Hour of day in 24-hour format
MM
Minutes of hour
SS
Seconds of minute
TTT
Thousandths of a second (milliseconds)
IIII
Unit ID number
n, ns
nano, nanosecond; 10-9 = 0.000000001
u, us
micro, microsecond; 10-6 = 0.000001
m, ms
milli, millisecond; 10-3 = 0.001
K, KHz
Kilo, KiloHertz; 103 = 1,000
M, MHz
Mega, MegaHertz; 106 = 1,000,000
G, GHz
Giga, GigaHertz; 109 = 1,000,000,000
Kb, KB
Kilobit, KiloByte; 210 = 1,024
Mb, MB
Megabit, MegaByte; 220 = 1,048,576
Gb, GB
Gigabit, GigaByte; 230 = 1,073,741,824

Rev A REF TEK 130-SMHR/9 Users Guide 5/6/2021
98060-00-UG
vi Reftek Systems Inc.
REF TEK Support and update notifications
As a valued user of REF TEK equipment we would like to provide the best support
possible.
If you would like to know more about any of our REF TEK products and services,
please visit our website at https://reftek.com/technical-support.
On our support page, you can find information about submitting a support ticket,
downloading sensor calibration sheets and exploring training options.
You can contact us at:
Support Phone: 1-902-444-0539
Thanks,
Your REF TEK Support Team

Rev A REF TEK 130-SMHR/9 Users Guide 5/6/2021
98060-00-UG
Reftek Systems Inc. vii
Contents
1130-SMHR/9 Overview ........................................................................... 1
Introduction................................................................................................................................................1
130-SMHR/9 Features ................................................................................................................................1
Mating Connectors .....................................................................................................................................1
Specifications..............................................................................................................................................2
Purpose of the 130-SMHR/9.......................................................................................................................4
Recorder Connections ................................................................................................................................5
1.6.1 Power connector......................................................................................................................................6
1.6.2 130-SMHR/9 Serial Connector.................................................................................................................6
1.6.3 GPS Connector .........................................................................................................................................7
1.6.4 Modem connector ...................................................................................................................................7
1.6.5 130-SMHR/9 Net Connector....................................................................................................................7
1.6.6 Relay connector .......................................................................................................................................9
1.6.7 Channel 4-6 connector...........................................................................................................................10
1.6.8 Channel 7-9 connector...........................................................................................................................11
Hardware Modularity ...............................................................................................................................12
Frequently Asked Questions.....................................................................................................................13
2Operation with command line............................................................... 15
Overview...................................................................................................................................................15
Getting started with your 130-SMHR/9....................................................................................................15
2.2.1 Establishing Minimal Hardware Connections ........................................................................................16
DAS control overview ...............................................................................................................................16
2.3.1 General recorder operation with command line...................................................................................17
Power Considerations...............................................................................................................................18
Selectable Sensor Output Power..............................................................................................................19
2.5.1 To change output power for the sensor................................................................................................19
Port settings and modem communications..............................................................................................21
2.6.1 Command Port (Serial)...........................................................................................................................22
2.6.2 Ethernet Port .........................................................................................................................................22
2.6.3 Internal modem port .............................................................................................................................23
2.6.4 To remove the internal modem.............................................................................................................24
2.6.5 Optional external modem port..............................................................................................................25
General GPS operations............................................................................................................................26
Example configuration..............................................................................................................................27
Formatting media .....................................................................................................................................28
2.9.1 Clearing RAM on the 130-SMHR/9 ........................................................................................................28
2.9.2 Formatting a disk in the 130-SMHR/9 ...................................................................................................28
2.9.3 Checking status of a media device on 130-SMHR/9 ..............................................................................29

Rev A REF TEK 130-SMHR/9 Users Guide 5/6/2021
98060-00-UG
viii Reftek Systems Inc.
Sample LCD displays .................................................................................................................................30
3130-SMHR/9 Settings with SMCC ......................................................... 31
Overview...................................................................................................................................................31
DAS Control with SMCC Overview............................................................................................................31
Port settings and modem communications..............................................................................................34
3.3.1 Command Port (Serial)...........................................................................................................................35
3.3.2 Ethernet Port .........................................................................................................................................35
3.3.3 Toss parameter......................................................................................................................................36
3.3.4 Internal modem port .............................................................................................................................36
4Internal and 130-Modem support......................................................... 39
Internal modem and the RT630................................................................................................................39
Operating the Modem..............................................................................................................................39
4.2.1 Modem features ....................................................................................................................................40
Modem configuration with Command Line..............................................................................................40
4.3.1 Define a window for external modem power........................................................................................40
4.3.2 Define a delay time to initialize a modem .............................................................................................40
4.3.3 Set the baud rate ...................................................................................................................................40
4.3.4 Configure the modem initialization string .............................................................................................41
4.3.5 Modem dial out strings..........................................................................................................................42
4.3.6 Configure the modem hang-up string....................................................................................................42
Using SMCC for modem configuration .....................................................................................................42
4.4.1 Configure the modem initialization string .............................................................................................43
4.4.2 Modem Dial Out strings.........................................................................................................................43
4.4.3 Modem Power Time Windows ..............................................................................................................44
4.4.4 Delay Time/Speed..................................................................................................................................44
5130-SMHR/9 Assembly......................................................................... 45
Introduction..............................................................................................................................................45
Disassembly of the 130-SMHR/9 for service ............................................................................................45
Assembly of the 130-SMHR/9...................................................................................................................46
130-SMHR/9 REF TEK IP67 Test................................................................................................................48
5.4.1 IP67 enclosure protection procedure....................................................................................................48
5.4.2 Pass or Fail Vacuum Test procedure......................................................................................................49
5.4.3 Leak test.................................................................................................................................................49
6Permanent Field Installation ................................................................ 51
Mount the 130-SMHR/9 Wedge Anchor ..................................................................................................51
Disassemble the 130-SMHR/9 case..........................................................................................................52
Re-assemble the 130-SMHR/9..................................................................................................................53
Install GPS and cables...............................................................................................................................53
7Periodic Maintenance Operations ......................................................... 55

Rev A REF TEK 130-SMHR/9 Users Guide 5/6/2021
98060-00-UG
Reftek Systems Inc. ix
Introduction..............................................................................................................................................55
Replacing the Compact Flash™.................................................................................................................55
RAM Backup Battery replacement ...........................................................................................................57
130-SMHR/9 cable list ..............................................................................................................................57
Connector Assembly & Maintenance.......................................................................................................58
Warranty Statement.................................................................................................................................60
Warranty/Non-Warranty Service .............................................................................................................60
8147A-01/3/INT/SM Triaxial Accelerometer Assembly ......................... 61
Introduction..............................................................................................................................................61
Purpose of the 147A-01/3/INT/SM ..........................................................................................................62
9Logfile example .................................................................................... 63
Timing examples.......................................................................................................................................63
System information ..................................................................................................................................66
Acquisition Information............................................................................................................................69
Disk Access Information ...........................................................................................................................71
10 Index.................................................................................................... 73


Rev A REF TEK 130-SMHR/9 Users Guide 5/6/2021
98060-00-UG
Reftek Systems Inc. 1
1130-SMHR/9 Overview
Introduction
This section describes connections and purpose of the REF TEK 130-SMHR/9.
The 130-SMHR/9 (98060-00) unit is intended for deployment in buildings or other structures such
as a bridge. This design, with an internal tri-axial accelerometer and external connectors for two
external tri-axial accelerometers, is well suited for structural monitoring.
130-SMHR/9 Features
Feature
Description
Communication
TCP/IP over Ethernet and Asynchronous Serial
Command/Control
SMCC for command line
Interface allows programming and examination of operating parameters as well as performing
some diagnostic functions
Display
Unit LCD continuously displays state-of-health and status
Enclosure
Larger case for internal battery for backup power
Relays
3 Relay closures contacts for external alarm notification
Relay closure parameters are user selectable
Oscillator
Different from SM - Used for internal time keeping
Options
Internal V.90 modem for event trigger, alarm notification and dial-in
Battery Charger - External or internal lead-acid battery
Size of the case allows internal battery (12 VDC sealed lead-acid 12 AmpH) to provide up to 24
hours of backup power.
Mating Connectors
Function
Mating Connector
Serial
PT06SE12-10S
Power
PT06A12-4P
GPS
PT06SE12-8P
NET
PT06SE14-19S
Channel (x2)
PT06SE14-19P
Modem
PT06A12-3S
Relay
PT06SE14-15S

Rev A REF TEK 130-SMHR/9 Users Guide 5/6/2021
98060-00-UG
2 Reftek Systems Inc.
Specifications
Mechanical
Description
Size
9.25” high x 8.0” long x 13.25”
(235mm x 203mm x 336mm)
Weight
10.5 lbs (4.8 kg) without internal battery
Watertight Integrity
IP67
Shock
Survives 1 meter drop on any axis
Operating Temperature
-20° C to +60° C
Connectors
Part Number
Power
PT07A12-4S
NET
PT07A14-19P
Serial
PT07A12-10P
GPS
PT07A12-8S
Channel (4-6)(7-9)
PT07A14-19S
Modem
PT07A12-3P
Relay
PT07A14-15P
Power
Input Voltage
10 to 16 VDC
Operating Power
2 W (3-channel @ 125sps)
(without power for external sensors)
Peak Power
3 W (DAS and GPS active, writing to CF)
Battery Charger
12 V, 800 mAmp
Battery
12 VDC, sealed lead-acid, 12 AmpH (optional, internal)
A/D Converter
Type
modulation, 24-bit resolution
Channels
9 channels
Input Impedance
Matched to accelerometer
Input Full Scale
Matched to accelerometer
Bit Weight
1.589 µV
Self Noise Level
2 counts RMS @ 200 sps
Sample Rates
200, 100, 50 sps (User selectable)
Dynamic Range
>130 dB
Time Base
Type
GPS Receiver/Clock plus a disciplined oscillator
Accuracy
± 100µsec with GPS locked and a validated 3-D fix
Accuracy without GPS
2.5 ppm from -20° to 60° C
Auxiliary Channels
Inputs
Battery, Temperature, and Backup Battery

Rev A REF TEK 130-SMHR/9 Users Guide 5/6/2021
98060-00-UG
Reftek Systems Inc. 3
Calibration
Enable
User Command
Type
Step applied to feedback
Communication
NET
Ethernet
10-Base-T: TCP/IP,UDP/IP,FTP,RTP
Serial
Asynchronous RS-232;1K,X-Modem,Y-Modem
Serial
Asynchronous RS-232;1K,X-Modem,Y-Modem
Modem (optional)
V.90
Recording Mode
Trigger Type
Continuous, External, Level, Vote Trigger
Media
Compact Flash, Ethernet
Format
PASSCAL Recording Format
Recording Capacity
Battery Backed SRAM
5 MB
Flash Disk
32 MB - 2 GB (Customer specified)
Compliance
147A-01/3/INT/SM Internal Accelerometer
Type
Force-feedback (Internal)
Self-Noise
<1 µm/s/s
Full-scale Range
±4.0 g
Full-scale Output
±10V differential, 20 VPP
Dynamic Range
>145 dB (DC to 2 Hz)
Sensitivity
2.5 V/g
Linearity
<0.1%
Cross-Axis Sensitivity
≤-40 dB due to misalignment of active axis to case reference
Frequency Response
DC –100 Hz flat response (± 3 dB)
Damping
0.7

Rev A REF TEK 130-SMHR/9 Users Guide 5/6/2021
98060-00-UG
4 Reftek Systems Inc.
Purpose of the 130-SMHR/9
The REF TEK 130-SMHR/9 combines the Third Generation Broadband Seismic Recorder (REF
TEK 130-01) and an advanced low-noise force-feedback accelerometer housed in an anodized
aluminum instrument case with a single point mounting and 3-point leveling. The standard
accelerometer has a full scale range of +/- 4g.
The 130-SMHR/9 is a rugged, portable, and versatile data recorder. The modular design of
their hardware and software allows you to reconfigure the 130-SMHR/9 for various types of
applications for continuously monitoring earthquakes and other seismic events by thoroughly
measuring strong earthquake shaking at ground sites, in buildings and critical structures, and
automatically broadcasting information when a significant earthquake occurs. This allows
immediate assessment of an impact.
Some specific uses include the following:
•Free field reference station for strong motion.
•Telemetry networks
•Aftershock studies
•Building arrays
•Structural monitoring

Rev A REF TEK 130-SMHR/9 Users Guide 5/6/2021
98060-00-UG
Reftek Systems Inc. 5
Recorder Connections
The functions of the standard connectors on the 130-SMHR/9 faceplate are as follows:
Channels 4-6
Connection
Relays for External
Alarm Notification
Optional Internal
Modem (POTS)
15V
Power
Channels 7-9
Connection
Ethernet Optional
External Modem
Local Serial
Connection
130-GPS

Rev A REF TEK 130-SMHR/9 Users Guide 5/6/2021
98060-00-UG
6 Reftek Systems Inc.
Power connector
Power is supplied to the 130-SMHR/9 through one power connector. The hardware
connection diagram on the previous page shows typical connections for the 130-SMHR/9. The
following chart details individual connectors and REF TEK cable numbers.
Recorder
Faceplate
Connector and
Cable
DAS
Pin
Pin Desc
Electrical Desc
Voltage Range
Power
PT0-7A-12-4S
A
+15 VDC
Input
15 VDC
B
+12 VDC
Input/Output
12V battery input/charger
out when +15V is supplied
on Pin A.
10-14 VDC
C
DGND
Power Return
D
DGND
Power Return
CAUTION: Disk operations are suspended when the input voltage drops below 11.1 Volts and
are re-enabled when the voltage goes above 11.5 Volts (Version 2.9.6 or later) (See the 3.0.0
Release Notes for more information).
Firmware upgrades are not performed when the power is below 11.5 Volts (Version 2.9.6 or
later) (See the 3.0.0 Release Notes)
130-SMHR/9 Serial Connector
The 130-SMHR/9 SERIAL connector provides general-purpose serial communications.
Commonly, a personal computer, such as a DOS-based desktop or laptop, running a program
in terminal mode, is connected here to monitor and control the 130-SMHR/9 operations.
Recorder
Faceplate
Connector
DAS
Pin
Pin Desc
Electrical Desc
Voltage
Range
Serial
PT0-7A-12-10P
A
TX B
Output RS232
±5 Volts
B
RX B
Input RS232
±12 Volts
C
RTS B
Output RS232
±5 Volts
D
CTS B
Input RS232
±12 Volts
E
DSR B
Input RS232
±12 Volts
F
DCD B
Input RS232
±12 Volts1
G
DTR B
Output RS232
±5 Volts
H
No Connect
J
DGND
PWR
K
PWR
Output2
+ 5 Volts3
1
Volts = Controlled by software
2
Output = Protected by self resetting fuse
3
Volts = Controlled by software

Rev A REF TEK 130-SMHR/9 Users Guide 5/6/2021
98060-00-UG
Reftek Systems Inc. 7
GPS Connector
The GPS connector allows an external clocking device, such as the REF TEK 130-GPS\01 Global
Positioning System clock to be connected.
Recorder
Faceplate
Connector
DAS
Pin
Pin Desc
Electrical Desc
Voltage Range
GPS(Ext Clock)
PT0-7A128S
A
GPS 1Hz
Input Pulse
0-5 Volts
B
DGND
PWR/Signal GND
C
GPS RX
Output RS232
±5 Volts
D
DGND
PWR/Signal GND
E
GPS TX
Input RS232
±12 Volts
F
PWR 12V
12 Volts Output
10-15 Volts4
G
GPS RST
Output Pulse
0-3.3 Volts
H
IRIGE
5 Volts Output1
0-5 Volts
Modem connector
The modem connector provides connections for the 130-SMHR/9 internal modem. The modem
connector is provided in order to connect the internal modem to the Plain-Old-Telephone-
Service.
Recorder
Faceplate
Connector
DAS
Pin
Pin Desc
Electrical Desc
Voltage Range
Modem
PT0-7A-12-3P
A
TIP
Telephone Line
B
RING
Telephone Line
C
X
No Connection
130-SMHR/9 Net Connector
Communications between the 130-SMHR/9 and a remote system using either external TCP/IP
and/or an optional external modem occur across the 130-SMHR/9 NET connector. The cable has
two connectors to allow two connections, one for Ethernet and one for serial communications.
The internal modem must be removed before using an external modem. See Section 2 in this
manual for a procedure on removing the internal modem.
CAUTION: A 130-SMHR/9 is shipped pre-configured with a default IP address. Be sure to
change this address before connecting the 130-SMHR/9 to an Ethernet port. Any IP
addresses on one of the same subnets, as the 130-SMHR/9 unit, may connect using FTP
and/or the command socket. However, the 130-SMHR/9 unit restricts the external IP
addresses from which it will accept connections, to the equivalent of a Class C subnet
containing the RTP host. If no RTP host is set for an interface, no connections can be
established to the unit from outside its subnet.
The 130-SMHR/9 uses a 10BaseT Ethernet chip. The 130-SMHR/9 Ethernet port may not
work when connected to all 100BaseT and some 10/100BaseT Ethernet hubs.
4
Volts = Controlled by software and protected by self resetting fuse

Rev A REF TEK 130-SMHR/9 Users Guide 5/6/2021
98060-00-UG
8 Reftek Systems Inc.
This connector also functions as the point of input for the external trigger. It also serves as the
point of output for an event detection (trigger out) pulse. There is also a 12VDC nominal input on
this connector to allow for lab setup via Ethernet using only this connector.
Recorder
Faceplate
Connector
DAS
Pin
Pin Desc
Electrical Desc
Voltage Range
Net Comm.
PT0-7A-14-19P
A
TX A
Output RS232
±5 Volts*
B
RX A
Input RS232
±12 Volts*
C
RTS A
Output RS232
±5 Volts*
D
CTS A
In RS232
±12 Volts*
E
DSR A
In RS232
±12 Volts*
F
DCD A
In RS232
±12 Volts*
G
+5V COMP1PWR
PWR VDC5out
+5 Volts6out
H
ENET TX+
Output Ethernet7
J
ENET TX-
Output Ethernet8
K
ENET RX+
Input Ethernet9
L
ENET RX-
Input Ethernet10
M
ENETPWR 12VDC
PWR Ethernet11 out
+12 Volts12 out
N
DGND
P
DGND
R
DTR A
Output RS232
±5 Volts*
S
TRIG_485+
Input/ Output
RS-48513
T
TRIG_485-
Input/ Output
RS-48514
U
+15VDC IN
Input
15 VDC15
V
OSC
Output, Tristate16
0-5 Volts
Note: * RS232 In/Out is disabled when the optional internal modem is installed
5
VDC = Controlled by software
6
Volts = Protected by self resetting fuse
7
Ethernet = Transformer coupled
8
Ethernet = Transformer coupled
9
Ethernet = Transformer coupled
10
Ethernet = Transformer coupled
11
Ethernet = Controlled by software and protected by self resetting fuse
12
Volts = Tracks main input voltage
13
External trigger= RS-485 differential signal for trigger in and out
14
External trigger= RS-485 differential signal for trigger in and out
15
VDC = Alternate main power input
16
Tristate = Controlled by software

Rev A REF TEK 130-SMHR/9 Users Guide 5/6/2021
98060-00-UG
Reftek Systems Inc. 9
Relay connector
The relay connector on the 130-SMHR/9 provides three relay closures for certain software set
able alarm conditions.
Recorder
Faceplate
Connector
DAS
Pin
Pin Desc
Electrical Desc
Voltage
Range
Relay
PT0-7A-14-15P
A
NO
Relay 1 Normally Open Contact
0-120V AC 0-
30V DC
B
COM
Relay 1 Common Contact
C
NC
Relay 1 Normally Closed Contact
D
X
No Connection
E
NO
Relay 2 Normally Open Contact
0-120V AC
0-30V DC
F
COM
Relay 2 Common Contact
G
NC
Relay 2 Normally Closed Contact
H
X
No Connection
J
NO
Relay 3 Normally Open Contact
0-120V AC
0-30V DC
K
COM
Relay 3 Common Contact
L
NC
Relay 3 Normally Closed Contact
M
X
No Connection
P
X
No Connection
R
X
No Connection
N
X
No Connection
Note: There is an optional jumper (JP3 located near the relay connector) that can be installed on the RT630 Lid
board in order to set the three provided relays as normally energized.

Rev A REF TEK 130-SMHR/9 Users Guide 5/6/2021
98060-00-UG
10 Reftek Systems Inc.
Channel 4-6 connector
The channel 4-6 connector on the 130-SMHR/9 provides inputs for an external sensor.
Recorder
Faceplate
130
Pin
Name
Dir
Electrical Desc
Voltage Range
Note
Channel 4-6
A
CH4+
In
Channel 4 input +
±10 Volts
PT0A1419S
B
CH4-
In
Channel 4 input -
±10 Volts
C
CH5+
In
Channel 5 input +
±10 Volts
D
CH5-
In
Channel 5 input -
±10 Volts
E
CH6+
In
Channel 6 input +
±10 Volts
F
CH6-
In
Channel 6 input -
±10 Volts
G
AGND
In
Analog ground
H
PWR
Out
Sensor power
+15 or +24 Volts
1,2,3
J
PGND
-
Power ground
K
CalEn- 456
Out
Calibration Enable active
low
OC
4,6,7
L
CalEn+ 456
Out
Calibration Enable active
high
OC
5,6,7
M
Center- 456
Out
Center Enable
active low
OC
4,6
N
CalSig 456
Out
Calibration signal
±5 Volts
6
P
Aux4
In
Aux (Mass Position)
Channel 4
±10 Volts
6
R
Aux5
In
Aux (Mass Position)
Channel 5
±10 Volts
6
S
Aux 6
In
Aux (Mass Position)
Channel 6
±10 Volts
6
T
DGND
-
Digital ground
U
Center+ 456
Out
Center Enable Active High
OC
5,6
V
Sensor ID2
In/Out
Sensor ID
0-5 Volts
6
Note: 1 = Hardware user selectable to +15 Volts or +24 Volts (See Section 2.5)
Note: 2 = Protected by self resetting fuse
Note: 3 = See Section 2.5 for channel connection information
Note: 4 = Open Collector, pulls to Ground
Note: 5 = Open Collector, pulls to + 5 Volts
Note: 6 = Functions provided by Optional RT527 Sensor Control Board
Note: 7 = Also can be activated by Sensor test command to test REF TEK 131 Accelerometers if no RT527 is
installed
Table of contents
Other Reftek Measuring Instrument manuals
Popular Measuring Instrument manuals by other brands

CS Instruments
CS Instruments FA 410 instruction manual

Delmhorst Instrument Co
Delmhorst Instrument Co TechCheck PLUS owner's manual

Greenlee
Greenlee FC-110 instruction manual

Tobii
Tobii Pro Glasses 3 user manual

Fluke
Fluke 165X Quick reference guide

Spectroline
Spectroline OIL-GLO ULTRA instruction manual

PCB
PCB Piezotronics M1631-03C Installation and operating manual

YOKOGAWA
YOKOGAWA PBL5000 user manual

Tokheim
Tokheim MA26 Technical manual

Global Sensor Systems
Global Sensor Systems ExpressCube 265R user guide

HEIDENHAIN
HEIDENHAIN LIF 471R Mounting instructions

socomec
socomec CCS WattNode BACnet WNC-3Y-208-BN installation manual