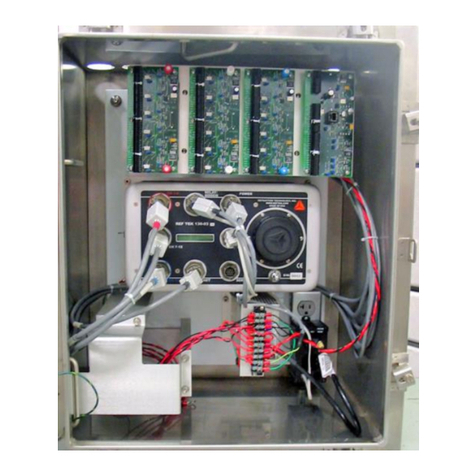
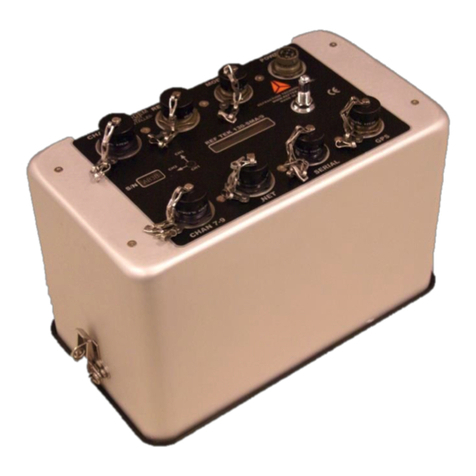
Reftek 180-SM 2 Series User manual

This REF TEK manual provides an overview and basic operating procedures for the SMA2(180-SMA)
and SMHR2(180-SMHR) and its related family of products.
Reftek Systems Inc.
75 MacDonald Avenue, Unit 1
Dartmouth, NS B3B 1T8
Canada
Tel: 1-902-444-0539
www.reftek.com
180-SMx2 Users Guide
180-SMx2-UG
Rev 1.0
11/29/2022

Rev 1.0 180-SMx2 Users Guide 11/29/2022
180-SMx2-UG
Reftek Systems Inc. ii
Revision History
Rev
Date
Reason for Change
Pages
1.0
2022.11.29
Initial release
All
Legal Notices
Corporate Office
Reftek Systems Inc.
75 MacDonald Avenue, Unit 1
Dartmouth, Nova Scotia
B3B 1T8
Copyrights and Trademarks
Copyright© 2022 Reftek Systems Inc.
All rights reserved. No part of this manual may be reproduced, copied or transmitted in any form outside
the approved recipient’s organization without written permission from Reftek Systems Inc.
Printed in CANADA
Product warranty information
For applicable product warranty information, please refer to the Warranty Card included with this
product.

Rev 1.0 180-SMx2 Users Guide 11/29/2022
180-SMx2-UG
Reftek Systems Inc. iii
Notation Conventions
The following notation conventions are used throughout REF TEK documentation:
Notation
Description
ASCII
Indicates the entry conforms to the American Standard Code for Information Interchange definition of
character (text) information.
Binary
Indicates the entry is a raw, numeric value.
Hex
Indicates hexadecimal notation. This is used with both ASCII characters (0 –9, A –F) and numeric values.
BCD
Indicates the entry is a numeric value where each four bits represents a decimal digit.
FPn
Indicates the entry is the ASCII representation of a floating-point number with n places following the
decimal point.
<n>
Indicates a single 8-bit byte. When the contents are numeric, it indicates a hexadecimal numeric value;
i.e. <84> represents hexadecimal 84 (132 decimal). When the contents are capital letters, it represents a
named ASCII control character; i.e. <SP> represents a space character, <CR> represents a carriage
return character and <LF> represents a line feed character.
MSB
Most Significant Byte of a multi-byte value.
MSbit
Most Significant Bit of a binary number.
LSB
Least Significant Byte of a multi-byte value.
LSbit
Least Significant Bit (bit 0) of a binary number.
YYYY
Year as a 4-digit number
DDD
Day of year
HH
Hour of day in 24-hour format
MM
Minutes of hour
SS
Seconds of minute
TTT
Thousandths of a second (milliseconds)
IIII
Unit ID number
n, ns
nano, nanosecond; 10-9 = 0.000000001
u, us
micro, microsecond; 10-6 = 0.000001
m, ms
milli, millisecond; 10-3 = 0.001
K, KHz
kilo, kilohertz; 103= 1,000
M, MHz
mega, megahertz; 106= 1,000,000
G, GHz
giga, gigahertz; 109= 1,000,000,000
Kb, KB
kilobit, kilobyte; 210 = 1,024
Mb, MB
megabit, megabyte; 220 = 1,048,576
Gb, GB
gigabit, gigabyte; 230 = 1,073,741,824
WARNING
This alert warns of a potential hazard which, if not avoided, could result in
severe injury or even death.
CAUTION
This alert warns of a potential hazard or unsafe practice that could result in
minor injury or property damage or irretrievable data loss.
NOTE: This is a note.

Rev 1.0 180-SMx2 Users Guide 11/29/2022
180-SMx2-UG
Reftek Systems Inc. iv
REF TEK Support and update notifications
As a valued user of REF TEK equipment we would like to provide the best support possible.
If you would like to know more about any of our REF TEK products and services, please visit our
website at https://reftek.com/technical-support.
On our support page, you can find information about submitting a support ticket, downloading
sensor calibration sheets and exploring training options.
You can contact us at:
Support Phone: 1-902-444-0539
Thanks,
Your REF TEK Support Team
The latest version of REF TEK manuals can be found at https://manuals.reftek.com

Rev 1.0 180-SMx2 Users Guide 11/29/2022
180-SMx2-UG
Reftek Systems Inc. v
Table of Contents
1 Overview..........................................................................................................................1
1.1 Introduction ....................................................................................................................................1
1.2 Purpose of the SMx2Seismic Recorder.........................................................................................1
1.3 Specifications ..................................................................................................................................1
1.4 Standard Faceplate Connections ...................................................................................................3
1.4.1 Power Connector: 4-pin PT07 ..............................................................................................3
1.4.2 GPS Connector: 10-pin PT07 ................................................................................................4
1.4.3 Net Connector: 19-pin PT07.................................................................................................4
1.4.4 Net Connector .......................................................................................................................4
1.4.5 USB Connectors .....................................................................................................................4
1.5 Mating Connectors .........................................................................................................................5
1.6 LCD Display......................................................................................................................................5
1.7 General Recorder Control Considerations ....................................................................................7
1.7.1 General Recorder operation .................................................................................................7
1.7.2 Power Considerations ...........................................................................................................8
1.8 Sensor Control.................................................................................................................................9
1.9 Frequently Asked Questions ..........................................................................................................9
1.10 Warranty Statement ...................................................................................................................10
2 Getting Started with your SMx2DAS .........................................................................11
2.1 Connecting the Internal Battery ..................................................................................................11
2.2 Controlling Unit Power.................................................................................................................12
2.3 Establishing Minimal Hardware Connections.............................................................................12
2.4 Power up the SMx2DAS ...............................................................................................................12
2.5 General GNSS Operations ............................................................................................................12
2.6 Ethernet for Configuration ..........................................................................................................13
2.7 Using a Mobile Device for Configuration ...................................................................................13
2.8 Setting Passwords.........................................................................................................................14
2.9 Check the GNSS Status .................................................................................................................14
2.10 Example Configuration Steps ....................................................................................................14
2.11 Change the Configuration..........................................................................................................14
3 Installation.....................................................................................................................15
3.1 Introduction ..................................................................................................................................15
3.2 Installing the Wedge Anchor .......................................................................................................15
3.3 Installing the SMx2........................................................................................................................15
4 Firmware Updates.........................................................................................................16
4.1 Firmware Version ..........................................................................................................................16
4.2 Update Firmware ..........................................................................................................................16
5 Periodic Maintenance ..................................................................................................17
5.1 Introduction ..................................................................................................................................17
5.2 Replacing the USB Disk ................................................................................................................17
5.3 Replacing the RTC Battery ...........................................................................................................18
5.4 Replacing the Internal Main Battery ...........................................................................................18

Rev 1.0 180-SMx2 Users Guide 11/29/2022
180-SMx2-UG
Reftek Systems Inc. vi
5.5 Connector Assembly and Maintenance ......................................................................................19
6 Recorder State of Health (Log) Messages .................................................................21
6.1 Keyword and Abbreviation Examples .........................................................................................21
6.2 Some Useful Message Examples..................................................................................................21

Rev 1.0 180-SMx2 Users Guide 11/29/2022
180-SMx2-UG
Reftek Systems Inc. 1
1Overview
1.1 Introduction
This section describes operations and maintenance requirements for the REF TEK SMA2
(180-SMA) and SMHR2(180-SMHR) 3-channel Strong Motion seismic recorders. It
includes the following:
•An explanation of the general purpose of the SMx2DAS units.
•Standard faceplate connection functions, pin-out, and associated cables drawings.
•General SMx2DAS control considerations and operation.
•Frequently Asked Questions about the SMx2.
CAUTION
A SMx2DAS is shipped pre-configured with a link-local IP address that is safe to
connect to your LAN. This should be changed to a fixed IP or to DHCP.
1.2 Purpose of the SMx2Seismic Recorder
The REF TEK SMx2DAS units include an internal accelerometer and optional internal
battery providing a complete recorder in a small package. It is intended for strong-
motion monitoring of various structures. Some specific uses include the following:
•Structural monitoring.
•Site Noise Survey
•Earthquake Early Warning
1.3 Specifications
Mechanical
Size:
7.3in x 6in x 5.3in (cables removed)
Weight:
7 lb 11oz (3.488 kg)
Watertight Integrity:
IP68
Shock:
Survives a 1 meter drop on any axis
Connectors
Power:
PT07A12-4S
NET:
PT07A14-19P
GPS:
PT07A12-10S
Power
Input Voltage:
Main power: 9.5 to 24 VDC
Auxiliary battery: 11 to 20 VDC
Average Power:
2.4W (3 channel, No Communications, No battery charging)
2.7W (3 channels, With Communications, No battery charging)

Rev 1.0 180-SMx2 Users Guide 11/29/2022
180-SMx2-UG
Reftek Systems Inc. 2
A/D Converter
Type:
32-bit Successive Approximation
30-bit output resolution
Channels:
3 channels
Common Mode Rejection
Greater than 70 db within ±2.5 VDC
Input Full Scale:
Sensor output matched to ADC input
Sensitivity:
476 nano-g/count @ 24-bit recording resolution
Sample Rates:
4000, 2000, 1000, 500, 250, 200, 125, 100, 50, 40, 20, 10, 5, 1, 0.1 sps
Internal Sensor
SMA2:
+/-4g MEMS triaxial accelerometer matched to the ADC
SMHR2:
+/-4g force-balanced triaxial accelerometer matched to the ADC
Time Base
Type:
Disciplined oscillator phase-locked to external time source
Accuracy with GNSS:
±10 µs after validated 3-D fix and locked
Accuracy with PTP:
±100 µs after PTP clock is stable
Accuracy with NTP:
±500 ms after two valid NTP polls (2 minute poll rate)
Free-Running Accuracy:
0.1 ppm over the temperature range of 0º C to 70º C
0.2 ppm from -30º C to 0º C
Communication
Ethernet:
10BASE-T/100BASE-TX, TCP/IP, UDP/IP, FTP, RTP
WiFi:
802.11 b/g
Recording Mode
Continuous Trigger:
Record length
Time Interval:
A periodic recording time
Time Trigger:
A list of record times and lengths
Event Trigger:
STA/LTA with advanced features including bandpass filter LTA hold, etc.
Level Trigger:
Absolute value, user selectable: g, or % of full scale, or counts including bandpass
filter
Vote/External Trigger:
Votes per channel including bandpass filter, external pulse on trigger input line
External Trigger:
External pulse on trigger input line
Recording Capacity
RAM:
16 MB
Internal non-volatile
SEEDlink ring buffer
8 GB
USB Flash Disk:
8/16/32/64 GB
Recording Format:
Format:
MRF Recording Format
MSD (miniSEED) Recording Format
Compliance:
Specifications:
CE, FCC, RoHS

Rev 1.0 180-SMx2 Users Guide 11/29/2022
180-SMx2-UG
Reftek Systems Inc. 3
1.4 Standard Faceplate Connections
The functions of the standard connectors on the SMx2Seismic Recorder faceplate are as
follows:
1.4.1 Power Connector: 4-pin PT07
Pin
Description
Pin
Description
A
Main Power Input; 9.5–24VDC
C
Ground
B
Battery Power Input; 11 –20VDC
D
Ground
Primary power is supplied to the SMx2DAS unit through the power connector. A
separate ground connection can be attached to the quick-disconnect spade attached to
the power connector.
CAUTION
Disk operations are suspended when the input voltage drops below a user-
settable threshold (above 10V).
NOTE: The internal battery, when installed, is only charged when Power A is
above 14VDC. It is not charged from Pin B. An external battery on Pin B
can also be charged when Power A is above 14VDC.
Power
GNSS
Ethernet
USB-C
Vent: DO NOT REMOVE

Rev 1.0 180-SMx2 Users Guide 11/29/2022
180-SMx2-UG
Reftek Systems Inc. 4
1.4.2 GPS Connector: 10-pin PT07
Pin
Description
Pin
Description
Pin
Description
A
DAS Trigger+
E
GPS TX+
J
GPS Power
B
DAS Trigger-
F
GPS TX-
K
GPS Power Ground
C
GPS RX+
G
GPS PPS+
-
-
D
GPS RX-
H
GPS PPS-
-
-
The GPS connector allows connection of an external 184-GNSS or AcuTime GPS
Receiver. This connector provides power and serial connections to the receiver via the
appropriate cable. See the 184-GNSS manual for more information.
1.4.3 Net Connector: 19-pin PT07
Pin
Description
Pin
Description
Pin
Description
A
n.c.
H
Enet TX+
R
n.c.
B
n.c.
J
Enet TX-
S
Reset
C
n.c.
K
Enet RX+
T
Reset Ground
D
n.c.
L
Enet RX-
U
n.c.
E
n.c.
M
NET Power
V
n.c.
F
n.c.
N
Ground
-
-
G
n.c.
P
Ground
-
-
1.4.4 Net Connector
Communications between the SMx2DAS and an external Ethernet device occurs across
the unit's NET connector. Power (+12VDC) can also be provided to an external
communications device. The standard cable (R-101422) only provides the Ethernet
connection.
CAUTION
A SMx2DAS is shipped pre-configured with a link-local IP address that is safe to
connect to your LAN. This should be changed to a fixed IP or to DHCP.
1.4.5 USB Connectors
The contents of the internal USB drive can be transferred to a computer using a USB-C
to USB-A cable. The USB-C connector is in a sealed compartment underneath the
bubble-level screw-cap.
A USB-microAB port is also provided for factory diagnostic.

Rev 1.0 180-SMx2 Users Guide 11/29/2022
180-SMx2-UG
Reftek Systems Inc. 5
1.5 Mating Connectors
Function
Mating Connector
Power
PT06SE124P
GPS
PT06SE128P
NET
PT06SE1419S
1.6 LCD Display
The SMx2DAS displays various status conditions using the color LCD display.
In general, a green color indicates a positive working condition and a red color indicates
a warning or error condition. The following table shows the various icons and their
meaning.

Rev 1.0 180-SMx2 Users Guide 11/29/2022
180-SMx2-UG
Reftek Systems Inc. 6
Meaning
Icon
Off
Green
White
Orange
Red
TIME
n/a
Reference
Clock last
locked within
the last hour
Reference
Clock last
locked
between 1 –
4 hours ago
Reference
Clock last
locked
longer than
4 hours ago
Reference
Clock has not
locked since
boot
ACQ
n/a
Acquisition is
on and no
non-
continuous
triggers are
active
Acquisition is
on and at
least one
non-
continuous
trigger is
active
n/a
Acquisition is
off
Vin
n/a
Input voltage
is at or above
13.0 V
Input voltage
is less than
13.0 V and at
or above
11.5 V
Input
voltage is
below 11.5 V
and not in
LVD
Input voltage
is below 11.5
V and in LVD
WIFI
Wi-Fi is off
Wi-Fi is on
and the
mobile
device is
connected
via Wi-Fi
Wi-Fi is on
but the
mobile
device is not
connected
via Wi-Fi
Wi-Fi is
turning on
n/a
SLINK
No clients
are
connected
One client is
connected
Multiple
clients are
connected
n/a
n/a
RTPD1
Not
configured
Connected
n/a
n/a
Not
connected
RTPD2
Not
configured
Connected
n/a
n/a
Not
connected
RAM%
n/a
Less than
20% total
RAM used
Between 20%
and 80%
total RAM
used, and at
least one RTP
link using
less than
20% of total
RAM
Between
20% and
80% total
RAM used,
and at least
one RTP link
using more
than 20% of
total RAM
More than
80% total
RAM used
USB%
n/a
Less than
33% total
USB used
Between 33%
and 66%
total USB
used
Between
66% and
99% total
USB used or
more than
99% total
USB used
and Disk
Wrap is
enabled
More than
99% total
USB used
and Disk
Wrap is
disabled
USB
n/a
USB off and
no data read
or write
errors
n/a
USB on
USB off and a
read or write
error
occurred

Rev 1.0 180-SMx2 Users Guide 11/29/2022
180-SMx2-UG
Reftek Systems Inc. 7
1.7 General Recorder Control Considerations
The SMx2DAS is a microprocessor-based instrument. Each SMx2DAS unit contains
programmable flash memory that contains the SMx2DAS firmware (control code,
microprocessor instructions and FPGA images). Occasionally, REF TEK revises the SMx2
DAS firmware, adding features and improving efficiency. The firmware can be upgraded
by downloading new code images onto the USB flash drive. To download new code see
“Firmware update options”. Contact REF TEK to determine the availability, applicability
and advantages of such an upgrade.
In addition to the CPU control code in the SMx2DAS, the SMx2DAS requires that you
enter specific parameter information to instruct it exactly how and when to record data
and perform other system functions. A web-based User Interface (Web UI) is used to
enter these parameters. Mobile devices can access the Web UI over Wi-Fi.
1.7.1 General Recorder operation
The SMx2DAS provides a Web UI to select data collection parameters. All SMx2DAS
units have multiple datastream capability (maximum of 4 plus one auxiliary), allowing
users a vast array of possible parameter combinations.
You may set the following parameters for each datastream:
•Which input channel or channels to include
•Sample rate
•Data compression format
•Trigger type
The trigger type selected for a datastream defines the particular mechanism that
controls when the SMx2DAS records data. The various predefined trigger types
supported are as follows:
•Continuous trigger
•Level trigger
•External trigger
•Time Interval trigger
•Time List trigger
•Event trigger
•Vote/External trigger
Each trigger has its own set of parameters that determines the exact conditions under
which the SMx2DAS records data.

Rev 1.0 180-SMx2 Users Guide 11/29/2022
180-SMx2-UG
Reftek Systems Inc. 8
Detailed explanations and methods for using all SMx2DAS unit parameters, including
datastreams and triggers, are provided in subsequent sections in this manual.
REF TEK pre-sets and tests the hardware of each SMx2DAS before you receive the unit
to ensure that it performs as specified. The SMx2DAS units do not require hardware
adjustments for normal operations. You may use a SMx2DAS unit as a stand-alone
recorder, or you may use a network of many SMx2DAS units deployed over a structure
or site. During field operations, the SMx2DAS can store data in a USB flash drive. The
SMx2has a network connection that allows connection to IP-based networks and
devices.
All SMx2DAS units employ hardware, firmware, and software that comply with the
requirements of the IRIS PASSCAL Program, portable and telemetry stations, US ARRAY
(the USGS and ANSS) specification for national, regional, strong motion, and structural
stations.
1.7.2 Power Considerations
This section describes current draw, power load, and general power supply
considerations for SMx2DAS units, peripherals, and subsystems.
All SMx2DAS units operate on nominal 15-volt power (9.5 to 24 VDC). This range allows
a SMx2DAS unit to be powered from an ordinary lead acid battery, a solar panel or an
AC power source. When powered with at least 14 volts on Pin A, both the optional
internal and external batteries can be charged from the SMx2itself.
To ensure continual, uninterrupted power to your SMx2DAS and peripherals, use a well-
regulated power supply that can deliver at least 1.25 times the maximum current that
the load of your combined system components requires. Be sure to account for the
cable resistance (especially if you build your own cables). Power for an external modem
is available from the network connector (12 VDC).
In general, perform the following to ensure a sufficient power supply:
1. Use the specification data and add the maximum current draw for the SMx2DAS and each
peripheral that uses the same power supply to obtain the maximum total current they will
draw at any given time then add at least 25%.
2. Check your power supply's specifications to ensure that it can handle this load. The power
specifications for SMx2DAS units are provided for each configuration of SMx2DAS. Contact
REF TEK if you require more accurate calculations or other information regarding power
considerations.
Solar power setups are frequently used in remote locations and these are available in
several capacities that cover the various equipment configurations. Solar power arrays

Rev 1.0 180-SMx2 Users Guide 11/29/2022
180-SMx2-UG
Reftek Systems Inc. 9
supplied by REF TEK include solar panels, battery charge regulators, and protective
safety devices.
1.8 Sensor Control
SMx2DAS provides controls for testing the internal accelerometer. For more information
on sensor control see the SMx2Theory of Operations.
1.9 Frequently Asked Questions
Question: Does any data loss occur if acquisition is turned on and the NET is not
connected?
The data loss that occurs depends upon the parameters of the unit. If the unit
parameters are set to store data to disk ONLY then there is no effect, otherwise RAM will
fill and acquisition will stop. For further clarification see the explanation in the section
“NET Port”.
Question: Can a different sampling rate be used on different datastreams?
Yes.
The sample rate list can be broken into two groups:
•Group One: The following rates are only available when recording a single sample rate for all
streams: 4000, 2000, 1000, 500, 250, and 125.
•Group Two: The following rates may be recorded in any combination within all streams: 200,
100, 50, 40, 20, 10, 5 and 1.
Case
Description
Example of
Selection of a
sample rate from
Group One.
When the user activates any of the
other data streams, the sample rate
chosen must be the SAME.
Selection of 125 SPS for Data Stream 1.
This means that when Data Stream 2 is
activated the sample rate is fixed at 125 SPS
and there are no other sample rate choices
available.
Selection of a
sample rate from
Group Two.
When the user activates any of the
other data streams, ANY of the group
two sample rates can be chosen.
Selection of 40 SPS for Data Stream 1.
This means that when Data Stream 2 is
activated the choice is selection of any of
Group two sample rates (200, 100, 50, 40, 20,
10, 5, or 1).
NOTE: All channels of a datastream run at the same base sample rate.
Question: Can I format the USB disk on the PC for use in the SMx2recorder?
For optimal performance in a REF TEK SMx2recorder, USB disks should ALWAYS be
formatted BY THE RECORDER.

Rev 1.0 180-SMx2 Users Guide 11/29/2022
180-SMx2-UG
Reftek Systems Inc. 10
1.10 Warranty Statement
REF TEK instruments are warranted free from defects of manufacture for one year from
date of shipment.
For the full text covering the Product Limited Warranty, Warranty Remedies, How to
Obtain Warranty Service, Warranty Exclusions and Disclaimer, Limitation of Liability,
Official Language, Registration and any Product Extended Limited Warranty that may
apply, please see:
https://reftek.com/terms-conditions
Warranty/Non-Warranty Service
The customer must obtain a Return Material Authorization (RMA) number from REF TEK
before returning any equipment.
NOTE: Do not return any REF TEK supplied equipment without first
obtaining an RMA number.
The following policy is applicable for warranty/non-warranty equipment when a
problem is encountered.
Contact REF TEK, by a means that is listed below, to obtain an RMA number.
Tel: 902-444-0539
EMAIL: support@reftek.com
WWW: https://www.reftek.com/
To return equipment, follow these steps:
1. Supply the indicated information at time of contact.
a. Description of Problem
b. Type of Instrument
c. Model No.
d. Serial No.
2. Package the equipment safely, preferably using the original packing materials. Include the
RMA on the outside of the shipping container, a return address where the repaired
equipment can be shipped and a contact telephone number.
NOTE: It is advised to use a shipping company that can provide a tracking
number.
3. Ship the unit to the this address, freight prepaid:
Reftek Systems Inc.
75 MacDonald Avenue, Unit 1
Dartmouth, Nova Scotia
B3B1T8

Rev 1.0 180-SMx2 Users Guide 11/29/2022
180-SMx2-UG
Reftek Systems Inc. 11
2Getting Started with your SMx2DAS
This section provides information on the following topics:
•Connecting the internal battery.
•Controlling Unit Power
•Establishing minimal hardware connections for use.
•External cable list.
•Minimum hardware connection and power-up.
•A procedure to specify an abbreviated set of operating parameters, start and verify data
acquisition, and save collected data to a file.
These instructions do not provide you with the detailed comprehensive information you
need to prepare your recorder for field deployment and ‘real’ data collection. The
complete process to establish all hardware connections, select and implement
parameters, and perform data acquisition is only outlined in this section for rapid
familiarization.
2.1 Connecting the Internal Battery
When supplied, the SMx2is shipped with the internal battery disconnected for safety
reasons. To connect the internal battery and provide initial verification of a working
unit, do the following:
1. Disconnect all cables.
2. Remove the screws from each corner of the top of the unit.
3. Pull the cover straight up. This will disconnect the internal interface board from the rest of
the board stack.
4. Attach the battery leads, taking care to connect the red lead to the positive terminal and the
black lead to the negative terminal.
5. Carefully replace the top of the unit back onto the base, sliding it straight down making sure
the edge connector of the Interface board attached to the bottom of the unit is properly
inserted into its socket on the board stack inside the top.
6. If the unit does not automatically power up, remove the top, verify the battery connections
and again replace the top of the unit back onto the base until it powers up.
7. Replace the screws in the 4 corners of the top.
8. Hold the magnet above the REF TEK triangle on the label until the LCD indicates the unit is
shutting the unit down.

Rev 1.0 180-SMx2 Users Guide 11/29/2022
180-SMx2-UG
Reftek Systems Inc. 12
2.2 Controlling Unit Power
The SMx2has a magnetic switch which is used to wake up the unit and cause it to
perform a proper shutdown.
•To wake up the SMx2, wave the magnet across the REF TEK triangle.
•To properly shut down the unit (including flushing data in RAM to disk) hold the magnet
above the REF TEK triangle until the LCD screen indicates the unit is shutting down.
•To force power off, hold the magnet above the REF TEK triangle for approximately 8
seconds. This activates a hard shutdown.
2.3 Establishing Minimal Hardware Connections
These instructions cover the hardware and connections needed to perform the recorder
operations described in the rest of this section.
To operate the unit, you need the following hardware:
•An SMx2DAS.
•An external power supply; you can use a 12 volt car battery.
•An Ethernet connected PC or Wi-Fi enabled mobile device.
•One cable to connect the power supply to the recorder (if you are using an Auxiliary Power
Subsystem, you can use a REF TEK PT07A12-4S connector with a power cable).
•If using Ethernet, the Ethernet cable to the recorder.
Assuming you have obtained or made up all the required cables, proceed to make the
following hardware connections:
1. Secure the Ethernet cable from your PC to your recorder if using Ethernet.
2. Secure the PT06A12-4S connector on your external power cable to the POWER connector on
the recorder. Secure the other end of the power cable to your power supply so that
connector pins A or B are connected to power and pins C and D are the return lines
(ground).
2.4 Power up the SMx2DAS
Follow these steps to power up the DAS.
1. Turn on the supply to apply voltage to the SMx2Recorder.
2. Wave the magnet across the REF TEK triangle on the label.
3. Observe the LCD screen show current status.
4. Wait about 30 seconds until the ACQ icon turns green.
2.5 General GNSS Operations
The SMx2DAS can receive time from an external 184-GNSS receiver. To save power the
184-GNSS power can be duty cycled. When the 184-GNSS is powered on, the DAS waits
for time to become stable, and then phase locks its internal oscillator to the 184-GNSS
pulse-per-second signal. Any drift and offset that was introduced while the 184-GNSS

Rev 1.0 180-SMx2 Users Guide 11/29/2022
180-SMx2-UG
Reftek Systems Inc. 13
was off are corrected before the 184-GNSS is turned off again. The 184-GNSS can be
operated in three modes.
Mode
Description
Duty-cycle
Powers down the 184-GNSS and awakens the 184-GNSS and repeats the above phase locking
algorithm each hour at 40 minutes after the hour.
Continuous
Leaves the 184-GNSS powered on continuously.
Off
Powers down the 184-GNSS and does not turn the 184-GNSS power back on.
The SMx2DAS can also use a PTP Grandmaster or an NTP server through the internet instead of
the external 184-GNSS. These time sources are not as precise, but do not require a dedicated
184-GNSS for each DAS.
2.6 Ethernet for Configuration
As shipped from the factory, the recorder uses a link-local connection, which allows its
Ethernet cable to be plugged into any existing Ethernet network. The SMx2recorder will
default to a fixed link-local IP address of 169.254.109.109.
NOTE: Only one factory default recorder can be connected to a network
until the default IP address has been changed to a new, unique IP address.
From a computer on the same network as the recorder, open a web browser and
connect to the SMx2link-local IP address as follows: http://169.254.109.109. Check the
status of the DAS using the Status tab and sub-menus.
2.7 Using a Mobile Device for Configuration
The SMx2DAS includes an internal Wi-Fi hotspot that allows a mobile device to connect
directly to the Web UI for configuration.
1. On the mobile device, enable Wi-Fi from its system Wi-Fi settings.
2. Wave the magnet on the DAS to turn on the Wi-Fi hotspot.
3. On the mobile device, select the SMx2DAS you want to connect to. This may take a few
seconds for it to show up on the Wi-Fi list.
4. If a warning pops up indicating Internet connections are not possible, choose an option to
stay connected/continue. This is device/OS dependent.
5. On the mobile device, exit the Wi-Fi settings and open a web browser.
6. Enter the IP address of the DAS to display the configuration Web UI.
7. Check the status of the DAS using the Status tab and sub-menus.

Rev 1.0 180-SMx2 Users Guide 11/29/2022
180-SMx2-UG
Reftek Systems Inc. 14
2.8 Setting Passwords
Viewing the status of a unit does not require a password. However, other operations
require logging into the unit as either an administrator (admin) or a user. Control
functions only require user access. Changing parameters or changing passwords
requires admin access. The first time you browse to the Parameters or Control tabs, you
will be required to set a new admin password. You CANNOT use the word ‘password’.
Once you set the admin password, you will need to login as admin with the password
you just entered before performing other control or parameter operations. One of the
first things you should do is to also change the user password. The admin can change
either password from the Login tab.
CAUTION
Resetting the admin password back to factory default requires physical access
to the unit, a specific USB cable and a specific sequence of commands through
the developers console. Be sure you select an admin password that you will
remember..
2.9 Check the GNSS Status
Follow these steps to check the GNSS status.
1. Select the Status –Time Reference display to check the GNSS status.
2. Select the Control –Time Reference display to change the GNSS mode and source.
2.10 Example Configuration Steps
The SMx2DAS comes from the factory with a default datastream configuration. This is
the configuration that starts the first time the DAS is powered on. The default
configuration includes all available channels at 200 SPS. A quick check of the data can
be made by going to the Monitor tab in the Web UI.
2.11 Change the Configuration
Change the configuration to have 1 datastream with 1 channel at 100 SPS using the disk
as a destination for the data:
1. Select the Control –Datastream page in the Web UI.
2. Uncheck all channels except Channel 1.
3. Uncheck all destinations except ‘D’ for disk.
4. Select 100 in the Sample Rate box.
5. At the bottom of the screen, click Send.
6. Acquisition restarts immediately after sending the new datastream parameters. Acknowledge
the alert.
7. Go back to the Monitor tab to see that only 1 channel is active.
Table of contents
Other Reftek Measuring Instrument manuals