9
INSTALLATION OF OPTIONAL LIGHT KIT
Be sure all power to the fan is off before beginning to install the light kit by turning off circuit breaker or removing
fuse at fuse box. Turning power off at switch is not sufficient to prevent electrical shock.
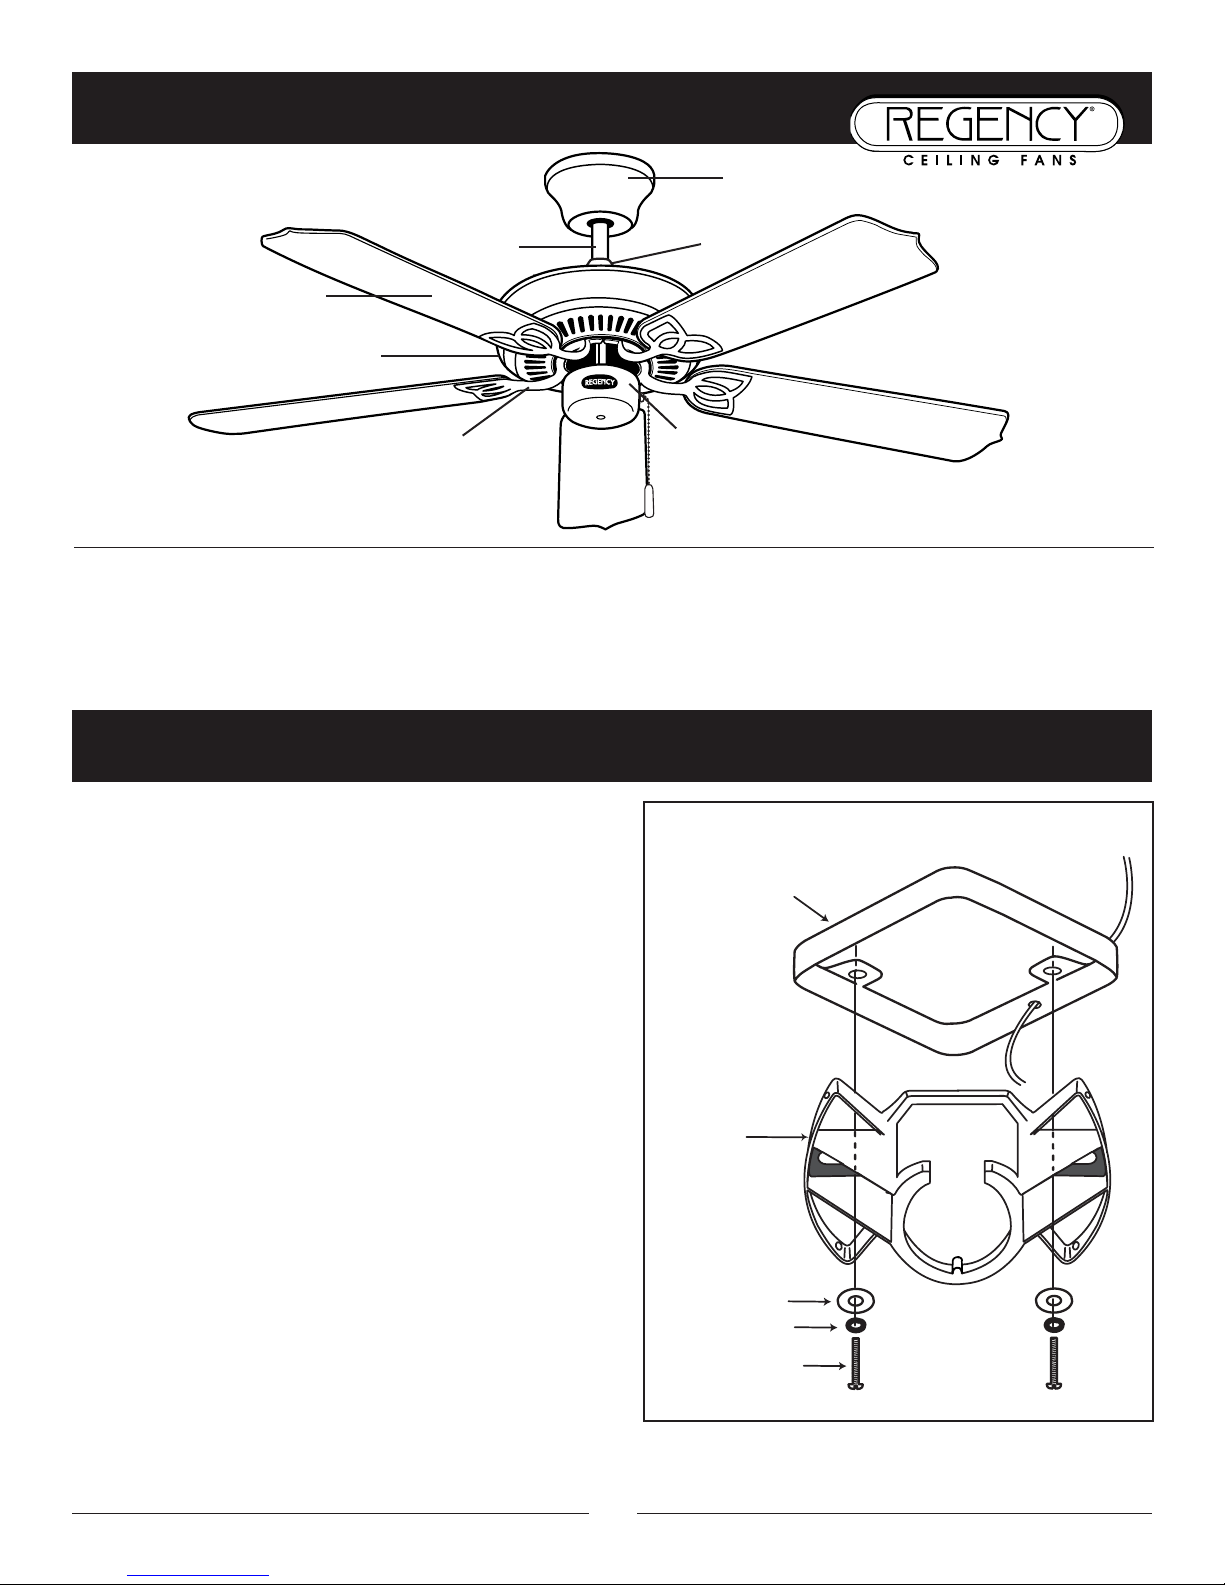
For Type A: Center Nipple Attachment (as shown in Fig. 13)
1. Remove the switch box housing cover from the motor assembly by unscrewing the three screws.
2. Remove the threaded plug from the center of this cover by pushing out. You may discard this plug or keep it for
future use.
3. Attach the cover to the fixture by feeding the kit wires (black and white) through the hole of the cover and
screw it onto the fixture threaded post. Thread the post washer and nut (provided with the light kit hardware bag)
onto the post until snug against the inside of the switch cover plate. Be sure it is tight enough to prevent the light
kit from vibrating loose.
4. Locate two single wires in switch housing. White and blue labeled “for light”
5. Connect them to the light kit wires
-White to white
-Blue to black
NOTE: If the wire connector from the fan switch box does not marry with the wire connector of the light kit,
cut off the connectors and join the wires with wire nuts.
6. Carefully push all wires back into switch housing of fan, then replace the cover with original screws.
7. Install 60 watt (max.) Bulb (not provided) and glass shades. Tighten fitter screws provided with the light kit.
Do not over tighten.
8. Restore the power and your light kit is ready for operation.
9. If light kit does not work, you need to lower either canopy or decorative housing on your ceiling fan to make sure
blue wire is connected to black household wire. Please refer to electrical connection section.
For Type B: Light kit center mounting cover attachment (as shown following Fig. 14) (light kit without center
mounting box)
1. Locate the two single wires in the switch box housing; white and blue labeled “for light”.
2. Make wire connections: white to white, blue to black.
NOTE: If the light kit wire from the fan switch box does not marry with the wire connector of the light kit, cut off the
connectors and join the wires with wire nuts.
3. Carefully push all wires into switch housing.
4. Install 60 watt (max.) Bulb (not provided) and glass shades.
Tighten shade fitter screws until it is against the glass. Do
not over tighten.
5. Restore power and your light kit is ready for operation.
6. If light kit does not work, lower the decorative housing/canopy
and check wiring connections. Ensure the blue wire is attached
to the black wire. (Remember turn off power at first.)
For Type C: Light fixture is already pre-installed onto the switch
housing (As shown in Figure 15)
1. Install a 60 watt (max.) Bulb (not provided) and glass shade.
Gently tighten the 3 thumb screws: do not over tighten.
2. Restore power and your light kit is ready for operation.
3. If the light kit does not work, turn off the electricity and lower
either the canopy or the decorative housing on your ceiling fan
to make sure the bulb wire is connected to the black
household wire.