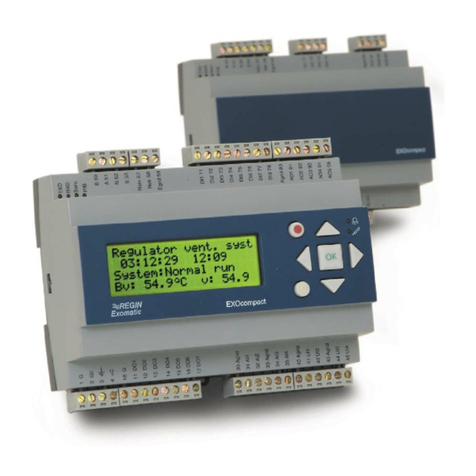
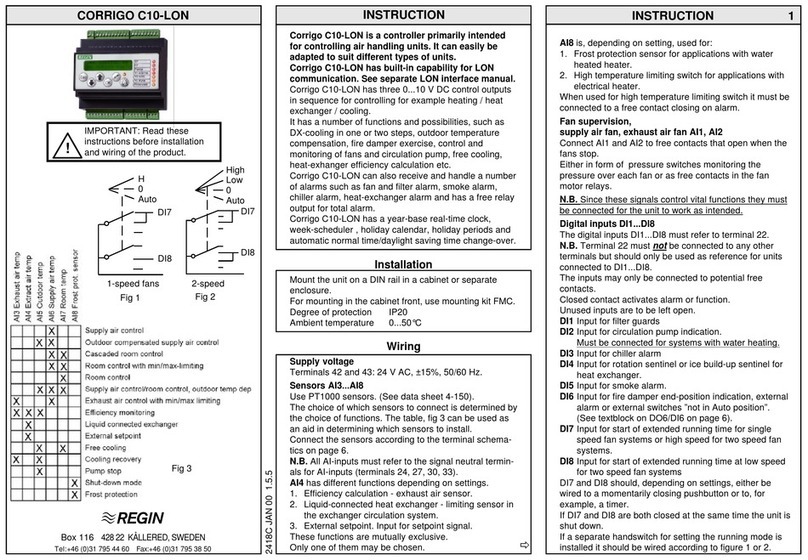
Regin EXOCLEVER EC-PU4-2 User manual

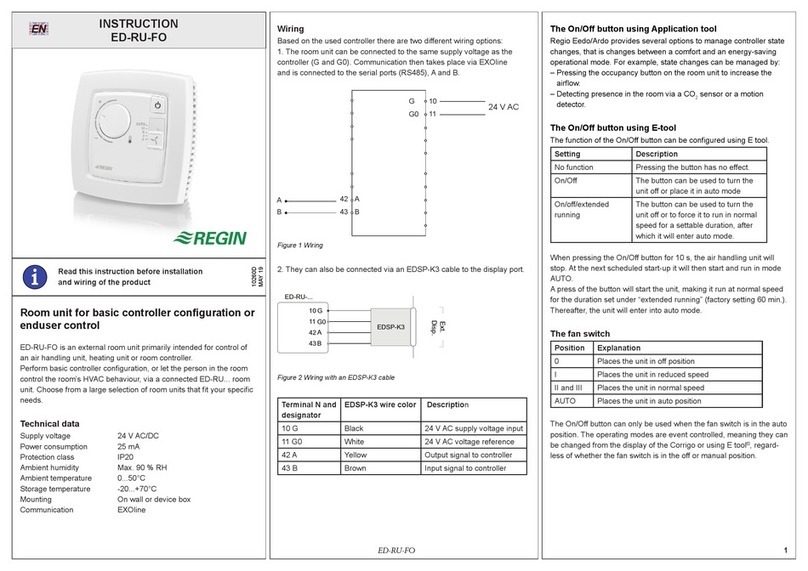
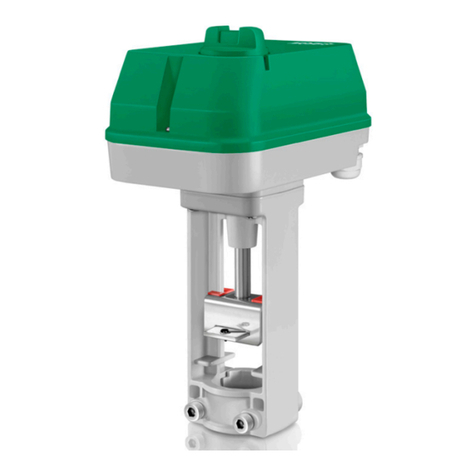
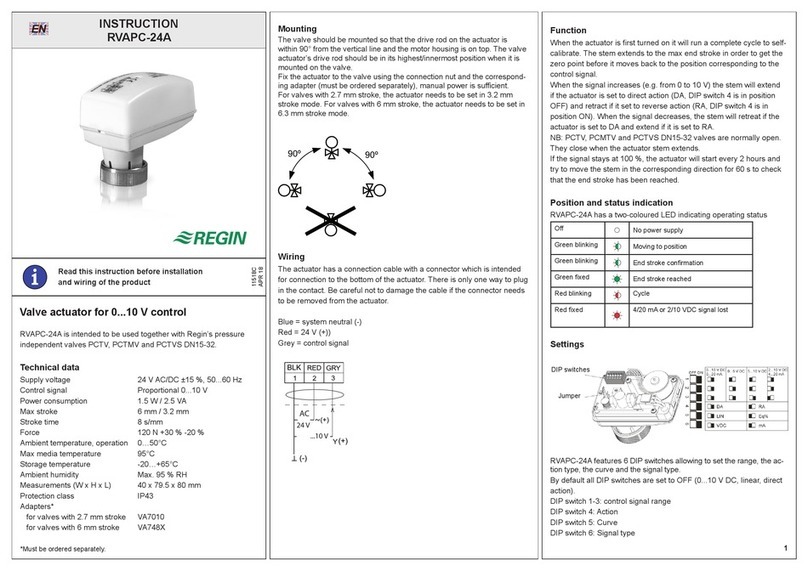
en
WE TAKE BUILDING
AUTOMATION PERSONALLY
MANUAL
EXOCLEVER EC-PU4-2

Rev. A, 2022-11-17
THANK YOU FOR CHOOSING REGIN!
Ever since Regin was established in 1947, we have developed and marketed prod cts and systems that create good
levels of indoor comfort. Today, we are an important player with one of the market's broadest ranges for b ilding
a tomation.
O r goal is to make real estates in the world more energy efficient. Regin is an international gro p and o r prod cts
sells in over 90 co ntries. Thanks to o r global presence with strong local representation, we are well aware of the
req irements of the market, as well as of how o r prod cts and systems f nction nder the most variable conditions.
Every year, Regin makes s bstantial investments in the development of o r systems and HVAC-prod cts.
DISCLAIMER
The information in this man al has been caref lly checked and is believed to be correct. Regin makes no warranties
abo t the contents of this man al and sers are req ested to report errors and discrepancies to Regin, so that
corrections may be made in f t re editions. The information in this doc ment is s bject to change witho t prior
notification.
Some prod ct names mentioned in this doc ment are sed for identification p rposes only and may be the registered
trademarks of their respective companies.
© AB Regin. All rights reserved.

Tab e of Contents
1 Introduction .................................................................................................................................5
1.1 Abo t this man al...............................................................................................................5
1.2 More information................................................................................................................5
2 Information for the end user ........................................................................................................6
2.1 Introd ction .......................................................................................................................6
2.2 General information............................................................................................................6
2.2.1 With AC s pply ....................................................................................................6
2.2.2 With DC s pply ....................................................................................................6
2.2.3 Using an isolated comm nication port .....................................................................6
2.2.4 Using the EFX port................................................................................................6
2.2.5 System set p example............................................................................................7
2.3 Stat s indicators..................................................................................................................7
2.3.1 System stat s.........................................................................................................7
2.3.2 Port stat s.............................................................................................................8
2.4 Maintenance and Service .....................................................................................................8
2.4.1 Changing the battery..............................................................................................8
2.4.2 Resetting the Application Memory ..........................................................................9
2.4.3 Updating the operating system ..............................................................................10
2.5 Using EC-PU4-2 with EXOflex..........................................................................................10
2.5.1 Setting the base address of the expansion ho sing ...................................................10
3 Information for the specia ist......................................................................................................12
3.1 Installation and wiring .......................................................................................................12
3.1.1 Installation ..........................................................................................................12
3.1.2 Wiring ................................................................................................................13
Appendix A Technica data..........................................................................................................14
A.1 EC-PU4-2 ........................................................................................................................14
A.1.1 General data........................................................................................................14
A.1.2 Operation ...........................................................................................................14
A.1.3 Storage ...............................................................................................................14
A.1.4 Battery................................................................................................................14
A.1.5 Comm nication port 1-3......................................................................................14
A.1.6 EFX port.............................................................................................................15
A.1.7 TCP/IP port ........................................................................................................15
Appendix B Mode overview .......................................................................................................16
Introduction
1 Introduction
1.1 About this manua
Special text formats sed in the man al:
NNoottee!! This box and symbo is used to show usefu tips and tricks.
CCaauuttiioonn!! This type of text and symbo is used to show cautions.
WWaarrnniinngg!! This type of text and symbo is used to show warnings.
This box is used to show formulas and mathematical calculations
This box is used to
represent the display
window on the
controller
1.2 More information
All the above doc ments are available for download from Regin’s website, www.regincontrols.com
EXOc ever EC-PU4-2 manua , Rev. A 5 (18)

Information for the end user
2 Information for the end user
2.1 Introduction
EXOclever is a range of freely programmable controllers for control, reg lation, s pervision and
comm nication in a tomation installations. They offer great possibilities when constr cting different types
of control and reg lation systems. EXOclever has a mod lar design that makes it easy to adapt the n mber
and type of inp ts and o tp ts req ired, as well as the type of comm nication needed by the individ al
client. EXOclever can be sed either as stand-alone nits or together with other EXO prod cts as part of a
larger a tomation system. In large a tomation systems, EXOclever is the basis, with EXOcompact and
EXOdos as good s pplements. Software applications s ch as EXOdesigner and EXOscada can be sed to
their f ll extent with EXOclever.
EC-PU4-2 s pports Modb s master 3.0 and Controller Web.
2.2 Genera information
2.2.1 With AC supp y
The 24 V AC s pply, typically a 230 V / 24 V transformer, is connected to contacts G0 (2), signal gro nd
and G (1), phase.
The EMI earth m st be connected to the earth rail or similar to protect against dist rbances.
NNoottee!! The cab e screen shou d be earthed at a iso ated ports but on y at one port if using uniso ated
ports (see section 2.2.5 System setup example).
2.2.2 With DC supp y
The 24 V DC s pply, typically a stabilized power s pply, is connected to contacts - (2) and + (1).
The EMI earth m st be connected to the earth rail or similar to protect against dist rbances.
NNoottee!! The cab e screen shou d be earthed at a iso ated ports but on y at one port for each power
source if using uniso ated ports (see section 2.2.5 System setup example).
2.2.3 Using an iso ated communication port
✓At longer distances (>30 m) or when experiencing comm nication problems, terminate b s with 100
Ω / 0.5 W in both ends.
✓Shielded cables are preferable, se twisted pair with min. 24 AWG cond ctor size.
✓Cable screen sho ld be connected to “N” terminal at all connected ports (isolated).
2.2.4 Using the EFX port
✓At longer distances (>10 m) or when experiencing comm nication problems, terminate b s 100 Ω /
0.5 W in both ends.
✓Shielded cables are preferable, se twisted pair with min. 24 AWG cond ctor size.
✓Cable screen sho ld be connected to “N” terminal at both ends (port isolated at PIFA end).
6 (18) EXOc ever EC-PU4-2 manua , Rev. A

Information for the end user
2.2.5 System setup examp e
Figure 2-1 System setup example
2.3 Status indicators
12
1 System status indicator
2 Port status indicators
2.3.1 System status
EXOclever EC-PU4-2 has a system stat s indicator (1) which can be inspected both when it is mo nted on
the backside or on its side. The indicator changes colo r depending on system stat s.
EXOc ever EC-PU4-2 manua , Rev. A 7 (18)

Information for the end user
Colour Description
Green Powered and all IO-units online.
Yellow (Blink 2.5 Hz) Controller identification.
Red Replace battery.
Orange (blink 1 Hz) IO-unit connection problem.
2.3.2 Port status
On the label side of the EC-PU4-2 there are seven port stat s indicators (2).
Indicator Description
TCP/IP Link Lit when link is ok, flashing during communication.
P1 Tx Lit when port P1 is transmitting data, intensity depends on data & communication speed.
P1 Rx Lit when port P1 is receiving data, intensity depends on data & communication speed.
P2 Tx Lit when port P2 is transmitting data, intensity depends on data & communication speed.
P2 Rx Lit when port P2 is receiving data, intensity depends on data & communication speed.
P3 Tx Lit when port P3 is transmitting data, intensity depends on data & communication speed.
P3 Rx Lit when port P3 is receiving data, intensity depends on data & communication speed.
2.4 Maintenance and Service
2.4.1 Changing the battery
When the system stat s indicator is red, the battery for back p of program memory and the real-time clock
has become too weak. The battery is replaced as described below. A back p capacitor saves the memory and
keeps the clock r nning for at least 10 min tes after the battery has been removed. Th s, if battery
replacement takes less than 10 min tes, there will be no need to reload the program and the clock will
contin e to r n normally.
The replacement battery m st be according to the specification in the Appendix A Technical data chapter.
CCaauuttiioonn!! Fo ow proper ESD precautions when changing the battery; i.e. an earthed wristband or
simi ar protection must be used!
To change the battery:
1. Remove the DIN lock.
8 (18) EXOc ever EC-PU4-2 manua , Rev. A

Information for the end user
2. Gently bend the corners of the lid o twards.
3. Remove the lid.
4. Remove the battery by p lling it straight p from the holder. Note the polarity and p sh the new
battery firmly in place.
5. Mo nt the lid by aligning the notches into the holes in the lid and snap it on the opposite side.
6. Mo nt the DIN lock.
NNoottee!! If the battery is p aced the “wrong way round”, the system status indicator wi change to red to
indicate a battery error when the contro er is connected to the power supp y.
Note that the system status indicator wi not indicate a battery error if a battery is not mounted.
2.4.2 Resetting the App ication Memory
CCaauuttiioonn!! This procedure shou d on y be carried out by qua ified system integrators since the current
app ication wi stop running and the contro er wi return to its factory app ication.
To reset the processor’s program memory (application programs) the controller has to be connected to the
power s pply. Use the reset b tton accessed thro gh the small opening located to the right of the PORT 3
connector. Preferably se a non-metallic object when pressing the reset b tton since a metallic object co ld
potentially short/damage the electronics next to the b tton if it slips of the b tton.
A recommendation is to se a wooden toothpick to access the reset b tton.
If the controller is not possible to reset in this way for some reason it sho ld be powered down. Then keep
the reset b tton pressed in while reconnecting the power.
3
3 Reset button
EXOc ever EC-PU4-2 manua , Rev. A 9 (18)

Information for the end user
2.4.3 Updating the operating system
The EXOreal operating system can be pdated from EXOdesigner sing any of the RS485 EXOline Slave
ports or the TCP/IP port.
2.5 Using EC-PU4-2 with EXOf ex
EC-PU4-2 can be sed together with an EXOflex expansion ho sing (EH(X)0-S) that has a Power PIFA for
Extender (EP1004) and any n mber of additional PIFA nits.
An EXOflex processor ho sing (EH(X)1-S) can be converted to an expansion ho sing by removing the
processor card and changing the Power PIFA (EP1011) to a Power PIFA for Extender (EP1004).
Note that yo cannot se any comm nication PIFA:s, s ch as LON PIFA (EP8210), Basic Serial PIFA
(EP8101), D al Serial PIFA (EP8102) or TCP/IP PIFA (EP8282) together with EC-PU4-2. The
comm nication port in EP7408 cannot be sed together with EC-PU4-2 either.
2.5.1 Setting the base address of the expansion housing
The base address of the EXOflex ho sing sho ld be set to 0.
In the ho sing, the base address is set sing a gro p of j mper switches on the power PIFA. The base
addresses are selected as follows:
Base address Jumpers
321
28
24
20
16
12
8
4
0(use this setting)
3, 2 and 1 in the table refers to the j mpers for setting the base address in the below fig re:
10 (18) EXOc ever EC-PU4-2 manua , Rev. A

Information for the specia ist
3 Information for the specia ist
3.1 Insta ation and wiring
3.1.1 Insta ation
EXOclever EC-PU4-2 is intended to be mo nted on DIN-rail. It can be mo nted on its backside, and it can
also be mo nted on the short side to save space.
EXOclever ses p sh-in connectors for easy cable installation. The p sh-in connectors have integrated test
holes in each terminal for easy test meas rements.
4
5
4 Test holes
5Cable releaser
12 (18) EXOc ever EC-PU4-2 manua , Rev. A

Information for the specia ist
3.1.2 Wiring
Table 3-1 Pinout P1-P3 ports
Pin Signal Signal description
50/60/70 B Non-inverted (+) data signal line
51/61/71 A Inverted (-) data signal line
53/63/73 E Control signal, RS485
Table 3-2 Pinout POWER port
Pin Signal Signal description
1 G/+ Power input, 24 V AC or 24 V DC (+) at power supply
2 G0/- System ground, 0 V connection (-) at power supply
3EMI earth, connect to earth rail
Table 3-3 Pinout EF port
Pin Signal Signal description
10 N Cable screen earth
11 A Inverted (-) data signal line
12 B Non-inverted (+) data signal line
EXOc ever EC-PU4-2 manua , Rev. A 13 (18)

Technica data
Appendix A Technica data
A.1 EC-PU4-2
A.1.1 Genera data
Supply voltage 24 V AC 50…60 Hz or 24 V DC
Tolerance 18…26 V AC / 22…30 V DC
Power consumption 10 VA / 5 W
Dimensions (WxHxD incl.
terminals)
140 x 136 x 40mm
Mounting DIN-rail
Protection class IP20
Real-Time clock (RTC) max ±20 sec./month
Operating system EXOrealC
Application SRAM memory 768 kB available for user applications
Application flash memory (TCP/
IP)
~7 MB available for user applications
A.1.2 Operation
Ambient temperature 0…55°C
Ambient humidity Max. 95 % RH
A.1.3 Storage
Storage temperature -20…+70°C
Storage humidity Max. 95% RH
A.1.4 Battery
Battery type Replacable Lithium cell, CR2032
Battery backup of RAM, RTC 5 Years
Battery monitoring System status LED + Software accessible
A.1.5 Communication port 1-3
Type RS485
Built-in protocol EXOline
Other protocols
Control signal, RS485 E
Speed Configurable, max 76800 bps
Standard speed 9600 bps
Galvanic isolation, common
mode voltages
max. 150V
Max communication distance 1200 m (depending on communication speed
14 (18) EXOc ever EC-PU4-2 manua , Rev. A

Technica data
A.1.6 EFX port
Type RS485
Communication speed 115200 bps
Galvanic isolation, common
mode voltages
No
Max communication distance 300 m
A.1.7 TCP/IP port
Type 10Base-T/100Base-TX auto-negotiation built-in protocol
EXOreal 3.4 or later EXOlineTCP Slave, EXOlineTCP Master
Modbus TCP Slave, BACnet/IP, HTTP, SMTP
Auto MDIX Yes
Fast connector shielded RJ45
Supported standards IEEE 802.3u and IEEE 802.3x full-duplex flow control
Cable length (max) 100 m (min CAT 5e)
EXOc ever EC-PU4-2 manua , Rev. A 15 (18)

EXOc ever EC-PU4-2 manua , Rev. A 17 (18)

MA30021 Rev. A, 2022-11-17. © AB Regin. A rights reserved.
HEAD OFFICE AB Regin, Box 116, SE-428 22 Kå ered • Visiting address: Bangårdsvägen 35, SE-428 36 Kå ered
Phone: +46 (0)31 720 02 00 • Fax: +46 (0)31 720 02 50 • info@regincontro s.com • www.regincontro s.com
last page
Table of contents
Other Regin Controllers manuals

Regin
Regin Corrigo U10 Series User manual

Regin
Regin OPTIGO OP10 User manual

Regin
Regin RVAPC-230 User manual

Regin
Regin Exigo User manual

Regin
Regin ED-RU-FO User manual

Regin
Regin CORRIGO L10 User manual

Regin
Regin TTC25X User manual

Regin
Regin Optigo OP5U User manual

Regin
Regin RDAS20-24C User manual

Regin
Regin Regio Eddo User manual

Regin
Regin RVAN10-230 User manual

Regin
Regin AQUA230T User manual

Regin
Regin TTC80F User manual

Regin
Regin SPINN/D User manual

Regin
Regin REGIO RC-DTO User manual

Regin
Regin RVAZ4-24 User manual

Regin
Regin RVA25-24A User manual

Regin
Regin Corrigo C Series User manual

Regin
Regin RVAZ4-24 User manual

Regin
Regin TTC80F User manual