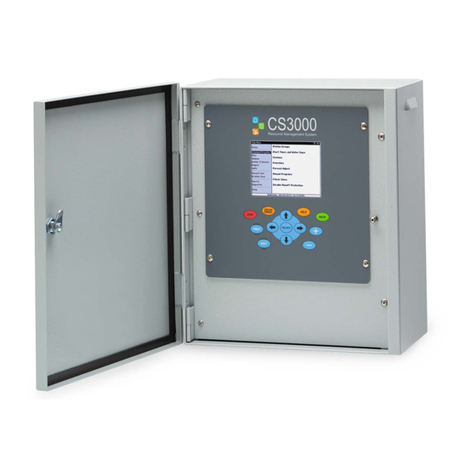
Calsense CS3000 User manual

C A L I F O R N I A S E N S O R C O R P O R A T I O N
2075 Corte del Nogal, Suite P, Carlsbad, CA 92011 ph (760) 438-0525 fax (760) 438-2619 www.calsense.com
CS3000 Quick Start Guide
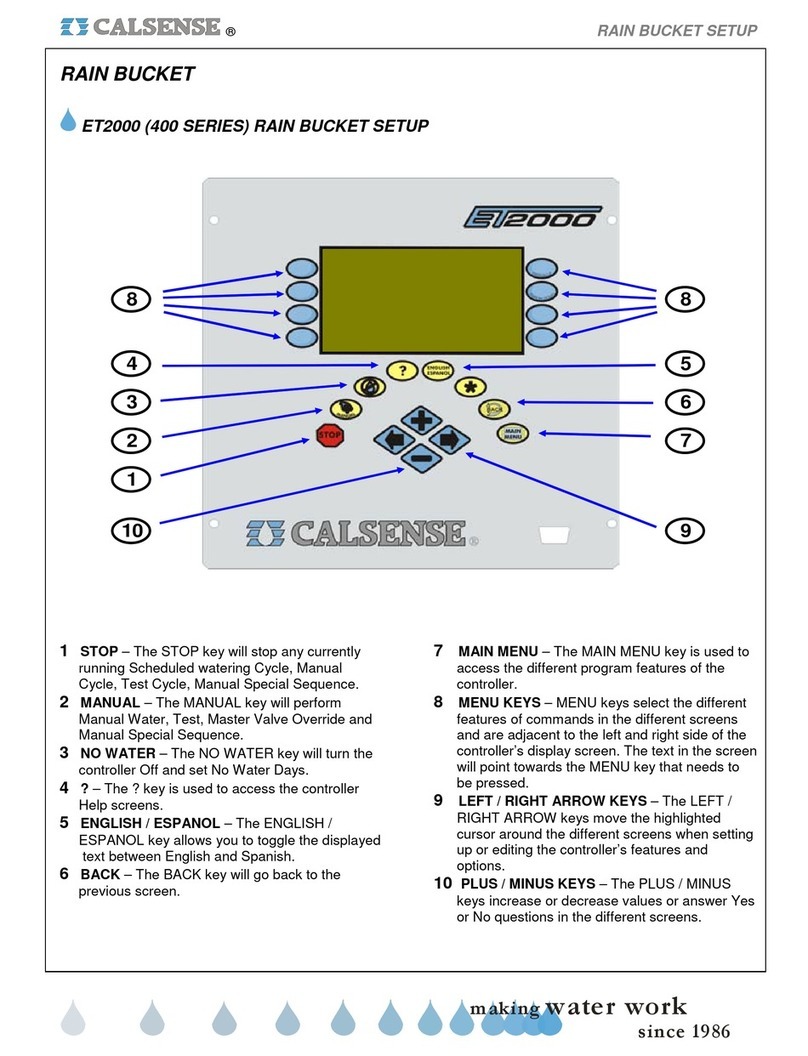
Key Map
1. ENGLISH/ESPANOL –Change screen text from English to Spanish and vice versa
2. STOP –Stop any currently running irrigation
3. PREV/NEXT –Selects the Previous or Next menu item
4. ←↑→↓/SELECT –Move the cursor position around in the different programming and reports
screens and selects a main menu field or a particular programming field. SELECT also provides
dropdown menus for certain fields or numeric keypad for others.
5. +/––Increase or decrease values on programming screens
6. BACK –Returns to the previous screen
7. HELP –Display different help based upon the status or menu screens and highlighted cursor
position on programming screens
1
7
6
5
2
3
4

Calsense
2 CS3000 Quick Start Guide
Setting Date and Time
The controller defaults to the Pacific Standard time zone. Based on your location, you may need to
adjust the time zone and set the clock accordingly. To set the date and time:
1. From the Main Menu, use ↓to navigate to Setup and press SELECT. The Setup menu displays.
2. Use ↓to navigate to Date & Time and press SELECT. The Date & Time screen displays
(Figure 1).
Figure 1 - Date & Time screen
3. Use +/–to adjust the time zone if necessary. Based on your time zone, the controller
automatically determines whether it observes daylight saving time or not.
4. Use ←↑→↓ to navigate to the date and time and use +/–to change values to set the current
date and time.
5. Once the time is correct, navigate to and select Set Date & Time to save the change.
6. Once done, press BACK to return to the Main Menu.
Discovering 2-Wire Decoders
If this controller has the 2-Wire option and uses 2-Wire decoders to operate POCs or stations, perform
the following steps to discover the decoders and assign stations to each decoder. If you don’t have a 2-
Wire option, skip to Using Station Groups.
Note: Prior to performing these steps, verify that the 2-Wire decoders are properly wired to the 2-Wire
cable per the 2-Wire decoder installation diagram included with each decoder.
1. From the Main Menu, use ↓to navigate to Setup and press SELECT. The Setup menu displays.
2. Navigate to 2-Wire and press SELECT. The 2-Wire dialog displays (Figure 2).

Calsense
3 CS3000 Quick Start Guide
Figure 2 - 2-Wire dialog
3. Select Discover Decoders Connected to this Box and press SELECT. The controller scans the 2-
Wire cable, discovering all decoders attached to this controller.
Assigning Stations Numbers to 2-Wire 2-Station and Moisture Sensor Decoders
1. From the 2-Wire dialog, navigate to and select Assign Stations to Discovered Decoder if it
doesn’t automatically appear. The Station Assignment screen displays (Figure 3). The pane on
the left displays the 2-Station and Moisture Sensor decoders discovered while the right shows
each’s station assignments.
Figure 3 - Station Assignment screen
2. Using ↑↓ to highlight a decoder to edit and press SELECT. The cursor moves to the Station field
on the right.
3. Use ←↑→↓ to navigate through the screen and the +/–to assign the appropriate station
number to each of the decoder outputs. If no station is attached to an output, leave it as ---.
4. Press BACK to save the changes.
5. Repeat steps 2-4 for each decoder attached to the controller.

Calsense
4 CS3000 Quick Start Guide
6. When done, press BACK to return to the Main Menu.
Assigning POCs to 2-Wire POCs Decoders
1. From the 2-Wire dialog, navigate to and select Assign POCs to Discovered Decoder if it doesn’t
automatically appear. The Station Assignment screen displays (Figure 4). The pane on the left
displays the 2-Station and Moisture Sensor decoders discovered while the right shows each’s
station assignments.
Figure 4 –POC Assignment screen
2. Using ↑↓ to highlight a decoder to edit and press SELECT. The cursor moves to the “Is this POC
Decoder In Use” field on the right.
3. Use ←↑→↓ to navigate through the screen and the +/–to select whether the decoder is in
use and whether it’s part of a 2- or 3-stage bypass manifold.
4. Press BACK to save the changes.
5. Repeat steps 2-4 for each decoder attached to the controller.
6. When done, press BACK to return to the Main Menu.
Using Station Groups
Stations that share the same irrigation and/or landscape characteristics are grouped together using
Station Groups. To add and edit Station Groups:
1. From the Main Menu, navigate to Scheduled Irrigation and press SELECT. The Scheduled
Irrigation menu displays.

Calsense
5 CS3000 Quick Start Guide
2. Navigate to and select Station Groups. The Station Groups screen displays (Figure 5). The panel
of the left shows the list of Station Groups and includes the ability to add new groups.
Figure 5 - Station Groups screen
3. Using ←↑→↓ to highlight the Station Group to edit and press SELECT. The cursor moves to
the Group Name field on the right.
4. Use ←↑→↓ to navigate through the screen and the +/–to change values. The various settings
on this screen include:
Group Name –A name which describes the stations assigned to that group. By default,
the name will automatically take on the plant type, head type, and exposure.
Mainline –The mainline the stations in this group are physically connected to
Plant type –The type of plant material, such as Warm Season Turf
Exposure –The amount of sun exposure, such as Full Sun
Head Type –The type of sprinkler head or drip emitter, such as Spray, High Efficiency
Precip Rate –The precipitation rate associated with the head type
Soil Type –The type of soil such as Loam
Slope –The slope percentage
Soil storage capacity –The root zone working water storage associated with the plant
material and soil type
Crop coefficients –The monthly crop or landscape coefficient associated with the plant
material

Calsense
6 CS3000 Quick Start Guide
5. To add the stations that share these characteristics to the Station Group, navigate to and select
Add Stations. The Add Stations screen displays (Figure 6).
Figure 6 - Add Stations screen
6. Use SELECT or +/–to add or remove stations from the Station Group.
7. When you’re done, press BACK to save the changes.
8. If additional groups are required, press BACK and navigate to and select <Add New Group> to
create additional groups and repeat steps 3-7 to define the characteristics and add stations.
9. When done, press BACK to return to the Main Menu.
Setting a Schedule
1. From the Main Menu, navigate to Scheduled Irrigation and press SELECT.
2. Navigate to and select Start Times and Water Days. The Start Times and Water Days screen
displays (Figure 7). The pane on the left displays the Station Groups on this controller while the
right shows the settings for each.
Figure 7 - Start Times and Water Days screen

Calsense
7 CS3000 Quick Start Guide
3. In be pane on the left, select the Station Group to set a schedule for and press SELECT.
4. Use ←↑→ to navigate through the screen and +/–to change values. The various settings are as
follows:
Start time –The time when the irrigation starts
Mow day –A day when irrigation is skipped to allow for maintenance
Stop time –The time when irrigation will stop, even if there is time remaining
Days to water –The days irrigation will run
5. Press NEXT to move to the next schedule and repeat step 4 to set the schedule.
6. When done, press BACK to return to the Main Menu.
Adjusting Individual Stations
1. From the Main Menu, navigate to Scheduled Irrigation and press SELECT. The Scheduled
Irrigation menu displays.
2. Navigate to and select Stations. The Stations screen displays (Figure 8). The pane on the left
displays the stations attached to this controller while the right shows the settings for each.
Figure 8 - Stations screen
1. Press SELECT to enter the right side to adjust the schedule.
2. Use ←↑→↓ to navigate through the screen and +/–to change values, setting the following
values:
Expected flow rate –The expected rate at which this station flows
Square footage –The square footage, used for budgetary purposes
Distrib. uniformity –The distribution uniformity or application efficiency of the zone
3. Press NEXT to move to the next station and repeat step 2 to set the individual station’s settings.
4. Once done, press BACK to return to the Main Menu.

Calsense
8 CS3000 Quick Start Guide
Measuring Flow
1. From the Main Menu, use ↓to navigate to POCs and press SELECT. The POCs menu displays.
2. Navigate to Flow Meters & Master Valves and press SELECT. The Flow Meter & Master Valves
screen displays (Figure 9). The pane on the left displays the POCs attached to this controller
while the right shows the settings for each.
Figure 9 - Flow Meters & Master Valves screen
3. Press SELECT to enter the right side to adjust the schedule.
4. Use ←↑→↓ to navigate through the screen and +/–to change values, setting the following
values:
POC used for –Either Irrigation, Non-Irrigation, or Not Used. If there is no flow meter or
master valve connected to this POC, select Not Used.
Flow Meter –The flow meter type. This can be either a Calsense FM series flow meter,
such as an FM-1.5B, an insertion-style flow meter (model FMBX), or a hydrometer.
Master Valve –The master valve type, either Normally Open or Normally Closed.
5. Press NEXT to move to the next POC and repeat step 4 to set each POC’s settings.
6. Once done, press BACK to return to the Main Menu.
Manually Watering a Station
1. From the Main Menu, use ↓to navigate to Manual & Test and press SELECT. The Manual &
Test menu displays.

Calsense
9 CS3000 Quick Start Guide
2. Navigate to Manual Watering and press SELECT. The Manual Watering screen displays
(Figure 10).
Figure 10 - Manual Watering screen
3. Use ←↑→↓ to navigate through the screen and +/–to select the station to manually irrigate.
4. Navigate to Run station for and use +/–to set how long to run the station for.
5. Navigate to and select Run Station to activate the selected station. The valve turns on and the
Irrigation Details screen displays to show the progress.
Sharing Real-Time Weather
If the controller does not have an ET Gage and Rain Bucket connected to it, you can share real-time
weather to the controller using the Command Center Online web application. If you don’t have an
account yet, contact Calsense Product Support at (800) 572-8608 to create one. Once an account is
created:
1. From the Main Menu of the controller, use ↓to navigate to Setup and press SELECT. The Setup
menu displays.

Calsense
10 CS3000 Quick Start Guide
2. Navigate to About and press SELECT. The About screen displays (Figure 11).
Figure 11 - About screen
3. Make note of the Site ID and Serial Number displayed on the screen.
4. Using a computer, log in to Command Center Online at www.calsense.net.
5. If the CS3000 already exists, skip to Step 7. Otherwise, tap or click Settings > Site Controllers.
The Site/Controllers list displays.
6. On the CS3000 Sites heading, tap or click [Add CS3000].
7. Type the Site ID and Serial Number noted in Step 3 and tap or click Add Site. The controller is
added.
8. Tap or click Settings > Weather Sharing. The Weather Sharing list displays.
9. Locate the new site in the list and tap or click Edit. The Site Settings page displays.
10. Under Sharing Settings, select your ET and Rain source. If you don’t have an on-site ET Gage
and/or Rain Bucket, select WeatherSense to receive data generated by Calsense.
11. Click Save to save the changes. Weather Sharing will automatically occur each night shortly after
8:00 PM local time.
Other manuals for CS3000
1
Table of contents
Other Calsense Controllers manuals

Calsense
Calsense ET1 User manual

Calsense
Calsense ET2000e User manual

Calsense
Calsense CS3000 User manual

Calsense
Calsense 500 Series User manual

Calsense
Calsense 500 Series Operating instructions

Calsense
Calsense ET2000 400 Series User manual

Calsense
Calsense ET2000 500 Series User manual

Calsense
Calsense ET2000e User manual

Calsense
Calsense ET2000e Operating instructions

Calsense
Calsense ET1 User manual