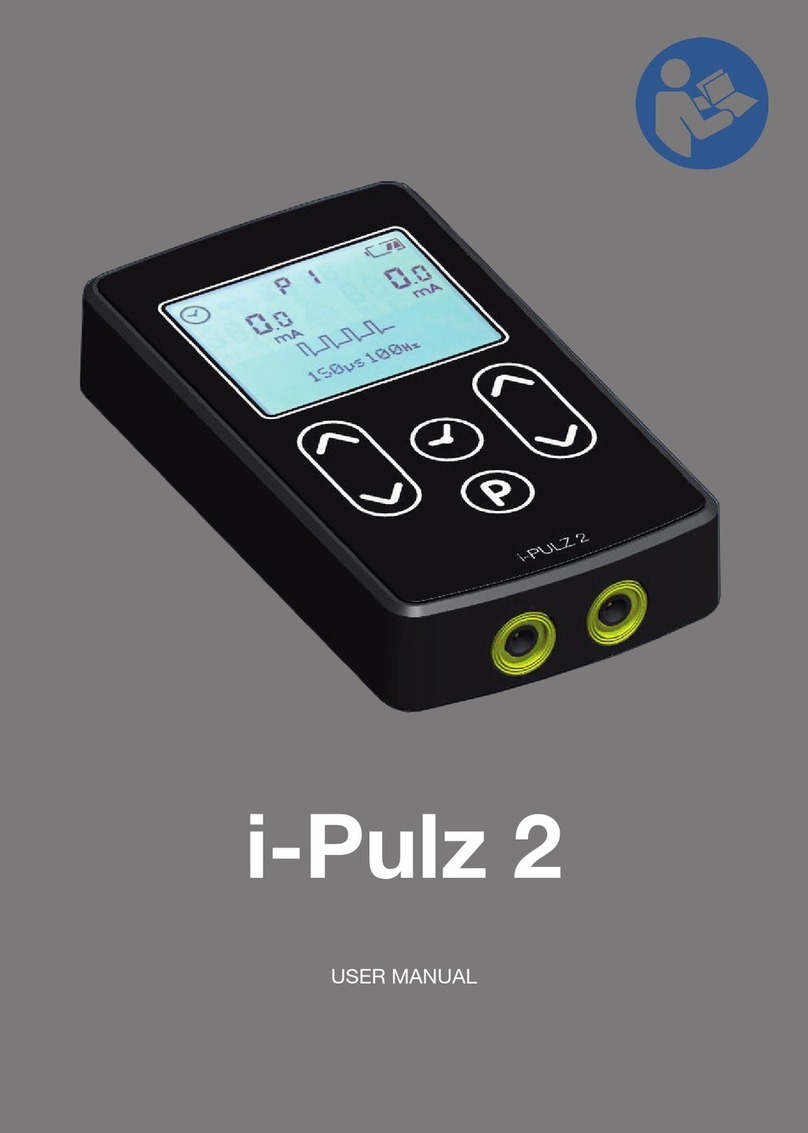
Rehan Electronics i-Pulz User manual

i-Pulz
User Manual
i-Pulz
User Manual


3
USER MANUAL
Read this manual carefully before using the i-Pulz TENS
device and keep to the instructions of your doctor or
specialist.
Table of contents
1 Safety information, maintenance and defects............................... 5
1.1 Use of the device.................................................................. 5
1.2 Precautions........................................................................... 5
1.3 Indications ............................................................................ 6
1.4 Contra-indications................................................................ 6
1.5 IP Rating............................................................................... 6
1.6 Warnings............................................................................... 6
1.7 Maintenance......................................................................... 7
1.8 Maintenance of the batteries................................................ 8
1.9 Battery charger..................................................................... 8
1.10 What to do in case of a defect ............................................. 9
2. The i-Pulz nerve stimulator........................................................... 9
2.1 General ................................................................................... 9
2.2 Controls .................................................................................. 9
2.3 Buttons ................................................................................. 10
2.3.1 On/off............................................................................ 10
2.3.2 Mode ............................................................................ 10
2.3.3 Timer............................................................................. 10
2.3.4 Up / down..................................................................... 11
2.4 The display ........................................................................... 11
2.5 Clip ....................................................................................... 12
2.6 Battery compartment ........................................................... 13
3. Starting the treatment ................................................................ 13
3.1 Cleansing of the skin ............................................................ 13
3.2 Placing of the electrodes...................................................... 14
3.3 Setting up the stimulator ...................................................... 14
3.4 Treatment period .................................................................. 15
3.5 Stopping your daily treatment.............................................. 15
3.6 Removing the electrodes...................................................... 16
3.7 Taking care of your skin........................................................ 16
V1.51

4
3.7.1 Irritation of the skin....................................................... 16
4. Advanced options and setup possibilities.................................. 17
4.1 General ................................................................................. 17
4.2 Menu Options....................................................................... 18
4.2.1 Device information........................................................ 18
4.2.2 Cable tester .................................................................. 18
4.2.3 Buzzer........................................................................... 18
4.2.4 Default timer ................................................................. 18
4.2.5 Program presets ........................................................... 18
4.3 User Programs ..................................................................... 19
4.4 Mask presets........................................................................ 23
5. Accessories ................................................................................ 23
5.1 Cables .................................................................................. 23
5.2 Batteries and charger. .......................................................... 23
5.3 Removing adhesive residues................................................ 23
5.4 Treating the irritated skin ...................................................... 24
5.5 Disposable electrodes.......................................................... 24
5.6 Reusable electrodes............................................................. 24
6. Contents of package.................................................................. 24
7. Technical information ................................................................. 25
8. Program overview ...................................................................... 26
9. Important information regarding EMC........................................ 27
9.1 General ................................................................................. 27
9.2 Emissions Guidance for Users ............................................ 28
9.3 Immunity Guidance for Users ............................................. 29
9.4 Conducted and Radiated Immunity Guidance .................... 30
9.5 Recommended separation distance .................................... 31

5
1 Safety information, maintenance and defects
1.1 Use of the device
The i-Pulz is an external stimulator used for pain treatment among
people suffering from chronic and acute pain. Do not use the nerve
stimulator for other purposes. Use it only with permission from a medical
specialist.
1.2 Precautions
• Make sure the nerve stimulator does not get hit, falls or is used
inappropriately to avoid it getting damaged.
• Check the nerve stimulator and cables for any inconsistencies
before using it. Do not use if damaged or degraded in any way.
Replace immediately.
• Do not use the nerve stimulator when driving or controlling heavy
machinery.
• Always check if the nerve stimulator is switched off before
removing or placing electrodes.
• While it is not necessary to store the nerve stimulator in its carry
case when not being used or when being transported, it is ad-
visable to do so for safety and added protection from dust, pet
hairs, pests or insects.
• Remove the device from its carry case when intending to use it.
• Avoid the use of accessories, detachable parts and materials not
described in this manual as these may make the device
• unsafe for use or compromise the selected therapy.
• Avoid connecting the device to other equipment not described
in this manual as this may make the device unsafe for use or
compromise the selected therapy.
• Do not wrap electrode cables around the neck as this could lead
to serious injury or strangulation.
• The application of electrodes near the thorax may increase the
risk of cardiac brillation. If in doubt, consult with a specialist.

6
1.3 Indications
TENS can be used for many purposes. Both acute and chronic pains
can be treated with TENS. In general, TENS can be used with:
• Neurological pain, like neuralgia, blunt pain and phantom pain
• Muscle- and joint pain, like rheumatic, lower-back pain, neck-
and shoulder pain, etc.
• Postsurgeon and posttraumatic pain
• Angina Pectoris
• Facial pain
• Circulationdisorders
• Delivery pain
• Complex Regional Pain Syndrome, CRPS type I and II
• Scar tissue pain
• Certain bone fractures
1.4 Contra-indications
At this moment there are no contra-indications, either short term, or long
term. Caution: Electrodes, gel or patches can cause an allergic reaction.
1.5 IP Rating
The i-Pulz is classied with an ingress protection rating IP21. This
means that the device is protected from touch by ngers or similar ob-
jects greater than 12.5mm and is effective against condensation.
1.6 Warnings
• Patients with a pacemaker: the nerve stimulator can inuence
the workings of the pacemaker.
• Never stimulate the nerves of the jugular vein (the area of the
sinus caroticus), on the eyes or in the mouth.
• Simultaneous use of the nerve stimulator and surgical devices
operating on a high frequency can cause burns where the elec-
trodes are placed on the skin.
• Use of the nerve stimulator in the range of shortwave or
microwave equipment (cellular phone or microwave) can cause
uctuations in the output of the nerve stimulator.
• The functioning of electronic monitors, like ECG equipment, can
be disrupted when the nerve stimulator is activated.
• Never use the nerve stimulator for purposes not described in this
manual.
• Keep the nerve stimulator out of reach from children.

7
• Only use the nerve stimulator on account of a medical prescrip-
tion; never lend out your TENS device.
• Do not place electrodes on damaged or irritated skin.
• Do not use electrodes with a surface area smaller than 5 cm²,
as there will be a risk of suffering a burn injury. All electrodes
supplied by Van Lent Systemss fulll this requirement. Caution
should always be exercised with current densities greater than
2 mA/cm².
• Irritation of the skin can be caused by “lengthy” use of small
electrodes and/or an electric current that is too high.
• Do not use on the skull area.
1.7 Maintenance
The i-Pulz stimulator requires little to no maintenance.
• If needed, clean the device with a damp cloth. Never use aggressive
detergents like ether, alcohol or abrasives.
• Never submerge the device in water or in any other liquid. In case it
does get submerged, get the device checked by the manufacturer
or distributor before you use the i-Pulz again.
• The manufacturer advises a technical check up of the device every
5 years.
• You can clean the cables with a damp cloth. The use of aggressive
detergents is not advised, because the cables can get damaged or
rigid, which increases the likelihood of the cables breaking.
• Store the nerve stimulator and its accessories in the original casing.
• If the i-Pulz is to be used on multiple patients then it is necessary to
use new cables and pads each time. Professional hygienic mainte-
nance prior to re-use is not required for the i-Pulz device.

8
1.8 Maintenance of the batteries
Remove the batteries from the device if you do not intend to use it for an
extended period of time. This will improve the longevity of the batteries.
1.9 Battery charger
The supplied charger can charge rechargeable AA batteries and rechar-
geable AAA batteries. Place 2 or 4 batteries in the charger and plug it
into the wall socket. The lights on the charger will illuminate as follows:
LED Description
Light burns red Batteries are being charged
Light blinks red Batteries are defect or not placed in
charger correctly
Light burns green Batteries are fully charged
i-Pulz batteries will be charged within 2 hours.
When the batteries are fully charged, you must remove the charger from
the wall socket before removing the batteries.
Warning: do not place non-rechargeable batteries in the char-
ger - this may cause leakage in those batteries which may re-
lease dangerous chemicals.
When using rechargeable batteries, keep in mind the following points:
• Rechargeable batteries are sensitive to over-charging. Remove the
batteries from the charger after the incidated time has passed.
• Rechargeable batteries have an electric discharge that strongly
depends on the temperature of the environment.
• New rechargeable batteries need a few charging-cycles in order
to reach their nominal capacity.
• Rechargeable batteries (NiMH) must be charged at least once
per 6 months.
• The average life expectancy of rechargeable batteries is usually
500 charging-cycles, though this strongly depends on its use.
The total capacity of the battery will slowly decrease after multi-
ple charging-cycles.

9
1.10 What to do in case of a defect
Repairs, expansions or alterations to your nerve stimulator should only
be done by the manufacturer or distributor. Contact your distributor for
more information.
Manufacturer Distributor
Rehan Electronics
Aughrim Road
Carnew
Co-Wicklow
Ierland
Tel: 00353-53-9426742
Fax: 00353-53-9426051
2. The i-Pulz nerve stimulator
2.1 General
The i-Pulz is a two-channel nerve stimulator. There is a channel on the
left- and right side of the device. Both channels work independently
from each other and do not inuence each other – two different forms
of stimulation can therefore be used simultaneously. You can also use
just one channel.
The i-Pulz has 10 standard stimulation programs (indicated by P1 to
P10). It is also possible to adapt special user programs and to mask
them (render invisible). The i-Pulz will always start with the last used
preset and, if set, the timer function as well.
2.2 Controls
When you ip open the i-Pulz nerve stimulator, the buttons and the
display will become visible. All presets or settings are selectable and
controllable by pressing these buttons. Presets, intensities and other
settings are visible on the display.

10
channel
clip
screen
screen
right channel
up, right
down, right
on/off
mode
timer
battery compartment
down, left
up, left
left channel
2.3 Buttons
2.3.1 On/off
Press this button to switch the stimulator on or off.
2.3.2 Mode
Pressing this button (multiple times) will select a program. In
case of an active program (output currents > 0mA), it is possible
to reduce the current to 0 immediate by pressing this button.
2.3.3 Timer
Pressing this button enables you to set a timer for the
program. Press the timer button (multiple times) to set up
the desired time (ranging from 0 to 90 minutes). The timer is
switched off when 4 horizontal lines are visible on the display.
The timer logo in the upper left corner of the screen, which
usually indicates that the timer is activated, will disappear as
well. Timer adjustments can only be done if both channels are
set to 0mA.

11
2.3.4 Up / down
Pressing these buttons allows you to control the in-
tensity. The buttons on the right-hand side of the
device control the right-hand side channel and
vice versa. These buttons can also be used to set
other parameters of the device (see chapter 4).
2.4 The display
A - Preset number / (remaining) time
B - Timer
C - Check the user manual
D - Battery indicator
E - Keypad lock
F - Intensity display left channel
G - Intensity display right channel
H - Graphic section
A - Preset number / (remaining) time
The program number will be displayed here. After setting the intensity,
the timer will countdown to 0 minutes (if activated). The semi colon
between the “P” and the program number will blink each second.
B
AC
D
E
F G
H

12
During the therapy it is possible to show the remaining minutes of the
therapy by pressing the Timer button.
B - Timer
When the clock-icon is visible, the timer is active.
C - Check the user manual
When this icon is displayed please read the manual for further instruc-
tions (see chapter 3.3).
D - Battery indicator
This icon indicates the capacity of the battery and is displayed in 3
steps (full, half full and empty).
E - Keypad lock
If the buttons aren’t pressed after setting up the intensity, the keypad
lock will activate after 15 seconds. This is to prevent any accidental
increase in the current. The key-icon indicates that the lock is active.
Press the intensity-down button once (of the channel in use) to cancel
the keypad lock.
F - Intensity display left channel
The display shows the set intensity.
G - Intensity display right channel
The display shows the set intensity.
H - Graphic section
This section is used to clarify the presets used. Every preset has a grap-
hic representation of the TENS waves being used. See chapter 4 for
device options and other display menus.
2.5 Clip
On the rear side of the device you can nd an attachment clip. With
this clip you can easily attach the device to your trousers, skirt or belt.
The hole in the clip can be used to attach the device to a key-chord or
something similar.

13
2.6 Battery compartment
The left hand side of the device contains a compartment where the bat-
teries can be inserted into the device. Be careful that during insertion
of the batteries their polarity is consistent with the + and – sign on the
compartment. When sliding the compartment into the device, a clicking
sound will indicate that the compartment is closed.
The latch to release the battery compartment can be found on the rear
side of the device. Press your nger on the latch until the compartment
is ejected.
3. Starting the treatment
For the daily use of the device there are the following steps:
• Cleansing of the skin
• Placing of the electrodes
• Setting up the stimulator
• Treatment period
• Stopping the daily treatment period
• Removing the electrodes
• Skin care
3.1 Cleansing of the skin
It is important that you give the proper care to your skin. Cleaning your
skin properly will ensure good contact with the electrodes and will help
you to prevent irritation to the skin. It is advised that you remove all
body hair on the location where the electrodes are to be placed, as they
may cause irritation. To ensure that the electrodes stick to your skin pro-
perly, please make sure that your skin is not oily or greasy. Furthermore,
the electrodes and patches will be easier to remove.
release

14
3.2 Placing of the electrodes
Keep to the instructions of your doctor or specialist when placing
the electrodes.
Follow the instructions on the packaging of the electrodes or on its user
manual.
3.3 Setting up the stimulator
After the electrodes are placed properly, you can activate the device. The
device starts up with the program you used last. During the trial period
you and your doctor/specialist have decided which program(s) is best
suited for you.
In the back of this manual you will nd a summary of the standard pro-
grams.
Every time you press the MODE button the next program will appear (it
is an ongoing list, you will reach your starting position eventually).
Check if the timer is set properly. By default, the timer is set to 30
minutes per program, unless your doctor or specialist has altered this.
The timer you set for a program will be saved and used automatically
when you select that program again.
After you have selected the desired program, you can set up its inten-
sity. Pressing the Up-button briey will increase the intensity in small
steps of 0,5mA. When you keep the up-button pressed, the intensity
will increase faster.
Caution: for safety regulations it is not possible to increase the in-
tensity beyond 20mA when keeping the Up-button pressed. Only
when you release the button briey you can increase the intensity
again, but only 10mA per time.

15
If there is no or limited connectivity between the device
and your skin, you are able to set up the intensity to a
maximum of 7.5mA. If you try to go beyond the 7.5mA,
the device will produce a beeping sound and the inten-
sity will be reduced to 00,0 mA. You will also see a war-
ning sign on the display. This problem is caused by the cables or elec-
trodes. Check that the cables and electrodes are properly connected
and if necessary replace them.
If you are only using 1 channel, e.g. the left channel, you should
use the left Up / Down button.
If you have nished setting up the intensity, the automatic key lock
will activate after 15 seconds. The keypad will be activated again by
pressing the Down-button once.
An overview of all available programs can be found in the back of the
manual at the technical specications.
3.4 Treatment period
Regarding the treatment period you must strictly adhere to the
instructions from your doctor or specialist. If you need a longer treatment
period, you should discuss this with your doctor or specialist before
changing your stimulation patterns.
Close the ip of the device during treatment to prevent any damage to
the display.
3.5 Stopping your daily treatment
If you have activated the timer, the i-Pulz stimulator will switch off
automatically after the treatment has run its course. You can also stop
the program manually by pressing the MODE button or by tuning down
the stimulation until it reaches 00,0mA. When the current reaches
00,0mA the device will switch off after a few minutes in order to pre-
serve the batteries. The device can also be switched off by pressing the
On / Off button.

16
3.6 Removing the electrodes
Pay attention: Always switch the device off before removing elec-
trodes!
When removing the electrodes, follow the instructions on the packaging
of the electrodes.
3.7 Taking care of your skin
After you have removed the electrodes you can carefully clean your skin
with a mild soap. Never use aggressive substances like ether or alcohol
to remove any adhesive residues.
After the skin is cleaned, a red mark from the patches and/or electrodes
may be visible on the skin. This reaction usually disappears quickly.
3.7.1 Irritation of the skin
Despite all the precautions, it is possible that you experience irritati-
on of the skin. Many skin creams take good care of your skin but are,
unfortunately, not compatible with nerve stimulation therapy. Most skin
creams are oily or greasy, which may impair the ow of the current onto
your skin. We advise you to use a special TENS cream that does not
contain any oils or perfumes. This cream is especially designed for this
kind of stimulation and does not impair it in any way.
Irritation of the skin can only be solved temporarily by using a cream.
However, the cause of this irritation, being overly sensitive for a specic
type of material, is not changing. If you experience persistent irritation
of your skin when using the nerve stimulator, please contact your dis-
tributor.

17
+
4. Advanced options and setup possibilities
4.1 General
Pressing the MODE button when starting up
will activate the advanced options and setup
possiblities.
The advanced mode has been activated when you the device informa-
tion is visible on the screen (such as the serial number).
Using the right Up / Down button it is possible to select different items
in the menu. Pressing the Mode button will (de)activate an item in the
menu. With the left Up / Down button you can change the set up which
are immediately stored in memory.
Switch off the device to exit the advanced mode.

18
4.2 Menu Options
4.2.1 Device information
This data may be requested by the manufacturer or distributor if you
report a defect or problem.
4.2.2 Cable tester
Connect the supplied cable(s) to the device without connecting the
electrodes. For both channels, the text OPEN will be displayed on the
screen. You can now test the cable by pressing the 2mm pins together.
The text on the display will change from “OPEN” to “CLOSED” on the
side of the device where you are testing the cables. You will hear a bee-
ping sound when the cable is functioning. This means that the cables
are functioning properly.
If this is not the case, and the text OPEN remains on the screen, this
indicates that the cable is defect and must be replaced. Please contact
your distributor for a new set of cables.
4.2.3 Buzzer
This option allows you to switch the sound on or off that is heard when
the i-Pulz is switched on.
4.2.4 Default timer
The interval size with which you can set the timer is 10 minutes by de-
fault. This interval size can be changed to 1, 5, 10, or 15 minutes.
4.2.5 Program presets
The program presets are generally switched off. After activating this
option, 2 extra menu items will be added to the menu: User Programs
and Mask Presets. These menu options allow you to modify and mask
the programs.
To activate program presets, make sure you see the text PROGRAM
PRESETS on your display. Select it with the Mode button. You will now
see the text OFF on your display. Use the left up / down button to chan-
ge this to ON. De-select the option with the Mode button.
Program presets is now activated and you can access the user pro-
grams and mask presets options.

19
4.3 User Programs
This mode allows you to adapt the user programs. These are saved
under U1 – U10, which correspond to the default programs P1 - P10.
It is also possible to combine these presets with the standard conven-
tional TENS wave.
With combined TENS programs, the standard TENS pulse (con-
ventional TENS) always ows from the right channel.
The right hand side Up / Down button are used to select the preset.
Use the right hand side Up / Down button to select “EXIT” in the
menu to return to the main menu.
The left hand side Up / Down buttons are used to change the settings
and parameters.
Pressing the Mode button allows you to select the parameter.
User programs (U1-U10) are hidden by default, so you need to
“unmask” them rst before use. See chapter 4.4 for details.

20
On the following pages you can nd several ways to set up your User
Programs (U1-U10).
User Program U1
Step Parameter Adjustments Description
1 Pulsewidth 30..300 μS
2 Frequency 1..175 Hz
User Program U2
Step Parameter Adjustments Description
1 Pulsewidth 30..300 μS
2 Frequency 1..175 Hz
User Program U3
Step Parameter Adjustments Description
1 Pulsewidth 30..300 μS left channel
2 Frequency 1..175 Hz “
3 Pulsewidth 30..300 μS right channel
4 Frequency 1..175 Hz “
User Program U4
Step Parameter Adjustments Description
1 Pulsewidth 30..300 μS phase 1
2 Frequency 60..175 Hz “
3 Duration 1..10 sec. “
4 Pulsewidth 30..300 μS phase 2
5 Frequency 1..20 Hz “
6 Duration 1..10 Sec. “
Table of contents
Other Rehan Electronics Medical Equipment manuals
Popular Medical Equipment manuals by other brands

Konica Minolta
Konica Minolta Pulsox-2 Multi Lingual Short Form Instruction Manual

Seers Medical
Seers Medical ATLANTA PT1402 operating instructions

Primus
Primus PRIMECARE PCB901 instruction manual

Curlin Medical
Curlin Medical 4000 Series Clinicians Guide

Anthro
Anthro ZPHLEBSB/CG4 Assembly instructions

Easylife
Easylife Happy Feet Scrubber EL4860 instruction manual

Stryker Medical
Stryker Medical ST104 Maintenance manual

Sunrise Medical
Sunrise Medical Whitmyer Directions for use

Carestream
Carestream CS 9300C user guide

Microline
Microline PowerPack Dual Control Footswitch Instructions for use

socorex
socorex 167 operating instructions

MEDsan
MEDsan ULTRA SBMS 24 Quick operation guide