Reiner P5-S. User manual

DE
GB
ES
FR
P5-S.
Manual de instrucciones
Bedienungsanleitung
Instructions
Mode d‘emploi

1
1
Aluminiumbeutel
2
Druckpatrone
3
Clip
4
Einrastklemmen
5
Dichtung
6
Düsen
7
Kontakte-Druckpatrone
A
1
D
7
2
6
B
3
2
5
C
4
5
3
Originalanleitung

2
Zu Ihrer Sicherheit
WARNUNG Warnungen vor Gefahren, die bei Missachtung
der Maßnahmen zu Tod oder schweren Verlet-
zungen führen können.
Hinweise und Tipps
Sicherheitshinweise für Tinte
WARNUNG
Bei Kontakt mit den Augen.
fEinige Minuten lang behutsam mit Wasser ausspülen.
fEventuell vorhandene Kontaktlinsen nach Möglichkeit
entfernen.
fWeiter ausspülen. Sofort GIFTINFORMATIONSZENTRUM oder Arzt
anrufen.
1. Druckpatrone gebrauchsfertig machen
1.1. Verpackung önen Abb. A
fAluminiumbeutel
1
mit einer Schere abschneiden.
fDruckpatrone
2
entnehmen.
1.2. Clip von der Druckpatrone lösen Abb. B+ C
Die Druckpatrone
2
wird mit einem wiederverwendbaren Clip
3
ausgeliefert.
fEinrastklemmen
4
leicht nach hinten drücken.
fDruckpatrone entnehmen.
fDruckpatrone gemäß der Bedienungsanleitung einsetzen.
DE
Originalanleitung

3
2. Druckmedien
Beste Ergebnisse werden erreicht, wenn die zu bedruckende
Oberfläche porös, sauber, fettfrei, trocken und temperaturange-
glichen ist.
Eignung vor Serieneinsatz durch Probedruck überprüfen.
3. Aufbewahrung Abb. A + B
Tinte ist schnelltrocknend. Die Dauer bis zum Eintrocknen der
Düsen
6
ist abhängig von der Umgebungstemperatur und der
Luftfeuchtigkeit.
Soweit das Gerät nicht mit einer Düsen-Abdeckung ausgestat-
tet ist, bei Arbeitsunterbrechungen Druckpatrone
2
mit dem
Clip
3
gegen Eintrocknen schützen.
Um die Düsen
6
der Druckpatrone
2
sicher verschließen zu
können, die Dichtung am Clip
3
frei von Schmutz und Staub
halten.
fDruckpatrone
2
aus dem Gerät entnehmen.
fDruckpatrone in den Clip
3
führen.
fDruckpatrone nach hinten drücken bis die Einrastklemme
4
klickt.
Druckpatrone nach dem Önen innerhalb von vier Wochen
aufbrauchen.
4. Störungen erkennen und beseitigen Abb. D
Originalanleitung

4
Eingetrocknete Tinte an den Düsen kann zu Streifenbildung oder
zu eingeschränkter Druckqualität führen.
4.1. Reinigungsmechanismus
fHinweise zur Reinigung der Düsen
6
in der Bedienungsanlei-
tung zum Gerät beachten.
4.2. Manuelle Reinigung der Düsen
Wenn der Reinigungsmechanismus nicht zu dem gewünschten
Erfolg führt, empfehlen wir folgende Maßnahme:
fUm die getrocknete Tinte zu lösen, ein weiches, eventuell
leicht in Ethanol (Spiritus) getränktes Tuch etwa drei Sekun-
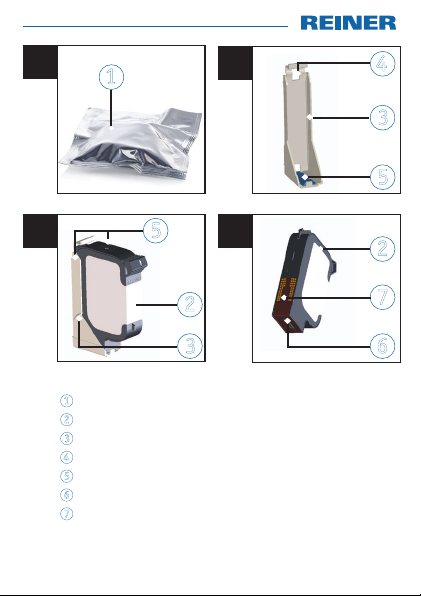
den gegen die Düsen
6
drücken.
fGelöste Tinte abtupfen und Düsen trocken wischen.
4.3. Kontakte-Druckpatrone reinigen
In seltenen Fällen können Verunreinigungen an den Kontakten-
Druckpatrone fehlerhafte Druckergebnisse hervorrufen.
fKontakte-Druckpatrone
7
an der Druckpatrone
2
und im Ge-
rät mit einem weichen, eventuell leicht in Ethanol (Spiritus)
getränkten Tuch oder Wattestäbchen reinigen.
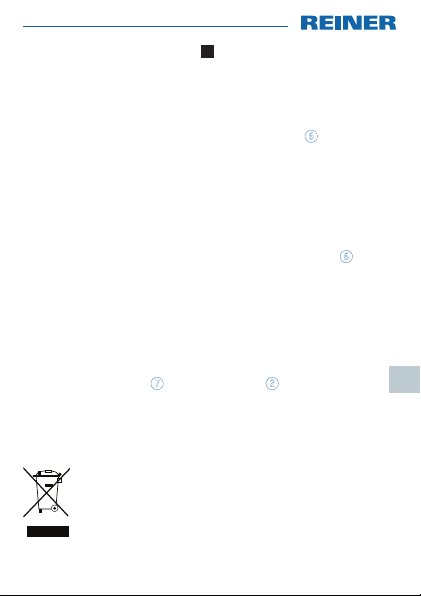
Entsorgung
Elektro- und Elektronik-Altgeräte
Altgeräte nicht mit dem gewöhnlichen Hausmüll entsor-
gen, sondern einer dafür vorgesehenen Annahmestelle
für das Recycling von elektrischen und elektronischen
Geräten zuführen.
DE
Originalanleitung

5
1
Foil pouch
2
Print cartridge
3
Dust cover
4
Latching wings
5
Rubber seal
6
Print nozzles
7
Printing contacts
A
1
D
7
2
6
B
3
2
5
C
4
5
3

6
GB
For your safety
DANGER Warnings about risks where non-observance
of the measures may directly cause death or
serious injury.
Instructions and tips
Safety instructions for ink
WARNING
If in eyes.
fRinse cautiously with water for several minutes.
fRemove contact lenses, if present and easy to do.
fContinue rinsing. Immediately call a POISON CENTER
or doctor/physician.
1. Making the print head ready for use
1.1. Opening the pack Fig. A
fCut open foil pouch
1
with shears.
fRemove printing cartridge
2
.
1.2. Releasing the clip Fig. B+ C
The print cartridge
2
is supplied with a reusable dust cover
3
.
fPush the latching wings back slightly
4
.
fRemove printing cartridge.
fUse the printing cartridge according to the operating
instructions for the device.

7
2. Printing material
For the best results, use material that is porous, clean, non-greasy,
dry and at the same temperature as the print head.
Before carrying out a large print job, perform a test print.
3. Storage Fig. A + B
Ink is fast-drying. The time it takes the print nozzles
6
to dry up depends on the ambient temperature
and the humidity.
Where the device is not equipped with a nozzle cover, protect
the printing cartridge
2
against drying out with the dust cover
3
when interrupting work.
To securely close the nozzles
6
of the printing cartridge
2
,
keep the seal at the dust cover
3
free from dirt and dust.
fRemove the printing cartridge
2
out of the device.
fGuide the printing cartridge into the dust cover
3
.
fPush the printing cartridge back until the latching wing
4
clicks.
Use the print head within four weeks after opening.

8
GB
4. Troubleshooting Fig. D
Dried ink on the print nozzles may result in streaks or reduced
print quality.
4.1. Cleaning mechanism
fObserve notes on cleaning of the print nozzles
6
in the
operating instructions for the device.
4.2. Cleaning the print head nozzles manually
We recommend the following measure if the cleaning mechanism
does not lead to the desired success:
fTo remove dried ink, press a soft cloth, if necessary lightly
soaked in ethanol (spirits), against the print nozzles
6
for about 3 seconds.
fDab o the dissolved ink and wipe the print nozzles dry.
4.3. Cleaning the print head contacts
In rare cases, dirt on the print head contacts may result in inferior
printing results.
fClean the contacts
7
on the print head
2
and in the device
with a soft cloth or cotton bud, if necessary lightly soaked
in ethanol (spirits).
Disposal
Electrical and electronic waste devices
Waste devices must not be disposed of in the conventio-
nal household waste. They must be returned to a special
collection point for recycling of electrical and electronic
devices.

9
1
Envase de aluminio
2
Cartucho de impresión
3
Clip
4
Pinzas de encaje
5
Junta
6
Inyectores
7
Contacto de impresión
A
1
D
7
2
6
B
3
2
5
C
4
5
3
Table of contents
Languages:
Other Reiner Printer Accessories manuals
Popular Printer Accessories manuals by other brands

Star Micronics
Star Micronics TSP800 Series install guide

Citizen
Citizen CBM-202PC Series user manual

Canon
Canon Color imageCLASS MF8170c installation instructions

Codonics
Codonics Virtua 1VCX-LR833 Technical brief

Roland
Roland DU2-64 Supplementary manual

TonerRefillKits
TonerRefillKits ReChargX RX126 instructions


