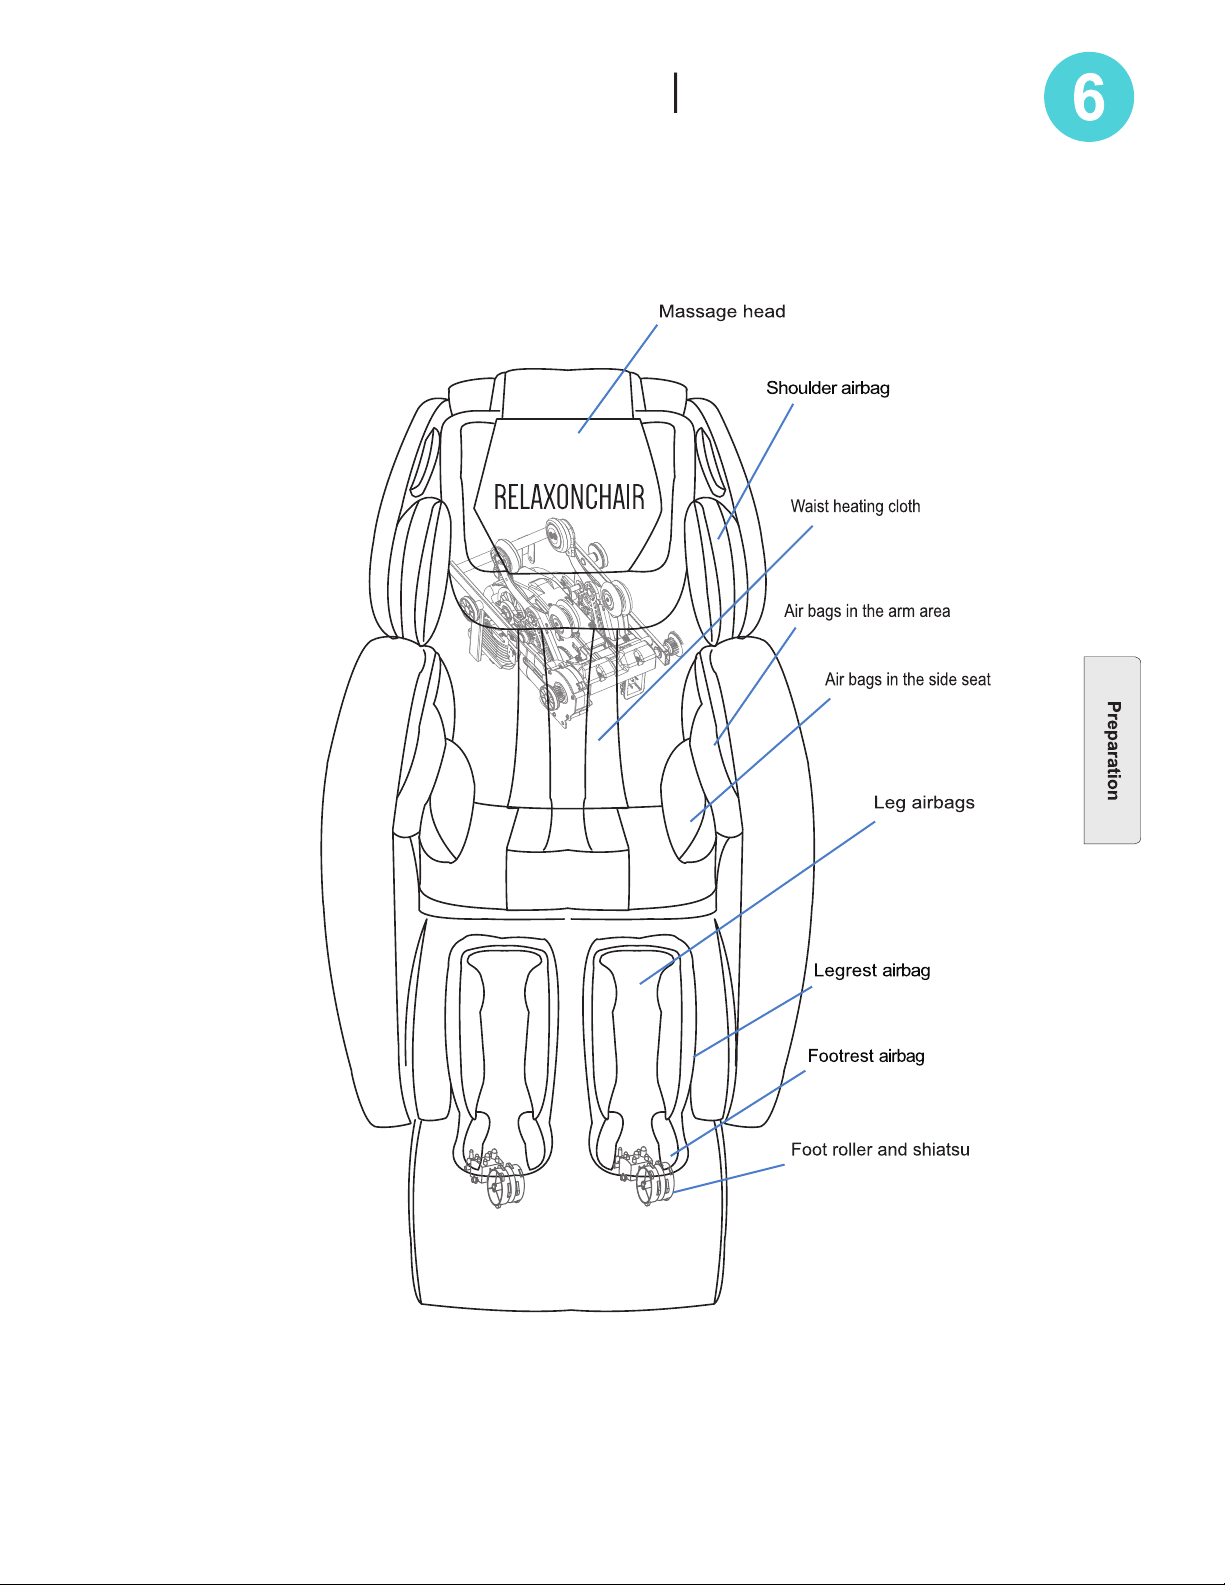
Function Introduction
ION-3D
1. With the innovative, patented massage mechanism for the back, the massage chair can achieve
kneading, knocking, Shiatsu, tapping , rubbing etc. It can create close to the manual massage of the
kneading techniques from a professional massage therapist.
2. With acupoint tracking detection functions, it can provide a specific and accurate massage that is
suitable for different heights and sizes of users.
3. Combined with ergonomics and a long L-shaped curve guide, you can fully enjoy a head to thigh
massage to quickly relieve the effects of spinal pressure.
4. One-button zero-gravity function can effectively relieve the pressure on the spine and joints, so that
you may experience the benefits of true zero gravity.
5. Only requires 3 inches from the wall allowing the chair to be placed almost anywhere in the home.
Enjoy the massages even in a limited space in your home.
6. Footrest with a full range of rolling and airbag massage functions to stimulate the soles.
7. Equipped with multiple sets of air bags in the legs and provides pulsating air pressure and compression
to promote blood circulation and restore vitality.
8. Armrest with an all-arm air pressure massage function which can promote blood circulation and relieve
hand numbness.
9. Air bags strategically located on the chair to provide a gentle squeezing massage to relax stressed
muscles and quickly eliminate fatigue.
10. Legrest and foot part can be freely adjusted to any angle and can extend/retract up to 7" making it
suitable for different heights of users.
11. User-friendly remote controller with a high-resolution LCD screen that can display massage functions,
techniques, and status in real-time.
12. With Chinese medicinal heating therapy on the waist, heat is distributed throughout the hips relieving
back pain and promoting blood circulation.
Function Introduction