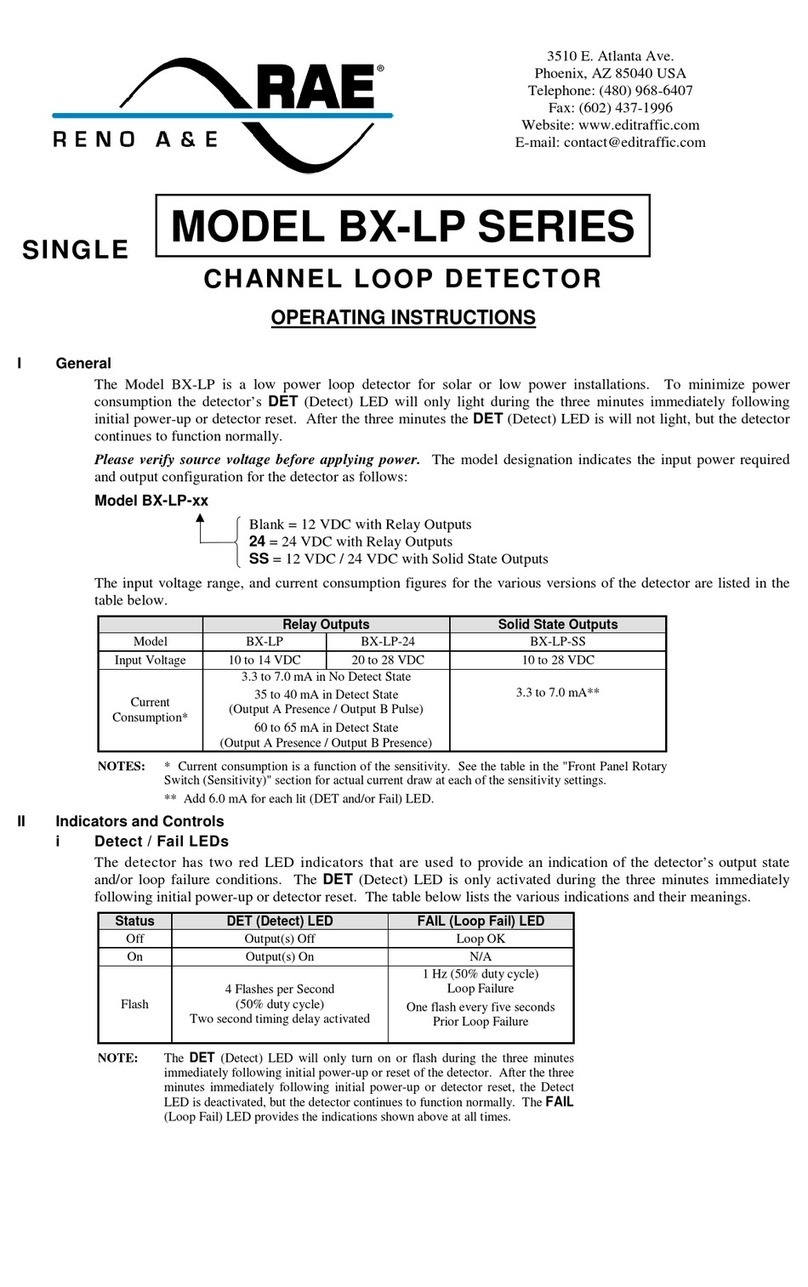
Reno A&E U-1400 User manual

This manual contains technical information for the
Model U-1400 Loop Detector
pn 889-2106-03 Revision: April 2020
Model U-1400
Loop Detector
Firmware Version 4.00
Operations Manual
Four Channel Menu Drive Programmable Inductive Loop Vehicle
Detector Designed for Railroad Applications
Four Loop Inputs, Eight Vital Outputs, and Four Vital Inputs
Built-in Loop Analyzer for Each Channel


THE FOLLOWING PRODUCT WAS DESIGNED, INSPECTED, TESTED AND
MANUFACTURED IN THE USA BY EBERLE DESIGN, INC. IN PHOENIX, ARIZONA.
INFORMATION CONTAINED HEREIN IS PROPRIETARY TECHNICAL INFORMATION OF
EBERLE DESIGN, INC. PUBLICATION, REPRODUCTION OR USE IN WHOLE OR PART IS
NOT PERMITTED EXCEPT UNDER TERMS AGREED UPON IN WRITING. ALL
REGISTERED TRADEMARKS OF EBERLE DESIGN INC. ARE UNDER
© COPYRIGHT
MAINTENANCE NOTE
IT IS AN EBERLE DESIGN, INC. RECOMMENDATION THAT EACH UNIT BE TESTED
AT LEAST ANNUALLY TO ENSURE COMPLIANCE WITH FACTORY
SPECIFICATIONS AND MEETS PROPER OPERATIONAL STANDARDS. THE
RESULTS OF THIS TESTING WILL BE DOCUMENTED.


Model U-1400 Operations Manual
Table of Contents
Section 1 General Description..........................................................................................................1
Section 2 General Characteristics....................................................................................................2
2.1 Loop Frequency.....................................................................................................................2
2.2 Sensitivity..............................................................................................................................2
2.3 Option 1: Loop Inductance Display .......................................................................................2
2.4 Option 2: Loop Inductance -∆L/L Display.............................................................................2
2.5 Option 3: Noise Filter ............................................................................................................2
2.6 Option 4: Detection Zone Tracking........................................................................................2
2.7 Option 5: Sensitivity Boost....................................................................................................3
2.8 Option 6: Audible Detect Signal............................................................................................3
2.9 Loop Check............................................................................................................................3
2.10 Detector ID ..........................................................................................................................4
2.11 Option 7: Synch Feature.......................................................................................................4
2.12 Option 8: Inductive Island Circuit Feature...........................................................................4
2.13 Option 9: Inductive Shunt Enhancement Circuit Feature.....................................................5
2.14 Primary Vital Output Delay .................................................................................................6
2.15 Primary Vital Output Extension...........................................................................................6
2.16 Input / Output Mapping........................................................................................................6
2.17 Full Restore to Factory Default Settings ..............................................................................6
2.18 Diagnostic Features Activation............................................................................................6
2.19 Password Protection.............................................................................................................6
Section 3 Specifications.....................................................................................................................7
3.1 Physical..................................................................................................................................7
3.2 Electrical................................................................................................................................7
3.3 Operational ............................................................................................................................7
3.4 Table: Sensitivity, -∆L/L, and Response Time.....................................................................10
3.5 Table: Default Settings.........................................................................................................11
3.6 Table: Pin Assignments .......................................................................................................11
3.7 Table: Pin Assignments / Wire Colors.................................................................................13
Section 4 User Interface..................................................................................................................14
Section 5 Installation and Set-Up...................................................................................................15
5.1 Initial Installation Start-Up Mode Display Screens..............................................................17
5.2 Program Mode Display Screens...........................................................................................18
5.2.1 Primary Vital Output Mapping Screens.....................................................................22
5.2.2 Auxiliary Vital Output Mapping Screens...................................................................25
5.3 Normal Mode Display Screens ............................................................................................29
5.4 Error Message Display Screens............................................................................................30
5.5 Loop Check Pass / Fail Indications......................................................................................32
5.6 Vital Input (VITAL IN) Status / Fail Indications.................................................................32
5.7 Primary Vital Output (VITAL OUT) Status / Fail Indications.............................................33
5.8 Auxiliary Vital Output (VITAL AUX) Status / Fail Indications..........................................33
5.9 Synch Fail Indications..........................................................................................................33
5.9.1 Series Synch Fail Indications.....................................................................................33
5.9.2 Parallel Synch Fail Indications...................................................................................33
5.10 Loop Fail Indications.........................................................................................................34
5.11 Setting Sensitivity Using the Bargraph ..............................................................................34

5.12 Full Restore to Factory Default Settings ............................................................................35
5.13 Diagnostic Features Activation..........................................................................................35
5.14 Display Test.......................................................................................................................35
5.15 Changing or Relocating Detectors......................................................................................35
Section 6 Block Diagram ................................................................................................................36
Section 7 Theory of Operation.......................................................................................................37
Section 8 Maintenance and Troubleshooting................................................................................38
8.1 Basic Troublshooting Tips...................................................................................................38
8.2 Things to Know About Loops..............................................................................................39


889-2106-03 Model U-1400 Operations Manual Rev Apr 2020 Page 1of 39
Section 1 General Description
This product manual was written for people installing, operating, and maintaining the Reno A&E Model U-1400
inductive loop vehicle detector. The Model U-1400 is a stand-alone, box type, four-channel inductive loop vehicle
detector. It is designed to be used in applications requiring detection of railway vehicles in large detection areas
typically required in classification yard switch and sideswipe protection, interlocking and moveable bridge
occupancy detection, or detection of roadway vehicles and/or railway vehicles in at-grade crossing sites.
The Model U-1400 monitors and processes signals from four loop / lead-in circuits, four check loop circuits, and
four Vital inputs. These inputs can be programmed to control eight Vital outputs, four primary Vital outputs and
four auxiliary Vital outputs. Each of the four primary Vital outputs can be controlled by any combination of the
four loop inputs and/or any combination of the four Vital inputs. In addition to the four loop inputs and four Vital
inputs (as described above), the four auxiliary Vital outputs can be controlled by the four loop Health Status inputs
that are continuously monitored by the processor. A loop failure will deactivate the Vital output that the loop
status input and/or loop Health Status input is programmed to control. The check loop circuits can be programmed
to simulate a vehicle detection (every 1 to 255 minutes) in the loop area as a means of verifying proper loop
operation. The Vital outputs and Vital inputs are monitored to ensure they are in the correct state. If the state of a
Vital input is not correct, the front panel LED indicator corresponding to that input will turn red and all Vital
outputs will be deactivated. If the state of any Vital output is not correct, the front panel LED corresponding to
that output will turn red and all Vital outputs will be deactivated.
A Liquid Crystal Display (LCD), sixteen LEDs, and four front panel pushbuttons are used to display and program
all detector functions. The Model U-1400 also incorporates a series of front panel mounted connectors to facilitate
set-up and operation. A 55 pin circular connector is used for detector input and output connections, a 15 pin D-
subminiature connector is used to allow connection of an external EEPROM memory module, and a nine pin RS-
232 connector is used for communication with a laptop computer.
The use of a LCD is one feature that distinguishes this detector from that of other manufacturers. It allows for
more information, never before available, to be displayed to the user during normal operation of the detector.
Several diagnostic modes are available to aid the technician in troubleshooting detection problems. It also allows
easy viewing and setting of all programmable values in the detector. The detector continues to operate normally
while being programmed. An eight-segment bargraph at the top of the LCD provides a graphical representation of
the relative change of inductance as seen by the detector. This automatically takes into account loop size, loop
inductance, number of loops, number of turns, geometry, lead-in length, etc. The first bargraph segment represents
the minimum inductance change necessary for the detector to output a call. Larger inductance changes will be
indicated by more segments. Each additional segment represents the next sensitivity level exceeded. Therefore,
the bargraph indicates if the sensitivity is set too high or too low, easily facilitating the ideal setting of sensitivity
level.
All programmed settings are stored in non-volatile memory and can only be changed by programming new
settings. Memory storage consists of an internal EEPROM and an external EEPROM memory module. Settings
programmed on either component must match those programmed on the other for the detector to operate. Loss of
power or a detector reset will not change the programmed settings. If a loop failure occurs, the LCD will display
the type of loop failure as L lo (for -25% change or shorted loop conditions) or L hi (for +25% change or open loop
conditions). Each loop failure is counted (up to a maximum of 255 failures) and accumulated in the Loop Failure
Memory. Information on the number of failures since the last detector reset or power interruption is very useful
during analysis of problems due to intermittent loop operation.
The Model U-1400 detector is a scanning detector. The scanning operation sequentially activates the ON and OFF
cycle of each detector channel’s oscillator. Because only one channel’s input loop(s) is (are) active at a given time,
crosstalk between adjacent loops connected to the same scanning detector is minimized. Several Model U-1400
detectors can be linked together via the Synch In and Synch Out lines. This allows loops connected to different
detectors to be scanned in series or parallel. When in Program Mode, the Model U-1400 detector displays the real
time loop frequency reading for each channel. The eight frequency levels can be incremented or decremented to
provide precise frequency settings. This removes the guesswork when changing frequency settings to eliminate
crosstalk. NOTE: Adjacent loops connected to different channels of a non-scanning detector or different scanning
detectors should be set to different frequencies with the maximum separation possible.
The Reno A&E Model U-1400 utilizes the first major innovation in inductive loop detectors since the introduction
of digital detectors. The programming of all of the detector’s parameters with four normally open pushbutton
switches not only simplifies setup by removing binary coded rotary or DIP switches, but also increases the
reliability of the detector by removing the dependence on switch contacts during normal operation. The detailed
descriptions displayed on the LCD eliminate the interpretation of numerous LED flash rates to determine the
detector status.
889-2106-03 Model U-1400 Operations Manual Rev Apr 2020 Page 2of 39
Section 2 General Characteristics
2.1 LOOP FREQUENCY
There are eight selectable loop frequency settings (normally in the range of 20 to 100 kilohertz) per loop input.
The actual loop operating frequency is a function of the loop / lead-in network and the components of the loop
oscillator circuit. The digital display of the actual loop operating frequency for each setting makes it easy to
quickly identify and eliminate crosstalk in the most difficult to configure installations. The frequency display is
typically very stable when the loop is vacant and vehicles are not passing close to the loops. If the reading is
varying by more than ±1 in the last digit, this is an indication of possible crosstalk between loops.
2.2 SENSITIVITY
There are ten selectable sensitivity levels per loop input, plus Continuous-Call and Loop-Off. The sensitivity
levels are designed so that a one level increase actually doubles the sensitivity and a one level decrease halves the
sensitivity. A unique bargraph displayed on the LCD makes it easy to quickly set sensitivity at the ideal level for
any loop / lead-in network situation. (See Section 3.4 for actual detection levels at each sensitivity level.)
CONTINUOUS-CALL: When set to the Continuous-Call state, the Loop Status is continuously in the Call state
regardless of the presence or absence of vehicles over the loop. If the Loop Status Input is assigned to a Vital
Output, the Continuous-Call state will deactivate the Vital Output. The loop oscillator is disabled when in the
Continuous-Call State. This state is indicated by Call flashing on the LCD. This option can be selected from
the Sensitivity menu in Program Mode and is useful for checking controller response and other troubleshooting
activities.
LOOP-OFF: When set to the Loop-Off state, the Loop Status is continuously in the No-Call state regardless of
the presence or absence of vehicles over the loop. If the Loop Status Input is assigned to a Vital Output, the
Loop-Off state will not affect the Vital Output. The loop oscillator is disabled when in the Loop-Off State. This
state is indicated by OFF flashing on the LCD. This option can be selected from the Sensitivity menu in
Program Mode and is useful for checking controller response and other troubleshooting activities.
2.3 OPTION 1: LOOP INDUCTANCE DISPLAY
The Loop Inductance Display setting can be toggled ON or OFF by momentarily pressing either the (UP) or
(DOWN) pushbutton. When this option is enabled (ON), the LCD displays the total loop inductance (actual loop
inductance plus actual lead-in inductance) in microhenries for loop inductance values in the range of 20 to 2500
microhenries. By recording the inductance of the loop / lead-in circuit when it is first installed, the actual
inductance can be compared to the expected inductance to help identify defective loop / lead-in circuits. Loop /
lead-in inductance can be easily estimated using the simple formulas included in Section 8.2 of this manual.
NOTE: Enabling this option activates it for all loop inputs. This option is automatically disabled 15 minutes after
activation or on loss of power.
2.4 OPTION 2: LOOP INDUCTANCE -∆L/L DISPLAY
The Loop Inductance -ΔL/L Display setting can be toggled ON or OFF by momentarily pressing either the
(UP) or (DOWN) pushbutton. When this option is enabled (ON), the LCD displays the percentage of
inductance change (-ΔL/L value) during the Call state. To facilitate the viewing of the maximum amount of
change in the -ΔL/L value while traffic is in motion over the detection zone, the channel holds the peak -ΔL/L
value for a period of two seconds. NOTE: Enabling this option activates it for all loop inputs. This option is
automatically disabled 15 minutes after activation or on loss of power.
2.5 OPTION 3: NOISE FILTER
Each loop input’s Option 3 has four settings ranging from 3.00 to 3.03. When Option 3 is set to 3.00, the option is
disabled (OFF), and normal noise filtering is used. When Option 3 is set to 3.01, 3.02, or 3.03 the option is ON,
and increased filtering of the loop signal is used to eliminate problems associated with particular types of noise.
Turning this option ON when not required can degrade the performance of the detector. The default setting of this
option is 3.00 (OFF). This option should only be turned ON at the advice of Reno A&E. NOTE: Each loop can
be enabled independently.
3.00 = 250 milliseconds filter.
3.01 = 1 second filter.
3.02 = 2 seconds filter.
3.03 = 10 seconds filter.
2.6 OPTION 4: DETECTION ZONE TRACKING
Each loop input’s Option 4 has ten settings ranging from 4.00 to 4.08 and 4.10. This option allows
the user to select a detection zone tracking setting that will maintain detection zone occupancy for an

889-2106-03 Model U-1400 Operations Manual Rev Apr 2020 Page 3of 39
extended period of time. When Option 4 is set to 4.00, the detector will track out the vehicle (i.e.
drop the detection of the vehicle) in four minutes to several hours depending on the amount of
inductance change (-ΔL/L) caused by the vehicle when it is detected. The greater the change caused
by the vehicle, the longer the time needed to track out the vehicle. When Option 4 is set to 4.01,
4.02, 4.03, 4.04, 4.05, 4.06, 4.07, 4.08, or 4.10 the option is ON, and the detector will provide
extended detection times.
There are many factors that influence the proper setting of this option. A full explanation of how to
determine the correct setting is beyond the scope of this manual. Contact a Technical Support
representative at Reno A&E regarding proper setting of this option.
NOTE: Using this option in a long loop application is not recommended. The detector will drop the
call prior to the vehicle totally exiting the loop.
4.00 = Tracking Rate 0.
4.01 = Tracking Rate 1.
4.02 = Tracking Rate 2.
4.03 = Tracking Rate 3.
4.04 = Tracking Rate 4.
4.05 = Tracking Rate 5.
4.06 = Tracking Rate 6.
4.07 = Tracking Rate 7.
4.08 = Tracking Rate 8.
4.10 = Tracking Rate 10.
2.7 OPTION 5: SENSITIVITY BOOST
Each loop input’s Option 5 has five settings ranging from 5.00 to 5.04. When Option 5 is set to 5.00, the option is
disabled (OFF), and no sensitivity boost is added. When Option 5 is set to 5.01, 5.02, 5.03, or 5.04 the option is
ON, and sensitivity boost is enabled. After detection, the sensitivity is boosted to the currently selected sensitivity
level plus the number of level(s) selected. The maximum sensitivity level which can be obtained with or without
sensitivity boost is level 10.
5.00 = Off (no sensitivity boost).
5.01 = 1 level of sensitivity boost.
5.02 = 2 levels of sensitivity boost.
5.03 = 3 levels of sensitivity boost.
5.04 = 4 levels of sensitivity boost.
2.8 OPTION 6: AUDIBLE DETECT SIGNAL
Each loop input’s Audible Detect Signal setting can be toggled ON or OFF by momentarily pressing either the
(UP) or (DOWN) pushbutton. Only one loop input can be turned ON at a time. Turning this option ON for one
loop input automatically turns it OFF for the other loop inputs. When this option is enabled (ON), an audible
signal will be activated whenever the detection zone for the selected loop input is occupied. The audible signal
indicates actual occupancy of the loop detection zone. This feature allows a technician to watch the detection zone
and confirm correct detector operation without having to look at the detector display as well. NOTE: This option
is automatically disabled 15 minutes after activation or on loss of power.
2.9 LOOP CHECK
The Loop Check feature provides a means of automatically verifying the proper operation of each loop circuit.
The Loop Check Timer can be set for an interval ranging from 0 to 255 minutes in one-minute increments. A
setting of 000 indicates that the Loop Check feature is off.

889-2106-03 Model U-1400 Operations Manual Rev Apr 2020 Page 4of 39
2.10 DETECTOR ID
This feature is used in conjunction with the Synch feature (Option 7) and is also used as a means of providing each
detector with a unique identification signature for communication purposes. Detector ID settings can range from
000 to 255. If, however, the detector is set to an ID value of 255, it is considered to be in an uninitialized state and
the detector will not save any power down data. When a detector with an ID setting of 255 is powered up, the
LCD will alternate between id and 255 until the ID setting is changed to something other than 255 and the new
setting is saved in detector memory. When any detector is first initialized, its ID setting is, by default, 255.
2.11 OPTION 7: SYNCH FEATURE
This option provides a means of linking together up to four (4) U-1400 detectors. Each detector’s Option 7 has
three settings ranging from 7.00 to 7.02. There are two modes of Synch, Series Synch and Parallel Synch. When
set to operate in Series Synch mode, one detector channel in the entire detector system is active at any given time.
This has the advantage of minimizing crosstalk between adjacent loops connected to different U-1400 detectors.
When set to operate in Parallel Synch mode, all detectors scan their respective channel 1, 2, 3, or 4 inputs at the
same time. Parallel Synch offers a faster response time than Series Synch, however the potential for crosstalk is
greater.
7.00 = Off.
7.01 = Series Synch.
7.02 = Parallel Synch.
NOTE: When operating in either Series or Parallel Synch mode, all linked detectors must have Option 7 set to the
same setting.
2.12 OPTION 8: INDUCTIVE ISLAND CIRCUIT FEATURE
The detector’s Inductive Island Circuit option can be toggled ON or OFF by momentarily pressing either the
(UP) or (DOWN) pushbutton. Option 8 is a detector wide option. Turning this option ON for one loop input
automatically turns it ON for the other loop inputs. NOTE: Option 8 is mutually exclusive with Option 9. Only
one option can be enabled at a given time. If an attempt is made to turn one option ON while the other is enabled,
a warning buzzer will sound to provide an alert that the other mutually exclusive option is ON.
For proper operation, the arming loops must be connected to input channels 1 and 3 and the main channel loops
must be connected to input channels 2 and 4.
The sequence of operation starts with a detection on one of the two arming loops. Once this presence detection has
occurred, the remaining two or three input channels arm and Auxiliary Vital Output 1 deactivates. As the vehicle
proceeds from the first arming loop onto the main channel loop(s) and onto the other arming loop, presence
detection continues and deactivation of Auxiliary Vital Output 1 is maintained. Once the vehicle has cleared the
second arming loop, presence detection ends and Auxiliary Vital Output 1 reactivates.
This feature is used in applications where it is necessary to monitor the presence of vehicles within at-grade
crossings. The expected installation is two 20-foot arming loops located on either side of the crossing, and one or
two main channel loops spanning the crossing. Contact a Technical Support representative at Reno A&E regarding
proper loop configurations and spacing for specific applications.
Basic Installation - Single Main Channel Loop
Channel 1 and Channel 3 Loops are Arming Loops
Channel 2 Loop is Main Channel Loop
Channel 1 Loop
Channel 3 Loop
Channel 2 Loop

889-2106-03 Model U-1400 Operations Manual Rev Apr 2020 Page 5of 39
2.13 OPTION 9: INDUCTIVE SHUNT ENHANCEMENT CIRCUIT FEATURE
The detector’s Inductive Shunt Enhancement Circuit option can be toggled ON or OFF by momentarily pressing
either the (UP) or (DOWN) pushbutton. Option 9 is a paired input option. This means that it takes two
inputs to implement the feature. When this option is toggled ON or OFF for one input, its paired input is also set
to the same state. In the Model U-1400, input Channel 1 is paired with input Channel 2 and input Channel 3 is
paired with input Channel 4. NOTE: Option 9 is mutually exclusive with Option 8. Only one option can be
enabled at a given time. If an attempt is made to turn one option ON while the other is enabled, a warning buzzer
will sound to provide an alert that the other mutually exclusive option is ON.
When Option 9 is turned ON, a vehicle entering the first loop will cause that input channel to enter a pending state.
As the vehicle enters the second loop while still occupying the first loop, the second input channel will enter the
Call state while the first input channel remains in the pending state. A Call is never output on the first input
channel with a detection. Under normal conditions it is not possible to have both outputs on at the same time.
However, if one of the loops fails, both outputs will come on and stay on until the failure is corrected.
The sequence of operation starts with a detection on one input channel. When both of the paired input channels
have detection, the last input channel to have detection will output a Call and its Primary Vital Output(s) (if
mapped) and Auxiliary Vital Output(s) (if mapped) deactivate until the detection for the last input ends, even if the
detection ends for the first input channel. Primary Vital Output timing functions (Primary Vital Output Delay or
Primary Vital Output Extension) are unaffected by the setting of this feature. When detection ends for both input
channels, the Call output will cease and the Primary Vital Output(s) (if mapped) and Auxiliary Vital Output(s) (if
mapped) will reactivate.
This feature is used in applications where it is necessary to determine the travel direction of vehicles operating on a
two-way section of railway trackage. The expected installation is two 20-foot long loops spaced approximately 25
to 28 feet apart. Contact a Technical Support representative at Reno A&E regarding proper loop configurations
and spacing for specific applications.
Basic Installation - Dual Main Channel Loops
Channel 1 and Channel 3 Loops are Arming Loops
Channel 2 and Channel 4 Loops are Main Channel Loops
Channel 1 Loop
Channel 3 Loop
Channel 2 Loop
Channel 4 Loop
Vehicle enters Channel 1 Loop
N Clli t t
Vehicle enters Channel 2 Loop
N Clli t t
Vehicle proceeds to Channel 2 Loop
C ll i t t Ch l 2
Vehicle proceeds to Channel 1 Loop
C ll i t t Ch l 1
Channel 1 Loop
Channel 2 Loop

889-2106-03 Model U-1400 Operations Manual Rev Apr 2020 Page 6of 39
2.14 PRIMARY VITAL OUTPUT DELAY
Each Primary Vital Output can be conditioned with a Delay time that is adjustable from 0.0 to 25.5 seconds in 0.1-
second steps. Primary Vital Output Delay time starts counting down when a Call state is received from the Loop
Status Input or Vital Input that is mapped to the Primary Vital Output. When the timer reaches zero, the Primary
Vital Output is deactivated. Primary Vital Output Delay does not condition the Auxiliary Vital Outputs.
2.15 PRIMARY VITAL OUTPUT EXTENSION
Each Primary Vital Output can be conditioned with an Extension time that is adjustable from 0.0 to 25.5 seconds in
0.1-second steps. Primary Vital Output Extension time starts counting down when a Call state is cleared from the
Loop Status Input or Vital Input that is mapped to the Primary Vital Output. The Primary Vital Output will remain
off until the Extension time reaches zero. Any vehicle entering the loop detection zone during the Extension time
period causes the Primary Vital Output to remain in the off state, and later, when the last vehicle clears the loop
detection zone, the full Primary Vital Output Extension time starts counting down again. Primary Vital Output
Extension does not condition the Auxiliary Vital Outputs.
2.16 INPUT / OUTPUT MAPPING
The Loop Status Inputs and/or Vital Inputs can be assigned to one or more of the Primary Vital and Auxiliary Vital
Outputs. Health Status can only be mapped to the Auxiliary Vital Outputs.
2.17 FULL RESTORE TO FACTORY DEFAULT SETTINGS
Pressing all four front panel pushbutton switches simultaneously and continuously for five (5) seconds resets the
detector and restores all the factory default settings. The countdown of the five second period is displayed on the
LCD. Releasing any of the switches before the countdown ends aborts the Full Restore operation. (See Section
3.5 for default settings). NOTE: A factory default reset will clear any previously mapped output(s).
2.18 DIAGNOSTIC FEATURES ACTIVATION
When the detector is operating in normal mode, pressing either the (UP) or (DOWN) pushbutton will
temporarily activate Option 1 (Loop Inductance Display) and Option 2 (Loop Inductance -ΔL/L Display) for all
loop inputs and Option 6 (Audible Detect Signal) for the loop input indicated in the lower portion of the LCD. All
three of these diagnostic options will remain active for 15 minutes.
2.19 PASSWORD PROTECTION
This detector has a password protection feature to guard against the accidental change of detector settings. In order
to change any detector setting, a valid password must be entered to disable the password protection feature. Refer
to Section 5.0 for details.

889-2106-03 Model U-1400 Operations Manual Rev Apr 2020 Page 7of 39
Section 3 Specifications
3.1 PHYSICAL
WEIGHT: 2.73 lb (43.6 oz) (1236 gm).
SIZE: 7.65 inches (19.43 cm) high x 3.90 inches (9.91 cm) wide x 7.13 inches (18.11 cm) deep including
connectors.
OPERATING TEMPERATURE: -40°F to +180°F (-40°C to +82°C).
CIRCUIT BOARD: Printed circuit boards are 0.062 inch thick FR4 material with 2 oz. copper on both sides and
plated through holes.
CONNECTORS:
PRIMARY INTERFACE CONNECTOR: MS type, 55 Pin, Circular, Male, 71-570128-55M.
AUX PORT CONNECTOR: DB-15, 15 pin, right angle, PC Board mount, metal shell, D subminiature receptacle
with gold plated female contacts and latching blocks.
COMM PORT CONNECTOR: DB-9, nine pin, right angle, PC Board mount, metal shell, D subminiature
receptacle with gold plated female contacts and nuts for retaining screws.
3.2 ELECTRICAL
POWER: 9.5 to 18 VDC, 3.0 Amps maximum.
FUSE:3 amp, 3AG type (Slo-Blow) type located in a fuse holder mounted on the front panel.
POWER DOWN: When the DC voltage drops below the low power detection threshold (7.8 VDC), the detector will
save all needed information to hold calls through the power down sequence. Upon power restoration (a minimum
of 9.0 VDC), the detector will use this saved data to determine the correct occupancy state of all loops.
LOOP FEEDER LENGTH: Up to 1500 feet (450 m) maximum with proper feeder cable and appropriate loops.
LOOP INDUCTANCE RANGE: 20 to 2500 microHenries with a Q factor of 5 or greater.
LOOP INPUTS:Transformer isolated. The minimum capacitance added by the detector is 0.068 microFarad.
LIGHTNING PROTECTION: The detector can tolerate, without damage, a 10 microFarad capacitor charged to 2,000
volts being discharged directly into the loop input terminals, or a 10 microFarad capacitor charged to 2,000 volts
being discharged between either loop terminal and earth ground.
RESET: Application of a 30 millisecond low state (relative to +12 VDC) to Pin Z of the primary interface
connector resets all loops. Each loop input channel can be manually reset by selecting the loop input channel then
pressing and holding the front panel CHAN pushbutton for three seconds, or by changing the sensitivity or loop
frequency of the loop input channel.
SYNCHRONIZE SCAN CONTROL:The SYNCH IN input and SYNCH OUT output allow the loops from different
detectors to be scanned sequentially, either in series or parallel. This feature can be used to eliminate crosstalk
between adjacent loops connected to different U-1400 detectors. NOTE: Response times will vary depending on
the number of detectors (up to a maximum of four) on the Synch Line. (See Section 3.4.)
VITAL OUTPUTS:The Primary and Auxiliary Vital Outputs are transformer isolated and are capable of sourcing 200
mA at 12 VDC. Opto-isolated circuitry verifies that the Vital Output is in the desired state. If either Vital Output
fails its self-check, both of the detector’s Vital Outputs will be deactivated.
VITAL INPUTS:12 volt inputs isolated from the detector. Opto-isolated circuitry verifies that the Vital Inputs are
operational.
CHECK LOOP RELAYS:Contacts rated for 6.0 Amps maximum, 150 VDC, 300 VAC, and 500 VA maximum
switched power.
3.3 OPERATIONAL
LOOP STATUS INDICATORS: Each loop input has a super high intensity red light emitting diode (LED) to indicate a
Call (vehicle detected over loop) or failed loop.

889-2106-03 Model U-1400 Operations Manual Rev Apr 2020 Page 8of 39
INPUT /OUTPUT INDICATORS: The detector has three dual color (green / red) LEDs to indicate the following:
VITAL IN LED Status Meaning
OFF Vital Input is deactivated (low voltage level).
ON (GREEN) Vital Input is activated (high voltage level).
ON (RED) Vital Input has failed its self-check (Vital Input, Primary Vital
Output, and Auxiliary Vital Output revert to OFF state).
VITAL OUT LED Status Meaning
OFF Primary Vital Output is deactivated (low voltage level).
ON (GREEN) Primary Vital Output is activated (high voltage level).
2Hz FLASHING (GREEN) Timing Delay activated and Primary Vital Output is working
(high voltage level until delay times out).
5Hz FLASHING (GREEN) Timing Extension activated and Primary Vital Output is
working (low voltage level until extension times out).
ON (RED) Primary Vital Output has failed its self-check (Vital Input,
Primary Vital Output, and Auxiliary Vital Output revert to OFF
state).
VITAL AUX LED Status Meaning
OFF Auxiliary Vital Output is deactivated (low voltage level).
ON (GREEN) Auxiliary Vital Output is activated (high voltage level).
ON (RED) Auxiliary Vital Output has failed its self-check (Vital Input,
Primary Vital Output, and Auxiliary Vital Output revert to OFF
state).
RESPONSE TIME: See Section 3.4 for response times.
SELF-TUNING: Each loop circuit tunes and is operational within two seconds after application of power or after
being reset. Full sensitivity and hold time require 30 seconds of operation.
ENVIRONMENTAL &TRACKING: The detector is fully self-compensating for environmental changes and loop drift
over the full temperature range and the entire loop inductance range.
GROUNDED LOOP OPERATION: The loop isolation transformer allows operation with poor quality loops (which may
include one short to ground at a single point).
LOOP (FAIL)MONITOR: If the total inductance of a channel’s loop input network goes out of the range specified for
the detector, or rapidly changes by more than ±25%, and the Loop and/or Health status outputs are mapped, the
Loop and/or Health status outputs will immediately enter Fail-Safe mode and the LCD will display LOOP FAIL.
The type of loop failure will also be displayed as L lo (for -25% change or shorted loop conditions) or L hi (for
+25% change or open loop conditions). This will continue as long as the loop fault exists. At the time of a loop
failure, the Loop status LED will begin to flash at a rate of three flashes per second. The LED will continue this
display pattern until the loop input channel is manually reset or power is removed. If the loop self-heals, the
LOOP FAIL message on the LCD will extinguish and the loop input channel will resume operation in a normal
manner; except the Loop status LED will continue the three flashes per second display pattern, thus providing an
alert that a prior Loop Fail condition has occurred. Each loop failure for the loop input channel is counted and
accumulated into the Loop Fail Memory. The total number of loop failures written into the Loop Fail Memory
(since the last power interruption or manual reset) can be seen by stepping through the loop input channel’s
detector functions in Program Mode to the LOOP FAIL message. When the status of one or more loops is
assigned to a Vital Output, a loop failure will deactivate the Vital Output and the corresponding VITAL OUT
LED will turn from green to OFF to indicate the failure. When a Health Status is assigned to an Auxiliary Vital
Output, a loop failure will deactivate the Auxiliary Vital Output and the corresponding VITAL AUX LED will
turn off.
LOOP CHECK:This feature is used as a means of verifying proper operation of each inductive loop connected to a
detector. In a typical installation, a separate loop of wire called a check loop will be wound around the perimeter
of each inductive loop. The Loop Check Timer can be programmed with a value ranging from 1 to 255 minutes.
Once this time interval has elapsed, the detector will automatically short the check loop simulating vehicle
detection in the inductive loop. If this initial loop check test fails, the detector will enter a verification mode to
make certain that the loop failure is indeed due to a loop related problem. While operating in this verification
mode, the detector will perform a series of ten verification tests and the LCD will flash Pcl. If the ten loop check
verification tests all fail, the Vital Output(s) to which the Loop Status Input(s) and/or Health Status Input(s) is (are)
mapped will be deactivated. The loop check test will be repeated at regular intervals depending on the value
programmed into the Loop Check Timer. The Vital Output(s) to which the Loop Status Input(s) and/or Health
Status Input(s) is (are) mapped will not be activated until the problem with the check loop is corrected and the

889-2106-03 Model U-1400 Operations Manual Rev Apr 2020 Page 9of 39
channel reset or until the Loop Check function is turned off. During a check loop failure the LCD will flash Lcl.
NOTE: If the Loop Check Timer is set to 0 minutes, the Loop Check function is off.
SYNCH MODE:The Synch feature provides a means of linking up to four U-1400 detectors together. There are two
modes in which the detectors can be configured to operate, Series Synch or Parallel Synch.
Series Synch mode can be used to eliminate the possibility of crosstalk between adjacent loops. Series Synch will
activate one loop at a time, cycling through all loops configured to detect in the Series Synch mode. When the
detector system is configured to operate in Series Synch mode, it is necessary for one detector to be identified as
the master unit, i.e. the detector that starts the Synch pulse. This master unit must be assigned a Detector ID value
of 000. The scanning sequence of detector loop input channels is Detector ID 000 channel 1, Detector ID 000
channel 2, Detector ID 000 channel 3, Detector ID 000 channel 4, second detector channel 1, second detector
channel 2, second detector channel 3, second detector channel 4, and so on until the synch pulse returns to the first
detector. The Synch-out of the first (master) unit is connected to the Synch-in of the second detector; the Synch-
out of the second detector is connected to the Synch-in of the third detector. This connection scheme is continued
until the Synch-out of the last detector is connected to the Synch in of the first (master) detector.
When set to operate in Parallel Synch mode, all detectors configured to operate in Parallel Synch mode start
scanning their respective channel 1 loop inputs at the same time and then proceed to sequentially scan their
respective channel 2, 3, and 4 loop inputs. When the detector system is configured to operate in Parallel Synch
mode, it is necessary for one detector to be identified as the master unit. This master unit must be assigned a
Detector ID value of 000. Connections between detectors differ from those in Series Synch mode in that the
Synch-out of first detector is connected to the Synch-in of the other detectors and the Synch-in of the first detector
is connected to the Synch-out of the other detectors.
(ID 000)
Synch
Out
Synch
In
Detector
2
Detector
Detector
4
Synch
In
Synch
Out
Synch
In
Synch
Out
Synch
In
Synch
Out
Reset
Reset
Reset
Reset
+
-
+
-
+
-
+
-
Series Synch Connections
Detector
(ID 000)
Synch
Out
Synch
In
Detector
2
Detector
3
Detector
4
Synch
In
Synch
Out
Synch
In
Synch
Out
Synch
In
Reset
Reset
Reset
Reset
+
-
+
-
+
-
+
-
Synch
Out
Parallel Synch

889-2106-03 Model U-1400 Operations Manual Rev Apr 2020 Page 10 of 39
Operation in either Synch mode requires that the Reset inputs (pin Z of the primary interface connector) of all
detectors be tied together and that the DC Common inputs (pin G of the primary interface connector) of all
detectors be tied together. To start operation in either Synch mode, the detectors must be reset using the Reset pin
(pin Z of the primary interface connector).
When operating in Series Synch mode, if any detector fails to Synch, all of the Vital Outputs of every detector
configured to operate in Synch mode will be deactivated. If the detector that has failed to Synch has the Synch
feature turned off, the other detectors configured to operate in Synch mode will continue to operate in Series Synch
mode.
When operating in Parallel Synch mode, if the master unit fails, all of the Vital Outputs of every detector
configured to operate in Synch mode will be deactivated. If one or more of the detectors connected to the master
unit Fails, only those Vital Outputs of the detector(s) which has (have) failed will be deactivated.
When operating in either Series or Parallel mode, FSY will be displayed on the LCD screen of the detector(s)
associated with the failure. This display state will continue until the problem is corrected and the detectors are
powered down and repowered, reset, or until the Synch function is turned off.
In either mode of operation, the Synch feature will continue to function if one or more detectors has (have) been
disabled.
INDUCTIVE ISLAND CIRCUIT:The Inductive Island Circuit feature provides a means of monitoring and detecting the
presence of vehicles within at-grade crossings. The expected installation is two 20-foot long arming loops located
on either side of the crossing and one or two main channel loops spanning the crossing. The two arming loops
must be connected to detector Channels 1 and 3. If two main channel loops are required, they should be connected
to Channels 2 and 4. If the installation requires a single main channel loop, it should be connected to Channel 3
and Channel 4 should be deactivated (i.e. set the Channel 4 sensitivity to the Loop-Off state).
This option is a detector wide option. Turning this option ON for one loop input automatically turns it ON for the
other loop inputs. The sequence of operation starts with a detection on one of the two arming loops. Once this
presence detection has occurred, the remaining two or three input channels arm and Auxiliary Vital Output 1
deactivates. As the vehicle proceeds from the first arming loop onto the main channel loop(s) and onto the other
arming loop, presence detection continues and deactivation of Auxiliary Vital Output 1 is maintained. Once the
vehicle has cleared the second arming loop, presence detection ends and Auxiliary Vital Output 1 reactivates.
INDUCTIVE SHUNT ENHANCEMENT CIRCUIT:The Inductive Shunt Enhancement Circuit feature provides a means of
determining the travel direction of vehicles operating on a two-way section of railway trackage. The expected
installation is two 20-foot long loops spaced approximately 25 to 28 feet apart. The loops must be connected to
channels 1 and 2 or channels 3 and 4.
This option is a paired input option. This means that it takes two inputs to implement the feature. When this
option is toggled ON or OFF for one input, its paired input is also set to the same state. Channel 1 is paired with
Channel 2 and Channel 3 is paired with Channel 4. The sequence of operation starts with a detection on one input
channel. When both of the paired input channels have detection, the last input channel to have detection will
output a Call and its Primary Vital Output(s) (if mapped) and Auxiliary Vital Output(s) (if mapped) deactivate until
the detection for the last input ends, even if the detection ends for the first input channel. Primary Vital Output
timing functions (Primary Vital Output Delay or Primary Vital Output Extension) are unaffected by the setting of
this feature. When detection ends for both input channels, the Call output will cease and the Primary Vital
Output(s) (if mapped) and Auxiliary Vital Output(s) (if mapped) will reactivate.
3.4 TABLE: SENSITIVITY, -∆L/L, AND RESPONSE TIME
Sensitivity -ΔL/L
Response Time (milliseconds)
One
Detector
Two Detectors
Three Detectors
Four Detectors
Series
Synch Parallel
Synch Series
Synch Parallel
Synch Series
Synch Parallel
Synch
OFF
-------
-------
-------
-------
-------
-------
-------
-------
1
5.12 %
121 ±25
268 ±52
278 ±58
400 ±80
278 ±58
530 ±110
278 ±58
2
2.56 %
121 ±25
268 ±52
278 ±58
400 ±80
278 ±58
530 ±110
278 ±58
3
1.28 %
121 ±25
268 ±52
278 ±58
400 ±80
278 ±58
530 ±110
278 ±58
4
0.64 %
121 ±25
268 ±52
278 ±58
400 ±80
278 ±58
530 ±110
278 ±58
5
0.32 %
121 ±25
268 ±52
278 ±58
400 ±80
278 ±58
530 ±110
278 ±58
6
0.16 %
121 ±25
268 ±52
278 ±58
400 ±80
278 ±58
530 ±110
278 ±58
7
0.08 %
121 ±25
268 ±52
278 ±58
400 ±80
278 ±58
530 ±110
278 ±58
8
0.04 %
121 ±25
268 ±52
278 ±58
400 ±80
278 ±58
530 ±110
278 ±58
9
0.02 %
121 ±25
268 ±52
278 ±58
400 ±80
278 ±58
530 ±110
278 ±58
10
0.01 %
121 ±25
268 ±52
278 ±58
400 ±80
278 ±58
530 ±110
278 ±58

889-2106-03 Model U-1400 Operations Manual Rev Apr 2020 Page 11 of 39
CALL
-------
-------
-------
-------
-------
-------
-------
-------
3.5 TABLE: DEFAULT SETTINGS
Channel & Detector Settings
Function
Channel 1
Channel 2
Channel 3
Channel 4
Frequency
2
4
6
8
Sensitivity
6
6
6
6
Option 1 - Loop Inductance Display
OFF
OFF
OFF
OFF
Option 2 - Loop Inductance -ΔL/L (%) Display
OFF
OFF
OFF
OFF
Option 3 - Noise Filter
3.00
3.00
3.00
3.00
Option 4 - Detection Zone Tracking
4.02
4.02
4.02
4.02
Option 5 - Sensitivity Boost
5.00
5.00
5.00
5.00
Option 6 - Audible Detect Signal
OFF
OFF
OFF
OFF
Loop Check Feature
005
005
005
005
Detector ID Setting
255
Option 7 - Synch Feature
7.00
Option 8 - Inductive Island Feature
OFF
OFF
OFF
OFF
Option 9 - Inductive Shunt Enhancement Circuit Feature
OFF
OFF
OFF
OFF
Vital Output Settings
Function
Output 1
Output 2
Output 3
Output 4
Primary Vital Output Delay Time
00.0
00.0
00.0
00.0
Primary Vital Output Extension Time
00.0
00.0
00.0
00.0
Primary Vital Output Mapping
00
00
00
00
Auxiliary Vital Output Mapping
000
000
000
000
3.6 TABLE: PIN ASSIGNMENTS
Primary Interface Connector
Sequential Pin Assignments
Pin
Function
Pin
Function
A
Channel 1 Primary Vital Output -
f
Channel 3 Primary Vital Output +
B
Channel 1 Vital Input -
g
Channel 4 Primary Vital Output -
C
Channel 2 Vital Input +
h
Channel 4 Primary Vital Output +
D
Channel 3 Loop Input
i
Channel 2 Check Loop Input
E
Channel 3 Loop Input
j
Channel 3 Check Loop Input
F
Channel 4 Loop Input
k
Channel 2 Auxiliary Vital Output -
G
DC Common (Non-isolated)
m
Channel 2 Primary Vital Output -
H
12 VDC + (Non-isolated)
n
Channel 1 Auxiliary Vital Output +
J
Channel 4 Auxiliary Vital Output -
p
Channel 1 Auxiliary Vital Output -
K
Channel 3 Primary Vital Output -
q
Channel 1 Vital Input +
L
Channel 3 Auxiliary Vital Output +
r
Channel 4 Vital Input +
M
Channel 3 Auxiliary Vital Output -
s
Channel 4 Vital Input -
N
Channel 1 Check Loop Input
t
Reserved
P
Channel 2 Check Loop Input
u
Channel 1 Check Loop Input
R
Channel 3 Check Loop Input
v
Channel 4 Check Loop Input
S
Channel 1 Loop Input
w
Reserved
T
Channel 1 Loop Input
x
Reserved
U
Channel 2 Loop Input
y
Channel 3 Vital Input +
V
Channel 2 Loop Input
z
Channel 2 Auxiliary Vital Output +
W
Channel 2 Vital Input -
AA
No Connection
X
Synch In
BB
Channel 2 Primary Vital Output +
Y
Channel 3 Vital Input -
CC
No Connection
Z
Reset
DD
No Connection
a
Reserved
EE
Chassis Ground
b
Channel 4 Loop Input
FF
Channel 1 Primary Vital Output +
c
Synch Out
GG
No Connection
d
Channel 4 Check Loop Input
HH
No Connection
e
Channel 4 Auxiliary Vital Output +

889-2106-03 Model U-1400 Operations Manual Rev Apr 2020 Page 12 of 39
Primary Interface Connector
Functional Pin Assignments
Pin
Function
Pin
Function
H
12 VDC + (Non-isolated)
m
Channel 2 Primary Vital Output -
n
Channel 1 Auxiliary Vital Output +
f
Channel 3 Primary Vital Output +
p
Channel 1 Auxiliary Vital Output -
K
Channel 3 Primary Vital Output -
z
Channel 2 Auxiliary Vital Output +
h
Channel 4 Primary Vital Output +
k
Channel 2 Auxiliary Vital Output -
g
Channel 4 Primary Vital Output -
L
Channel 3 Auxiliary Vital Output +
q
Channel 1 Vital Input +
M
Channel 3 Auxiliary Vital Output -
B
Channel 1 Vital Input -
e
Channel 4 Auxiliary Vital Output +
C
Channel 2 Vital Input +
J
Channel 4 Auxiliary Vital Output -
W
Channel 2 Vital Input -
N
Channel 1 Check Loop Input
y
Channel 3 Vital Input +
u
Channel 1 Check Loop Input
Y
Channel 3 Vital Input -
P
Channel 2 Check Loop Input
r
Channel 4 Vital Input +
i
Channel 2 Check Loop Input
s
Channel 4 Vital Input -
R
Channel 3 Check Loop Input
EE
Chassis Ground
j
Channel 3 Check Loop Input
G
DC Common (Non-isolated)
d
Channel 4 Check Loop Input
Z
Reset
v
Channel 4 Check Loop Input
X
Synch In
S
Channel 1 Loop Input
c
Synch Out
T
Channel 1 Loop Input
AA
No Connection
U
Channel 2 Loop Input
CC
No Connection
V
Channel 2 Loop Input
DD
No Connection
D
Channel 3 Loop Input
GG
No Connection
E
Channel 3 Loop Input
HH
No Connection
F
Channel 4 Loop Input
a
Reserved
b
Channel 4 Loop Input
t
Reserved
FF
Channel 1 Primary Vital Output +
w
Reserved
A
Channel 1 Primary Vital Output -
x
Reserved
BB
Channel 2 Primary Vital Output +
AUX PORT (DB-15 External EEPROM Connector)
Pin
Function
1
No Connection
2
No Connection
3
No Connection
4
No Connection
5
No Connection
6
No Connection
7
I2C DC +
8
I2C Clock
9
No Connection
10
No Connection
11
No Connection
12
No Connection
13
No Connection
14
I2C Common
15
I2C Data

889-2106-03 Model U-1400 Operations Manual Rev Apr 2020 Page 13 of 39
COMM PORT (DB-9 Communication Interface Connector)
Pin Function
1
No Connection
2
RS-232 TX
3
RS-232 RX
4
No Connection
5
RS-232 Common
6
No Connection
7
No Connection
8
No Connection
9
No Connection
3.7 TABLE: PIN ASSIGNMENTS / WIRE COLORS
(Model 805-3-S and Model 805-8-S Wiring Harnesses)
Pin
Function
Wire Color
Pin
Function
Wire Color
A
Channel1 PrimaryVitalOutput -
Brown/Blue
f
Channel3PrimaryVitalOutput +
Blue/ Orange
B
Channel1VitalInput -
Brown / Gray
g
Channel4PrimaryVitalOutput -
Yellow / Blue
C
Channel2VitalInput +
Gray / Red
h
Channel4PrimaryVitalOutput +
Blue/Yellow
D
Channel3 LoopInput
Orange
i
Channel2 Check LoopInput
White
E
Channel3 LoopInput
Orange
j
Channel3 Check LoopInput
White
F
Channel4 LoopInput
Yellow
k
Channel2 AuxiliaryVitalOutput -
Red / Violet
G
DCCommon(Non-isolated)
Black
m
Channel2PrimaryVitalOutput -
Red / Blue
H
12VDC + (Non-isolated)
Red / White
n
Channel1 AuxiliaryVitalOutput +
Violet/Brown
J
Channel4 AuxiliaryVitalOutput -
Yellow /Violet
p
Channel1 AuxiliaryVitalOutput -
Brown / Violet
K
Channel3PrimaryVitalOutput -
Orange/Blue
q
Channel1VitalInput +
Gray/ Brown
L
Channel3 AuxiliaryVitalOutput +
Violet /Orange
r
Channel4VitalInput +
Gray/Yellow
M
Channel3 AuxiliaryVitalOutput -
Orange/ Violet
s
Channel4VitalInput -
Yellow/Gray
N
Channel1 Check LoopInput
White
t
Reserved
N/A
P
Channel2 Check LoopInput
Red
u
Channel1 Check LoopInput
Brown
R
Channel3 Check LoopInput
Orange
v
Channel4 Check LoopInput
White
S
Channel1 LoopInput
Brown
w
Reserved
N/A
T
Channel1 LoopInput
Brown
x
Reserved
N/A
U
Channel2 LoopInput
Red
y
Channel3VitalInput +
Gray/ Orange
V
Channel2 LoopInput
Red
z
Channel2 AuxiliaryVitalOutput +
Violet / Red
W
Channel2VitalInput -
Red / Gray
AA
NoConnection
N/A
X
SynchIn
Blue
BB
Channel2PrimaryVitalOutput +
Blue / Red
Y
Channel3VitalInput -
Orange/Gray
CC
NoConnection
N/A
Z
Reset
Gray
DD
NoConnection
N/A
a
Reserved
N/A
EE
ChassisGround
Green
b
Channel4 LoopInput
Yellow
FF
Channel1PrimaryVitalOutput +
Blue/Brown
c
Synch Out
Violet
GG
NoConnection
N/A
d
Channel4 Check LoopInput
Yellow
HH
NoConnection
N/A
e
Channel4 AuxiliaryVitalOutput +
Violet / Yellow
NOTES: The pairs of wires connected to Pins D & E, Pins F & b, Pins N & u, Pins P & i, Pins R & j, Pins S & T, Pins U & V, and
Pins d & v are twisted together.
There is an additional green wire in the harness wire bundle that is used to ground the connector shell.
Table of contents
Other Reno A&E Security Sensor manuals

Reno A&E
Reno A&E H2 User manual

Reno A&E
Reno A&E AX Series User manual

Reno A&E
Reno A&E B Series User manual

Reno A&E
Reno A&E B Series User manual

Reno A&E
Reno A&E BX-LP Series User manual

Reno A&E
Reno A&E RAE BX-LP Series User manual

Reno A&E
Reno A&E T-400 Series User manual

Reno A&E
Reno A&E S-1212 User manual
Popular Security Sensor manuals by other brands

Powerfix Profi
Powerfix Profi IAN 40111 Operation and safety notes

Global Fire Equipment
Global Fire Equipment GFE-SWR Series installation manual

Vimar
Vimar NEVE UP 09595.0.120 manual

Digitrax
Digitrax BDL16 Installation information

Western Safety Products
Western Safety Products 66452 Instructions and precautions

Protekt
Protekt CR 240 Series instruction manual